Berry Honey


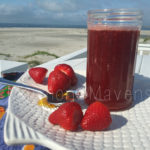
Berry Honey highlights the versatility of a pantry basic that’s the “bees knees.” How many things can you think of that pair well with berries and honey?

This recipe is a versatile little sauce that can be drizzled over ice cream–I think vanilla would be awesome–pancakes, waffles, fresh fruit.  We used it in place of maple syrup over Honey-Lemon Cottage Cheese Pancakes.

Ooh…put it on toast!

Quick prep and readily available ingredients make this Berry Honey a great addition to your pantry.

Berry Honey
Write a review
Print
Ingredients
  1. 2 cups fresh strawberries, raspberries or blackberries
  2. 1 cup honey, mild
Instructions
  1. Blend berries until smooth. Strain through a fine mesh strainer into a medium bowl and discard seeds.
  2. Let puree stand 10 minutes and skim off any foam.
  3. Whisk the honey into the puree. Transfer to a jar with a lid.
Notes
  1. Keeps in refrigerator for up to 2 weeks.
Adapted from Magnolia Journal
Mormon Mavens https://www.mormonmavens.com/

September Favorite Things


Netzero Reusable Produce Bags 

How many times have you been to the grocery store and caught yourself licking your fingers to get those pesky little plastic bags open for your fruits and veggies?  Ooh gross! Do you know where those bags have been?  I saw these on a Facebook ad and ordered 2 sets–one for my daughter and one for me.  These have so many benefits.  Easy to wash and air dry; you can actually wash your produce while it’s in the bag, go out your back door and swing the bag above your head to get the extra water out–because it’s just more fun that way–and store the food in the bag or not. Oh, and they’re not just for food–multiple uses like for collecting seashells at the beach!


Magnolia Journal

I have decided to purge my magazine collection and will soon have it down to one Church magazine,  Consumer Reports, my BYU Alumni magazine and this gem…Magnolia Journal. I love the food  photography and the articles.  And Joanna’s articles are a breath of fresh air compared to some of the stuff I have seen in another family magazine that I have been getting for years.  I won’t mention the name, but their format, articles, etc. just aren’t relevant to me anymore.  And the ads–oy vey!


 Insulated Water Bottle

Have you seen the 4Ocean commercials?  These two surfer guys have started a non-profit to help clean up the plastic/trash from the oceans and beaches, etc.  They sell handmade beaded bracelets that you can purchase and you will help clean up 1 pound of trash.  Well, I just don’t really wear bracelets that much and sometimes they get in my way.  So I found this great insulated water bottle on their site and purchased that instead.  It keeps my water really cold and the ice doesn’t melt for a couple of days, even in a hot car!  Check out their site and learn about what they are doing to take better care of our earth and what you can do to help.


Tomato Paste in a Tube

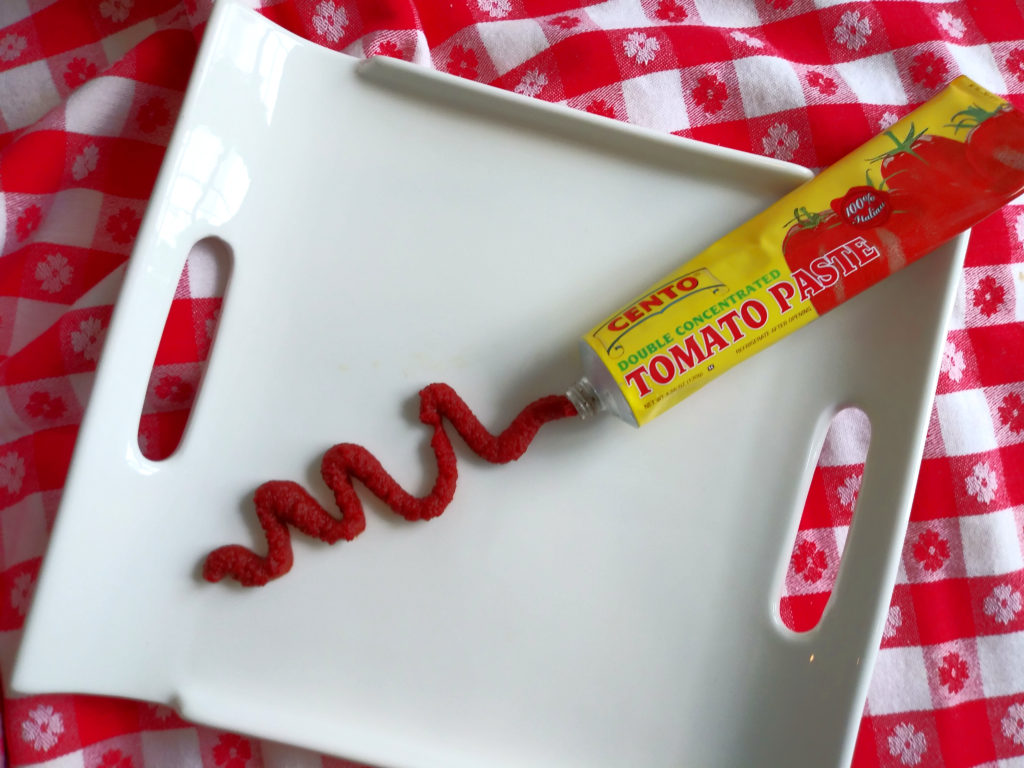
How many cans of tomato paste have you thrown out because you only need a tablespoon or two for a recipe?  Yeah, me too.  A recent trip to the grocery store snagged me this awesome Cento Tomato Paste in a tube!  Yes!  They finally get it.  So now, no more wasted paste and no more little tomato paste cans to deal with.  You’re welcome!


Fresh Tomato & Basil Pie


This Fresh Tomato & Basil Pie recipe is adapted from a friend’s pie, which she brought to dinner one night before she and her family moved away.  Sad to see her go but glad she shared the recipe with me.

I have always wanted to make tomato pie and this one is scrumptious!  Especially with the addition of the fresh basil.  And the crust?  So flaky and delicious, if I do say so myself.  I promise to share that in another post.

So we put in a garden this year–with the help of friends who are great at growing stuff, and canning, and freezing, and  drying, etc. Our tomatoes and basil have gone crazy!  I even made fried green tomatoes the other night. Never tried those?  Well, then that is something else I need to share later.

Fresh Tomato & Basil Pie
A scrumptious way to use fresh produce from your garden.
Write a review
Print
Ingredients
  1. Pastry for 1-crust 9 inch pie
  2. 2 T. evaporated milk
  3. 4 cups sliced, firm ripe tomatoes
  4. 1 t. salt
  5. 1/8 t. black pepper
  6. 1 T. fresh basil, finely chopped
  7. 1/3 c. mayonnaise
  8. 1/3 c. Parmesan cheese, shredded
  9. 1 large clove garlic, smashed and minced
  10. whole fresh basil leaves for garnish (opt.)
Instructions
  1. Preheat oven to 450 degrees F.
  2. Line pie plate with pastry. Flute the edges. Brush shell with evaporated milk.
  3. Bake shell for 5 minutes. Remove from oven. Reduce oven temperature to 350.
  4. Fill baked shell with layered, sliced tomatoes and sprinkle with salt, pepper, and chopped basil.
  5. Combine mayonnaise, Parmesan, and garlic and spread over the tomatoes.
  6. Bake at 350 degrees for approx 45 minutes, or until pie is golden brown.
Mormon Mavens https://www.mormonmavens.com/

Buttermilk-Pecan Waffles

buttermilk-pecan waffles


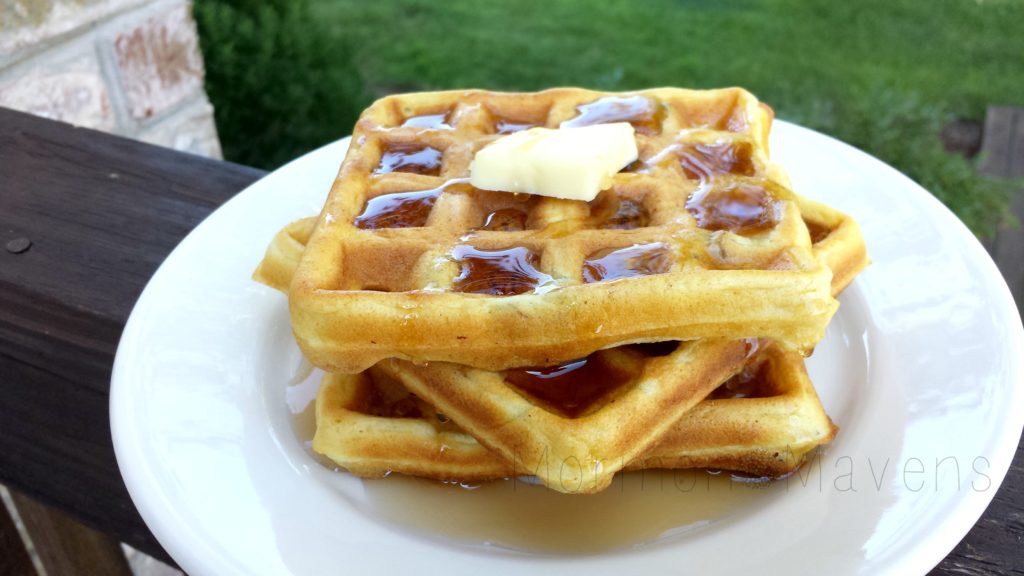
I thought I would re-post something from our Breakfast category today and as I was going through some of the older posts, this one caught my eye from August  18, 2016.  I don’t know what it is about waffles but they are magical to me.  And elusive.  I never seem to have the time to make them lately, especially since I am drinking my protein shakes these days while trying to lose weight AGAIN!  Anyway, I do remember these and they were DELISH.  Hope you enjoy…

Good mornin‘!  Today’s breakfast is brought to you by The Hen-Apple Bed & Breakfast in Palmyra, Pennsylvania.  No I am not there, yes I made waffles.  Years ago, when my girls were still little and in elementary school, I would often volunteer in their school library.  This was my favorite place at their school for many reasons–there were the books, of course, but we had an amazing librarian, and those Scholastic Book Fairs!  Loved working those and I always had time to browse the sale, so one day I picked up this cookbook called “Rise & Dine America: Savory Secrets from America’s Bed & Breakfast Inns.” I have often fantasized about running a B & B, haven’t you?  End of story, on with the recipe…

Buttermilk-Pecan Waffles
Breakfast of champions!
Write a review
Print
Ingredients
  1. 2 cups all-purpose flour
  2. 1 T. baking powder
  3. 1 t. baking soda
  4. 1/2 t. salt
  5. 4 eggs
  6. 2 cups buttermilk
  7. 1/2 cup butter, melted
  8. chopped pecans
Instructions
  1. Combine the flour, baking powder, baking soda and salt; set aside.
  2. Beat the eggs until light, add buttermilk and beat until smooth.
  3. Stir in the melted butter and chopped pecans.
  4. Pour about 3/4 cup of batter onto a greased, preheated waffle iron. Cook until done.
Notes
  1. I think this recipe was written for a single waffle application. My waffle iron makes 4 individual waffles. Adjust batter amount as needed for yours.
Adapted from Rise & Dine America
Mormon Mavens https://www.mormonmavens.com/

Slow Cooker Chicken Chile Verde

If you follow us on Instagram, you have already seen this picture.  Not your typical beautifully crafted finished product recipe image, right?  But, the technique used to shred this chicken is such a game changer, you will appreciate why I shared this.  

Besides, there wasn’t a particular dish that I was preparing this chicken for.  There are many ways you can use this Chicken Chile Verde.  Let your imagination run wild with that.

When I made this yesterday, I just scooped some of the chicken into a couple of romaine lettuce leaves and added chunks of avocado–low carb diet is happening right now.  Sort of.  You know what I mean.  My husband, however, made a burrito with his portion.

So, enjoy this recipe and the many ways in which you can use it. I would bet you could freeze it, as well, for future use.  

Slow Cooker Chicken Chile Verde
Write a review
Print
Ingredients
  1. 4 boneless, skinless chicken breasts*
  2. 1 medium onion, diced
  3. 1 bottle Herdez Salsa Verde
  4. 2 t. chili powder
  5. 1-2 t. ground cumin
  6. 2 cloves garlic, minced
Instructions
  1. Rub the chicken with the chili powder and cumin. Place in a covered dish and marinate overnight in the refrigerator.
  2. When ready to cook, place chicken in slow cooker; add garlic, onion and then top with the Salsa Verde.
  3. Turn slow cooker to low and cook for 8 hours.
  4. To shred, remove the chicken from the slow cooker to a large mixing bowl, leaving the liquid inside.
  5. With a mixer (I used a hand mixer) shred the chicken--literally takes less than 10 seconds. I think I had my setting on about 2 or 3.
  6. Return shredded chicken to the slow cooker and toss to coat with the liquid.
  7. Serve in a variety of ways.
Notes
  1. Original recipe calls for 6-8 chicken breasts, but I used a pack of 4. You may want to increase your seasonings if you use that much chicken.
Adapted from PaleoBurn Fat Burning Cookbook
Mormon Mavens https://www.mormonmavens.com/

Deviled Eggs


Happy 4th of July!! 

I know there are a bazillion recipes for deviled eggs out there, but I hope you try this one for your July 4th festivities or just whenever you want some of these tasty morsels!

Who doesn’t love all things Magnolia? This recipe is adapted from Joanna Gaines’ Magnolia Table cook book. It is the first recipe that I have tried from her and it did not disappoint. I made it for a Linger Longer at church this past Sunday and the platter emptied pretty quickly. Let me add that there were other deviled eggs on the table besides these.

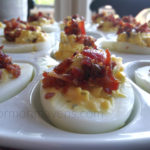
One thing that you will appreciate is that there is BACON on these eggs. Yep. With brown sugar. So, WIN-WIN. Let us proceed…

Deviled Eggs
Serves 8
Write a review
Print
Prep Time
30 min
Cook Time
35 min
Prep Time
30 min
Cook Time
35 min
Ingredients
  1. 12 large eggs
  2. 1/2 lb. bacon
  3. 1/4 c. packed light brown sugar
  4. 1 T. distilled white vinegar
  5. Kosher salt
  6. 1/2 c. mayonnaise (I used Hellmann's because Joanna prefers it)
  7. 2 T. dill weed (if you accidentally pick up sweet instead of DILL relish)
  8. 1 t. dry mustard powder
Instructions
  1. Preheat oven to 375 degrees F and line a rimmed baking sheet with foil. My bacon stuck to the foil so you could also add a cooling rack and lay the bacon on that. I will be doing that next time.
  2. Spread brown sugar on a plate and press both sides of the bacon slices into this to coat them. Lay slices on foil/cooling rack in the pan. Bake until crispy 14-16 minutes. Cool on baking sheet.
  3. While the bacon is cooking, place eggs in a single layer in a large saucepan, cover with water to 2 inches above the eggs. Use whatever trick you know to help the eggs peel easily, like adding baking soda to the water. The recipe uses the vinegar and salt. Bring the water to a full rolling boil, cover the pan, then remove from heat and let stand 10 minutes. The eggs will continue to cook off the heat.
  4. While the eggs are "cooking", prepare a large bowl of ice and water. When the eggs are done, drain them and put them immediately into the ice water. This will stop the cooking process and prevent you from getting egg yolks that are green around the gills. So to speak. Let the eggs stand in the water until completely cooled.
  5. Peel the eggs, rinse, then dry them. Slice in half lengthwise. Gently scoop out the yolks into a medium bowl, setting the whites aside. I put them on a sheet of parchment paper.
  6. Add mayonnaise, dill weed, mustard powder and 1/4 t. salt to the egg yolks. Mix well, mashing the yolks with the back of a fork to completely incorporate them. Use a spoon to gently fill the egg whites. I used a jam spoon which seemed just the right size. You could also place the filling in a small zip-top plastic bag, cut the tip off of one corner and squeeze the filling like a pastry bag, if you like.
  7. Chop the reserved bacon and generously top eggs with it.
  8. Arrange the deviled eggs on a platter, cover lightly, and chill in the refrigerator for at least 1 hour, or up 24 hours before serving.
Notes
  1. If you check out the original recipe you will notice that you can also dust the eggs with paprika or minced fresh dill and chives. I might try that next time myself--because next time I will get DILL relish instead of sweet.
Adapted from Magnolia Table
Mormon Mavens https://www.mormonmavens.com/

Mom’s Potato Salad

 
  I know Easter just happened, but I wanted to share this recipe again because it’s an Easter tradition and I am still enjoying the leftovers!
 
Hey, you know Julie posted a potato salad recipe back here and explained that we grew up in a different potato salad culture.  I, too, am a potato salad snob.  Mom’s recipe trumps all others in my world.  I realize your world may include eggs, or you might like to smash up the spuds.  Whatever floats your boat. 
 
I was feeling nostalgic this Easter and decided to pull out Mom’s recipe, much to the delight of my family.  I had no idea they liked it so much!  Guess I will have to make it more often.  So, Moms’ recipe in Grandma’s retro Pyrex bowl.  Sweet memories.
 
Ingredients:
 
5 lbs. potatoes, boiled in salted water & peeled & cubed (love the cubes–it’s a texture thing)
1 lg. green bell pepper, chopped
1 small onion chopped
1 tsp. celery seed
3 small jars diced pimiento, drained
1 1/4 cup Miracle Whip (no, not mayo, please.  not for this.)
4 tsp. salt
1/2 tsp. pepper
1 T. apple cider vinegar
1 tsp. prepared mustard
 
1.  Peel the potatoes, place in large pot and cover with water.  Bring water to boiling and cook until just tender.  No mushy spuds here!  Let cool, then cut into bite-size cubes.  Place in a large serving bowl.
 
2.  Add the green pepper and pimientos to the cooled spuds (I say spuds a lot.  My first two years in college were spent in Idaho.)
 
3.  Combine the rest of the ingredients.  Mix well.  This is your dressing.  Add to the…wait for it….spuds and friends.  Toss together gently with rubber spatula to make sure the dressing is evenly distributed.


This recipe originally posted on May 8, 2014.

Source: Pat Brew Recipes.

Sausage Okra Gumbo


Today I am sharing a family favorite recipe that gets rave reviews no matter when I serve it.  Just had it the other night–8 of us for dinner and I doubled the recipe and had one serving left.  Yeah, that good.  I use Kielbasa, but feel free to used whatever type of smoked sausage you would like to.  Turkey Kielbasa is also very good. 
 
Mom always made this with Kielbasa.  Don’t you love saying that word?  Kielbasa, kielbasa, kielbasa…

Ingredients:
1 1/2 lbs. Polska Kielbasa ( I just use 2 packages.  You can’t have too much sausage in gumbo, can you?)
2-3 T. butter
3 T. flour
2 cups chicken broth
18-oz. frozen gumbo vegetables*
14-oz. can of tomatoes, chopped, with juice
1 1/2 t. salt (you may want to adjust down, depending on how salty your meat choice is)
1/4 t. garlic powder
1/4 t. ground red pepper 
1 T. Old Bay Seafood Seasoning

3 cups hot, cooked rice

1.  Saute cut sausage for a few minutes in a Dutch oven or large pot.  Even though these are precooked, I think it improves the overall taste to brown them up just a little bit and it also helps your roux.  Remove and set aside.
 
2.  Melt the butter in the Dutch oven.  Add flour and cook, stirring constantly, until mixture is deep brown, about the color of an old penny (this is known as making a roux).
 
3.  Add broth, vegetables, tomatoes, seasonings, and sausages.  Bring to a boil; reduce heat, cover and simmer for 25 minutes.
 
4.  Remove from heat.
 
5.  Ladle gumbo into bowls and top with a scoop of rice.  Some people think you should put a bunch of rice in the bowl and then add the gumbo on top.  Personally, I like less of a rice ratio to my gumbo.  A little scoop of rice on top is perfect for me.


* You can use a combination of okra, corn, onions, celery and sweet red pepper instead of the frozen vegetables. These days that combo is hard to find in the frozen food section.
 

Source:  Pat Brew, Brew Family Cook Book, 1st Edition.

Originally posted on January 24, 2014.

Stuffed Cherry Tomatoes

 
There are days when you just can’t think of a recipe to post, so you hit your trusty family cookbook to see if anything strikes your fancy–and if you already have most of the ingredients.  Today was that day.  After a quick trip to the store before work to pick up chives and cherry tomatoes, I was ready to prepare your post for the day.  This is actually a recipe that I taped into my cookbook without even trying it.  I have quite a few of those, from back in pre-Pinterest days, pre-save it to your computer days.  Yes, that long ago.  This one is clipped from a magazine.  I would guess at Better Homes & Gardens.  This is actually quite good and any leftover filling makes a great egg salad sandwich.
 
Ingredients:
36 large cherry tomatoes 
1/3 cup mayonnaise
1 T. Dijon mustard (I used regular because I forgot to get some at the store)
1/2 t. curry powder
2 T. chopped fresh chives
10 whole chives for garnish
 
1.  Cut a slice off the top of each tomato and use a spoon to remove the meat and seeds.  I actually cut off the bottom end so that the tomatoes would sit level on the platter.
 
2.  Set the tomatoes upside down on paper towels to drain.
 
3.  Put the peeled eggs in a bowl along with the mustard and mayo and mash with a fork until fairly smooth.  Add the remaining ingredients, mix well and taste so you can add spices if you need to.  I added a little bit of salt.
 
4.  About 1 hour before serving, fill each tomato with egg salad, garnish with several 2″ chive spears standing up in the middle of the tomato.  Makes a lovely appetizer, don’t you think?
 
 
Originally posted on March 12, 2015.

Breakfast Tostadas

breakfast tostadas
 

I am currently in a breakfast funk. It’s hard to come up with healthy choices when you are used to just throwing some milk and Cheerios in a bowl.   Anyone else out there grow up with cold cereal for the first meal of the day?  I would bet there are a lot of us.  Nothing against Mom–she did the best she could for her kiddos.  I can even remember a time when she was trying to get creative with some healthier options, but we just didn’t cooperate very well, except with the frozen banana with peanut butter and wheat germ.  That is STILL a winner!  Maybe that should be a future post!  Stay tuned.

Anyway, as I was scouring my Pinterest folders for some ideas for my post this week, I found this gem and thought it would be a great recipe to share, plus maybe I will love breakfast again.  Plus, their picture looked so colorful and amazing.  By the way, this dish is so easy to prepare and you can do it with the messiest of counters. I had just gotten back from work and the store, plus as I was putting food away I noticed how nasty the fridge looked.  Took all the stuff off the shelves and out of the drawers and that was also on my counters, and I was able to make my tostada amidst the chaos.  Score!  And after my tostada, I cleaned/reorganized the fridge.


Ingredients:

1  16-oz. can of refried beans
6 tostada shells
6 eggs
1/4 cup crumbled Queso Fresco
1 avocado, sliced
cilantro
hot sauce

 
1.  Preheat the oven to 325 degrees F.  Place tostada shells in a single layer on baking sheet.  Bake 6-7 minutes or until crisp.
 
2.  Place re-fried beans in a small saucepan.  Heat over medium heat until warmed through. For those using freeze-dried beans, follow the directions on the package/can.  Mine was super easy and I made only as much as I needed.
 
3.  Cook eggs according to preference–I like slightly under cooked.
 

4.  Assemble the tostadas–put equal amounts of re-fried beans on each tostada and spread evenly.  Top each with queso, a few avocado slices.  Place an egg on each one and season with salt and pepper.  You can also use cilantro and some hot sauce or salsa, if you like.  I used hot sauce because, unfortunately, I did not have any fresh salsa ready.  Serve warm.


Source:  Taste and Tell via Pinterest.

Originally posted on September 10, 2015. 
Breakfast Tostadas
Write a review
Print
Ingredients
  1. 1 16-oz. can of re-fried beans
  2. 6 tostada shells
  3. 6 eggs
  4. 1/4 cup crumbled queso fresco
  5. 1 avocado, sliced
  6. cilantro
  7. hot sauce
Instructions
  1. Preheat the oven to 325 degrees F. Place tostada shells in a single layer on baking sheet and bake 6-7 minutes or until crisp.
  2. Place re-fried beans in a small saucepan. Heat over medium heat until warmed through. For those using freeze-dried beans, follow the directions on the package/can. Mine was super easy and I made only as much as I needed.
  3. Cook eggs according to preference–I like fried and slightly under cooked.
  4. Assemble the tostadas–put equal amounts of re-fried beans on each tostada and spread evenly. Top each with queso, a few avocado slices. Place an egg on each one and season with salt and pepper. You can also use cilantro and some hot sauce or salsa, if you like. I used hot sauce because, unfortunately, I did not have any fresh salsa ready. Serve warm.
Adapted from Taste and Tell
Mormon Mavens https://www.mormonmavens.com/