Chocolate Raspberry Cupcakes

Mr. Blue Eyes (yes, my husband cooks!–Thankfully!) and I made these earlier this month for my birthday. They. were. DELISH! You must try them! The frosting was a little complicated for us, being our first time using a meringue-type, but it was worth it! I don’t generally care for frosting. I’m the weirdo at all the parties who scrapes the frosting off the cake to eat it plain. But I’m telling you I REALLY liked this frosting. Very light. Truly worth every minute!

Chocolate Cupcakes

Ingredients:
18 Paper Cupcake Liners (plus a few extra…we needed them)
1 1/2 Cups all-purpose Flour
1/2 Cups Dutch-processed cocoa powder (we used Hersey’s Cocoa Powder)
3/4 tsp Baking Soda
1/4 tsp Salt
1/2 Cup (1 stick) unsalted butter, at room temp, cut into small pieces
1 1/3 Cups Sugar
1 tsp Vanilla Extract
2 Large Eggs
1 Cup Milk, at room temp
*3/4 – 1 Cup Fresh Raspberries (or frozen, thawed and well drained)–OPTIONAL

1. Preheat oven to 350 degrees F. Place paper liners in all wells of Cupcake Tins (we used one 12 cup tin, and one 6 cup tin.)

2. In a small bowl, sift together Flour, Cocoa Powder, Baking Soda, and Salt. Set aside.

3. In a Large bowl with an electric mixer, beat butter until creamy–about 2 minutes. (We used our Kitchen Aide for this.) Add sugar gradually, beating until light and fluffy, about 3 minutes. Be sure to scrape the bowl once or twice. Beat in the vanilla and eggs, one at a time until they are each mixed in well.

4. Alternating about 4 times, mix in the flour mixture and the milk. Beat briefly between each add-in to make sure it’s well incorporated and the batter is smooth.

5. If you’re using Raspberries, this is where you fold them into the batter. We only did 3/4 Cup, but next time I think we’ll do a full 1 cup.

6. Divide batter evenly among the cupcake wells. Bake for 22 minutes, or until a toothpick inserted in the center shows a few moist crumbs.

7. Cool on racks for 5 minutes, then remove cupcakes to cooling racks to cool completely.

Italian Meringue Butter Cream Frosting

Ingredients:
Scant 2/3 Cup, plus 3 Tbsp Sugar
1/4 Cup water
4 Large egg whites, at room temperature
1/2 tsp cream of tartar
1 1/2 Cups (3 sticks) unsalted butter, at room temp, cut into small pieces
*3/4 Cup Raspberries (OPTIONAL)

1. Place 2/3 Cup Sugar and the water in a small saucepan. Stir to wet the sugar. Bring to a boil over medium-high heat, stirring constantly. Dip pastry brush in cold water and wash down the sugar crystals from the sides of the pot once or twice. Turn down the heat to simmer gently.

2. Place the egg whites in a clean, grease-free mixing bowl and whip until frothy on low speed using balloon whip attachment to your standing mixer. Add cream of tartar and turn speed to medium-high. When soft peaks form add remaining 3 Tablespoons sugar gradually. (This is the meringue part of the butter-cream, and the frosting may be used at this point for low-fat, marshmallow-like frosting; it must be used immediately.)

3. Bring the sugar-water mixture to a rapid boil and cook until it reaches 248 – 250 degrees F. (We don’t have a thermometer *GASP!* and so the following directions were vital.) As syrup cooks, look for visual clues to assess temperature. It starts out thin with many small bubbles over the surface. The water will begin to evaporate and the mixture will become thicker. The bubbles get larger and sticky and pop more slowly. At this point the syrup looks thickened, but it has not begun to color. If you drop a bit of the syrup into a glass of cold water it will form into a ball. This is the firm-ball stage, and the syrup is ready.

4. Pour a thin, steady stream over meringue, without pouring any on the rotating whip or the sides of the bowl. (Be quick! We didn’t do it fast enough and had to make the syrup a 2nd time.) Whip meringue on high speed until cool. When the bowl is no longer warm, stop the machine and touch the surface of the meringue with your finger to check that it is cooled. With mixer on medium speed, add the butter, a couple Tablespoons at a time. Keep beating until the buttercream is completely smooth. It is now ready to use. Any flavorings or variations can be added at this time.

5. This is where you beat the raspberries into the frosting. Just keep the beater going and add the berries. The buttercream will turn pink and you will see bits of fruit (YUM!) suspended here and there. (Beautiful!)

6. Frost cupcakes smoothly using an icing spatula or a spoon. Top with garnish, candles, or whatever you prefer!

*You don’t have to use Raspberries. Use the cupcake and frosting recipes as is, or with your own variation. That’s what I love about these recipes! Make them your own.

Yield: The recipe says 18 cupcakes, but we got 18 big cupcakes + 10 small ones, and we weren’t skimpy when filling either!

Notes:
     ~Like I said before, the frosting was a little more difficult than we expected and we had a few hiccoughs in the procedure. Mr. Blue Eyes was in charge of the syrup, while I did the meringue. Having four hands worked well for us first-timers.

Source: A Baker’s Field Guide to Cupcakes: By Dede Wilson

~Kara

Pumpkin Pancakes

These delicious pancakes are especially good in the fall, for Christmas breakfast, or a regular day of the week–pretty much ANY TIME! Our nieces stayed with us over Thanksgiving and they gobbled these up! No pun intended…

Ingredients:
2 Cups Flour
2 Tbsp Brown Sugar
2 tsp Cinnamon
3 tsp Baking Powder
2 Eggs
1.5 Cups Evaporated Milk
1/2 Cup Pumpkin (we use canned–refrigerate unused portion for later)
2 Tbsp Vegetable Oil
1 tsp Vanilla

1. Sift together all dry ingredients.
2. Add all wet ingredients and stir until well incorporated.
3. Bake in 6″ diameter rounds in a frying pan or on a griddle over MEDIUM-LOW heat.  We make ours using a griddle and set it to 325.

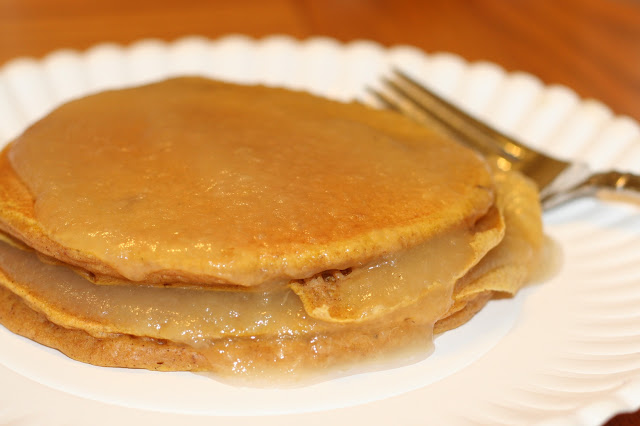
Serve with apple sauce (pictured above), maple syrup, whipped cream, or whatever seems good to you!

*Halves easily.

Source: My aunt, Eileen

~Kara

Boyd’s Famous Pumpkin Chocolate Chip Cookies

OK, so maybe these cookies aren’t famous. But they should be!  We eat them all year round, but during the fall they especially hit the spot!


Ingredients:
2 C pureed pumpkin (or one 15 oz can–That’s what we use.)
2/3 – 3/4 C Vegetable Oil (I use closer to 2/3 C)
2 tsp Cinnamon
4 tsp Baking Powder
2 tsp Baking Soda (“Baking Powder AND Soda?” you say? Don’t ask me; IT WORKS!)
2 C Sugar
2 Eggs
2 tsp Salt
2 tsp Vanilla
4 Cups Flour
2 Cups Chocolate Chips
1 Cup Walnuts (opt)

1. Preheat oven to 375 degrees F.
2. In a stand mixer, add ALL ingredients, one by one, and mix on Medium speed until fully incorporated. Really. That’s all you do.
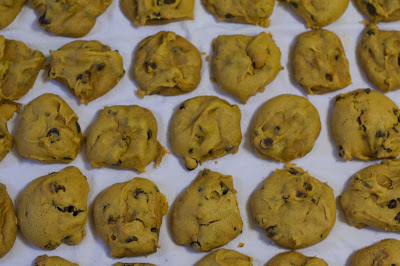
3. Drop heaping spoonfuls 1 – 2 Inches apart on a lightly greased cookie sheet.
4. Bake for 12 – 15 minutes or until springy to the touch.
5. Let cool on the sheet for 5 minutes, then remove to a rack or some such device–we use a cheesecloth on our counter.

DELISH!

Source: By AWESOME Father-in-Law, Boyd.

~Kara

Meatball Subs

Mr. Blue Eyes and I love these sandwiches! The meatballs are pretty run of the mill, but I love something that can be used in many recipes and stores or freezes easily. Sometimes I make the meatballs and freeze them for later use. SO great!
Ingredients for the Meatballs:
1 lb Ground Beef
1/4 C Bread Crumbs (we use Italian Seasoned)
1 egg
2 Tbsp finely chopped onion
1 clove garlic, minced
1/2 tsp salt
1/8 tsp ground pepper
Additions for the Sandwiches:
1 (32 oz) Jar of your favorite Spaghetti Sauce (We use Classico, Tomato and Basil)
3-6 Hoagie Rolls (We slice three, and eat them open)
Shredded Cheddar Cheese (Mozzarella is great, too!)
1. Preheat the oven to 400 degrees F.
2. In a Medium sized mixing bowl, mix all the Meatball ingredients together by hand.
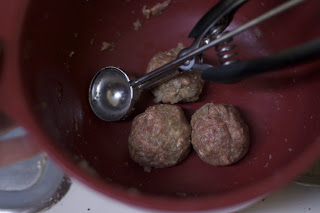
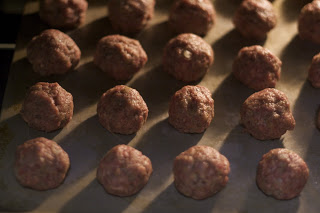
3. Roll into balls. I make mine with a cookie scoop–heaping.
4. Place about 1″ apart on a cookie sheet. (We use lean meat. If you use higher fat content, you may want to put these in a cake pan.)
5. Bake for 10 – 13 minutes.
6. After removing the meatballs from the oven, turn it to Broil–500 degrees–and move your rack up to the highest setting.
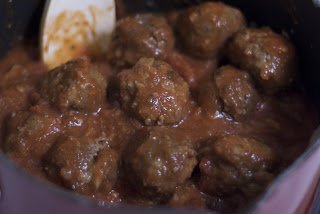
7. After letting them cool a bit (or not–depending how rushed you are. Just be aware that they may break a little if you handle them too much when they’re hot.), add them with your spaghetti sauce in a sauce pan. Warm them up over Medium heat, about 3 – 5 minutes, stirring gently.
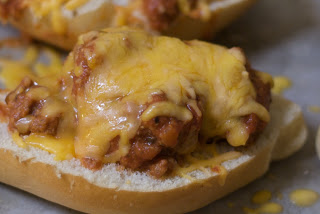
8. Halve your hoagie rolls lengthwise, place them on a cookie sheet, and spoon some meatballs over the bread BOTTOMS (if you’re going to Sandwich it. We do tops and bottoms because we eat them open)–enough to get a bite of meat when you chomp into it.
9. Sprinkle some cheese over each sandwich half and place on the top rack under the broiler until the cheese is nice and melted, about 3 minutes. (Don’t over bake!!) Serve hot.

Source: A family recipe

~Kara

Honey Chicken

 
This is one of my kids’ favorites! It can also be done in a little over an hour and has only 5 ingredients. WHO CAN BEAT THAT?! Don’t let the curry fool you. This recipe has a sweet, savory flavor that is fabulous on the tongue.
 
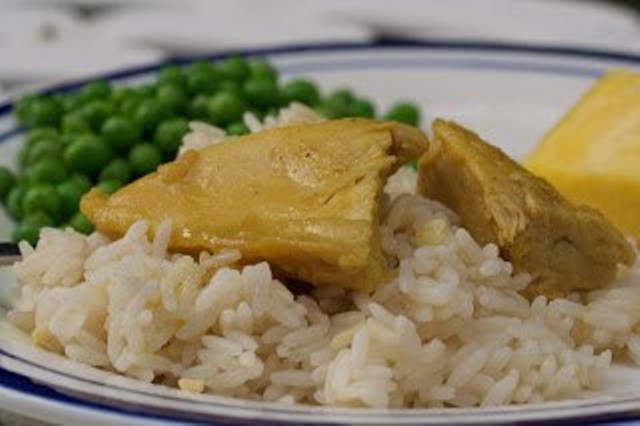
We serve this over rice with a little of the juice drizzled on top.
 
Ingredients:
1/4 C (1/2 stick) Butter, melted
1/2 C Honey
1/4 C Mustard (your favorite. We use regular ol’ French’s)
1 tsp Salt
1 tsp Curry
3 – 5 Large Chicken Breasts
 
1. Preheat oven to 375 degrees.
2. In a small bowl, mix first five ingredients.
3. Lay the Chicken in the bottom of a shallow baking dish.
4. Poor honey mixture over and bake, covered, for 1 hour.


NOTES:  I have used thawed or frozen chicken with little difference. You may have to adjust cooking time, but it really turns out the same. This is also GREAT in the crockpot!! 3-4 hours on Medium heat should do it.
 
Source: My Grandma


FABULOUS Peanut Butter Chocolate Bars

These things are so delicious, they’re DEADLY.
Bar Ingredients:
1.5 C (3 sticks) Butter
1.5 C White Sugar
1.5 C Brown Sugar
1.5 C Peanut Butter
(you’re already seeing the DEADLY part, aren’t you?!)
3 eggs
1.5 tsp Baking Soda
3/4 tsp salt
1 Tbsp Vanilla
3 C Flour
3 C Rolled Oats (we use instant)
1 bag chocolate chips
1. Preheat oven to 350 degrees F.
2. Cream together butter, sugars, peanut butter, and eggs.
3. Add Soda, salt, and vanilla.
4. Alternate adding flour and the rolled oats by the full 1 cup.
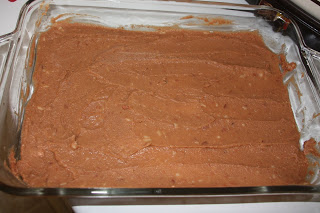
5. Spread in a Jelly Roll Pan and bake for 15 mins.
6. When you remove the bars from the oven, immediately sprinkle the chocolate chips over the top. Let them sit until they get wet looking and are melty to the touch. (That’s a technical term: Melty.) Then, spread the chocolate over the entire surface of the bars.
7. While this is cooling, make your frosting:
Frosting Ingredients:
2 C Powdered Sugar
3 Tbsp Peanut Butter
4-8 Tbsp Evaporated Milk
1 drop Vanilla
8. Spread the frosting over the chocolate. You can do it carefully so all you see is the frosting, or you can marble them together. (This is a source of conflict between Mr. Blue Eyes and myself. I like it marbled. It’s pretty that way.) Either way these are FABULOUS and DEADLY!!
Source: My FABULOUS sister-in-law, Debbi

~Kara

Layered Chip Dip

This is a General Conference tradition at our house. It is mui bueno! Mr. Blue Eyes also informed me that 1/8 Cup (including 4 chips) has about 200 calories in it–the same as 1 Glazed Krispy Kreme doughnut. If you’re going for Quality Calories, EAT THIS! If you’re going for SWEET with zero nutritional value, eat the doughnut (I’ll be with you!). 🙂
Ingredients:
2 Cans Refried Beans
4 Mashed Avocados
Lime Juice to taste–about 4 Tbsp
1 Cup Sour Cream
1 Cup Mayonnaise
1-2 Packages Taco Seasoning (I only use one, but know others who use two)
4 Cups Shredded Colby-Jack Cheese
1 Bunch Green Onions
4 Chopped Tomatoes
Your Family’s Favorite Tortilla Chips
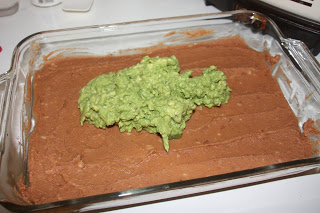
1. In an 11×15″ cake pan, spread the refried beans over the bottom.
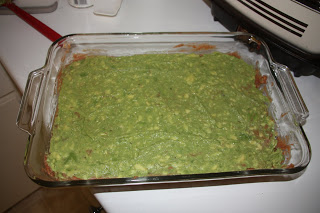
2. Mix your mashed avocados and your lime juice together. Plop it (or this fabulous Guacamole Dip!) onto the refried beans…

…and spread it over.

3. Mix the sour cream, mayo, and taco seasoning in a small bowl…
…then spread it over the guac.

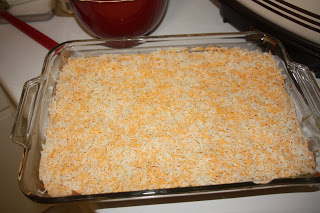
4. Spread the cheese over the sour cream–use as little or as much as you like!

5. Add your veggies* and serve with your favorite Tortilla Chips. We like any Scoop variety.

Serve immediately. Refrigerate any left overs (or if you’re not serving it until later).
*This recipe is so versatile that you can make it as simple or as glorified as you want. I’ve had several different kinds of veggies (peppers, olives, etc.) and haven’t had a bad combo yet!
Source: My variation of a family friend’s recipe
~Kara

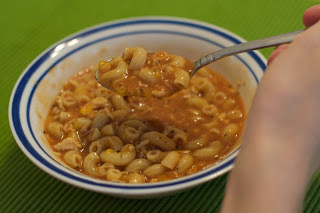
Thick Tomato Soup

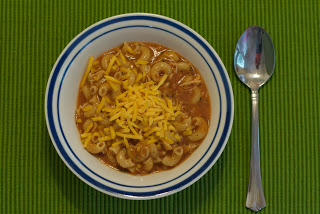
This is a staple dish in our home. We eat it for lunch at least once a week and the kids scarf it right up (even Mr. Picky, aka: Ruffian1). Easy-peasy! Guaranteed Goodness!
8-12 oz Uncooked Pasta–we like SMALL shells or Elbow Macaroni
2 (10 oz) Cans Tomato Soup
1 Can ONLY Water
1/2 tsp Thyme
1 tsp Basil
1 tsp Oregano
1 (13 oz) Can Chicken Breast (you could cook a chicken breast and shred it, instead)
1 Cup Cheddar Cheese
1. In a Medium saucepan, cook Pasta according to package directions. Remove to strainer.
2. In the same pan (SAVE ON DISHES!), empty the tomato soup and add 1 can of water (remember, this is THICK soup. You can add more water if you like, but we don’t.)
3. Stir in Thyme, Basil, and Oregano.
4. Shred the chicken with a fork and add it to the soup. Mix until everything is evenly incorporated.
5. Add cooked noodles and stir well.
6. Remove from heat and stir in cheese.
Mm-MMM!
Source: My family recipe box
~Kara

Grandma’s Swedish Pancakes

When I say “Grandma’s,” I mean MY grandma. We used to go to her house almost every week for Sunday dinner. It was common knowledge that we had a big lunch and “no dinner.” By “no dinner” I mean we had a big dessert. I attribute my sweet tooth to Grandma (and my mom. Yep, it’s totally genetic!)!

 
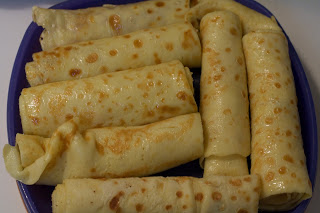
Swedish Pancakes were often on the “no dinner” menu. They are essentially Crepes, and though there are many various ways to eat them, the following way is the best. Trust me.
 
6 eggs
2 1/2 Cups Milk
1 1/2 Cups Flour
2 Tbsp Sugar
1 tsp Salt
 
1. Turn on your griddle to 350 F. A frying pan works, too–medium heat.
2. In a Medium bowl, beat your eggs until thick and foamy.
3. Stir in your milk.
4. Sift together dry ingredients (or if you’re naughty like me, don’t…) and add them to the egg mixture.
5. Beat until smooth.
 
This is where it may get a little tricky…
 
6. Making sure your griddle is nice and hot, spray it with Cooking Spray (don’t forget!!).
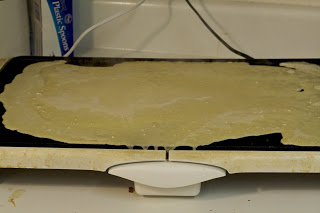
7. Using a Ladle, cover your griddle in a thin layer of batter (apx 3 ladles-full).
 
8. Wait until the batter looks a little dry, then use the corner of your Spatula and “cut” the pancake width-wise on the griddle into 4 rectangles (Sorry there’s no picture of this. My hands were tied and I don’t trust the Ruffians with the camera yet.).
9. Flip the rectangles over and butter them while the other side is cooking–I don’t time it, but by the time I’m done buttering the last rectangle, they’re done.
10. Don’t worry if you have a few that turn out like this:
Just butter them, or lather them with jam or syrup and eat ’em anyway! OR if you’re mad at it, THROW. IT. AWAY! That’ll teach it! And it may make you feel better. (NOT that I would know about this from experience…)
 
11. Take the pancakes off the griddle and pile them on a plate. Repeat Steps 6 – 11 till all the batter is gone.
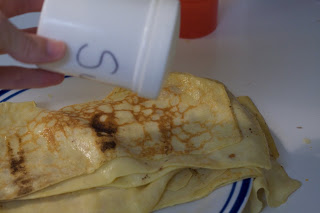
12. Take a sugar shaker***, if you have one–if not, your hand and a spoon will do just as well!–and shake a GENEROUS amount of sugar onto the buttery side, coating the entire thing. When I say “generous” I mean, GENEROUS. You should SEE the sugar! After you’ve done it a few times, you’ll know how you like it and can do it your way.
 
13. Starting at a short end, roll one rectangle to the other end. Repeat steps 12 and 13 till all your pancakes are rolled up.
 
Now you can eat away! Your hands will be a little sticky, your tummies will feel full, and if you’re like my Ruffians, your faces should look like this:
Ruffian3 smiling as he takes a bite. Ruffian2 likes to unroll hers. She always did like a mess!
 
 
Makes about 16.
 
***You really can use a variety of fillings. We’ve done jam, peanut butter and syrup, fruit and whipped cream, and Nutella–all VERY GOOD!
 
Source: Grandma Taylor, one of the greatest women alive!
 
~Kara

All Purpose Pizza Dough

As you can see, we didn’t use this dough for pizza this time. We used it for Stromboli, but this is the best recipe I’ve found for recipes needing a fairly easy, rising dough. We usually use this dough recipe for Pizza, Stromboli, and Scones.
1 C Warm Water
1 Tbsp (or 1 package) Yeast
1 Tbsp Sugar
1.5 tsp Salt
2 Tbsp Oil
2 3/4 – 3 1/4 C Flour
1. In a mixer (or bowl) combine your water, yeast, and sugar. Wait five minutes and allow yeast to activate (get foamy).
2. Add remaining ingredients, adding flour a little at a time until you have a moderately-sticky dough.
3. Knead dough (adding flour as needed–no pun intended!) for about 200 turns. I let my KitchenAide run for between 5 – 10 minutes.
4. Cover and let rest for 10 minutes.
5. Make your pizza!
For Pizza Crust:
1. Preheat oven to 425.
2. On a slightly floured board, roll dough out to fit your pan(s). Place dough in/on your pan(s).
3. Bake for 6 minutes. Prick any big bubbles with a fork.
4. Bake 6 minutes more. Add pizza toppings and bake until the cheese is melted and toppings are hot.
This is enough dough for 1 big 15 x 11 pan, or two 12″ pans.
Source: From My House To Yours: Big Piney-Marbleton Communities 1995 Cookbook
~Kara