Classic Waffles

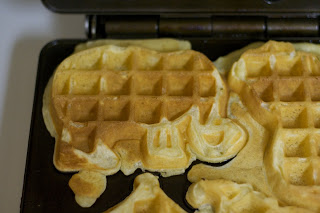
A few years ago, Mr. Blue Eyes gave me my most prized kitchen possession. My Waffle Iron. “Why in the world is a waffle iron your most prized possession?” you ask. Because it’s not just a waffle iron. It’s a CIRCUS waffle iron. Made by Williams-Sanoma. And they don’t make them anymore. AND it is TOTALLY Awesome. What other waffle maker can make an Elephant, a Big Top, a Clown, and a Lion? None. I mean, check this out!

That’s right. That’s a waffle Elephant. And it is Totally. Freakin’. Awesome.
I did find out that you can get other circus waffle makers here. And while they’re not the same, and totally not as cool (no Big Top), I’m sure they do just fine…maybe. (And now you know what a snob I really am! 🙂 )
However, this post is not about my waffle maker. It’s about the fact that since we got this waffle maker, we are Waffle SNOBS. No more Krusteaz mix-the-water-in mix for us. It’s all about homemade goodness.
This recipe came from the Williams-Sanoma booklet that came in the Circus Waffle Maker. It is the recipe that brought us down (or shall I say, UP?) to our waffle-snobby selves. I’m not going to lie: these waffles are not for a morning where you need to whip up a quick breakfast. But they don’t take all morning to make either. Trust me when I say, the time is well worth it. Nothing says, “I love you, Family,” more than these light, fluffy, waffles.
Enjoy this recipe. I also have a few other waffle recipes that have passed the waffle snob test. Stay tuned for more.
Classic Waffles (aka: The Waffle Snob’s Beginning)
1.5 Cups Flour
1/2 Cups Cornstarch
1 Tb Baking Powder
2 Tb Corn Meal (that’s right, corn meal. Gives it a special little bite!)
3/4 tsp Salt
1/2 Cup (1 stick) Butter, melted
3 Eggs, separated
1 3/4 C Milk
1 tsp Vanilla
2 Tb Sugar
1. In a Large mixing bowl, sift together the flour, cornstarch, baking powder, corn meal, and salt. This is also when I put my butter in the microwave to melt and plug in my waffle iron.
2. In two small/medium-sized bowls, separate the egg yolks from the whites.
3. Add the milk and the vanilla to your egg yolks and whisk together. Set aside.
4. Beat the egg whites till soft peaks form. Add sugar and then beat until stiff peaks form.
5. Add the milk mixture to the flour mixture and mix until everything is wet and all the large clumps are smooth. Don’t over mix!
6. Stir in the butter.
7. Fold in the egg whites. Don’t over mix! (This is key to the fluffiness. But I’ll tell you, I’ve over mixed a couple of times…and they still turned out!)
8. Pour into your hot waffle iron (don’t forget to spray it if needed) and… Voila! Totally Awesome Waffles.
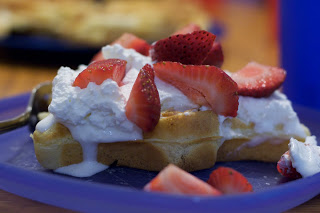
9. Top with your favorite toppings: syrup, Peanut Butter, jam, whipped cream and fresh fruit. Whatever suits your fancy!
Source: Williams-Sanoma
~Kara

Nigella Express Mac and Cheese (w/ variations)

Having Mac ‘n’ Cheese at our house is very important. While I don’t necessarily have a problem with “Blue Box Mac ‘n’ Cheese”, as our ruffians call the Kraft kind, I’d take a good homemade recipe over boxed anytime! A few years ago, Mr. Blue Eyes’ parents gave us Nigella Lawson’s Express Cookbook, and her Macaroni and Cheese has made it to our “Favorites” list. Of course, being an expert chef, her original recipe calls for only the best ingredients. I am a mom of three and don’t always have “the best” on hand, so we’ve done some tweaking. I’ll give you Nigella’s (because she and I are on a first-name basis. *sputter, cough* Excuse me!) …Ms. Lawson’s original recipe first, then our TWEAKED version.
Nigella’s Original Version
8 oz uncooked Macaroni
2 Cups coarsely chopped mature Cheddar or Leichester cheese, or a mixture of both
1 Cup Evaporated Milk
2 eggs
Grating of Fresh Nutmeg
1. Preheat the oven to 425 F.
2. Cook the macaroni according to the package instructions, drain, and put it back into the pan.
3. While the pasta’s cooking, put the cheese, evaporated milk, eggs, and nutmeg into a food processor and blitz, or put them all into a bowl and mix by hand.
4. Pour the mixture back into the pan with the macaroni and stir well. Then pour it all into a 10-inch-diameter shallow dish.
5. Bake 10 – 15 minutes until it is bubbling and blistering on top.
Tweaked Version
8 oz uncooked macaroni
2 Cups Shredded Cheddar Cheese
1 Cup Milk
2 Eggs
Pinch of Ground Nutmeg
Salt and Pepper to taste
1. Preheat the oven to 425 F.
2. Cook the macaroni according to the package instructions, drain, and add to a shallow casserole dish.
3. While the pasta’s cooking, put the cheese, evaporated milk, eggs, nutmeg, and salt and pepper into a bowl and mix.
4. Pour milk/cheese mixture over the macaroni and incorporate well into the noodles.
5. Bake for about 15 – 20 minutes, or until it is bubbling and blistering on top.
~Kara

It’s Time to Get Fresh!

As the newest member of the Maven’s let me just begin by saying it is a privilege to be joining such great group of women! What to cook is the age-old dilemma, and it is great to have fresh ideas and unique perspectives each day.
And now, drumroll please………It’s time to get Fresh!

Here’s the assignment: Go to the farmer’s market. Take a good look around. That’s right, it’s locally grown, freshly picked fruits and vegetables! This food has not been in a box for 2 weeks or traveled 2000 miles. Someone may have plucked it from the ground or off a tree as the sun came up this morning.
This is the perfect time to visit the farmer’s market. There are so many delicious things in season right now, and it all tastes amazing!! I personally love supporting local businesses and growers, and if you think you can’t find great deals, you’re mistaken. Who can argue with giant slicing tomatoes for $1 a pound? The farmer’s market can also bring out the inner photographer. Here’s my favorite picture I snapped from the North Carolina State Farmer’s Market in Raleigh:

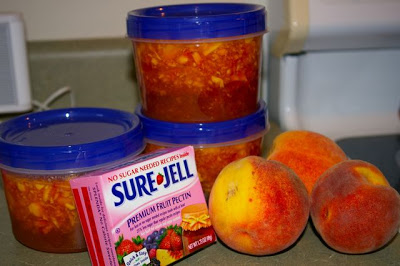
One fruit that is a true “must” when it comes to buying locally, is peaches. The flavor of freshly picked peaches just can’t be beat! A bowl full of fresh peach slices in a pool of cold milk with a dusting of sugar is my favorite summer midnight snack. Prime picking time for peaches may vary a bit from place to place but right now is the time for people like me in North Carolina. I can’t get enough! What should you do with all the peaches you buy after you go crazy at the farmer’s market? Jam, delicious peach jam. It is super easy, and you don’t even have to bottle it if you don’t have canning supplies.


All you need is:
*a few plastic containers with tightly sealing lids
*peaches peeled and chopped fresh or cooked and mashed
*sugar
*lemon juice (a little squirt so your peaches don’t go brown)
*box of pectin (preferably the no sugar needed type, even if you do add sugar it is deemed to be the easiest to work with. There are also no-cook pectins out there and then you don’t even have to boil anything!)
Follow the directions in your box of pectin for mixing your jam. Fill your containers, and cool if needed. Pop the extra containers in the freezer. Enjoy your fresh jam on toast or pancakes!! Your open container should be good in the fridge for about 3 weeks.

Oreo Cookies

My mom has made these cookies for years and years. I think I’m addicted to them. I blame her. 🙂
1 box Devils Food Cake Mix
1/2 tsp vanilla
1/3 Cup Vegetable Oil
2 eggs
1. Preheat oven to 350 degrees F.
2. In a stand mixer mix all ingredients till well combined and a stiff dough forms.
3. Roll into 1″ balls (I use a cookie scoop, but my mom just eyeballs it with a dinner spoon) and place on a cookie sheet 2″ apart.
4. Flatten slightly.
5. Bake for 7 – 9 minutes (I actually bake mine for 10, but that’s because my oven is…silly. And by “silly” I mean I-can’t-wait-till-I-can-pick-out-my-own-stinkin’-oven! Oops! Forgive the rant. It’s the simple things in life, right?)
Don’t over bake. The cookies will be soft and look moist when you pull them out.
6. Cool for 5 minutes or until firm, then remove from cookie sheet. Cool completely.
7. Make your Frosting.
4 oz Cream Cheese, softened
1/2 Stick (1/4 Cup) Butter or Margarine, softened
1/2 tsp Vanilla
2 – 2.5 Cups Powdered Sugar
8. Beat the Cream Cheese and Butter together until creamy and smooth.
9. Add vanilla and mix thoroughly.
10. Gradually beat in Powdered Sugar until your frosting is a good thick consistency.
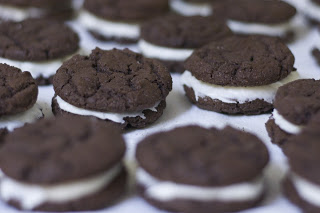
11. Make an Oreo by selecting two cookies that are the same size. Spread some frosting on the underside of one cookie and sandwich it with an other.
Voila!
12. Now you must decide: Should you share? Or should you stash them away for a hidden moment during the day? (I say, moderation in all things–do both!)
Source: Modified from Heidi Brady and Angella Workman, Duchesne 2nd Ward’s 2nd Cookbook.


~Kara

Cherry Cheese Pie

I have this memory from when I was small. My mom was hosting Mother’s Club at our house and she made Cherry Cheese Pie to share. I begged and begged to have a small piece. She told me no. I begged and begged to stay up so I could see all the ladies. She told me no.
I was heart broken.
I was also a bit devious. I went to bed when Mom asked (like an angel, I’m sure!), and then when I knew all her friends were there and she couldn’t get mad at me, I sneaked out of bed, batted my eyes a few times, and got some pie!
And we wonder where OUR kids get it. Yikes.
I hope you enjoy this dessert as much as I do. It’s so simple, the only thing I question is why I don’t make it more often!
Crust:
1 sleeve Graham Crackers
1/3 C white sugar
6 Tbsp Butter, melted
1. Put the graham crackers in a zip-lock bag and close it, making sure it’s air-tight. If it’s not air-tight, keep your broom handy!
2. Using a rolling pin, your feet, or your car’s tires, (OK, I may be kidding on the last two), crush the crackers into tiny crumbs. Dump them into a 9″ Pie Plate.
3. Add the sugar to the crumbs and mix it well with a fork.
4. Add the butter and mix until all the crumbs are well coated and moist.
5. Press the mixture to the sides and bottom of the pie plate. Set aside.
Filling:
1 (8 oz) Cream Cheese, softened to room temperature
1 (14 oz) can of Sweetened Condensed Milk
1/2 C Lemon Juice
1 tsp Vanilla
Pie filling of your choice (We like cherry or blueberry. And, sinners that we are, we use the canned kind.)
1. Beat the cream cheese until it’s light and fluffy–about 3 minutes or so.
2. Add the sweetened condensed milk–don’t forget to steal a taste or two!–and mix well.
3. Add the Lemon Juice and Vanilla.
4. Pour into the pie crust.
5. Chill 2 – 3 hours.
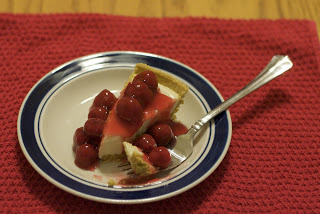
Serve topped with pie filling.
Source: Mama Karri
~Kara