Finding Courage in Difficult Times

After I wrote this article, I saw this picture and could not resist it! It’s PERFECT! Sometimes you just gotta hold your head high and keep marching forward! 
I am usually a happy and positive person – definitely an optimist. But lately I’ve had to face the fact that sometimes LIFE IS HARD and there’s not much we can do about it! (I really wanted to write “Life Sucks”, because that seemed to more accurately express my feelings, but I don’t like that word, so I won’t use it.) J


I know so many people who are suffering from health issues, terminal illnesses, financial troubles, broken marriages, struggles at work, temptations that haunt them, children who are straying from what they have been taught, the death of a spouse or child or parent, being a victim of abuse….you name it! These are serious and stressful situations. They are life crushing and life changing, and so hard to deal with. How do we manage and survive these things?

There’s only one answer. We need to rely on our Heavenly Father and His Son Jesus Christ and the love they have for us. It is real. They know us and love us, and we will feel their love and help when we reach out to them with our humble hearts and honest prayers. We need to trust in the Atonement of Jesus Christ and that it can heal us and make up the difference when we have done all we can. We need to understand that if we are trying and worthy, we can have the wonderful blessing of the companionship of the Holy Ghost, and we can be guided and protected and taught.

COURAGE – We need to have the courage to move forward in the right path, regardless of the consequences. We need to have the courage to just try to hang on one more day. We need to have the courage to try a little harder and do a little better. We need to have the courage to turn things over to the Lord and let go of the burdens that weigh us down or cause us so much hurt and pain. We need to have courage to believe that there are better days ahead and blessings waiting for us. 

One of my favorite scriptures is Joshua 1:9: 
“Be strong and of a good courage; be not afraid, neither be thou dismayed: for the Lord thy God is with thee withersoever thou goest.”

We can find many stories of courage in the scriptures – The prophet Daniel stood up for his beliefs and what he knew was right, even though he was threatened with death. The 2000 Sons of Helaman (the Stripling Warriors) were examples of faith and courage to obey God, to follow the teachings of their parents to be obedient in all things, and to trust that the Lord would protect them. I think of the courage of Esther who risked her life to save her people. The list goes on and on. And we all know of modern day examples of courage from family and friends in our own lives. 

May we have the courage we personally need to pick ourselves up and move forward to happier and better days. Our attitude will make all the difference!  

Here is a beautiful 3 minute video of examples of courage:

I couldn’t get the video to load here, so just click this link:
The Courage of Esther and Others 

Charleston Cheese Dip

This is the most amazing dip! The original recipe comes from Trisha Yearwood, and she knew what she was doing when she put this recipe together! How can you go wrong with cream cheese, cheddar cheese and BACON? YUM!


Charleston Cheese Dip

Ingredients:
1/2 cup mayonnaise
1 – 8 oz package of cream cheese, softened
1 cup grated sharp cheddar cheese
1/2 cup grated Monterey Jack cheese
2 green onions, finely chopped
Dash of cayenne pepper
8 Ritz Crackers or any buttery cracker, crushed
8 slices of bacon, cooked and crumbled

My Variation: I used sharp cheddar cheese and Colby cheese, and then threw in a little shredded Pepper Jack cheese. I did not have any Cayenne pepper, so I used a little Chipotle Seasoning and some black pepper. I also used my freeze dried Green Onions and Chopped Onions from Thrive. I thought about adding some bacon bits to the cheese mixture and then decided not to, but I think that would make it even better! I will definitely do it next time! The thought of that warm bacon mixed in with the cheese…ahhhh…pure heaven! 

Directions: 
1. Preheat the oven to 350 degrees. 

2. In a mixing bowl, beat the cream cheese with a hand mixer until smooth. Add the mayonnaise, cheeses, onions, and spices. Spread this mixture in a small baking dish. (I doubled the recipe and used a 9″ x 13: pan, so you might want to try a 8″ x 8″ dish or a pie pan or something small like that.)

3. Crush your crackers and sprinkle on top of cheese mixture. 

4. Bake for 15 minutes. Then top with the bacon and serve warm with crackers, pita chips, tortilla chips, or whatever sounds good to you. 

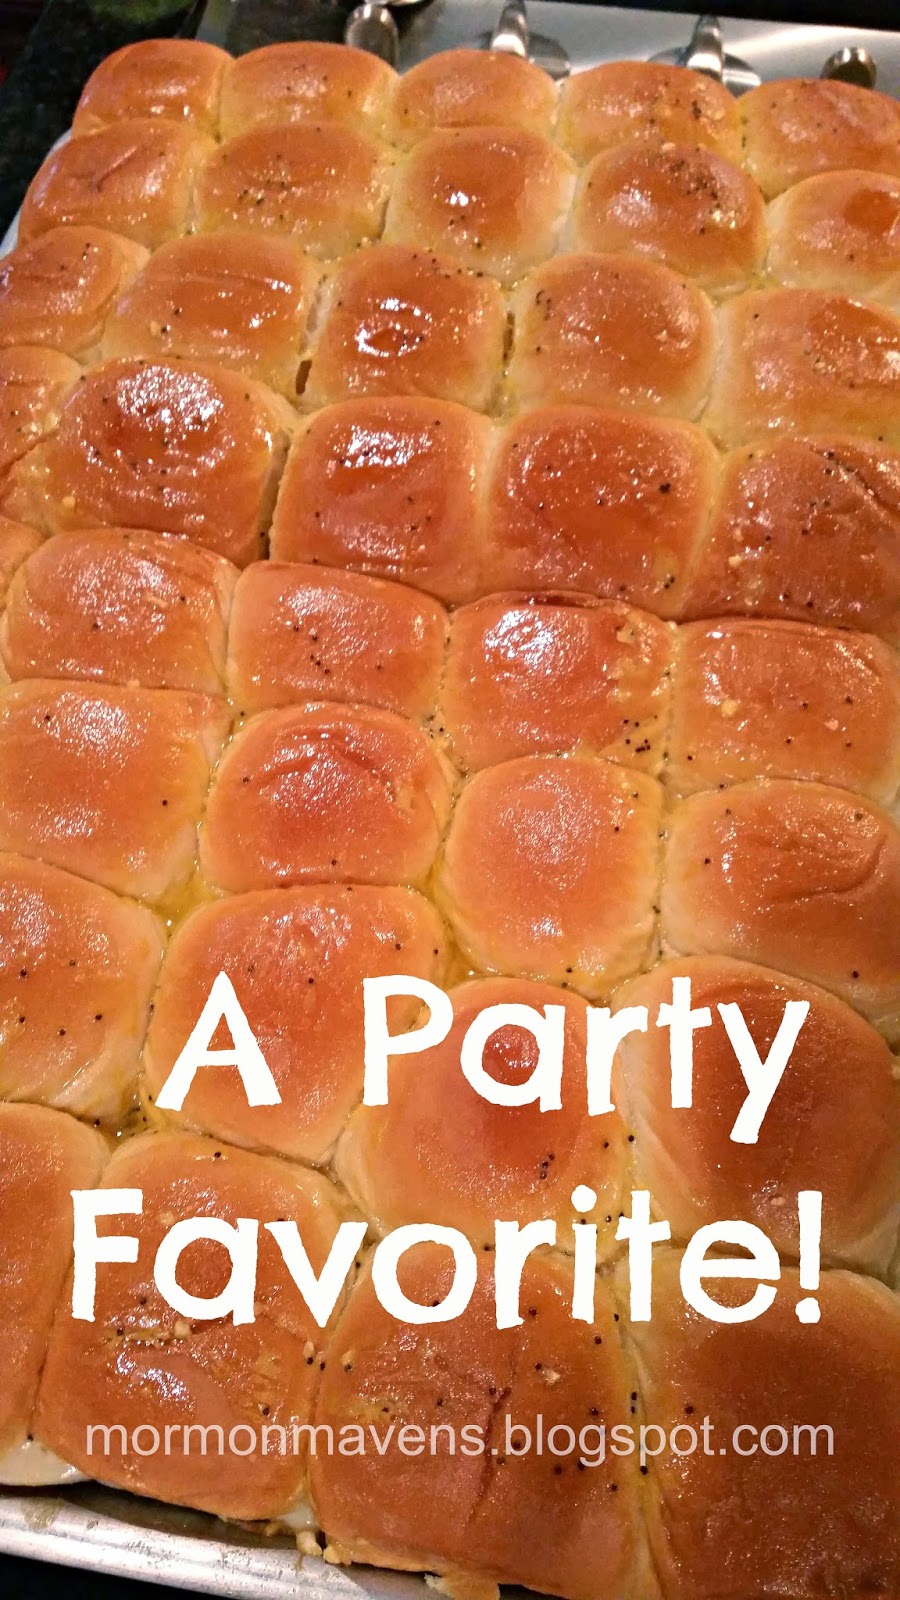
Ham Delights! A Party Favorite!

These are soooo delicious! I made 2 huge pans of these for a party, and every single one of them were eaten! Definitely a PARTY FAVORITE! And they are are so simple to make!
 
This picture does not even show how yummy they were…once they came out of the oven, they were quickly devoured, and I almost didn’t get a picture! Someone laid down their plate to get a drink, and I snapped a quick picture! 

Ingredients: 
1 Pkg of King’s Hawaiian King Rolls 
2 sticks melted butter (1 cup)
2 tsp poppy seeds
2 tsp Worcestershire Sauce
3 TBSP yellow mustard 
1 TBSP of finely minced onions, or freeze dried onions
a little salt – maybe 1/4 tsp
Ham slices
Swiss cheese slices 

Directions:
1. Open the package of rolls. With a long serrated bread knife, slice the whole pack of rolls in half, so that you have a top and a bottom. Place inside a large casserole dish or put on a cookie sheet.

2. Mix the butter, poppy seeds, Worcestershire Sauce, mustard, onions and salt in a bowl. Spread about half of butter mixture over the bottom part of the rolls. I just pour it on and take the back of a spoon to spread it out edge to edge. Then do the same with the underside of the top half. Reserve a little butter mixture to spread on top of the rolls when finished.

3. Layer ham slices on the bottom. I like at least two layers of ham. Then layer with plenty of Swiss cheese. Place the top of the rolls to make the sandwiches, and spread on any remaining butter.

4. Cover with tin foil. Bake in a 400 degree oven for 12-15 minutes, or until the rolls are warmed through and the cheese is melted. Be careful to not burn the bottom of the rolls. 

5. Take out of oven, and slice into separate sandwiches. Better grab one fast before they are all gone!

Notes: I have made these without poppy seeds and less butter before. You can also use cheddar cheese if you would like, and omit the onions if you don’t care for those. And I have not found any good substitute for the Worcestershire sauce! Just go buy some! : )

Source: My mother has made these for years!

Quick and Easy BBQ Chicken

This is the most tender, juicy chicken, and it SO EASY!
 

Ingredients:
Chicken Breasts (as many as you need to serve your family)
Pepper
BBQ Sauce (your favorite bottled sauce, or homemade)

Directions:
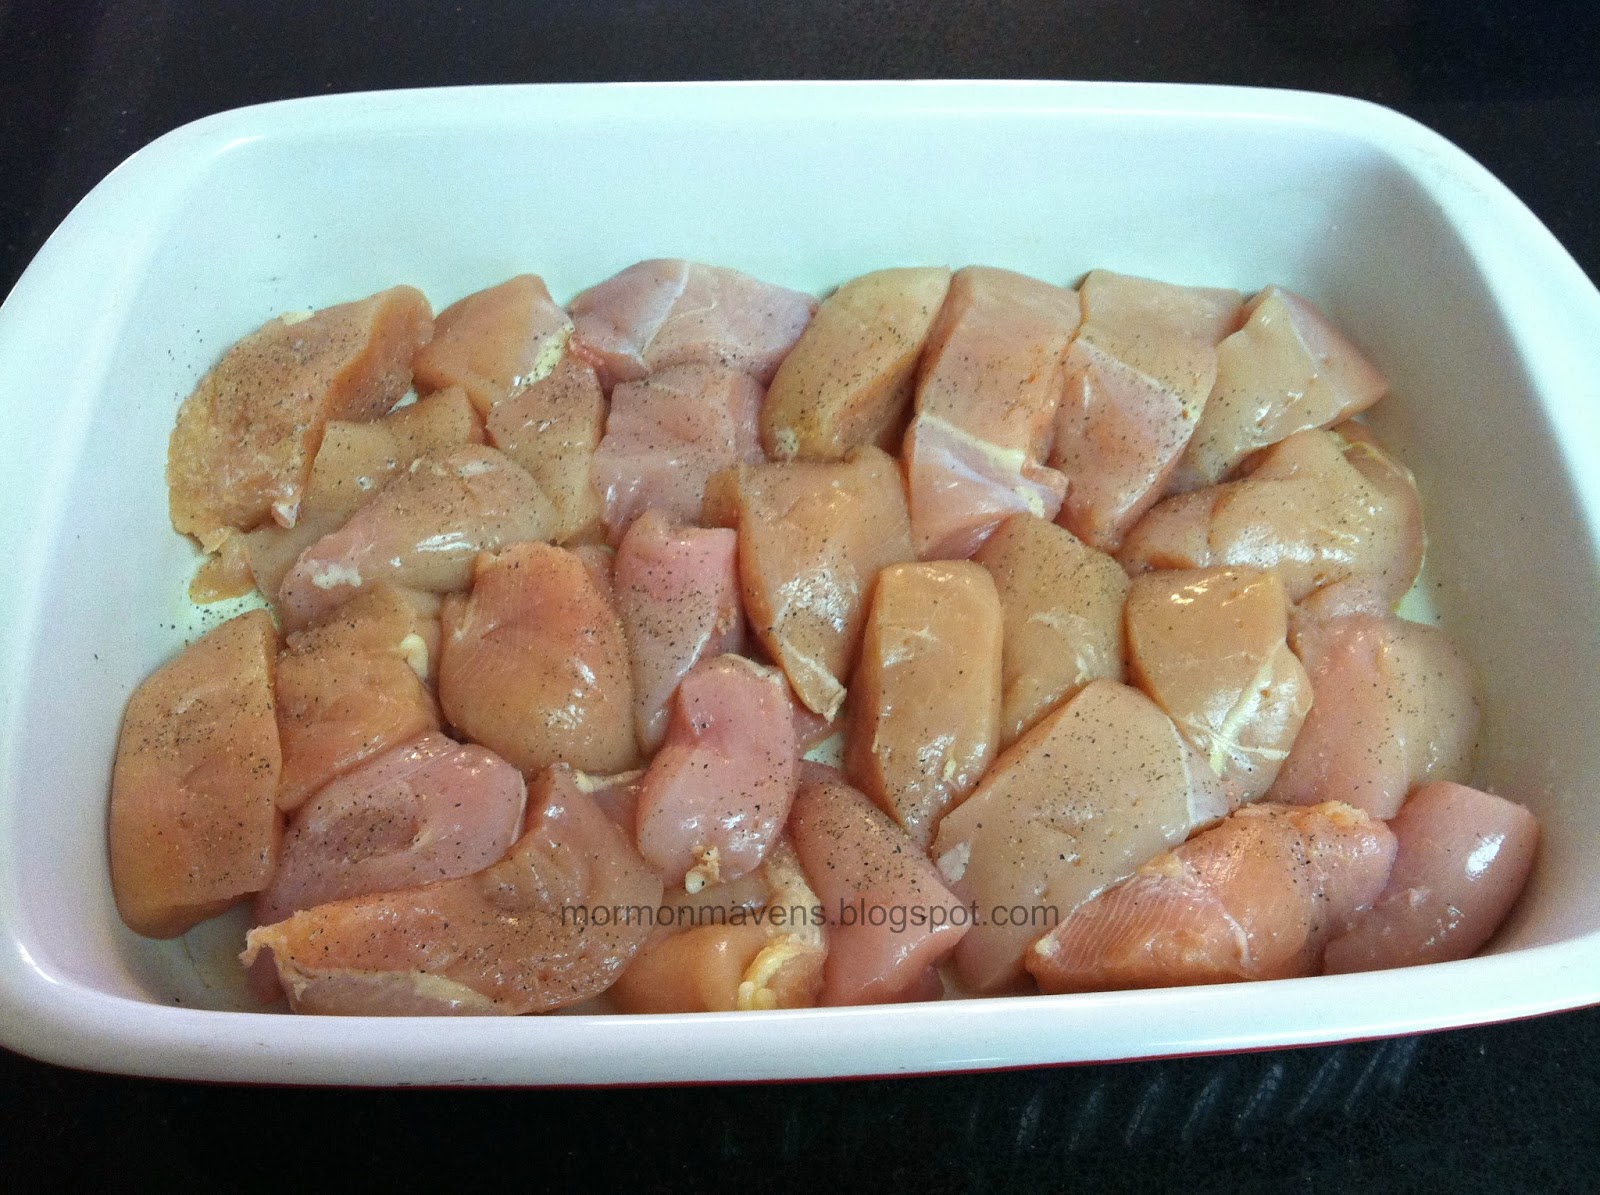
1. Cut up chicken breasts into 3-4 pieces each, depending on the size of the chicken breast and the size you would like each cooked piece to be. (I make sure to trim off any fat.)

2. Put them in a casserole or baking dish. Put pepper on them if desired.

3. Pour on your favorite barbecue sauce. WE LOVE the Kraft Sweet and Spicy Chipotle Barbecue Sauce. I just put on enough barbecue sauce to cover the top of the chicken. Do not add water. Cover with tin foil.

4. Bake in the oven at 350 degrees for about 30 minutes, or until the chicken is done. (Check the center piece and make sure it is not pink! The chicken should be white and have clear juices.) When I am feeding a large crowd and have 2 pans full of chicken in the oven, it will take about an hour to cook through. 

Note:
This can also be done in a crock pot!

Pictures:

Cut up chicken and place in pan.
 
Pour on your favorite barbecue sauce. We really like Kraft Sweet and Spicy Chipotle Barbecue sauce. 
 
 
Spread out the sauce. 
 
 Cover with tin foil and bake until chicken is done. (About 30 minutes.) Then ENJOY! You will love how it is so tender!


Ham and Cheese Omelet Roll

Yesterday my friend Marcia made this for us, and my family went crazy over it! It is delicious and quite easy to make!

Ingredients:

4 ounces cream cheese, softened
3/4 cup milk
2 Tablespoons all purpose flour
1/4 teaspoon salt
12 eggs
1 1/2 cups chopped ham (approx 8 oz)
1 1/2 cups shredded cheddar cheese (or your favorite cheese)
1/4 cup green onions, thinly sliced (optional)
2 Tablespoons Dijon Mustard (optional)

Directions:

1. Preheat oven to 375 degrees.

2. In a small mixing bowl, combine cream cheese and milk. Whisk until smooth. Add flour and salt. Whisk to combine.

3. In larger bowl, gently whisk eggs until blended. Add cream cheese mixture and mix well.

4. Line your pan with parchment paper, making sure the paper is long enough to go over the sides, so the egg mixture cannot run under the parchment paper. She used a “jelly roll pan”, which is about 12″ x 17″. 

5. Pour egg mixture into pan. Bake 30-33 minutes or until omelet is puffy and golden. 

6. While that’s cooking, chop ham, shred your cheese if you need to, and slice the green onions. 

7. Remove omelet from the oven, and immediately spread on a thin layer of Dijon mustard. (Optional) It doesn’t have to be an even coat. Just spread some around on the omelet. Sprinkle on ham and cheese and onions if you desire (saving a little to garnish the finished omelet roll).

8. Roll up the omelet, removing the parchment as you go. Garnish with cheese, ham and onions. Let sit for 5 minutes or so until the cheese melts. Slice and serve! Delicious!

Notes: I could imagine all kinds of variations with crumbled bacon, ground sausage, different cheeses, sauteed onions and mushrooms, or other veggies. I think I’m doing a veggie bacon omelet roll up this morning!!

The egg mixture has been cooked, and she just sprinkled ham and cheese on it.

Now she is rolling it up, while removing the parchment as she rolls it.

Here is the finished omelet roll. It’s so yummy! I hope you enjoy it as much as I did!


Source: My amazing friend Marcia Ennis. I think this recipe was adapted from a Pampered Chef cookbook. 


Grieving: Miscarriages and Still Births

A few weeks ago one of my best friends went into labor at only 21 weeks into her pregnancy, knowing her baby would not be born alive. It was such a traumatic and sorrowful experience for her and her husband. My heart just broke for them at the loss of their precious little one.

They have felt peaceful reassurances and comfort from Heavenly Father, and have had some very special and spiritual experiences. But they have also felt the deepest pain, sorrow and grief that parents feel when they lose a child. I found myself wondering what would be best for me to say or do, and how could I best serve them and bring comfort. My friend told me that a few friends and relatives and even hospital staff had unintentionally made insensitive comments. I know none of them meant to do that. They were trying to offer love and comfort, but what they said ended up doing the opposite. 

I found this article that gives great advice on how to love and help people going through something like this:

Easing the Pain of Miscarriage


Here is another article where a mom explains her experience and what others have gone through. 

Coping With The Heartache of Miscarriage


I know several people who have had miscarriages, and a few who have had still births. It’s surprising and sad that this happens so often. I have had 2 miscarriages myself, and I have learned that every situation is different and everyone grieves differently. May we be inspired to say the right words and give the love, support and comfort our friends need during these times. 

Easy 100% Whole Wheat Bread

I made many whole wheat bread recipes and almost gave up on ever finding one that was light and soft, until my friend Kelly Wilde shared this one with me. I have never made another whole wheat bread recipe since! It is so light and soft that many people don’t believe it’s 100% whole wheat! Plain ingredients – no tofu or enhancers needed.

Ingredients:

3 cups hot water                                
1 TBS salt                                                    
¼ cup oil                                              
1/3 cup honey
8-9 cups whole wheat flour (I like to use Hard White Wheat, but Hard Red or a mixture is good too!)
2 TBSP yeast
1 egg


Directions:

1. Stir water, salt, oil, honey and yeast together. Add 4 cups whole wheat flour and egg.
Mix in a mixer for 4-5 minutes.You can use a Bosch or Kitchen Aid type of mixer, or just use bowl and wooden spoon. This will be thin like a batter. Mix it well. This will help your bread have a nice texture, and it’s easier than kneading it once all the four has been added in.


2. Add 2 cups whole wheat flour. Mix well. Add 2-3 more cups of flour. The dough has enough flour when it is still a little sticky…if using a Bosch, it will pull away from the sides of the bowl and not stick to the sides of the bowl any longer. That’s the precise moment when you know you have enough flour added in. Remember that it is better to have a little less flour than too much! Too much flour makes a very stiff and dry bread! Knead or mix 10 minutes. 

3. Preheat oven to 325°.

4. Let the dough rise in the bowl until double. Punch down.  

5. Cut the dough into 3 pieces. Shape into loaves and put in pans that have been sprayed with non-stick spray. (See photots below)

6. Let the dough rise until double in pans. Bake 35 minutes at 325°. 

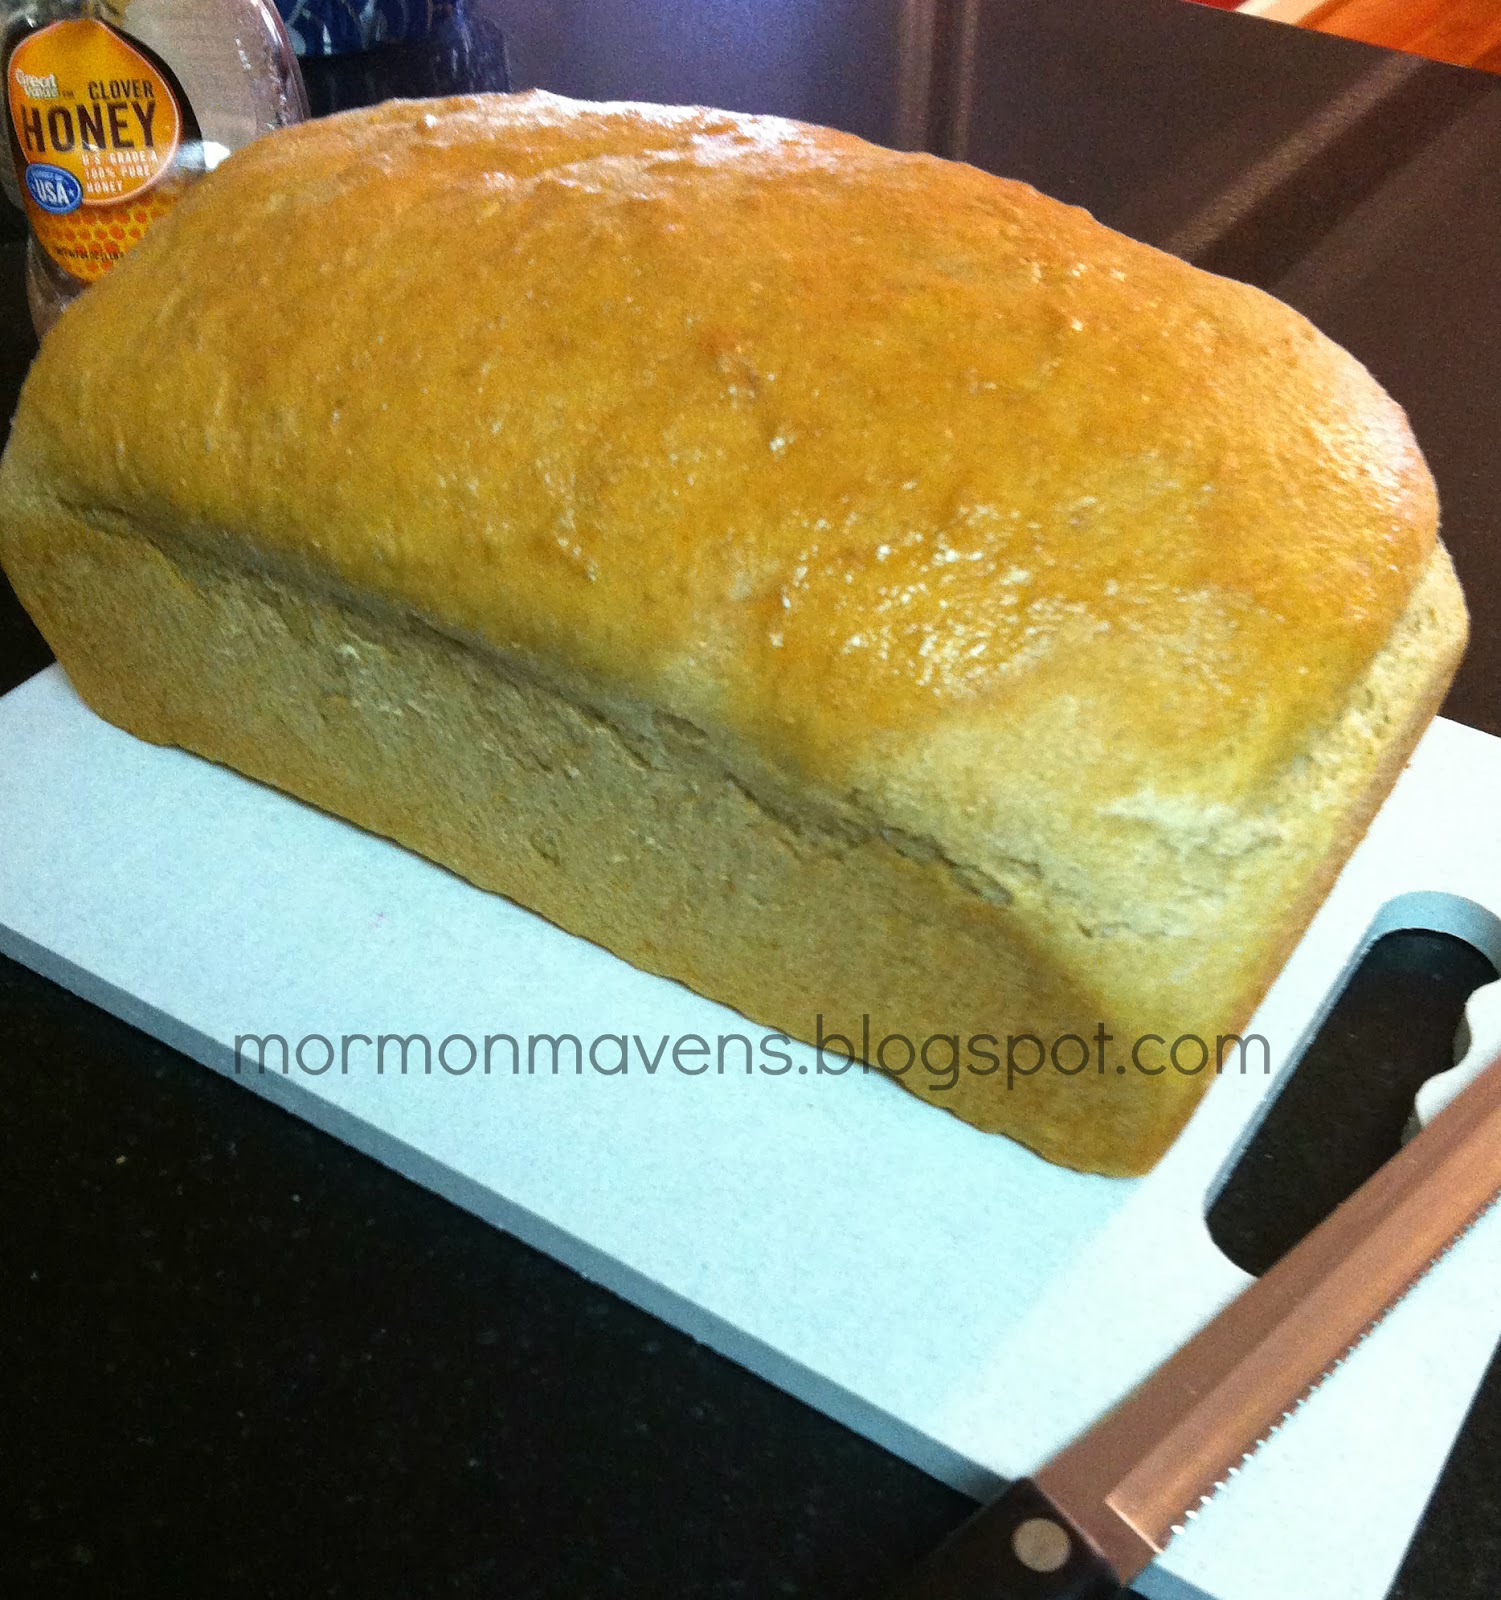
7. Let the bread sit in pans for 10 minutes after baking. Then take out and let it cool on a bread board or wire rack. Or eat immediately with butter and honey or homemade jam, and you will think you are in heaven. Once the loaf has mostly cooled down, you can bag it and freeze it if desired. It will be good in the freezer for a few months. 

I had just put the dough into the pans.

Now they have risen enough and are ready for the oven.

This is so beautiful to me. But if you let it rise much more than this, it will rise too much and then deflate, and you will have a sunken in bread. You can still eat it, but it will look funny and be a little dense. Still good though. With a little practice, you will learn when when your bread is ready for the oven.


Source: Original recipe came from my amazing friend Kelly Wilde about 20 years ago. : )

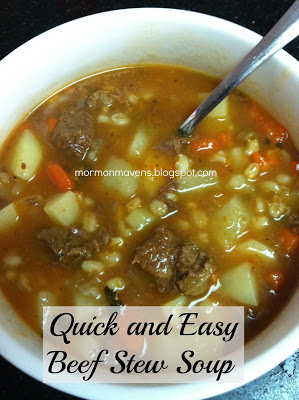
Quick and Easy Beef Stew Soup

There’s nothing more comforting on cold days that a warm bowl of delicious soup! This is a recipe I make all of the time because it is so fast and easy, especially of you are using canned food or dehydrated or freeze dried food. And you know me, I don’t measure anything when I am cooking, and I make abnormally large pots of soup, so this will be a different kind of recipe format…you can make as little or as much as you’d like. I think you will love this soup!!
Here are the ingredients that I throw in a big pot: (Use whatever amount you like. See my notes.)

Water
Beef bouillon cubes or granules
Salt, Pepper
Tomato sauce or crushed tomatoes (or any kind of tomato product you like to use. I like a quart of home canned plain tomato juice from the garden)
Onions (freshly diced, or dried)
Potatoes, diced
Carrots, cut (fresh or canned)
Barley (optional)
Beef (fresh, canned, or freeze dried)

Directions:
1. I fill the pot with almost as much water as I would like to have soup. Did that make sense? I also add the tomato juice, sauce or crushed tomatoes….whatever tomato product you like. You can also use tomato powder. Turn it on and start it boiling while you get everything else ready to add in.

2. Add some bouillon cubes or granules to taste. And some salt and pepper.

3. Throw in the onion. I always use dried onions. Use as many or as little as you’d like. 

4. Put in your carrots. I grew carrots and canned them, but I also have used store bought canned carrots, or fresh sliced. 

5. Cut up as many potatoes as you would like. I usually think of at least one good sized potato per person and I double it. (I feed teenage boys!)

6. Add the beef. Most of the time I use a few cans of the yummy canned beef from Aldi’s. It comes with a gravy, and I add all of it to the soup. You can cut up raw beef and throw it right into the soup. Or you can use freeze dried beef and throw it right into the soup. It turns out great either way.

7. I really love barley. so most of the time I add a little barley to this soup.For my very huge pot of soup, I only add about 1 1/2 cups, so you may want to add about 1/2 cup at the most. Barley absorbs a lot of water, so make sure you have enough water in the soup as the barley cooks. Add more water if needed.

8. Make sure the soup has enough salt while it is cooking. If it doesn’t, add more salt or bouillon.

9. Let the soup simmer on medium high until potatoes are done. Serve with crusty bread. YUM!


How To Make Melissa’s Yummy Cinnamon Rolls – Photo Tutorial

I originally posted this on my own blog, but wanted to share it here also since so many people are enjoying this recipe! Perfect for Christmas morning, or to take to Christmas parties! I promise they are easy to make, and they are sooooo delicious! 

Cinnamon Rolls


(I know this picture is obnoxiously large, but I wanted you to be able to get up close and personal with these cinnamon rolls. ha! ha!)


1. Start with the 30 Minute Roll Recipe
Note: This recipe makes about 50 cinnamon rolls! You might want to half the recipe!


Mix and rest 10 minutes:
3 ½ cups warm water                          
¾ cup sugar (OR 1/2 cup honey)
1 cup oil                                                
6 TBSP Yeast (Less yeast may be used, but rising time will be longer)

Add:
1 TBSP Salt                                          
3 eggs (can use egg powder and water)
10 ½ cups flour (wheat flour turns out really light and fluffy)
Mix in mixer or knead. Shape into rolls. Raise 10 minutes. *Bake at 425° for 10-12 minutes or until done. 

2. Here’s How to “Shape into Rolls”
Cut dough in half. Roll out one of the sections into a rectangle about ¼ inch thick (or so!) Spread soft or melted butter over the dough. Spread a mixture of brown sugar and cinnamon over the butter. (I use about 4 cups of brown sugar to 3-4 TBSP of cinnamon. I go heavy on the cinnamon and never really measure. I just dump it in until it taste the way I want it to.) Roll up. Cut into 1 inch sections and place on cookie sheet. Let rise for about 10 minutes or so. Repeat with other section of dough, or just make them into dinner rolls.

*I prefer to bake them at 375 degrees until they are starting to lightly brown and dough is done in the middle. Take out of oven and let cool for about 5 minutes or so. Spread on or drizzle on the frosting.

Photo Tutorial:

Start off by shaping the dough roughly into a rectangle.
Cinnamon Rolls
Roll out the dough about 1/4″ thick. This will take practice.
Roll out dough
Spread soft or melted butter over dough. 
Spread on the Butter
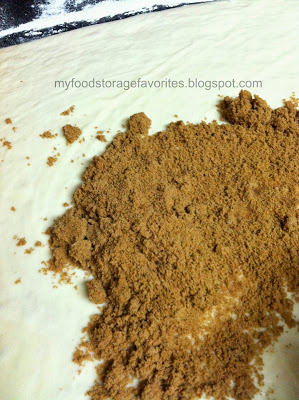
Put cinnamon sugar on the dough.
Cinnamon Sugar
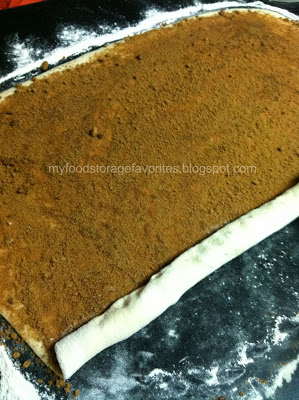
Spread it out smoothly – feel free to use your hands.
Spread out Cinnamon Sugar
Roll up the dough.
Roll up the dough
Cut into 1 inch slices.
Cut the dough
Place them neatly on a cookie sheet and let them rise. This is a “jelly roll pan”, which is half of a sheet cake. You can put them on smaller pans that just hold 12 cinnamon rolls.
Let them rise
Bake them in the oven and look how beautiful they are!
Bake in oven
Oh. My. Yumminess!
The best cinnamon rolls
Spread on your cream cheese frosting. (Recipe below)
Spread on Frosting
I wish you could smell these and taste them! Make some! YUM!!!! 
The best cinnamon rolls

3. Here’s How to Make the Frosting
Okay, I have to admit that I never measure! But here is an estimate….Soften about 8 oz of cream cheese and 3 tablespoon of butter in a large plastic bowl. Add 3-4 cups powdered sugar, 1 teaspoon of vanilla extract, and a few (maybe 4??) tablespoons of milk. Mix with hand mixer…you may need to add more milk or powdered sugar to get the right consistency you like. I like it kinda thin like a cake batter, not thick like cake icing.

4. Enjoy!

Eat immediately with a glass of milk and enjoy! They are good for a few days, but you will want to warm them up for about 8 seconds in the microwave!

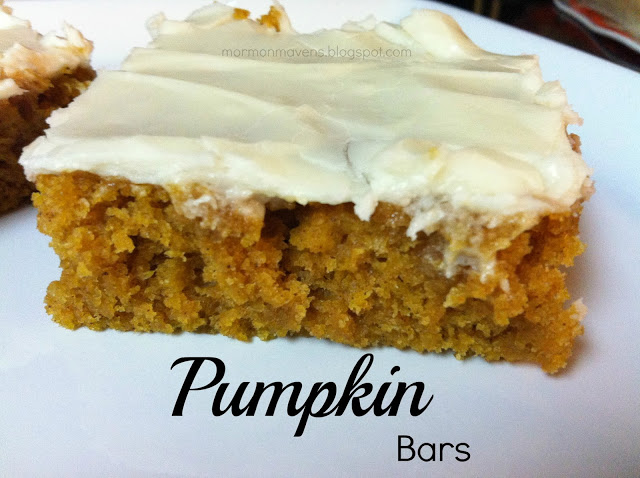
Pumpkin Bars

This is such a moist and delicious cake! Every time I make it for church or family activities, it is eaten down to the very last crumb! 

Ingredients:
1 cup oil
2 cups sugar
4 eggs 
1 tsp baking soda 
2 cups flour   
½ tsp salt   
2 tsp baking powder                               
2 tsp cinnamon                                    
2 cups canned pumpkin
Directions:
1. With wire whisk or electric beater, blend together oil, sugar and eggs until creamy. 

2. Combine baking soda, flour, salt, and baking powder. Then add to creamy mixture. Add cinnamon and pumpkin. Stir until well mixed. 

3. Pour into jelly roll pan. (Or two 9×13 casserole dishes.) 

4. Bake 350° for 25-30 minutes, making sure center is done. Let cake cool before frosting.
Frosting:
3 oz cream cheese               
6 TBSP butter                       
1 tsp milk
1 tsp vanilla                          
2 cups powdered sugar       
dash of salt

Cream together and spread on cooled cake. ENJOY!!