Family Favorite Chicken Salad

When it comes to chicken salad, my family can’t get enough! That includes my extended family. It’s a go to meal for all of us. An entertain the company meal, even!  So, several years ago one of my girls had a preschool teacher that introduced us to her chicken salad. And this is the chicken salad that I always make. But, I will warn you, if you have a hard time taste testing your recipes, or playing around with them, this probably isn’t for you. It always tastes the same to me. But, its one of those recipes that I just make up as I go. So, I will try to give you a general idea  and then you have to experiment!  It will be fun! And your family will love this!

5 or more chicken breasts, boiled, and chopped into bite sized pieces.
3-4 big stalks of celery, chopped
1 med. sized onion, chopped
Note: But, be careful not to add all of the onion at first.  you don’t want to over power the celery!
2-3 big red delicious apples, chopped
2-3 big granny smith apples
Note: You use the apples to stretch the salad. If you have a lot of people to feed up the apples! Up the veggies even!
2 cups Red seedless grapes, halved (obviously you can add more)
1 cup walnuts, or pecans, optional
Duke’s Mayo
Kraft Creamy Poppy seed Dressing (this is the secret ingredient)
Crescent rolls, crackers, yeast rolls, lettuce, etc. Anything and everything you would like to serve with this!

After you have boiled and chopped the chicken add all ingredients to a super large bowl and mix. In a separate bowl pour in the entire bottle of the poppy seed dressing and add about 3/4 c of mayo and stir until mixed well and the dressing has thickened up.  You made need to add more mayo. But, be careful not to over do the mayo, you will lose the poppy seed flavor if you add too much. Chill and serve!  Delicious!

Sometimes I find myself without poppy seed dressing and so I will make up a mixture of mayo and sugar and vinegar. This will taste yummy too!

Recipe adapted from Sherene Winkle.

Cherry Cheese Pie

This is so yummy! Have you ever had a serving of cheesecake with cherry topping and wished there were more cherries!?  Well, this is the pie for you! Most of the time the cheesecake is too much for me, but this has just the right amount.  AND, its way healthier than a regular cheesecake. (At least that’s what I told myself while eating practically the whole thing. Shh…don’t judge.) By the way, the crust on this pie is delicious!

3/4 c a.p. flour
3 TBSP. sugar
1/4 tsp. salt
1/4 c. butter, softened
1 can (21 oz) cherry pie filling
1 pkg. (8 oz) cream cheese, softened
1/3 c. sugar
1 egg
1 tsp vanilla extract

The CRUST!
Combine the first three ingredients into a bowl and add in the softened butter. Stir until combined well.  Press onto the bottom of a 9″ pie plate…also, go up the sides of the pie plate with the crust.  You will have to press it pretty thin to have enough to spread up the sides, but don’t worry, it will be great! Bake the pie crust at 350 degrees for 10-12 min. or until lightly browned. (I baked mine for about 15 min. But, don’t brown too much, you still have more baking to do.) After removing the crust from the oven, pour in the pie filling and set aside.

The Cheesecake part!
In a mixing bowl, beat the cream cheese, sugar, egg and vanilla until smooth. Pour the mixture over the cherries and spread carefully. Bake for 30-35 min. or until its beginning to brown around the edges. Cool on a wire rack. Refrigerate for several hours before serving!

Recipe  adapted from Taste of Home

Banana Cake with Vanilla Icing

Oh. My. Gosh!  This is delicious!  The icing is what makes it taste sooo good.  The cake itself tastes almost like a banana bread, but much sweeter and smoother. It would be yummy by itself, but with the icing…yum!  The icing is just addicting! I found this recipe on pinterest and changed a few things that worked better for me.  You’ve gotta try this!

Cake:
2/3 c. white granulated sugar
1/2 c. sour cream (use the good stuff!)
1 egg
2 TBSP. butter, softened (use the good stuff)
2 mashed ripe bananas
1 tsp. vanilla extract
1 c. a/p flour
1/4 tsp. salt
1/2 tsp. baking soda
Icing:
2 TBSP butter, softened
1/4 c. heavy cream
1/2 tsp. vanilla
1-1/4 c. confectioner’s sugar

Preheat oven to 375 degrees. (glass pans heat to 350)
Cream together the first 4 ingredients. Add the mashed bananas and the vanilla. Add in the last 3 cake ingredients and mix slowly. No lumps from flour…banana lump is okay, but you really should mash those well before you incorporate them into the mix. Pour into a greased 8×8 pan. Bake at 375 degrees for 20-25 minutes or until golden brown and a toothpick comes out clean! Cool completely before icing this. 
To make the icing: Cream together the butter and the confectioner sugar until smooth. Slowly add the cream in…(this is what makes it so good!)  Add in the vanilla extract and mix until smooth.  Put in the fridge if your waiting for the cake to cool because this has cream in it.  But if your cake is cooled, then ice away!
No joke…this is soo good!

*I doubled this the very first time I made it! Cooked it in a 9×13 pan and it worked well.

Pineapple Creams

Pineapple is one of my favorite things to eat.  I love this fruit!  Fresh, out of the can, the juice, icecream, pineapple cake, dried slices,…etc.  I love anything pineapple.  One of my fondest memories is going to the Dole Pineapple Plantation on the island of Oahu with my husband and eating pineapple icecream while standing in the pineapple field.  That was some yummy stuff!  I came across a pineapple icecream recipe on pinterest (that the creator had concocted while trying to copy a dessert she had tasted at Disney World.   Well, I have never had one of those particular desserts, but like I said, I love pineapple.  So, I decided to try it.  It is really good!  Its not very sweet, but just enough.  I froze it first as the original recipe suggested and then I froze it overnight.   I like it both ways! But, I think I like it better when its softer.  This is really yummy! Enjoy!

2 -20 oz cans crushed pineapple with juice
2 TBSP Lemon juice
2 TBSP Lime juice
1/3 cup white granulated sugar (I think I would like to add a bit more next time)
1 and 1/2 cups of heavy whipping cream, whipped
Drain the pineapple, and reserve the liquid. Set aside, adding 2 TBSP of this pineapple juice into a blender, or food processor. (I used my Ninja!) Into the blender add drained pineapple, lemon juice, lime juice, sugar and 2 TBSP pineapple juice. Mix until smooth.  Pour into ziplock bags so it can lay flat and freeze quickly.  Whip the cream and refrigerate until needed.  When its slushy (about 1 hour and 45 min for me) pour into the whipped cream and gently stir until its all incorporated.  Freeze again in ziplock bags or container of your choice…for at least an hour. It will be the consistency of homemade icecream.  Its really yummy!

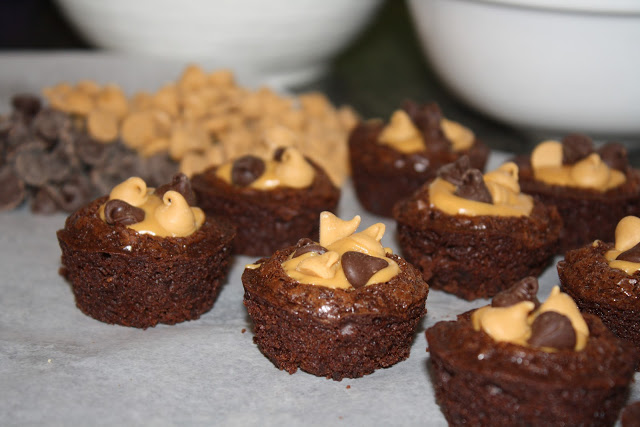
Brownie Bites

I think I found this recipe on Pinterest way back in February.  I used it then to send in for a Valentine party at school for one of my girls.  But, this would be a great end of school party treat!  This is soo easy!

Mini Muffin pan
Pam
Box of your favorite Brownie Mix
Reese’s Peanut Butter chips
Semi-sweet chocolate chips
Peanut Butter

Set oven to 350 degrees. Grease muffin pan. Mix up the brownie mix by the box directions. Fill the muffin pan cups to about 3/4 of the way up. Bake until done…about 15-20 min (depends on how chewy you want them) When they come out of the oven use the back of your spoon, or something rounded that you can press down into the brownie, to form a little cupped space for the peanut butter. (This step must be done immediatly after you remove them from the oven.)  Then let them cool for a bit, and dump them out to finish cooling.  Melt your peanut butter in the microwave until you could pour it!  Then spoon into the brownie cup tops and quickly add the chips.  As they cool the peanut butter will stiffen back up and the chips will be set!

Popsicles

We love popsicles at our house, and we always have some handy.  We saw these sipper popsicle containers at the dollar store, and ofcourse the kids wanted to make some pops of their own! Fruit popsicles is just a great idea!  Because as a mom we are always trying to get the right amount of fruit portions into their daily diet! Right!?  So, my kids helped chopped the fruit and they loaded the popsicle containers and then…they ate them!  They loved them!  I even let them have one for breakfast! Popsicles for breakfast!  Yay!  ….Yes, I am that good of a mom! (wink..wink)  
*FRUIT 
(chopped or sliced depending on the look you want)
strawberries
kiwi
grapes
bananas
pineapples
(you can use any kind of fruit you have or like…blueberries,etc. Oh, watermelon might even be yummy!)
*JUICE
juice boxes
pineapple juice, etc.
Add the fruit in the container first, and then the juice. Freeze. Then enjoy!


Beef and Bean Taco Casserole

!Delicous! (in my singing voice.)
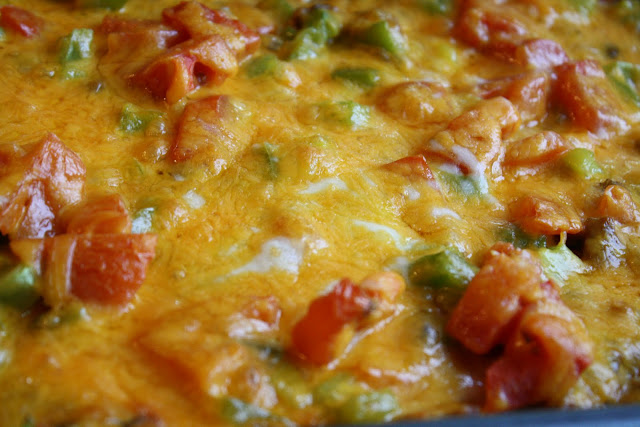
I usually don’t go for the taco soups and taco dips. If I am going to eat something that tastes like a taco, I want a taco! But, I came across a recipe on the Betty Crocker website that pricked my interest. I changed several things and made it my own. And oh my goodness. …it’s really good! The kids even loved it! What I loved most about it were the warm green bell peppers and warm tomatoes that still had a bite to them! This is really yummy and easy to make. And reheating the leftovers just made it better!
-1 lb ground beef, browned & drained well
-1 can black beans, drained & rinsed!
-1 16 oz jar chunky salsa, mild
-1 package of taco seasoning
-2 -1/2 cups broken tortilla chips
-1/2 medium green bell pepper, chopped (This added alot of flavor! Infact, it was my favorite part. So next time I might add more!)
-1/8 c yellow onion, chopped fine!! (You can add this into the meat when browning it, or just toss it into the mix and the baking will soften   
    them up just fine.)
-2-3 good size Roma tomatoes, chopped (These are my favorite. You can obviously use any tomato you want.)
-1 c shredded cheddar cheese
-1/2 c mozzarella cheese, or your favorite white cheese
  (I will be honest and say, I added cheese until I felt like it was enough!  So, you might want to play with the amount. Cheese adds fat, so take that into    
   consideration if you want this on thisdish on the lean side!)
 -shredded lettuce, to add as a topping, so as much as you want (but at least 1 cup.)
-tortilla chips, for topping or eating this dish with!

Heat oven to 350 degrees. Brown beef, and drain well. Set aside. Saute onions and add beef back into the pot. Drain beans and add into the pot along with the seasoning packet and the salsa. Stir well. Reduce heat to medium. (You may need to add some water if the mix is too thick.) Bring to a slow simmer.

In ungreased 9×13 baking dish, place 2 cups of broken tortilla chips evenly along the bottom. Top evenly with the beef mixture. Sprinkle chopped bell pepper, tomatoes, and cheese over the beef.
Bake uncovered for 25 – 30 minutes or until hot and bubbly and the cheese has melted. Serve and add lettuce, tomato and remaining chips on top.

You can add olives to this and green onions on the top, or whatever you fancy.   Eat this with a fork or scoop with the tortilla chips. We did a bit of both!

Glazed Berry Medley Cake

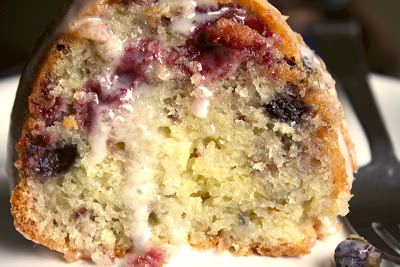
I found this recipe on Pinterest! (where else?!) The recipe on Pinterest called for strawberries only. I had a bag of mixed berries…so that is what I used. I liked it, but I like all sweets! My kids thought this tasted kind of like Fruit – Loops! I think that was because I used the mixed berries. So, you choose what berries you’d like to use and see how you like it. It’s a pretty cake, isn’t ? And, it is yummo!

1 cup (2 sticks) butter, softened
2 cups sugar
3 eggs
zest of 1 lemon
2 1/2 cups all-purpose flour, divided
1/2 tsp. baking soda
1/2 tsp. salt
8 oz plain or vanilla, greek yogurt
12 oz fresh strawberries (or frozen, or frozen medley of berries)
1 cup powdered sugar

Preheat oven to 350 degrees. Grease and flour a 10 inch bundt pan. Sift together the 2 1/2 cups flour, baking soda and salt. Mix in the lemon zest and set aside. ( I didn’t have any lemons handy that day, so I used orange zest. It was pretty good. I think I might have liked the lemon zest better)

With an electric mixer, cream together the butter and sugar until light and fluffy. Beat in the eggs on at a time, then stir in 1 TB. lemon juice. As always, alternate beating in the dry ingredients, flour, with the wet ingredients, yogurt, mixing just until incorporated.

Toss the berries of your choice with the remaining 1/4 cup of flour. Carefully mix them into the batter so they don’t turn to mush.

Pour the batter into the bundt pan. Bake in the preheated oven for 60 min., or until a toothpick inserted into the center of the cake comes out clean.

Allow to cool 10 minutes in the pan, then carefully turn out onto a wire rack and cool completely!!! If you can’t stand it any longer and you glaze this baby without letting it cool completely, the cake will soak up the glaze. So, let it cool completely!

Once cooled whisk together the remaining 2 TB of lemon juice and the powdered sugar, drizzle over the top of the cake, and voila!e

Asian Coleslaw

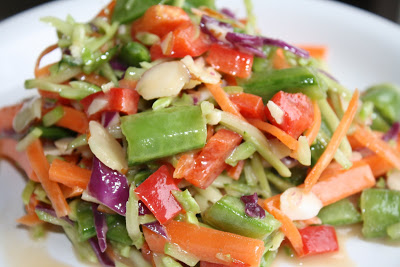
This is so refreshing and yummy. I found this recipe on pinterest and had to try it. I tweaked it a bit and it was great!

Dressing:
1/4 c honey
1/4 c vegetable oil
1/4 c unseasoned rice vinegar
1 TBSP soy sauce
1 tsp oil
1/2 TBSP peanut butter
1/2 tsp. salt
1/2 tsp hot sauce (optional)
1/2 TBSP ginger
1 large garlic clove, minced

Slaw:
4 cups prepared shredded coleslaw
2 cups prepared shredded carrots
1 red pepper,, thinly sliced into bite size pieces
1 cup pre-cooked, shelled edamame
2 med scallions, finely chopped
1/2 cup choped salted peanuts (optional)
1/2 cup loosely packed chopped fresh cilantro (optional -i did not add!)

I am not a cilantro fan, so that is the reason for the exclamation point.

Make the dressing by combining all ingredients in medum bowl. Stir until peanut butter is dissolved. Set aside.

combine all of the slaw ingredients in a large bowl. Add dressing and toss well. Let sit at least 10 minutes so vegetables have a chance to soak up the dressing. Taste and adjust seasoning if necessary…I needed to add salt to this. Chill the slaw in the fridge for at least 30 minutes before serving.

Cranberry Glazed Meatballs and Rice

Oh man, were we craving Chinese cuisine tonight! I was rummaging through the kitchen tryng to figure out something to make that would satisfy this craving. I spotted a bag of frozen meatballs and that was where I began. This dish is sooo yummy! My family really enjoyed it and I heard lots of “this is great mom!” comments. So, I thought you would like the recipe. It’s super easy and delicious!

1 bag of home style frozen meatballs
1 can Whole Cranberries Sauce
1/2 c Sweet Baby Rae’s BBQ sauce, or your favorite
1/2 -3/4 c. orange juice
3/4 can pineapple chunks and the juice
4 carrots, cleaned and sliced into circles
1 bunch of broccoli, cleaned and sliced into small spears
2 cups of cooked white rice

When your rice is covered and turn to low begin cooking your meatballs.

Cook about 3/4 of the bag of meatballs in the microwave for about 5 minutes. Set aside.
In a stew pot, add the following, 1 can whole cranberries sauce and stir until smooth. Drain out the juice fromt the can of pineapple. Turn the heat to medium and add the bbq sauce, orange juice, and the pineapple juice. Stir well. Chop veggies. As the sauce begins to bubble turn it down to med -low and add in the meatballs and stir and add in the carrots. Cover. Cook for about 15-20 min. Add in the broccoli and cook for about 5 min or until you like the “bite” of the broccoli. Turn to low and cook for another 5-10 min.
Serve immediatly.