Black Bean Lime Salad

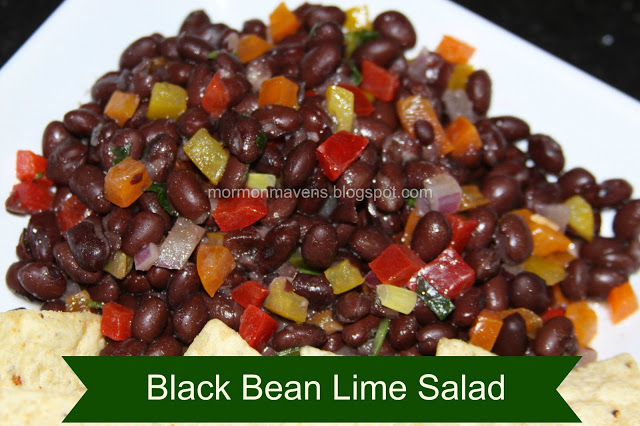
This is a DELICIOUS black bean salad that I had to share with you! It’s light, and fresh, and perfect for summer parties or barbecues. The lime juice makes it extra tasty. You can serve this with chips, as a topping for a taco/burrito bar, or as a side for hamburgers or grilled chicken. Great recipe!!

Black Bean Lime Salad

Ingredients:
3 cans black beans, rinsed
2 colored peppers, diced (or a mixture of red, yellow, orange, green – whatever you like!)
1/3 cup red onions, diced small
A large handful of chopped cilantro
Zest of 1 lime
Juice of 2 limes
1/4 cup of olive oil
A little salt to taste
Optional – diced avocado – add right before serving

Instructions:
Add all ingredients together in a bowl, gently toss until mixed, cover and put in fridge for at least an hour to let flavors blend. If you are adding avocado, add right before serving. Enjoy!

Notes:  
To add a different kick, you can add 1/4 cup of apple cider vinegar instead of the lime juice. Or you can add both if you would like.

Source: My amazing sweet friend, Liz Zimmerman.

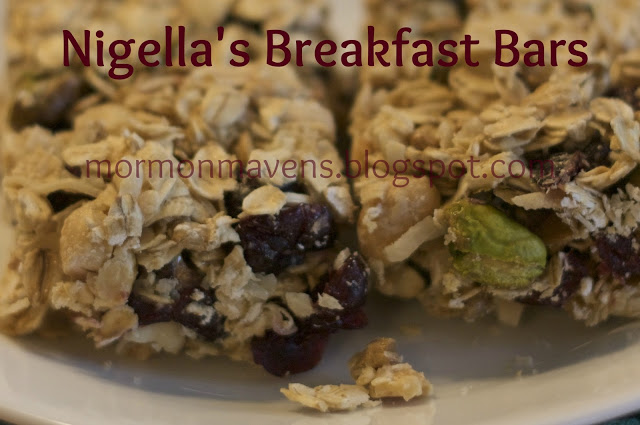
Nigella’s Breakfast Bars

Mr. Blue Eyes’ parents gave us a Nigella Lawson cookbook a few years ago and there are some fabulous recipes in it. I mean, c’mon. It’s Nigella we’re talking about. These granola bars are so easy and so good that we eat them morning, noon, and night!

Ingredients:

1 14 oz can Sweetened Condensed Milk
2.5 Cups of Rolled Oats (not instant!)
1 Cup Shredded Coconut
1 Cup Dried Cranberries
1 Cup Mixed seeds* (Nigella suggests pumpkin, sunflower, sesame)
1 Cup Natural Unsalted Peanuts

1. Preheat the oven 250 degrees F and spray a 9×13″ pan.
2. Warm the Sweetened Condensed Milk in a sauce pan. Ms. Lawson suggests a Large one; I used a small one. Tomato, Tah-mah-toe.
3. In a Large mixing bowl, mix all the other ingredients together. Pour the warmed milk over the top and fold it over until everything is looking gooey and good!
4. Press the mixture into your greased pan. At Nigella’s suggestion I used a latex (or non-latex for all you latex-sensitive people) glove. Make sure you press down fairly firmly and pack it well. We had trouble with crumbling. Not that that makes it taste any less delicious!
5. Bake for 1 hour. After it’s cooled about 10 minutes, cut 4×4 length to width and remove from pan to cool completely.

Store in an airtight container. Makes 16.

*Notes:
1. We have used Unsalted Cashews (1/3 Cup); Salted, shelled pistachios–pictured above (1/3+ Cup); Sunflower Seeds (1/3- Cup). They turned out great!
2. When she says natural, unsalted, she means it. Unsalted just seems to turn out better.

Source: Nigella Express:130 Recipes for Good Food, Fast

Pomegranate-Avocado Dip

I hope it’s not too late and that you can still find Pomegranates in the produce aisle. If it is too late, I’m really sorry, but put this recipe away for next year. Don’t be fooled by the variety of ingredients that you wouldn’t normally see together. It has just the right amount of sweet/savory to make it ADDICTING!

Ingredients:

1/4 tsp Chili Powder
1/8 tsp Cayenne (Red) Pepper

1 Tbsp Lemon Juice

1 small Onion, chopped (I used a yellow onion)
1 Roma Tomato, chopped
1-2 Avocados, sliced into bite-sized pieces
1 Pomegranate, seeded

1. Mix the chili powder, red pepper, and lemon juice in a small bowl and set aside.
2. Mix all the produce well in a Medium-sized bowl.
3. Pour the lemon juice mixture over and coat well.

Serve with your favorite chips or crackers. We like it with Club Multi-grained or some other multi-grained crackers.

Source: Aunt Beth

Baked Chicken Taquitos

The Superbowl is coming! I made these taquitos for New Years Eve, and boy were they good. I’m pretty sure they’ll show up on our table during the Superbowl as well.


Baked Chicken Taquitos 

Ingredients:
1/3 cup (3 oz) cream cheese, room temperature
1/4 cup green salsa
1 Tablespoon fresh lime juice
1/2 teaspoon cumin
1 teaspoon chili powder
1/2 teaspoon onion powder
1/4 teaspoon garlic powder
3 Tablespoons cilantro, chopped
2 Tablespoons green onions, sliced
2 cups shredded cooked chicken
1 cup grated pepper jack cheese
about 12 small flour tortillas
kosher salt
cooking spray

Instructions:
1. Preheat the oven to 425 and line your baking sheet with foil. Spray the foil with cooking spray.
2. In a bowl, combine the first 7 ingredients. Stir until well incorporated. Add the following 4 ingredients.
3. Now, it’s time to assemble them. You’ll spoon about 3 Tbs. of the chicken mixture into the lower part of the tortilla. Do not spread to too close to either side. Now, roll it up as tight as you can. As you roll, the mixture will spread closer to either side.
4. Place seam side down onto your spayed, foil lined, baking sheet.
5. Spray the tops of the taquitos with cooking spray and sprinkle salt over the top.
6. Cook in the preheated oven for 15-20 minutes.

* You could easily make this with corn tortillas to make this gluten free!

Source: Our Best Bites

Favorite Cheeseball

I was given a Lion House Christmas cookbook as a wedding gift.  One of the very first recipes I tried from it was this cheese ball.  At the time, all cheese balls seemed to include canned pineapple and that just grossed me out!  I didn’t want any sweet in my savory!  It’s been my go-to recipe for cheese ball ever since.  My kids request it for when we do party food for different celebrations.  After 20+ years, it’s still a favorite!

Um, as for the spider….well, it was for a family reunion where we celebrated several holidays all in the same week (we called it Holiday Inn week) and I was in charge of Halloween.  I hope it doesn’t freak you out too much.  I hate spiders and it freaked me out a little to make it!

Ingredients:
2 8-ounce packages of cream cheese, softened
2 cups finely grated sharp cheddar cheese 
2 Tbsp. finely chopped green onions
2 tsp. Worcestershire sauce
1 tsp. lemon juice
1/2 tsp. lemon pepper
1.  In a mixing bowl, combine all ingredients and cream together until well-combined.
2.  Line a bowl with plastic wrap, leaving enough overhang to fold back over the cheese ball mixture you’re going to put in it.  Firmly press the mixture into the bowl.  Flatten the top and fold the plastic wrap over to cover.  
3.  Refrigerate until ready to use.  Let it sit out for at least half an hour before serving.
Notes:
  • Half a recipe makes about a 3-inch ball.
  • For a fancier looking cheese ball, you can form the ball inside wax paper or plastic wrap, then roll it in finely chopped pecans and finely chopped parsley, mixed together.  Then wrap it in plastic wrap to put in the fridge.  I don’t do this anymore as my kids prefer it without nuts.
  • You’ll have to eyeball what size bowl to use.  I usually use a wide soup bowl from my china, but I have also used other shaped bowls for a different look.
  • Serve with all types of crackers, pretzels, pita points, or bagel chips.  (Bagel chips are a favorite in my house!)

Our Favorites from 2012


Last year around this time we posted the most popular recipes of 2011.  This year we thought we’d do something different…..this time we are sharing OUR favorites!  Each of the Mavens has chosen their favorite personal recipe of 2012.  We hope you’ll give them a try if you haven’t already!

from Emily…..Balsamic Glazed Pork Loin
 
from Anna…..Mexican Street Corn
 
from Melissa…..Amazing Crockpot Grits
 
from Audrey…..Mom’s Rolls
from Niki…..Cheesy Vegetable Chowder
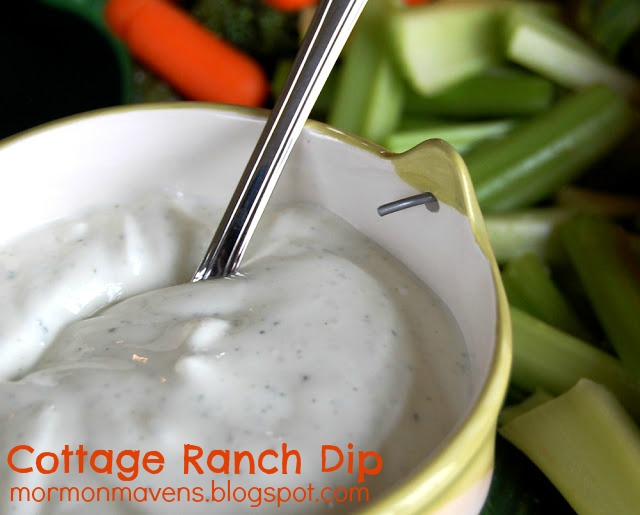
from Julie……Cottage Ranch Dip
 
 
from Amy…..Cobbler Custard Cups
from Kara…..Spinach Dip
 
Care to share what some of your favorite Maven recipes have been?  We’d love to hear from you!
 
image source: Microsoft Office Clipart (manipulated through Picmonkey)
 

Veggie Shooters

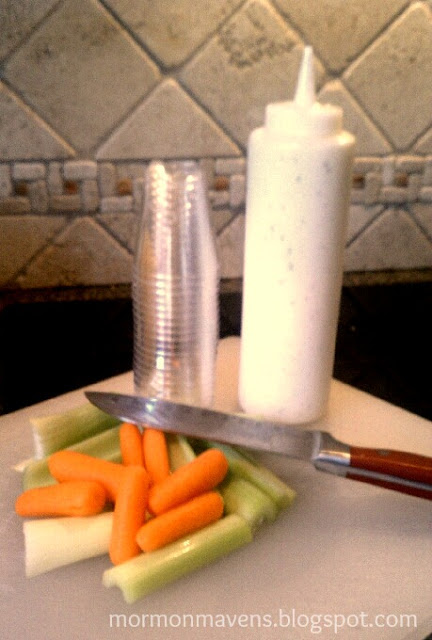
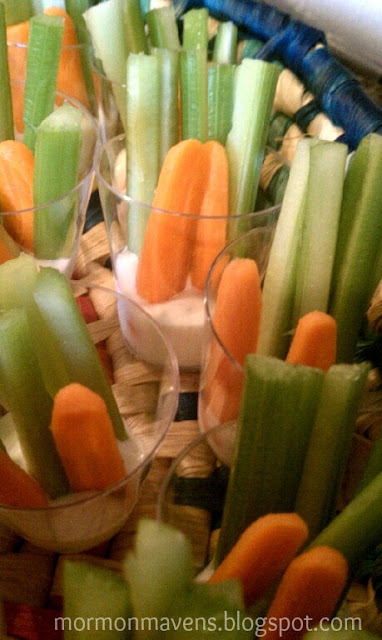
These are so cute and good for you as well. Plus it was a good way for me to use up some homemade Ranch dressing–which made a ton, or a half gallon at least.  Really, it filled a half gallon pitcher.  You can get that recipe HERE.  Tasty.  I could not really tell you a source for the shooters as I have had them in several different venues–our blog launch party (made by Julie), at an ice cream social (yes, we needed the contrast.  Opposition in all things, right?) and most recently at an Arts Council board meeting (made by me).  See how versatile these are?  And I had enough left over (because I forgot where to turn on the way to the host’s home and almost everyone had “helped their plate” by the time I got there) to serve to some of the Young Women at church after a yoga class!  Awesome.  Love to get more bang for my buck.  Who doesn’t these days?

Ingredients:
Celery, cut into 3-4 inch sticks
Baby Carrots, cut in half, lengthwise
Ranch Dressing
1.  You will need to purchase plastic “shot” glasses.  I got mine locally at Party City . These glasses are so versatile and come in several colors but you will want to use clear.
2.  Squirt about a tablespoon of Ranch dressing into the bottom of each glass.  Next, stand the celery and carrots into the dressing.  I used 5 celery sticks and the two carrot halves, but play with it and see what you like. It’s also really good with zucchini, yellow squash, red or green bell peppers, etc.
3. Serve these in a fun way or just on a tray.  I used my chips/salsa basket.  Looks really festive, don’t you think?

Summer Corn Cakes

Yes.  Another Pinterest Repin.  This one is my SAVORY board cover so I just had to try it.  It’s so pretty.  It’s so yummy.  I will now post the original ingredients, but know that I was able to pull things from food storage and, by rehydrating the freeze-dried corn, I had perfect kernels for this recipe, and my buttermilk was from a mix.  Also, I didn’t have a scallion but I did have a leek, so I substituted that and took out the minced garlic.  Now, there are two different recipes here, one for the corn cakes and one for the Chopped Tomato & Avocado Salsa.  Pay attention and be sure to get all of your ingredients for both recipes.  Pay ATTENTION…I emphasize this because I put the red onion in the salsa instead of the corn cakes because I was trying to watch the Republican National Convention at the same time. 

Corn Cakes Ingredients:
3 ears of corn, shucked
1 cup all-purpose flour
1/2 cup cornmeal
1/4 cup diced red onion
1 teaspoon baking powder
1/2 teaspoon baking soda
Sea salt and freshly ground pepper, to taste
2 tablespoons well-shaken (not stirred) buttermilk (sorry, just had to use that James Bond reference)
2 tablespoons unsalted butter, melted
Canola oil, for frying
1.  Preheat oven to 200 degrees F.  Line a baking sheet with a brown paper bag.
2.  Cut the corn from the cobs into a large bowl.  Scrape the stripped cobs with the back of the knife or spoon to release the juices into the bowl.
3. Place 2 cups of the corn kernels into a food processor. Pulse several times until the corn is slightly pureed but still chunky.  Scrape into the bowl with remaining kernels.
4.  Add flour, cornmeal, onion, basil, baking soda, baking powder, salt and pepper to the corn.  Stir to mix.
5.  Add the eggs, buttermilk, and butter, and stir just to combine–do not overmix.
6.  Place a large skillet over medium heat.  Add just enough canola oil to cover the bottom, and heat until sizzling hot.
7.  Scoop the batter onto the skillet, one heaping tablespoon at a time.  To avoid overcrowding, do in batches of 4 or 5 at a time.  Fry the cakes 1-2 minutes per side, until golden brown.

8.  Drain on the lined baking sheet, and place in the oven to keep warm while cooking the rest of the cakes.  Serve warm with LARGE spoonful of the Chopped Tomato & Avocado Salsa.
Chopped Tomato & Avocado Salsa Ingredients: 
1 large tomato, cored and chopped
1 scallion, trimmed and minced
1/2 jalapeno pepper, cored, seeded and diced
1 tablespoon chopped fresh basil
1 tablespoon chopped fresh cilantro
1 garlic clove, minced
Juice of 1 lime
1 1/2 teaspoons extra-virgin olive oil
1.  Place all ingredients, except avocado, in a bowl and stir to mix.  Refrigerate in an airtight container until ready to serve (for up to 2 days).
2.  Just before serving, add the avocado and mix gently.

Source:  Ezra Pound Cake

Baked Buffalo Wings

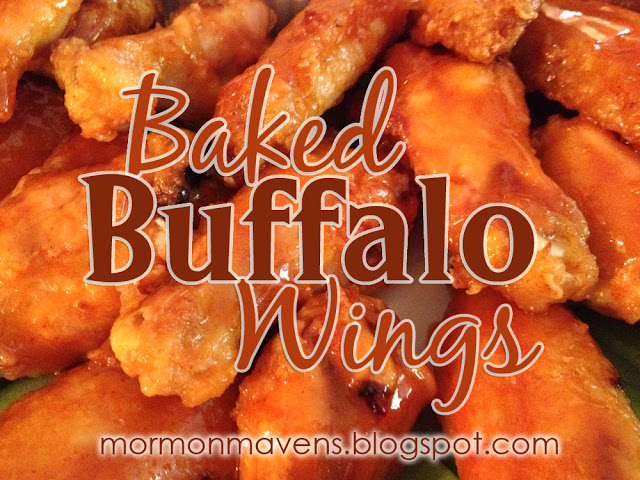
One of my favorite appetizers to order at a restaurant is Buffalo Wings.  A good plate of Buffalo Wings makes me a happy girl.  But I usually ONLY have them on a night out because they are kind of indulgent.  Baking instead of frying makes these wings a dish you can eat a little more often.  Without the side order of guilt.

Ingredients:
cooking spray
3/4 cup all-purpose flour
1/2 tsp. cayenne powder
1/2 tsp. garlic powder
1 tsp. salt (divided)
about 20 chicken wings (you know, appetizer size)
1/2 cup butter, melted
1/2 cup Frank’s Red Hot Wing Sauce (or Texas Pete or Texas Pete Wing Sauce)
2 Tbsp. honey
2 Tbsp. soy sauce

1.  Line a baking sheet with foil.  Then set a cooling rack in the baking sheet.  Spray this with cooking spray and set aside.  Rinse the wings and then dry them well with paper towels.
2.  Combine the flour, cayenne, garlic powder, and 1/2 tsp. of the salt in a gallon-size zip-top bag and shake well to combine.  Drop the wings into the bag, zip closed, and shake to coat.  Remove wings one at a time, shake off any extra flour, and place on the sprayed cooling rack.
3.  Place the wings in the fridge, uncovered, for one hour at least.  Preheat your oven to 400 degrees.  Remove the wings from the fridge and bake for 25 minutes.  Remove sheet from the oven, turn each wing over, and return to the oven for another 25 minutes.
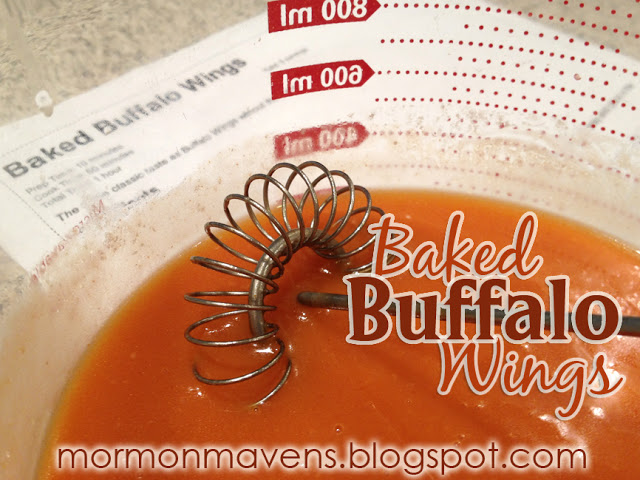
4.  Combine the butter, wing sauce, honey, soy sauce, and remaining 1/2 tsp. salt in a bowl.  Whisk until well blended.  When wings have finished their second trip to the oven, dip 3 or 4 at a time into the sauce mixture, making sure the wings are completely coated.  Return wings to baking sheet/rack and bake  for 7-9 minutes.
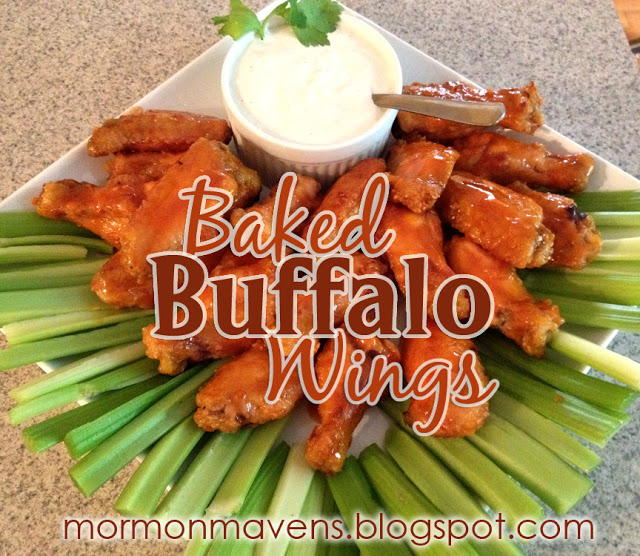
5.  Remove wings from oven, place on a serving platter, and pour any remaining sauce over them.  Serve with the traditional celery sticks and blue cheese dressing.

Yum!

Source:  Lana’s Cooking via Pinterest

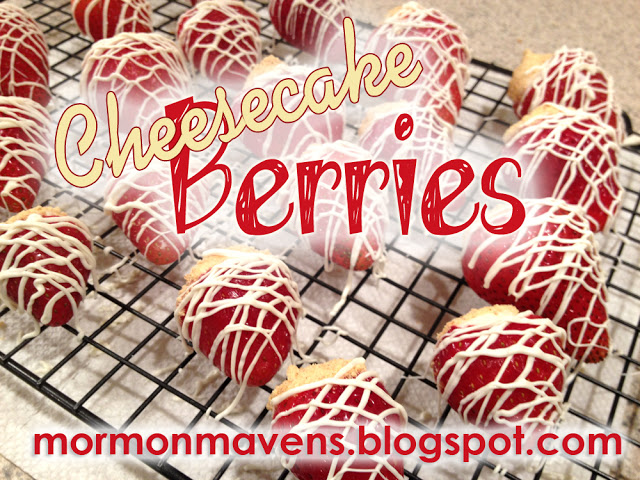
Cheesecake Berries

I had some friends over a few nights ago and wanted to try some new recipes that were collecting dust in my “Recipes to Try” Pinterest board.  I needed something simple, easy, and tasty.  BINGO!

I think this will be my new go-to treat to bring to parties and showers, or just to eat in the privacy of my closet while my children clean the kitchen.

I can dream can’t I?

Ingredients:
a carton of strawberries (there were about 20 in mine)
8 oz. cream cheese, softened
1/2 cup powdered sugar
1/2 tsp. vanilla
graham cracker crumbs (it doesn’t take much)
chocolate or vanilla melts for decor (optional)

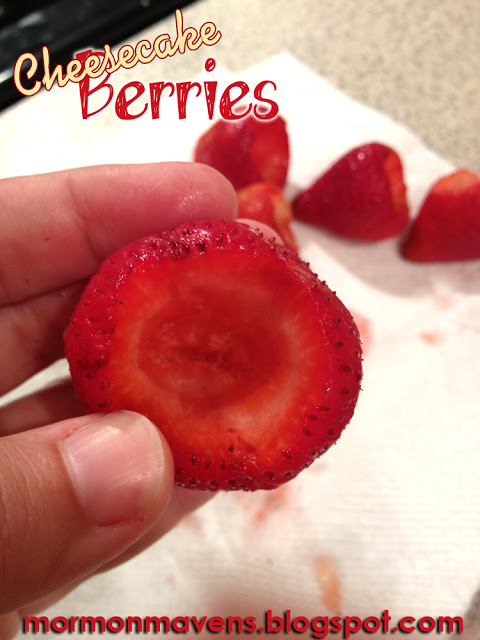
1.  Wash the strawberries, drain completely, and dry completely.   With a pairing knife, begin coring out the middle of each berry down through the stem.  For me this was easiest while holding the pairing knife higher up on the blade with maybe and inch of blade actually exposed beyond my fingers.  Work slowly until you get a feel for it.  You want a nice, roomy area for the yummy cheesecake filling; just don’t go all the way through the berry.

2.  In a mixer blend together the cream cheese, powdered sugar, and vanilla.  Scoop this mixture into a zip-top baggie, seal the bag, and snip off one corner.  You can always snip off more if the hole’s not big enough, so be stingy with your cut.  Holding a berry in one hand, use your other hand to squeeze the cheesecake-baggy mixture into the strawberry holes, allowing the filling to come up out of the berry just a bit.
3.  After filling the berries, either sprinkle on or dunk the tops of the berries with graham cracker crumbs.
4.  Place the berries on a cooling rack with a sheet of wax paper underneath.  Melt your chocolate and drizzle over the berries.  A tip here:  don’t try to “draw” the lines onto the berry.  This will make for a sloppy job.  Just quickly go back and forth over the berry, letting some of the chocolate go past the berry on each side.  I had a lot of melted decor here so I did lines in two directions.

Refrigerate until ready to serve.  YUM!

I think next time I will:

  • double the berries and one-and-a-half the cheesecake mixture.
  • try a chocolate cheesecake filling.
  • not invite people over so I can have more for myself.  (Just kidding.  Sort of.)

Source:  Sugar Derby via Pinterest