Tortellini Skewers

Need to serve something tasty but don’t have the time or energy to make something that’s gonna be really involved?  Want a fun main dish for dinner that you can prepare in a snap?  Have I got a dish for you.

Buttoni premade, refrigerated Tortellini…I got two packages:  Three Cheese and Spinach Feta (I think!).  They were BOGO at the store.  (Please ignore my nasty tile countertop.  I do my best to ignore it.  I’ve given up cleaning it because in a day it’s stained again, even after scraping, bleaching, grout-line-painting, and sealing.  My new counter top is on it’s way, thank goodness!)

Ingredients:
refrigerated Tortellini
olive oil
Pesto sauce
Spaghetti or Marinara sauce
wooden skewers

1.  Boil pasta as directed on package.  When done, pour into colander and rinse well with cold water.  Allow to cool and drain completely.
2.  Toss cooked tortellini in a bowl with a little olive oil.  Either store in a container in fridge, or go ahead and skewer the pasta to serve immediately.
3.  Serve with pasta sauces of your choice, but my preference is for pesto (which I also bought premade).  Drizzle sauce over the tortellini skewer once it’s on your plate.

Source:  photo idea found on Pinterest

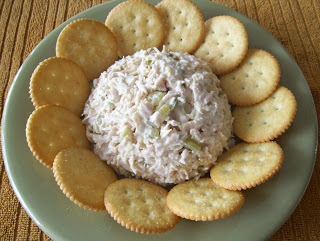
Easy-Peezy Chicken Salad

This recipe is here for you if you ever need to make an appetizer in a flash!

Ingredients (all to taste):

canned chicken breast, drained
dill salad cubes
mayonnaise
kosher salt (or regular)
pepper
1. Mix all ingredients together! You can serve with crackers but it’s also good as a sandwich.
Note–careful not to add too much salt as there is already salt in the pickles.
Source: my old boss, Lynn Burleson, had her husband make this at our request for several work events. It’s so good that I was disappointed when it didn’t show at one!

Cheesy Bread Sticks

These are just plain good! This is the same dough as used in my taco pizza that I posted a few weeks back. They are perfect!

1 tsp. active dry yeast
1-1/2 cup warm water
4 cups all purpose flour
1 tsp. kosher salt
1/3 cups of olive oil
1 cup monterey jack cheese, grated
1 cup sharp cheddar cheese, grated
a good marinara sauce, optional

Mix yeast with warm water and set aside for 8-10 minutes. mix flour, salt, and olive oil in a mixing bowl. With speed on low, drizzle in yeast/water mixture. Allow to mix until totally combined. Cover bowl with a towel and set bowl in a warm, draft free place. Allow to rise for 1-2 hours.
Place overn rack in the bottom position of oven. Preheat oven to 500 degrees. Remove half of the pizza dough from teh bowl. (save remaining dough or make more bread sticks!) With hands, spread pizza dough on an oiled baking sheet, making sure its relatively thin.
Sprinkle grated cheeses over the dough and bake for 9-12 minutes. Serve with or without marinara sauce.

Sausage Balls

I hope that no one is insulted by a simple sausage ball recipe, but I have given this out several times over the years. It’s not the ingredients that are so important, but the preparation and cooking time make all the difference!

Ingredients:
3 cups baking mix (I use Jiffy because it’s less expensive, but Bisquick works just as well)
3 cups sharp cheddar cheese
1 lb. sausage (I choose Bass Farms, hot)

1. Mix all ingredients by hand in a large bowl. You may want to allow the sausage to sit on the counter for about an hour before mixing. If find that if it is right out of the fridge, it’s too cold and my hands cramp up.
2. Shape into balls. Like my meatballs, I make these fairly large. I use atleast 2 tablespoons of the mixed ingredients to make one sausage ball.
3. Place sausage balls on a cookie sheet and bake 15 minutes at 350 degrees.

*Keep an eye on them as they cook. They are done when starting to brown on top and the grease is bubbling at the edges. If overcooked, you lose a lot of the flavor.

**It doesn’t matter the brand of sausage you use, just look for one with a higher fat content. If you are looking for a lower-fat version, you’ve come to the wrong place. It’s an insult to sausage balls everywhere!

Sticky Gooey Monster Jaws

You’d better take a bite before they do!  I adapted this from a cute idea found on Our Best Bites Easy Halloween Party Food, using a few of my kids’ favorite ingredients! But by all means…have fun and make it your own…I DARE you! 
Ingredients:
Apples (1 apples serves 4)
Water with a little lemon juice for dipping 
Peanut Butter
Raisins, chocolate chips, slivered almonds…any of these things could work for teeth
  1. Quarter your apples and remove the seeds.  
  2. Then cut a wedge out of the center of the side with the peel still on it.  
  3. Now, dip the apple quarters in the water/lemon mixture to keep them from browning.
  4. Smother some PB into that monster mouth and give him/her some teeth of your liking.  
  5. Give it some eyes using PB to make ’em stick.  
*The eyes look super cute when they’re buggin’ out on 2 pretzel sticks…too bad I didn’t have any.  =( HAPPY HALLOWEEN!  =)

Taco Pizza

This is easy and yummy! The kids will love this crust, and ask you to make cheesy breadsticks with the leftovers for an after school snack!

1 tsp Active Dry Yeast
1-1/2 c warm water
4 cups all-purpose flour
1 tsp. kosher salt
1/3 cup olive oil
1 can (14 ounce) Black Beans
1 tsp. Taco seasoning
4 whole corn tortillas, sliced into thin strips
1/2 cup canola oil, for frying
1 cup grated sharp cheddar
1 cup grated monterey jack cheese
1 head green leaf lettuce, sliced/shredded thin
2 whole rip tomatoes, diced
1/2 cup cilantro leaves
1/4 cup sour cream
3 Tbsp. hot sauce (more to taste)

Make the pizza dough: Mix yeast with warm water and set aside for 8-10 minutes. Mix flour, salt, and olive oil in a mixing bowl. With speed on low, drizzle in yeast/ water mixture. Allow to mix until totally combined. Cover bowl with a towel and set bowl in a warm, draft-free place. Allow to rise for 1-2 hours.

Pour black beans into a saucepan. Add seasonings to taste and heat up beans over med-low heat. Use a potato masher to mash the beans to desired texture. Continue cooking /heating beans over md-low heat, stirring occasionally, until no longer runny (should be the texture of refried beans). Set aside.

In a small skillet, heat canola oil over med heat. When hot enough to fry, drop in the tortilla strips in batches, frying quickly and removing from oil with a fork when crisp – about 30-40 seconds per batch. Transfer to paper towel-lined plate. Set aside.

Place oven rack in the bottom position in the oven. Preheat oven to 500 degrees. Remove half the pizza dough from the bowl. Place remaining half in a large plastic bag and refrigerate, saving for another use. With hands, spread pizza dough on an oiled baking sheet, making sure its relatively thin. Spread layer of beans all over pizza crust. Sprinkle mixed grated cheeses over the top. Place pan on bottom rack in oven and bake for 9 to 12 min. Watch it to make sure crust doesn’t burn.

Remove pizza from oven. Sprinkle on shredded lettuce, diced tomatoes, and cilantro leaves.

Mix together sour cream and hot sauce, adding enough hot sauce to make the mixture pourable. With a spoon ( or you can put it in a pastry bag) drizzle mixture over finished pizza.
Sprinkle with tortilla strips. Cut into squares and serve immediately with good quality salsa.

recipe from The Pioneer Woman

Layered Chip Dip

This is a General Conference tradition at our house. It is mui bueno! Mr. Blue Eyes also informed me that 1/8 Cup (including 4 chips) has about 200 calories in it–the same as 1 Glazed Krispy Kreme doughnut. If you’re going for Quality Calories, EAT THIS! If you’re going for SWEET with zero nutritional value, eat the doughnut (I’ll be with you!). 🙂
Ingredients:
2 Cans Refried Beans
4 Mashed Avocados
Lime Juice to taste–about 4 Tbsp
1 Cup Sour Cream
1 Cup Mayonnaise
1-2 Packages Taco Seasoning (I only use one, but know others who use two)
4 Cups Shredded Colby-Jack Cheese
1 Bunch Green Onions
4 Chopped Tomatoes
Your Family’s Favorite Tortilla Chips
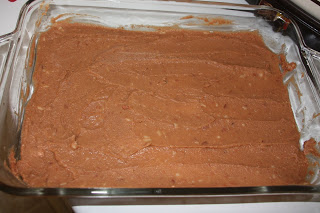
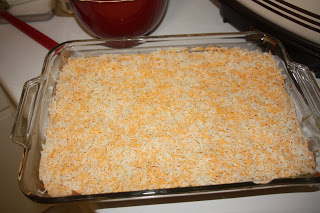
1. In an 11×15″ cake pan, spread the refried beans over the bottom.
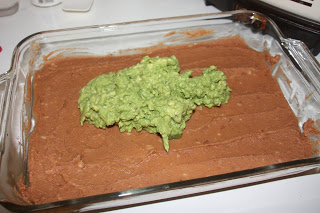
2. Mix your mashed avocados and your lime juice together. Plop it (or this fabulous Guacamole Dip!) onto the refried beans…

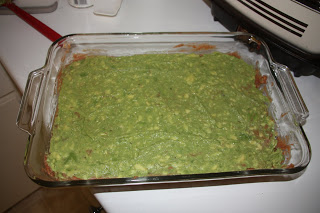
…and spread it over.

3. Mix the sour cream, mayo, and taco seasoning in a small bowl…
…then spread it over the guac.

4. Spread the cheese over the sour cream–use as little or as much as you like!

5. Add your veggies* and serve with your favorite Tortilla Chips. We like any Scoop variety.

Serve immediately. Refrigerate any left overs (or if you’re not serving it until later).
*This recipe is so versatile that you can make it as simple or as glorified as you want. I’ve had several different kinds of veggies (peppers, olives, etc.) and haven’t had a bad combo yet!
Source: My variation of a family friend’s recipe
~Kara

Homemade Kettle Corn

I used to make this for movie night when I lived at home with my parents.  It’s very easy to make and is ready in about 6 minutes! 

Ingredients:
1/4 cup oil (I’ve used vegetable and light olive oil.  Both work fine)
1/2 cup corn kernels
1/4 white sugar

1.  Have everything ready before you begin. Measure your corn and sugar and put into a bowl.  Pull out a large pot with a lid (I always use my 8 quart.  Do not use a dutch oven), two oven mitts, a wooden spoon, a large bowl to pour popped corn into, and salt.

2.  Pour your oil into your pot, add 3 corn kernels, cover, and heat over medium-high heat.

3.  Once the 3 kernels have popped, add the rest of your corn kernels and sugar.  Mix well and cover.

As soon as I put the lid on I rinse the sugar off my spoon.  It hardens quickly so I like to rinse it so I can use it later to mix the kettle corn with salt. 

4. After about 15-20 seconds, grip the handles of your pot and shake it.  Continue to shake your pot every 15-20 seconds until your kernels start popping.  Once they do, alternate between shaking and allowing pot to sit on burner a few moments.  When the popping slows down to 1 pop every few seconds, turn off the heat.  Give pot another shake, just for fun.

4.  Immediately pour kettle corn into your bowl and sprinkle with salt.  Stir, sprinkle more salt, then stir.

Enjoy!

*Please do not add extra sugar when making this.  After your kitchen fills with smoke and your pot is filled with burnt sugar…you will not like me anymore.  Just don’t do it.

*This recipe takes practice to get the hang of when to shake your pot and when to let it sit.  Just listen to your kernels and judge by how quickly they’re popping.

*After I’ve salted my kettle corn I like to fill my pot with soapy suds.  It makes clean up a breeze!

Source:  My memories…  Actually, I don’t know.  Probably somewhere online.

Easy Breakfast Casserole

This is so easy and delicious! It is a very modified version of a Bisquick Recipe. This works well with sausage, ham, shredded beef, or hamburger and can be used as a main dish. Garnish this with chopped tomatoes and a sprinkle of Parmesan Cheese and use as an Appetizer. I often get requests to bring this dish to events and activities.

Ingredients:

1 lb Bass Farms Mild Sausage
1 large onion chopped
1 1/2 cups baking mix such as Bisquick
2 cups milk
6 eggs
1 1/2 cups shredded sharp cheddar cheese
1 1/2 cups grated baked potato or frozen hash browns (optional)
1/2 medium red pepper finely chopped (optional)

If using as an Appetizer:
2 large Roma Tomatoes finely chopped

1/3 cup shredded Parmesan Cheese

1. Heat oven to 400. Spray 13×9 cake pan with non stick spray and set aside.
2. Brown sausage in skillet and drain off excess fat
3. Return sausage to skillet and add chopped onion and pepper. Continue cooking for 3-4 minutes or until onion starts to soften – stirring often.
4. Mix baking mix, milk, and eggs together until well blended.
5. Fold cheese and grated potatoes into egg mixture.

6. Layer Sausage and veggies into prepared pan.
7. Pour egg mixture over sausage
8. Bake at 400 for 20-25 minutes

For Garnish:
Sprinkle top with chopped tomatoes and cheese

Source: Adapted from Original Bisquick

Bacon Wrap Dates

During the summer I met Matt, I was an administrative assistant at VPPS.  I had barely been hired when one of my co-workers came to me selling cook books for her daughter.  I didn’t know this woman (or her daughter) and did not want to spend $15.  However, since I was new and wanted to be “nice”,  I did it.  I bought the book.

Since receiving this cook book, I’ve only used one recipe out of it; this one.  This appetizer is super easy to make and is always a hit.  Is it a $15-worth appetizer?  That’s for you to decide…

Ingredients:
1 package of bacon ( I use regular, not thick-cut)
32- 40 pitted dates (You’ll need 2 dates and 2 almonds per slice of bacon, so this number will vary depending on which brand of bacon you buy.  For the dates, I used Mariani Premium pitted dates from Sam’s Club)
32- 40 plain whole almonds
brown sugar (Optional, enough to coat)
toothpicks

1.  Preheat oven to 350 degrees.

2.  Cut your bacon in half; I find it easier to cut the bacon with kitchen shears while it’s in the package.  Line a jelly roll pan with foil and place a wire rack on top.  Lay your bacon halves on the rack and bake until bacon is half cooked (about 8-10 minutes).  If you’re cooking a whole package of bacon, you should be able to fit all of the bacon onto one pan, with some slices slightly overlapping.  

3.  While bacon is cooking, prepare your dates.  If you bought pitted dates, all you have to do is slip an almond into the center.  If you decided to buy regular dates, cut a small slit down the center to remove the pit before inserting almond.

4.  Count out the amount of toothpicks you need and have them ready.  Your hands will get dirty so it’s best to have exactly what you need before you assemble.  If you decide to use brown sugar, put enough into a bowl that will lightly coat each bacon-date. 

5.  After bacon has cooked halfway, remove from oven and allow to cool until cool enough to handle.  Usually at this point I’ll use paper towels to blot the bacon and absorb some of the grease.

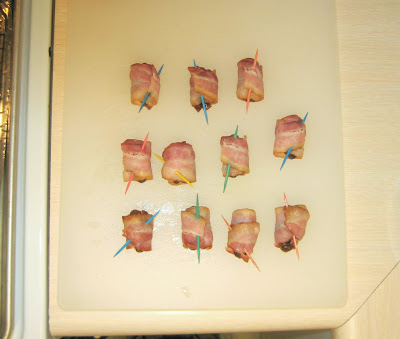
6.  Roll each date in half slice of bacon and secure with a toothpick.  Then, if you desire, coat each date in brown sugar before placing back onto the wire rack. 

7.  Bake until bacon is cooked through, turning once (about 15-20 minutes).

*The dates I used were on the small side.  If you purchase dates that still have the pit, they are usually bigger.

Source:  Easy Recipes by Home Economics (FACS) Teachers 2007