Bagel Quiches

bagel quicheIt’s a new look for bagels…and quiches!

If you’re bored with the same-old, same-old for breakfast, give this a shot.  We’re always using Thrive Life ingredients in our home, but you could easily sub your own ingredients; Thrive Life just makes prep easier. 

Try some different combinations of flavors!  I think a Caprese combo would be great, and it’s next on my list to try:  basil, tomato dices, and mozzarella!


Bagel Quiches
Serves 1
Quiche in a bagel!
Write a review
Print
Prep Time
10 min
Cook Time
25 min
Prep Time
10 min
Cook Time
25 min
Ingredients
  1. 1 bagel, sliced in half
  2. 2 eggs
  3. 1 pn. salt and pepper to taste
  4. 2 tbsp. THRIVE Red Bell Peppers - Freeze Dried
  5. 2 tbsp. THRIVE Mushroom Pieces - Freeze Dried
  6. 2 tbsp. THRIVE Shredded Cheddar Cheese - Freeze Dried
Instructions
  1. Preheat oven to 375 degrees.
  2. Measure out your Thrive Life veggies/cheeses/meats and place them in a small container with a tight-fitting lid. Add in about a Tablespoon of water and close the lid. Toss every couple of minutes to refresh the ingredients while you prep the other items. (If using non-freeze dried, prep and chop ingredients and set aside.)
  3. Cut a trench into each bagel half by cutting about 1/4" away from the outside edge and the inside hole. Use your fingers to carefully remove the bagel bread from between the cuts; again, being careful not to tear all the way through the bottom.
  4. Cradle each bagel half in foil and place on a baking sheet.
  5. Whisk the eggs in a small bowl or glass measuring cup. Add in the salt and pepper while whisking. Pour enough of the egg into each bagel half to cover the bottom of the trench.
  6. Drain the container with the Thrive Life veggies/cheeses/meats if needed. Using your fingers, sprinkle these ingredients over the egg in your bagel halves. Add more whisked egg over top but do not overfill the bagel (just fill to the top).
  7. Bake for 20-30 minutes or until egg is set (25 minutes in my oven at home). Serve!
Notes
  1. Depending on the size of your bagel, you will use anywhere from 4-8 Tablespoons of Thrive Life ingredients (or your non-freeze dried ingredients).
  2. Try adding Thrive Life's Chef Choice Seasoning or our delicious freeze dried herbs (or whatever herbs you have on hand)!
  3. Use any combo of ingredients you like.
  4. Could be a great way to use up those leftover veggies from dinner!
  5. I used presliced bagels, but would have preferred bakery bagels that are unsliced. Too often, presliced bagels are uneven--the top is thinner than the bottom. Still, it worked. 🙂
  6. You can also use our Thrive's Scrambled Egg Mix! It comes in handy if you're out of eggs, and I promise it is delicious. Even my pickiest eater eats it!
Adapted from Recipe Girl
Mormon Mavens https://www.mormonmavens.com/

Super Moist All Bran Muffins


Have you ever had a really moist, delicious bran muffin somewhere and then they don’t serve them anymore?  Back in the late 90’s, I think, McDonald’s was trying to offer more healthy options at breakfast.  You know, because how many Egg McMuffins can you really take?

My favorite thing was their bran muffin.  It came in it’s own little cellophane pouch so they could warm it for you if you preferred.  And then, just like that, they weren’t serving them anymore.  I haven’t been able to find a replacement for lo these many years.

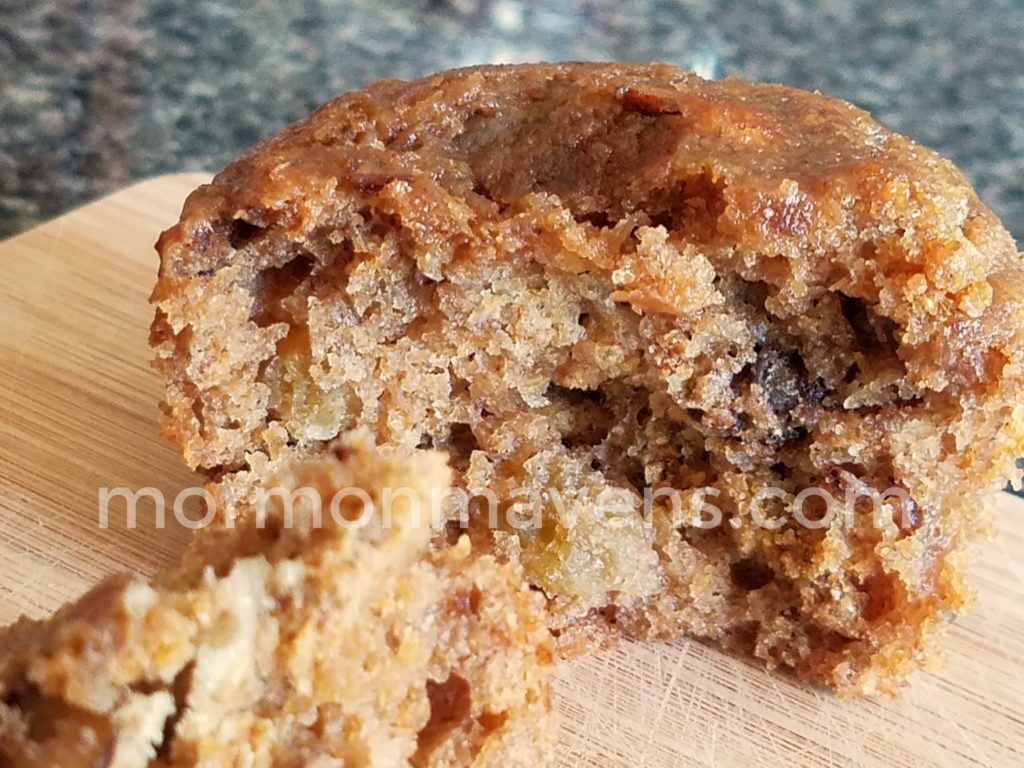
Last week I was determined to Google and find a good recipe and this is the first one I found.  It is moist and delicious and, HELLO, has apple butter in it. Come on, don’t tell me you aren’t drooling over it right now.

I am also excited to use up my supply of cute cupcake papers that I just HAD to buy.  But since I have no kids at home, I haven’t been asked to make any cupcakes for school stuff, ya know?  No bake sales, no fundraisers, no kids’ birthdays at school…


Super Moist All Bran Muffins
Yields 18
Write a review
Print
Ingredients
  1. 1 1/2 c. all-bran cereal
  2. 1/2 c. boiling water
  3. 1/4 c. canola oil
  4. 1 egg
  5. 3/4 c. sugar
  6. 1 c. buttermilk
  7. 1 1/4 c. all-purpose flour
  8. 1 1/4 t. baking soda
  9. 1/2 t. salt
  10. 3/4 c. apple butter
  11. 1/2 c. chopped walnuts
  12. 1/2 c. chopped pecans
  13. 1/2 c. golden raisins
  14. Honey to drizzle
Instructions
  1. Preheat convection oven to 375 degrees F (regular oven--400).
  2. In a large mixing bowl, pour boiling water over 1/2 cup of the bran cereal, mix in oil , then set aside.
  3. In another bowl mix egg, sugar and buttermilk.
  4. Add sifted flour, soda, salt and remaining dry cup of bran to the wet bran mixture, then add wet buttermilk mixture and stir.
  5. Stir in apple butter, nuts and raisins. Mix thoroughly.
  6. Line muffin tins with cupcake liners and scoop batter into each. My batch made 18.
  7. Bake for about 12 minutes (16-18 non-convection).
  8. Drizzle honey on top of muffins.
  9. Transfer muffins to wire racks to cool.
Notes
  1. Original recipe notes that in lieu of cupcake liners you can grease the muffin pan or stoneware. I didn't know you could grease stoneware...
Adapted from Kevin is Cooking
Mormon Mavens https://www.mormonmavens.com/

Pancakes with Apple Brown Sugar Topping


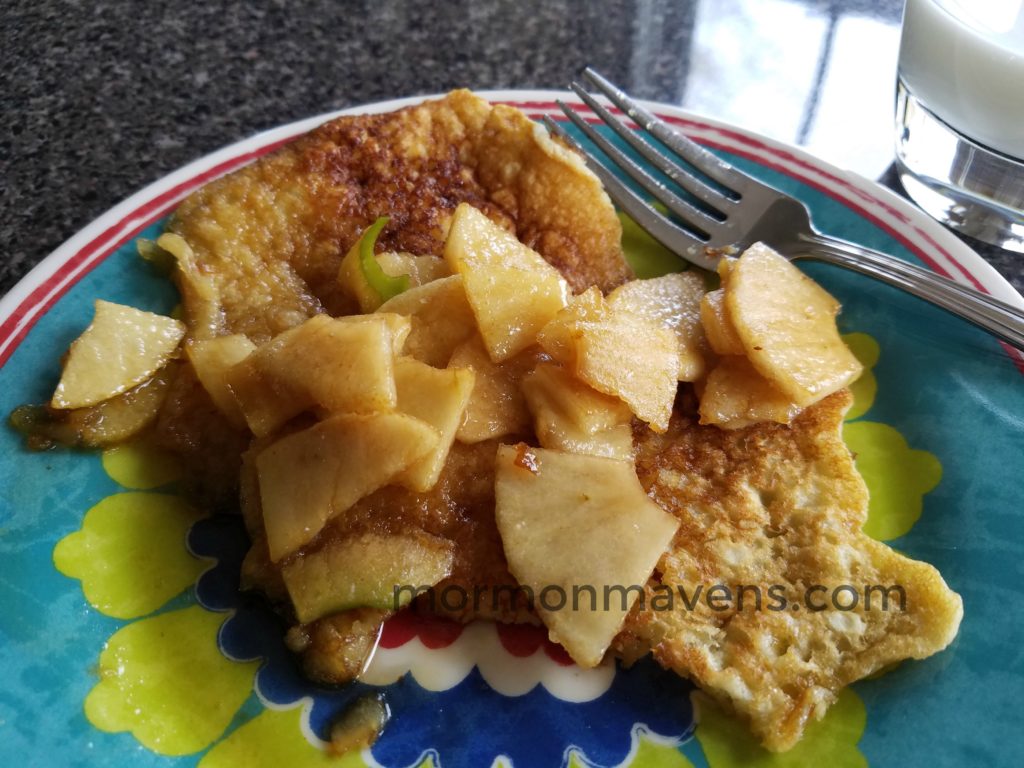
Who doesn’t like pancakes?  And what if you add apples, brown sugar, and butter?  Exactly.  I needed a quick breakfast because I had just finished a phone meeting with my new Power of Moms content editor–training her on how I publish the articles for the site–and I was hungry.  Checked the fridge and saw two leftover pancakes and some cut up apples I had left over from a pie I had made. Hmmm, I thought, those could be good together.  So I grabbed those, along with some butter and brown sugar.

Pancakes with Apple Brown Sugar Topping
Write a review
Print
Ingredients
  1. Pancakes (use a recipe of your choice)
  2. Cut up Fuji and Granny Smith apples
  3. Brown Sugar
  4. Butter
Instructions
  1. Melt a tablespoon of butter in a small skillet over medium-high heat.
  2. Add brown sugar and apples and stir to combine.
  3. If using leftover pancakes for a single serving, add the pancakes and heat them up along with the topping.
Notes
  1. There are many plain pancake recipes out there. This should work well with any of them. Check out some of our recipes here on the blog.
Mormon Mavens https://www.mormonmavens.com/

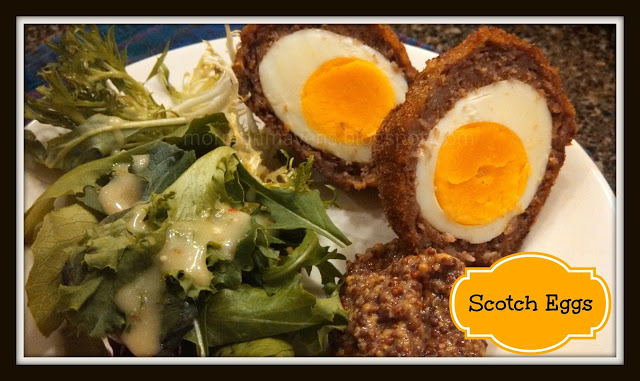
Scotch Eggs


Originally published on May 9, 2013. 

Do people still do “Throw-back Thursday” on Facebook?  It’s kind of a fun thing to do and so I thought I would do that today by bringing back an oldie but a goodie.  Seriously, if you have never tried Scotch Eggs before, you should.  The first time I had one was at Disney World…


My daughter ordered Scotch Eggs at an English Pub at Epcot.  She went bonkers over them so, of course, I had to have a taste.  I was gobsmacked!  Could not believe how yummy they were!  She asked our waitress for the recipe and she was happy to share how she, personally, makes them at home in England.  Did we find the napkin she wrote the recipe down on?  I don’t think so.  So, the other day I was looking through a magazine and I found a recipe!  Yahoo!   Chasity LeGrand shared this recipe via allrecipes.com.  I have made my variations to her recipe, below:

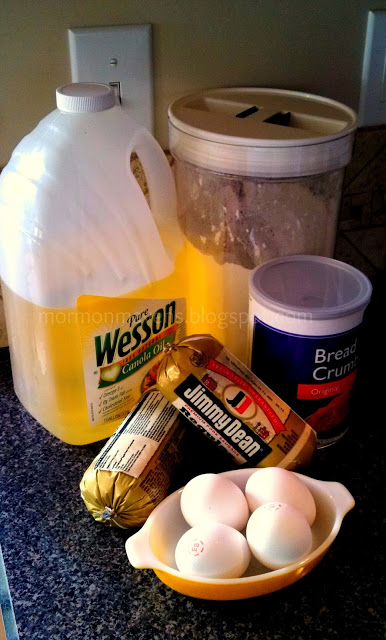
Ingredients:
1 quart oil for frying
4 hard-boiled eggs, cooled and peeled
1 pound pork sausage
1/3 cup all-purpose flour
3 eggs, beaten (did not take that much so I scrambled the rest for someone else to eat while I was making this)
2 cups dried bread crumbs, seasoned


1.  Preheat oven to 350 degrees F.  Heat oil in deep-fryer to 375 degrees.

2.  Flatten the sausage and make a patty to completely cover each egg and gently shape into a ball.  Very lightly flour the sausage and coat with beaten egg.  Roll in bread crumbs to cover evenly.


3.  Deep-fry until golden brown, then bake in preheated oven for 20 minutes.

4.  Cut eggs in half to serve.  I served mine with spring mix salad and coarse ground mustard.

Source:  Chasity LeGrand via www.allrecipes.com

Frittata in a Flash


Well this just happened–Frittata in a Flash!  I am visiting in my sister’s home for a few days and today I was put in charge of throwing together some lunch.  We were trying for something kind of Keto and kind of Abs Diet-y and I thought this would do well.  I think it is totally Keto, by the way.  Keto aficionados, please let me know if I am wrong.

So, I just kind of threw this together.  Someone wanted omelettes and this was just quicker since there were 5 of us eating and it was a busy day of errands, odd jobs around the house, and homeschooling.  A huge time-saver was using Thrive freeze-dried vegetables

This was a big hit!  And super easy.

Frittata in a Flash
Write a review
Print
Ingredients
  1. 10 eggs,
  2. Turkey sausage (about 1/4 or so of a bulk package)
  3. 2 Roma Tomatoes, chopped
  4. 1/2 cup Thrive freeze-dried asparagus
  5. 1/4 cup Thrive freeze-dried green onions
  6. 2 T. sour cream
  7. 1 1/2 cups shredded cheddar cheese (shred your own from a brick of cheese)
  8. Salt and pepper to taste
  9. Olive oil or spray
Instructions
  1. Preheat oven to 350 degrees Fahrenheit.
  2. Refresh the asparagus and onions in a little bit of water in a container with a lid. Shake a few times while you prepare the rest of the ingredients. Drain off excess water before adding to the sausage.
  3. Spray a large oven-proof skillet with olive oil spray and heat on medium-high heat.
  4. Add the turkey sausage and brown it as you chop it into small pieces.
  5. Add the tomatoes, onions, and asparagus and saute for a few minutes to bring out the flavor. Add salt and pepper to taste.
  6. Whisk the eggs to blend well, adding sour cream and cheese. Pour egg mixture into skillet and stir to incorporate the vegetables and sausage.
  7. Cook for a few minutes and then reduce to medium and cook until almost firm. Check the bottom of the frittata to make sure you aren't over browning it, since you will be putting it in the oven.
  8. Put the skillet in the oven for about 8 minutes to complete the cooking.
  9. You're done! Eat it!
Notes
  1. An afterthought: mushrooms would have been a great addition!
Mormon Mavens https://www.mormonmavens.com/

Mexican Hot Chocolate Oatmeal


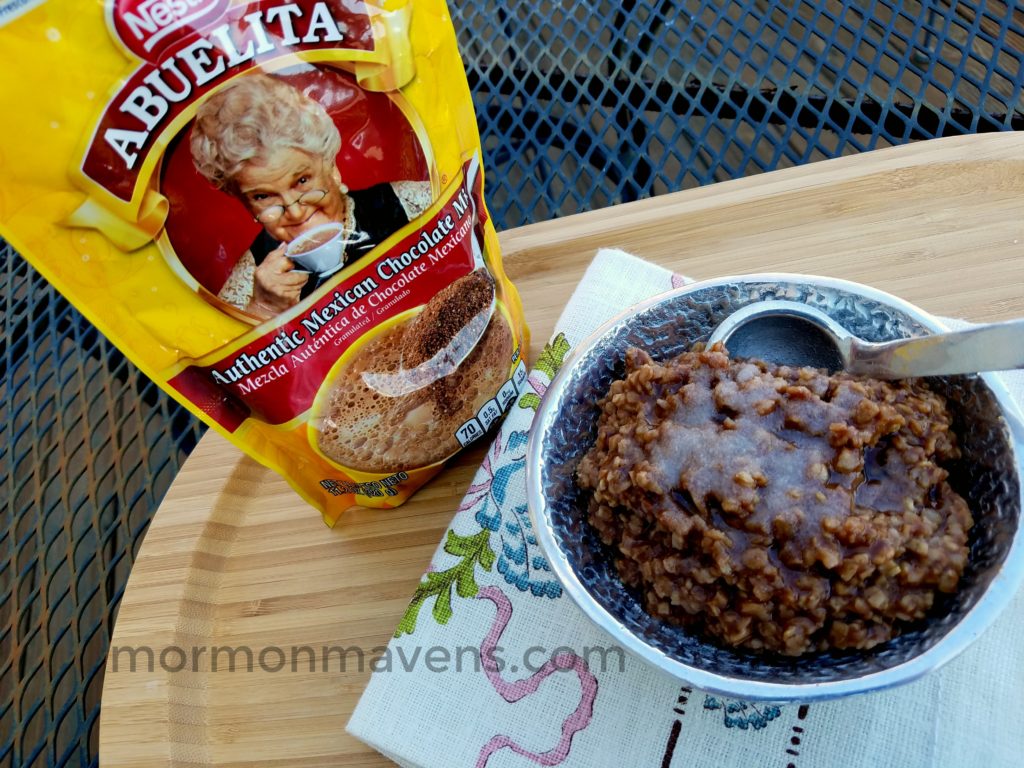
You haven’t tried Mexican Hot Chocolate Oatmeal?  Never thought about it?  I needed breakfast this morning and I have been wanting to try this idea since I bought some Abuelita Hot Chocolate Mix–not the tablets.  That’s for making it the non-instant way.  

So the original idea for chocolate oatmeal came from my Grandma Brew.  She would put Hershey’s chocolate syrup or Nestle’s Quik in my Uncle Reggie’s oatmeal–not when he was a kid.  He was a teenager.  The first time I saw that on a summertime visit I was a little shocked, but then I tried it and I was an immediate fan–try it yourself sometime when you need some chocolate in your most important meal of the day.

Back to this post.  Mexican Hot Chocolate is an acquired taste–I think mainly because it is like dark chocolate and the amount of sugar is not up to par with your usual hot chocolate recipe.  Also, there is cinnamon in the mix–or canela if you are serving it to your abuela (grandmother).

Feel free to adjust the amount of mix and maybe add a little sugar.  I added Truvia this morning and served it up in a Mexican pewter molcajete just to keep with the theme.

Here’s a fun tip: get yourself some of these cute measuring spoons so that you have the right measurement for dash/smidgeon/pinch and oh my goodness this set has a tad and a drop.  Be still my heart.

Mexican Hot Chocolate Oatmeal
Serves 1
Write a review
Print
Prep Time
5 min
Prep Time
5 min
Ingredients
  1. 1/2 cup quick cooking oats
  2. 1 cup water
  3. Dash of salt
  4. 1 T. Abuelita Hot Chocolate Instant Mix
  5. sugar to taste
Instructions
  1. Bring the water and salt to a boil in a small to medium saucepan.
  2. Add the oats and cook on medium for 1-2 minutes.
  3. Add the hot chocolate mix and stir.
Notes
  1. Adjust the amount of mix depending on how chocolate-y you want it.
  2. You will probably need to sweeten this.
Mormon Mavens https://www.mormonmavens.com/

Copycat Hardee’s Biscuits

Here in the South, biscuits hold an honored place at your table, no matter which meal is being served.  I don’t make them often because, well, they wreak havoc on any weight loss efforts I may currently be pursuing.  But once in a while someone wants biscuits and sausage gravy and there you go.  

Way back in the 1980’s our family acquired this delicious biscuit recipe from someone who shall remain nameless, because I don’t want to get them in trouble-and I can’t remember his name anyway.

There are lots of ways to serve them–one of my favorite being to eat them with butter and strawberry jam.  Oh and if you like cheese biscuits do this: instead of rolling them out and cutting them, just pinch off a good size portion of dough–like maybe the size of a tangerine or a little bigger–roll it into a ball, then kind of pat it out enough to wrap around about a 2 to 3-inch cube of sharp cheddar cheese, place in your pan and bake.  Shut your mouth good, y’all. If you are from Eastern North Carolina and have been to an Abram’s BBQ you will know what I’m talkin’ about–maybe I will try making a Tutti Frutti some time. Yeah, those…

Next time you get a hankering to have some comfort food, serve up some of these babies and you will be surprised at the compliments you get. By the way, the ingredient amounts on this recipe make for a LOT of biscuits.  I usually just half the recipe.

Be sure and shoot us a comment and let us know how you like these and how you like to serve them.  

Copycat Hardee's Biscuits
Write a review
Print
Ingredients
  1. 8 3/4 c. self-rising flour
  2. 1 1/2 c. Crisco shortening
  3. 2 T. Baking Powder
  4. 1 quart buttermilk
  5. 2 T. Sugar
Instructions
  1. Mix flour, baking powder and sugar for 20 seconds by hand. Work in Crisco.
  2. Add milk all at once. Mix quickly.
  3. Put on floured surface. Roll out to desired thickness and cut with a cookie or biscuit cutter.
  4. Bake at 450 degrees F for 12-15 minutes.
  5. Brush tops with melted butter, if desired.
Notes
  1. We got this recipe from an unnamed source back in the 80's. Hardees might have changed their recipe since then, but these are dang good.
Mormon Mavens https://www.mormonmavens.com/

Ham & Egg Cups

ham-egg-cups


I am sure that you have probably seen a gazillion recipes for this one.  I have seen a few myself–like back in the 70’s–and I had not even tried one yet. So I was going through that stack of Paleo recipes I was telling you about a couple of weeks ago and came across this super simple egg cup recipe and thought it was high flippin’ time I tried one.  This was so easy, you won’t believe it.  As a matter of fact, the original recipe title is Kid Simple Ham and Egg Cups.  There you go.  Your kids could totally make this for breakfast.  And who doesn’t love that little tidbit of something that will help you out, Busy Mama!  Two ingredients, a muffin tin and some cooking spray–BAM!!

Ham & Egg Cups
Write a review
Print
Ingredients
  1. Thin-sliced ham (2 per cup)
  2. 1 egg for each cup
  3. Spices like salt & pepper, ground mustard, etc.
Instructions
  1. Preheat oven to 375 degrees F.
  2. Spray muffin tins with cooking spray.
  3. Place 2 slices of ham in each cup.
  4. Crack an egg into each cup.
  5. Sprinkle with your chosen spices or you can do it later if you forget to.
  6. Bake for 20 minutes.
  7. You're done.
Notes
  1. These egg cups don't even require utensils. You can just pick them up and eat them on the go, if needed. And don't you just love the curly edges of the ham? It's all about the presentation, you know.
Adapted from PaleoBurn Fat Burning Cookbook
Mormon Mavens https://www.mormonmavens.com/

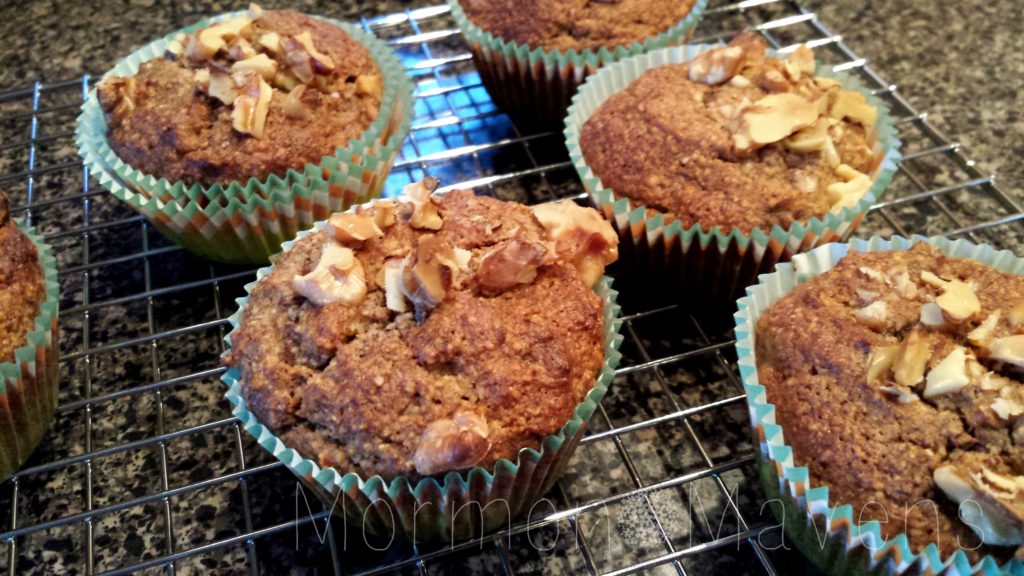
Banana Bread Muffins (Paleo)

banana-bread-muffins-paleo


No, I have not exactly jumped on the Paleo band wagon, but I am kind of running along beside it.  We are trying to eat healthier around here and so I have been checking out recipes from friends, Facebook, Google, Leanne Ely and Jeff Reagan.  So if you have any tried, true and tasty recipes, feel free to share on our Facebook Page .  I will be grateful.

I found this recipe in a packet given to me by a friend who ordered one of those Paleo programs from an infomercial and she never used it–thought she would sell it on eBay, but ended up giving it to me because she was tired of having it around the house.  So I have sifted through each of those cards and found a few that I think are doable.  I thought these muffins were pretty tasty on their own!  And then I found another recipe  I had been wanting to try for a flavored butter spread and made that at the same time.  They were great together, let me tell you.  But you will have to wait until next week for that one.

Banana Bread Muffins (Paleo)
Write a review
Print
Ingredients
  1. 1 1/2 c. almond flour
  2. 2 T. ground flaxseed
  3. 1 t. ground cinnamon
  4. 1/2 t. baking soda
  5. 1/2 t. baking powder
  6. pinch of nutmeg
  7. pinch of salt
  8. 2 very ripe bananas, mashed
  9. 2 eggs, beaten
  10. 1 T. honey
  11. 1 T. olive oil
  12. 1/2 t. vanilla extract
  13. 1/3 c. chopped walnuts, plus extra for garnish
Instructions
  1. Preheat oven to 375 degrees F.
  2. Place muffin cups in muffin tin and set aside.
  3. In large bowl, sift together all the dry ingredients, except the nuts.
  4. In a small bowl, combine all the wet ingredients, including the bananas--mix well. Pour this mixture over the dry ingredients. Add in chopped walnuts, stirring until combined.
  5. Fill the baking cups about 3/4 full--I used a cookie scoop.
  6. Sprinkle a few more chopped walnuts on each muffin before baking.
  7. Bake muffins for 21-23 minutes.
  8. Serve warm with your favorite spread (original recipe suggests coconut oil).
Adapted from PaleoBurn Fat Burning Cookbook
Mormon Mavens https://www.mormonmavens.com/

Chocolate Bombs

It’s the afternoon.  You’re dragging.  And you’re hungry.  “Is there still ice cream in the freezer?” you think to yourself.  “Wait, no, there’s a bag of chips in the pantry!”  Or maybe you’re at the office and there’s leftover birthday cake in the break room.  Or donuts.  Or both!

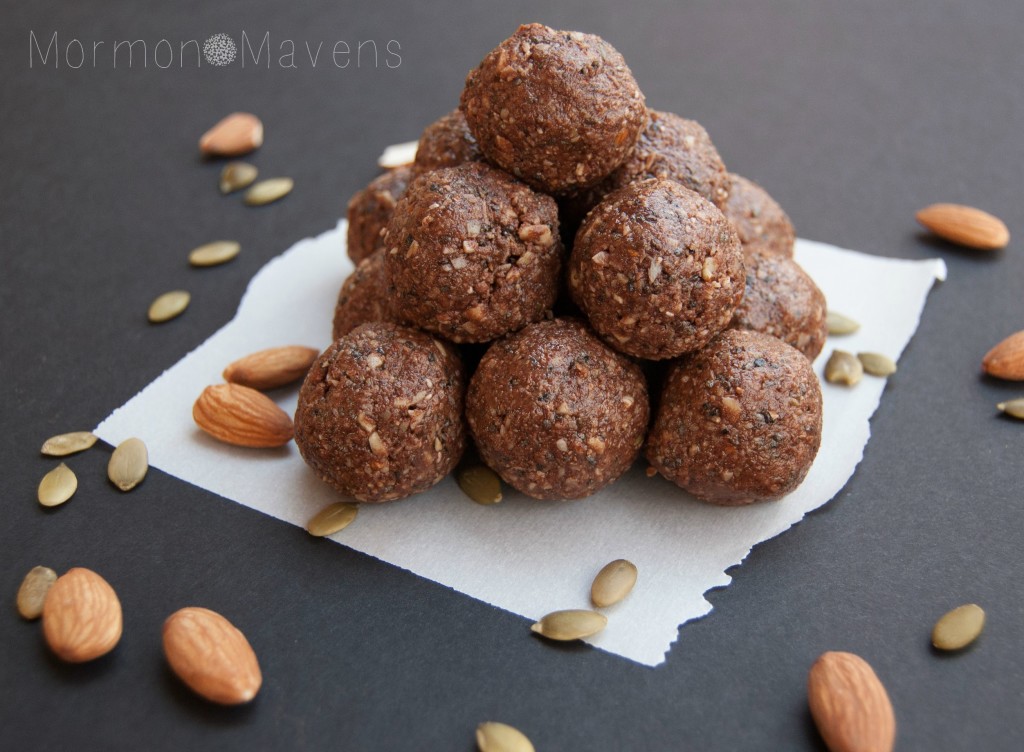
Let me introduce you to my secret weapon against those junk food temptations.  I wage war on those moments with this recipe in my arsenal.  I call them….(pause for dramatic effect)…..Chocolate Bombs!

Ever since I found this recipe from The Gabriel Method E-Cookbook, it’s been my go-to for fighting hunger and snack attacks with a healthy and filling alternative.  One of my most vulnerable times for hunger is Sundays.  I try to eat something right before I leave, but by the time I get home after church (which is three hours long) I am ready to eat the front door!  Armed with a few of these tucked away in my purse or waiting for me in the car, I soothe the hunger beast during the twenty minute drive home.

You could make a breakfast of these if you like; or just snack on them when you need a pick me up or have an afternoon snack attack.  I always have a big glass of water (or water bottle) on hand with these as they are quite the mouthful!

It’s the afternoon.  You’re dragging.  And you’re hungry.  “Chocolate bombs to the rescue!” you shout triumphantly.

chocolate bombs 2

Chocolate Bombs
Yields 10
Tasty, filling, healthy snack treats
Write a review
Print
Prep Time
10 min
Prep Time
10 min
Ingredients
  1. 1/3 cup almonds
  2. 1 Tbsp chia seeds
  3. 1 Tbsp pumpkin seeds
  4. unsweetened coconut (to taste)
  5. 1 tsp. sesame seeds
  6. 4 tsp raw cacao
  7. 3 Tbsp almond butter
  8. 2 Tbsp coconut palm sugar
  9. 1 Tbsp raw cashew butter
  10. 5-10 drops liquid stevia
  11. 1 tsp cinnamon
Instructions
  1. Place all the ingredients in a food processor and process until the almonds are in very small pieces.
  2. Check the consistency by taking a small amount of the mixture and forming it into a ball. If it's too crumbly, add more almond or cashew butter in small amounts and process again. Once it will form a ball, you've gotten it right!
  3. Using your hand or a small cookie scoop, take out tablespoonfuls of the mixture, squeeze if necessary, and roll into a ball in your hands.
  4. Eat immediately or store in the fridge in an airtight container.
Notes
  1. The original recipe calls for Tahini in place of cashew butter. Not a Tahini fan, so I subbed. The original also called for a teaspoon of stevia but I only had liquid. For the cacao I increased the amount from 3 teaspoons in the original, to 4.
  2. How much coconut you say? I'm a coconut lover, so I would guess I add 1/4 cup. This will affect how much extra nut butter you need to add at the end (if any).
  3. I love these. So when I make them, I triple the batch. Tripling just fits the mixture in my Ninja food processor
Adapted from The Gabriel Method E-Cookbook
Mormon Mavens https://www.mormonmavens.com/