Tater Tot Breakfast Casserole


It was one of those days when I felt the urge to serve breakfast for supper.  

And so I did.  

Fortunately, I was watching Pioneer Woman while ironing a million white shirts earlier in the day and she was preparing a brunch which looked mighty delicious. I went to the Food Network site and found her show…and this recipe.

Now, she was prepping for a brunch with friends for “the next day” and so she put the recipe together, covered it, and then put it in the fridge overnight.  I didn’t do that, but I did have it in the fridge for about 4 or 5 hours, so it still worked.

It was delicious and it is gone now.  We ate it up pretty quickly.


Due to technical difficulties today, we are using the older format for our recipe.  


Ingredients:

1 16-oz. bag frozen tater tots
Butter for your baking dish
1 T. olive oil
1 lb. spicy bulk breakfast sausage (I used 1 cup Thrive)
1 medium onion, finely diced (who wants to do that?  I used Thrive)
1 cup milk
1/2 cup half-and-half
1/4 t. seasoned salt
1/4 t. cayenne 
4 large eggs
1 red bell pepper, finely diced
1 green bell pepper, finely diced
2 cups grated Cheddar cheese (I used Mexican blend, on hand)
1 cup grated pepper jack cheese (I used regular jack, on hand)
Kosher salt and freshly ground black pepper

Instructions:

  1.  Line up the tater tots in a buttered 9 x 13 baking dish.
  2. Add the olive oil to a large skillet over medium heat.  Add the sausage and onion and cook, breaking the sausage up with a wooden spoon , until browned and cooked through, 8-10 minutes. OR…do what I did and use Thrive foods.  Scoop 2 cups of Sausage Crumbles and about 1/4 cup of already refreshed Thrive chopped onion.  Toast up for a few minutes–seriously, like 4 minutes– in the olive oil.
  3. Set meat aside and let cool a little, then sprinkle over tots.
  4. In a large bowl, mix the milk, half-and-half, seasoned salt, cayenne, eggs, bell peppers and half of each cheese and salt and pepper to taste.  Pour over the tots/sausage mixture, then top with the rest of the cheeses.  Cover with foil and refrigerate overnight or until you need to cook it.
  5. Preheat oven to 350 degrees F.
  6. Bake, covered, for about 25 minutes.  Remove foil and continue to bake until the cheese is brown and bubbly and the casserole is cooked through–about 20-35 minutes.
  7. Cut into squares and serve with sliced tomatoes, grapes or other appropriate sides.


SOURCE:  Ree Drummond, The Pioneer Woman on FoodNetwork.


Last Minute Tortilla Bake


The other day my husband mentioned, in passing, that our daughter and her family were coming over that evening.  I had no plans for supper and no time to go to the store so I threw this dish together “on the fly.”  It’s not super amazing or anything, but it was tasty and filling and I was able to feed the 6 of us–which included my two grandsons, ages 4 and 2–from items I had at home.  Don’t you love throwing things together and having them magically turn into a meal?
 
Ingredients:
12 corn tortillas
rotisserie chicken (left over from a previous meal)
Colby Jack Cheese
Salsa Verde (Herdez is a great brand, in the Hispanic Food section of your grocery store)
Purple bell  peppers (we picked these up at a local farmers’ market and I thought they would be a fun garnish)
 
1.  Spray a 9×13 baking dish with cooking spray.
 
2.  Cover bottom of dish with 6 corn tortillas, chop or chunk the chicken and spread over the tortillas, spoon desired amount of salsa over top, and sprinkle with about half a cup or more of cheese.  Repeat layers one more time and sprinkle with purple bell pepper strips.
 
3.  Bake 30 minutes at 350 F., or until cheese is melted and tortillas are crispy on the edges.
 
I served this with a big bowl of cut up watermelon, stir-fried zucchini with Mediterranean seasoning, and a Roasted Corn Blend that I found at Sam’s in the frozen vegetable section.  I stir-fried that with some olive oil.  Yummy.

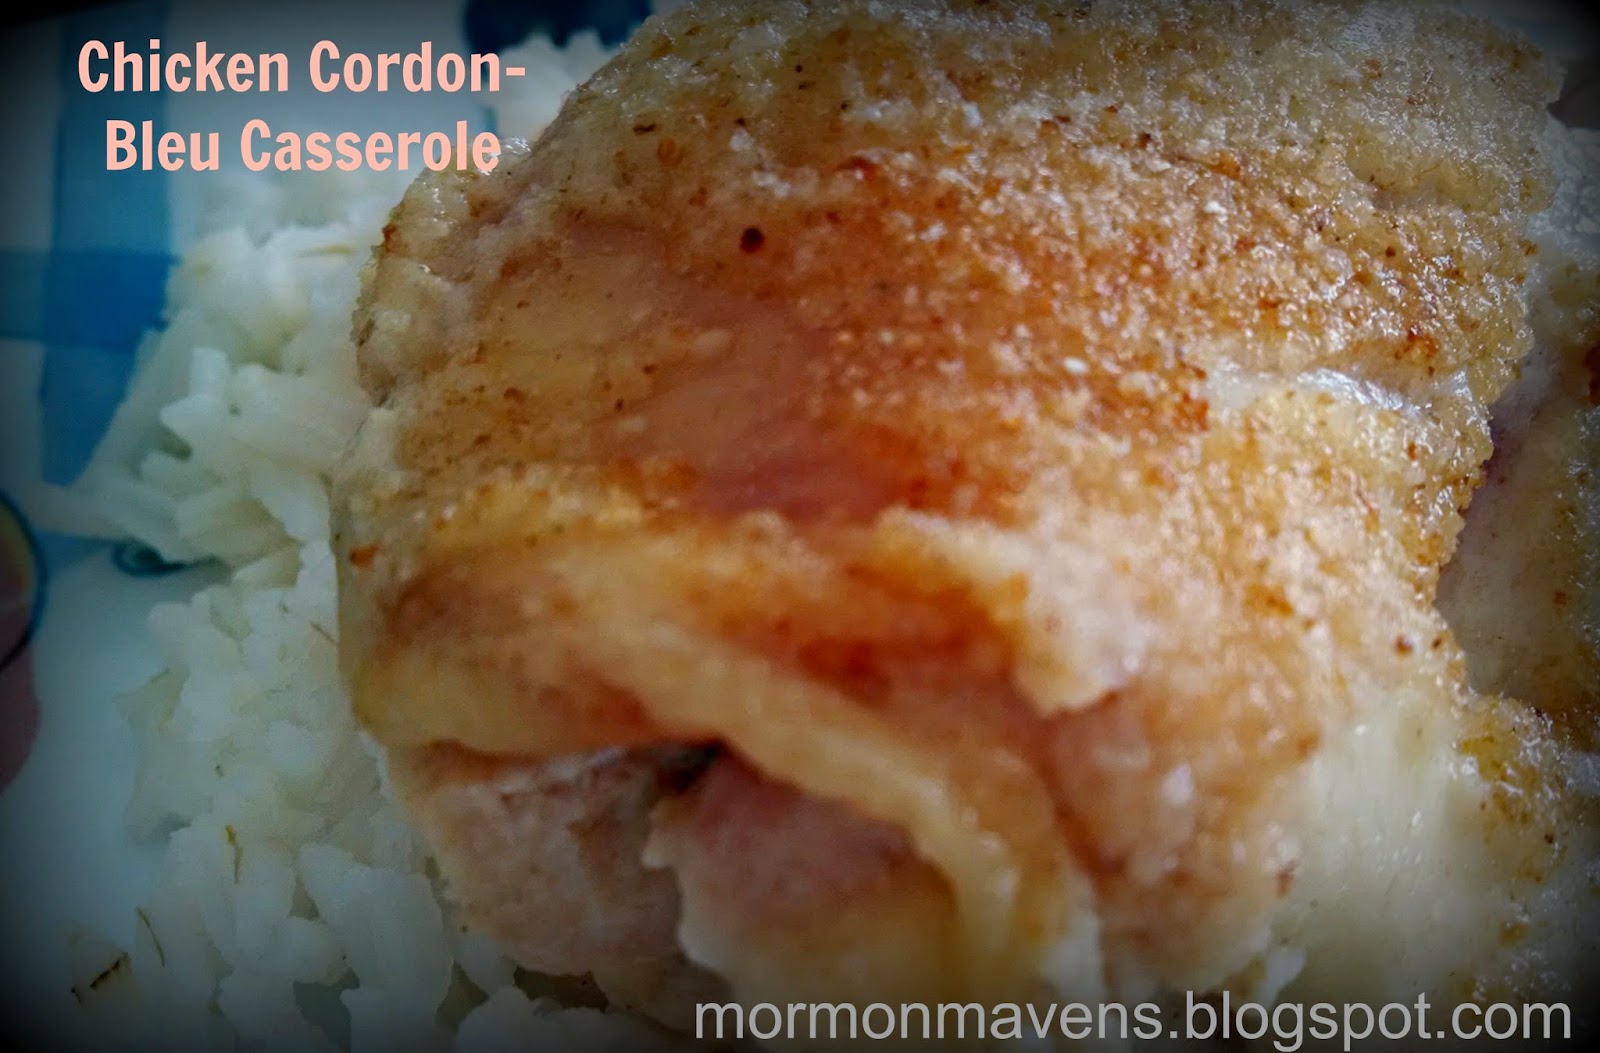
Chicken Cordon-Bleu Casserole

I love this casserole, I especially love that it doesn’t have any condensed soups in it!

6 cooked chicken breast
      -I bake mine in the oven @ 350 for about 40 min, the first 20 of which the pan is covered.
6 slices cooked ham
6 slices Swiss cheese
4 Tbsp. butter
4 Tbsp. flour
2 Cups milk
1/4 tsp thyme (I use my Penzeys Poultry Seasoning in place of this and love it)
1/4 tsp salt
1/4 tsp pepper
1 beaten egg
1/4 cup breadcrumbs
1 Tbsp. melted butter

Place the chicken breast in a 9X13 baking pan.  Place the ham on top of the chicken and the Swiss cheese on top of the ham.  In a mixing bowl combine milk, thyme, salt, pepper, and egg.  In a medium sauce pan melt the butter then add the flour and whisk until smooth.  Add milk mixture and cook on medium heat until thick and bubbly.  Pour over the chicken/ham/cheese evenly.  Sprinkle the bread crumbs on top then drizzle the butter over the bread crumbs.  Cook at 350 for about 30 mins.  Serve over rice.

Source: My amazing friend Kym Wood

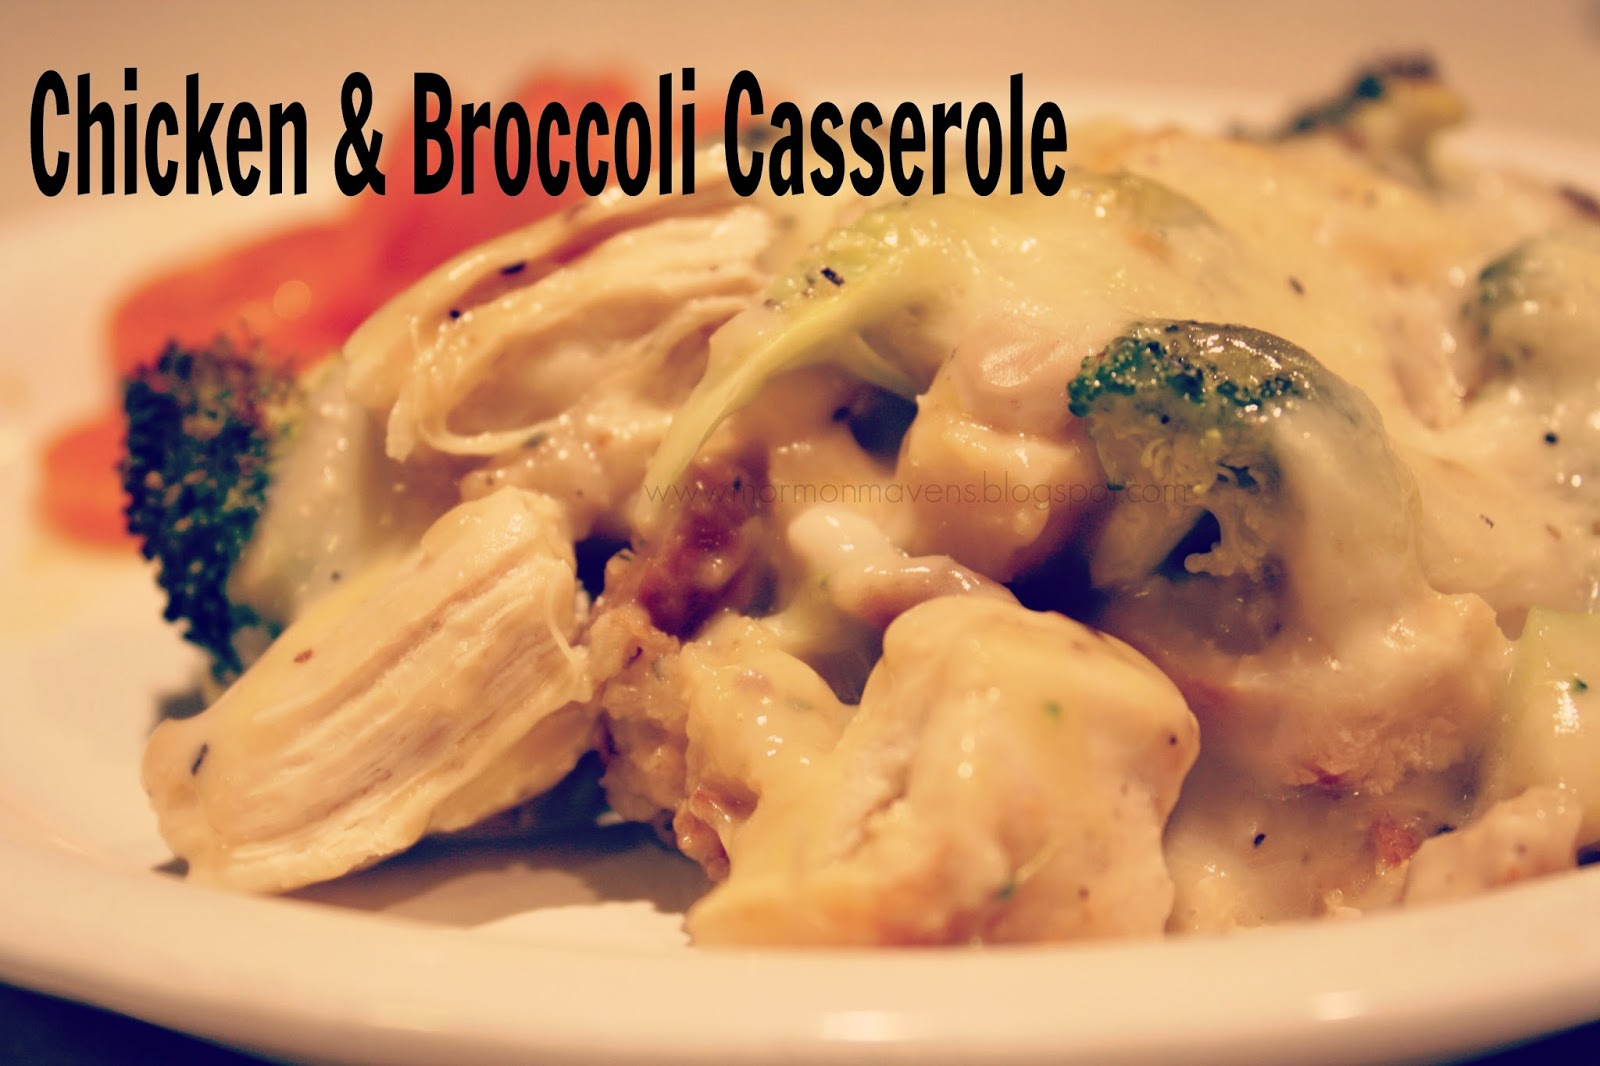
Chicken & Broccoli Casserole

I got this great recipe from a good friend named Ginni.  I do things differently with it from time to time, but it is still basically the same. Its all good.  You can not go wrong with this one. Its simple, tastes great, comforting, and all in one dish!  Enjoy!

Ingredients:
1 box Chicken Flavored Stovetop Stuffing Mix. Prepared according to package directions.
3 chicken breasts, cooked the way you like it (I grill it.) chopped into bite sized pieces
1 head of broccoli, cleaned and cooked until it looses some of the crunch, cut into bite sized pieces.
1 can cream of chicken
1 can cream of mushroom
1 cup water, or milk
salt
pepper
Swiss cheese slices

Preheat oven to 375 degrees. Spray your baking dish. I use an 11×7 size dish. Spread out your Chicken flavored Stovetop Stuffing on the bottom of the baking dish.  I usually spoon in the stuffing and then wit  a wet spoon I spread it out a bit until the bottom of the dish is covered.  Sprinkle the chicken over the stuffing evenly.   Sprinkle the broccoli over the chicken. then in a separate bowl pour in the cream of chicken and the cream of mushroom soup. add the cup of water and stir until incorporated. Continue to add water until the mixture is pourable. Pour the mixture over the casserole. Sprinkle with salt and pepper. Lay swiss cheese slices over the top of the casserole. Bake at 375 for about 25-30 minutes. Watch that the cheese doesn’t brown too much. You can always turn it down or cover it with tin foil.

Original recipe by Ginni White

Baked Macaroni and Cheese

Baked Macaroni and Cheese
    Who doesn’t love a good old Mac n’ Cheese? I certainly haven’t met anyone who doesn’t! This is supposedly the original version of the recipe that Thomas Jefferson brought back from Europe along with the first Macaroni machine. Feel free to fact check me on this. 
Macaroni and Cheese
1/2 lb Macaroni
1 Tbsp butter
1 egg
3 cups cheddar cheese
1 cup milk
1 tsp salt
1 tsp dry mustard
1/2 tsp Worcestershire sauce
Pinch of Paprika
Cook macaroni, add butter, 1/2 to 3/4 of the cheese to hot macaroni. Mix. To make milk mixture warm milk (not too hot), add egg, mustard, Worcestershire sauce, and salt. Put pasta in 13×9 inch baking dish. Pour milk mixture over pasta. Top with remaining cheese (or extra if desired). Bake at 350 for 30 minutes. 
Optional: top with buttered cracker crumbs or panko.
Source: Kim Anderson

Hashbrown Breakfast Casserole

YUM! YUM!  Everyone likes this casserole.  It’s easy to make and easy to eat! LOL!

2- 12 ounce bags frozen, shredded hashbrowns, thawed (at least 30 minutes)
1/4 cup unsalted butter, melted
1 cup of diced deli ham
1/2 – 2 cups shredded cheddar cheese, or your favorite kind of cheese!
6 large eggs
1 cup evaporated milk
salt
pepper

     Preheat oven to 425 degrees. Squeeze moisture out of thawed potatoes then put them in a large bowl. Pour melted butter over potatoes and stir well until combined. Pour the potatoes into an ungreased 9×13 casserole dish, and press them to make a crust. I press them up the sides of the dish also.
     Bake until the potatoes start to brown around the edges, at least 10 minutes.
     Into a big bowl add the eggs, the milk, salt and pepper.
     Remove the potatoes from the oven. Sprinkle the diced ham over the  potatoes, then sprinkle the cheese over the ham. Pour the egg mixture over the cheese and ham.
     Bake for about 25-30 minutes, or until golden brown on top.

Crockpot Mac & Cheese

This is probably the recipe I get asked for more than any other. It is heavenly! If you like creamy, cheesy, gooey mac and cheese, this recipe is for you! The youth at church ask me to bring it to every pot luck dinner, and they scrape the pot clean! 
 
 
Crock Pot Mac and Cheese
 
 
Ingredients:
4 cups dry macaroni noodles
1/2 cup butter, melted
2 cans evaporated milk (you can use regular milk if you don’t have this)
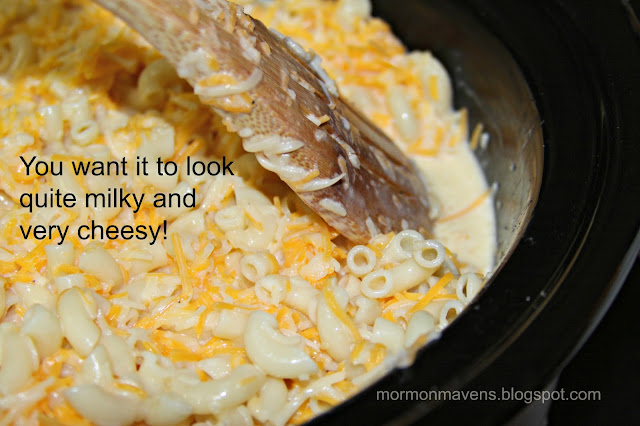
3 cups milk (Ok, I never measure this…I just add it until it looks almost right. See photo and note below.)
4 eggs, beaten
8 cups shredded cheese (I personally like the shredded Mexican Blend, but sharp cheddar is yummy too.)
Salt and pepper to taste 
 
Directions:
1. Cook macaroni noodles in salted water until done. Drain off water and put into crock pot.
 
2. Pour in melted butter, evaporated milk (or a few cups of milk), beaten eggs, salt and pepper. Stir until mixed.
 
3. Add about 6-7 cups of the shredded cheese. (You want to save a cup or two to spread over the top.) Mix in the cheese and add a few more cups of milk. Keep adding a little milk until you have it just right. You know you have enough milk when you pull back the noodles, and you can see milk a little below the surface. See photo. I have never measured the milk, because this is how my grandma and mom taught me to do it. : )
 
4. Put a cup or two of shredded cheese over the top of the mixture and cover with lid.
 
5. Cook on HIGH for 45 minutes to 1 hour (until it’s nice and hot), and then turn it to LOW or WARM for another few hours. In my crock pot, if I leave it on LOW, it will burn the edges and overcook it, so I turn it down to WARM. It’s done when the milk and eggs are absorbed and set.
 
6. Enjoy every last bite of this delicious macaroni and cheese! 
 
Notes:
1. This recipe makes enough to fill a huge 6 quart crock pot. If you have a smaller crock pot, you might want to half the recipe. You can also cook a half recipe in a casserole dish in the oven. Cover with foil and bake at 350 degrees for about 30 minutes. It’s done when the milk and eggs are absorbed and set. Some people like to take the foil off and let it bake uncovered for about 10 minutes so the cheese gets crusty. I like creamy and melty cheese, so I keep mine covered the whole time.
 
2. You can use whatever cheese you like, and as much or as little as you like. I have a friend who puts in some Velveeta cheese, although I would never do that because I am crazy over cheddar cheese. My point is, use your favorite cheese and make it your own!
 
3. I often make it without the evaporated milk and just use 2% milk or whatever I have in the fridge. I’ve even used reconstituted powdered milk and it turned out great. 
 
Source: I have made this for years and years and cannot remember when or why I first made it, or who might have given me the idea. All I know is that it is the best mac and cheese I have ever had!


Six Layer Casserole

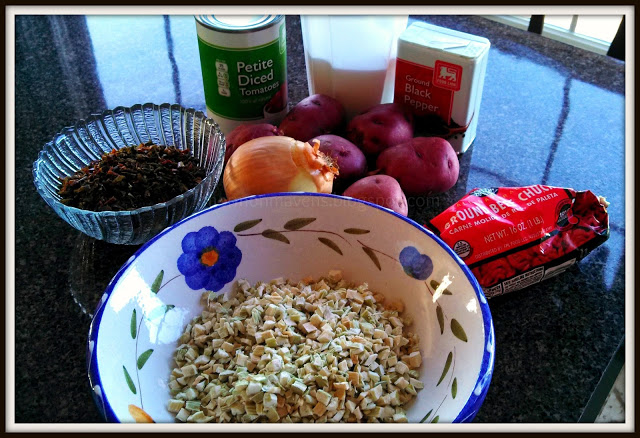
This is one of the recipes that I got from my Mom years ago and I pulled it out of my family cookbook the other day to fix sometime soon.  Sometime soon is today, but we will be eating a late supper.  This has to cook an hour and a half. I really like it because it is simple, good food.  I also took this as an opportunity to use some of my food storage items–the celery and the bell pepper.  I have both of these in my pantry in dehydrated form, so after re-hydrating according to the package directions, I was able to use them in my casserole.  I substituted Mixed Bell Peppers for the minced green pepper.  I will just give you the basic ingredient list so that you can make this the first time from fresh vegetables.


Ingredients:
2 cups sliced raw potatoes (I used red potatoes, unpeeled, to save time)
2 cups chopped celery 
1 lb. lean ground beef, browned
1/2 cup sliced onion
1 cup minced green pepper
2 cups cooked tomatoes, drained
2 tsp. salt
  pepper, to taste


1.  Grease a 2 quart casserole dish.
2.  Layer potatoes, celery, beef, onion, and green pepper.
3.  Combine tomatoes, salt, and pepper and spoon over top.
4.  Cover and bake about 1 1/2 hours at 350 F.

Source: Pat Brew, Greenville, NC.

Homemade Chicken Pot Pie

I was thinking of giving you a recipe for a diet soup that I love, but then I thought that everyone should know how to make a delicious homemade pot pie for those days that you need a little comfort food! The diet soup can wait for another day!

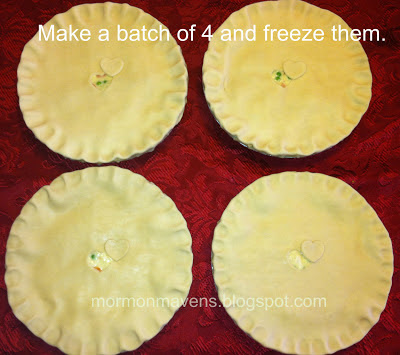
I make these in batches of 4 and freeze them, and then I have something quick to pull out of the oven for dinner on a busy day. My kids LOVE these! People ask me how many one will feed, and here is my answer: It will feed me 7-8 servings, but it will feed my son Curtis, who is 16, only 2 servings. It would definitely feed 4 really hungry normal people who are not teenage boys.  (smile).

Homemade Chicken Pot Pies

Ingredients:

4 frozen pie shells (or you can make homemade crust)
4 cups cooked, diced chicken
1 large can cream of chicken soup (or 2 small cans – about 20 oz)
1 8 oz package cream cheese, softened
1 1/2 cups baby carrots cut into slices
1 cup frozen peas
1/4 cup (or more) diced onions
4 cups potatoes, diced 
1 can of corn (or some frozen corn)
2 chicken bouillon cubes (or 1 if you like less salt)
2 boxes of roll out top crust (This will give you 4 top crusts) I recommend Pillsbury brand – or you can make homemade
1/2 cup flour and 1/2 cup water
1/2 tsp of Poultry Seasoning (or  a little Thyme, Oregano and Sage)
Salt and pepper to taste

Directions:

1. Put the diced potatoes, carrots and onions in a pot. Cover with water. Add the bouillon cube and some salt and pepper. Bring to a boil and cook until the potatoes are done…but not mushy and falling apart.

2. In a small bowl, add 1/2 cup flour to 1/2 cup of water and mix with a fork until smooth. Pour this slowly into boiling pot of vegetables while stirring briskly. This will thicken the water that the vegetables are cooking in. Turn off heat and let it cool down a bit.

3. In a large mixing bowl, beat the cream cheese until smooth with a hand mixer. Add in the cream of chicken soup and poultry seasoning. Mix until well blended. Add the chicken, corn, peas, and the cooked potato/carrot/onion mixture. Mix all ingredients together until well blended.

4. Add this delicious mixture to the pie shells, dividing mixture evenly between the 4 pie shells.

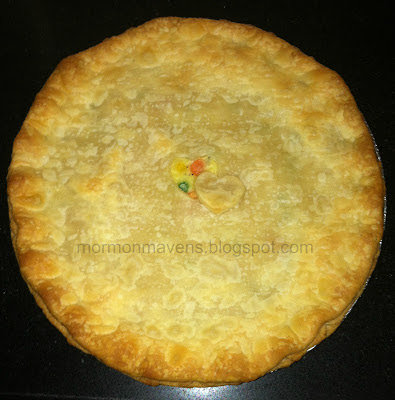
5. Roll out your crust onto the counter. (Cut a heart in the center for a vent hole if you would like – it’s so cute!) Place the crust on top of the pie. Fold under the extra crust as neatly as possible around the edges. Then pinch the edge of the crust to seal. If you have no idea how to to that, look up a tutorial. It is so hard to explain in words. But it is easy to do, and everyone has their own way of making their crust edge pretty. 

6. If you did not cut a heart into the center of the crust, cut a few vent holes into the top crust. Just take a knife and make a few small cuts.

7. At this point, I put a square of wax paper on top of the pie, then cover with foil and put in the freezer. I suppose you could skip the wax paper if you don’t have any.

8. If you want to bake one right away, bake it at 375 degrees for 30 – 45 minutes, depending on how dark you like your crust.

9. When baking from frozen, bake at 350 degrees for 1 hour and 15 minutes.

YOU ARE GOING TO LOVE THESE CHICKEN POT PIES!

Notes: 
1. Kids love to help make these! And they love eating them too!

2. These are perfect to have on hand when you need to take someone a dinner, or when you forgot to plan dinner for your own family.

3. We made these for a fund raiser at church to help earn money for girls camp. We sold LOTS of them and people liked them very much!

Source: Adapted from my friend Becky Robinson, Rock Hill, SC.


Chopstick Tuna Casserole

In case you don’t know this, I love retro.  I went back to the 60s for this recipe that my Mom used to make for us.  I don’t know how often we had it but when I was looking through some of her old recipes one day, I saw it and added it to my collection.  When we were compiling a family recipe book I included this one in it.  I don’t make it very often because M doesn’t like the word casserole and it has celery in it, which is actually one of my favorite parts, along with the cashews.  Well, there just isn’t any ingredient that isn’t good in this dish.  I hope you enjoy it as much as I do, and guess what?  It’s low fat and healthy.  You can use the healthier version of Cream of Mushroom soup and it is still yummy.

Ingredients:
1 can Cream of Mushroom soup
2 cups chow mein noodles
1 can tuna, drained and flaked
1 cup sliced celery
1/2 cup toasted cashews
1/4 cup chopped onion
1/4 cup water
Dash of pepper

1.  Combine soup and water in a medium bowl.
2.  Add 1 cup chow mein noodles, dash of pepper and remaining ingredients.  Toss lightly; turn into square baking dish.
3.  Sprinkle with remaining noodles.  Bake at 375 for 30 minutes.  Enjoy the aroma coming from your oven as this bakes.  Seriously.  Mouth watering.

Source:  Patricia D. Brew