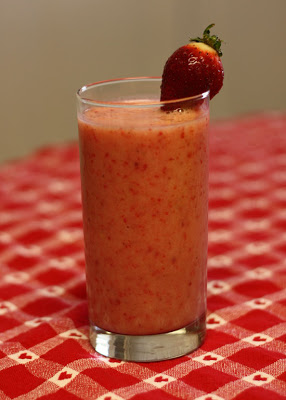
Jamba Juice’s Strawberries Wild Knock-Off

I’m expecting my second child in just two short weeks. I’ve started to pull out my recipes that are quick to make, nutritious, and can easily be eaten while I’m nursing. (I was always starving while I nursed my first baby!)  Enter Smoothies. I LOVE Jamba Juice…. sadly I live in the part of the country that there are none. That’s not a problem…. with some trial and error, I think I’ve made up a good knock-off of one of their more popular smoothies. Enjoy!


Jamba Juice’s Strawberries Wild Knock-Off 
1 c. apple juice
1 banana
1c. frozen strawberries
1 (6 oz.) light vanilla yogurt (you could also use frozen yogurt if you have that)
½ c. ice

Blend, and enjoy!

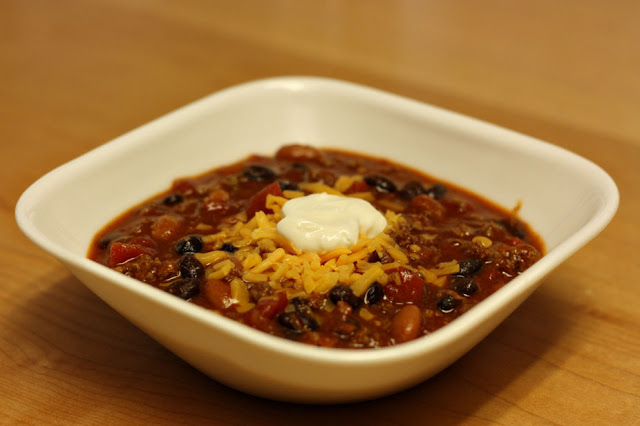
Ground Beef Chili

My favorite grocery store (Publix) often has meal demonstrations with samples to try. They also conveniently have all the ingredients ready to pick up right next to the station. I swung in to get a few items, and came out with a whole meal ready to cook. This chili is great. Originally, it has a good bit of a kick to it, I love that, but my husband’s tummy doesn’t… so I tamed it down a bit. The leftovers were great over baked potatoes too!

You can cook this fast or slow. Both variations are included below.

Ground Beef Chili
Serves 8

Ingredients 
1 onion, coarsely chopped  (my husband doesn’t like onions, so I substituted onion powder, tasted great!)
1 1/2 lb ground chuck beef
3 tablespoons chili powder (I only used 2 T.)
1/2 teaspoon seasoned salt
1/2 teaspoon pepper
1 (10.75-oz) can condensed tomato soup
1 (14.5-oz) can diced tomatoes/sweet onions, undrained (I used regular diced tomatoes to tame the spice a little) 
1 (10-oz) can milder diced tomatoes/green chiles, undrained (Ro-tel Brand)
1 (16-oz) can chili beans in mild sauce, undrained)  (Bush’s Brand)
1 (15-oz) can black beans, drained

Directions
Preheat large saucepan on medium-high 2–3 minutes.
Place beef, chili powder, seasoned salt, pepper, and one-half of the onions in pan; cook 4–5 minutes, stirring to crumble meat, or until meat is brown and no pink remains.
Stir in remaining ingredients, including remaining one-half onions.
Bring to a boil, stirring often.
Reduce heat to low; cook and stir 10 more minutes to blend flavors. Serve.

Slow Cooker Variation
Combine everything, except beef, cook on low 4-6 hours. About 10 minutes before serving, brown the beef then stir into chili.

I served it with some cheddar cheese and sour cream along with some Corn Muffins on the side. YUM!

Homemade Magic Shell

Not that I’m a huge fan of Magic Shell, but I have to admit the coolness of instant-hardening chocolate sauce is pretty hard to resist.  The kids think this is pretty awesome.  And truth be told, so do I.

Ingredients:
1/2 cup coconut oil
1 1/4 cups semisweet chocolate chips

1. Place coconut oil and chocolate chips in a microwave safe bowl and cook on HI for 1 minute.  Allow the bowl to set for just a minute or two so the hot oil can melt the chips.  Stir well with a whisk.
2.  Pour sauce over ice cream servings!

Notes:

  • Coconut oil is a solid at room temperature so look for a jar of it, not a bottle.  The brand I bought is Spectrum.
  • Store your leftover sauce in something that you can microwave later.  It helps to have a bottle that is microwave safe so you can pour easily, but you don’t have to.  We just spooned it on.
  • Store in the fridge.  To use, reheat in microwave at 30 second intervals until it’s liquid again.
Source:  alphamom.com, who has way cooler photos than I do

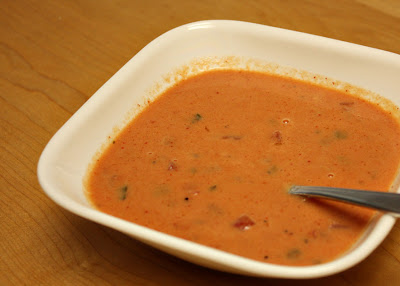
Creamy Tomato Soup

As a child I was not a fan of tomato soup. Well, thank goodness I got over that… because this soup is just too yummy. I was “introduced” to it at a church function last year, I enjoyed one (or two) bowls, and had the recipe in hand within 24 hours.

This recipe is so easy. It’s one of my go-to “I forgot about dinner” recipes. You just dump, simmer, and you’re done. (You may never go back to condensed soup after this)

Creamy Tomato Soup

1 [28oz] + 1 [14.5oz]can of PETITE diced tomatoes (I usually get the Italian seasoned ones)
46 oz. can  tomato juice
14 leaves fresh basil, diced
1 cup heavy whipping cream
1/2 cup butter salt and pepper to taste

1. Place tomatoes, juice, and basil in a stock pot over medium heat. Simmer for 30 minutes.
2. Puree the tomato mixture along with the basil leaves, with an immersion blender. (I don’t puree it because I like my soup a little chunky.)
3. Place the pot over medium heat, and stir in the heavy cream and butter. Season with salt and pepper. Heat, stirring until the butter is melted. Do not boil.

 *This recipe makes a lot of soup. I also think it would be a great dieter’s recipe since the only fat in the whole recipe is from the cream and butter. I honestly think you could probably omit the butter and it would still taste fantastic. The soup also keeps well in the fridge and reheats nicely.

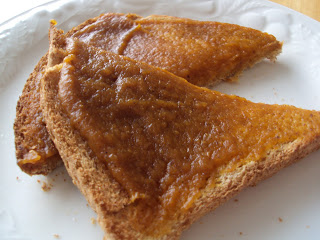
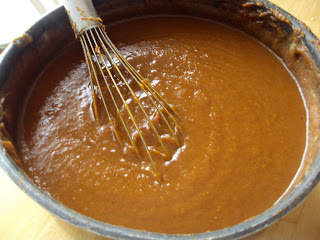
Homemade Pumpkin Butter

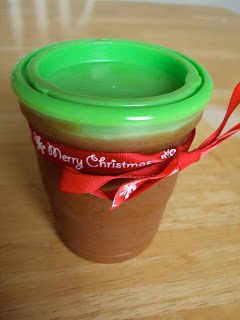
This is one of my favorite fall flavors!  Pumpkin with all of the spices.  It’s pretty much pumpkin pie that you can spread on toast or pancakes and stir into your oatmeal.  This is for a large batch that will fill about 15 freezer jam jars (which is the recommended jarring method). Check out THIS link for more info.  
Ingredients:  
2- 29oz cans pumpkin puree
4 c apple juice or cider
3 c white sugar
4tsp ground ginger
1tsp ground cloves
1tsp ground nutmeg
4tsp cinnamon
  1. Combine all ingredients in a large sauce pan.  Stir well. 
  2. Bring the mixture to a boil. Keep stirring.  Constantly.  Or it will bubble and spit pumpkin at you!
  3. Lower heat and simmer (while stirring) for about 30 min or until it reaches the desired consistency. 
  4. Cool for about 10 minutes before transferring to freezer jam jars.  Then cool another 10-20 minutes before you put the lids on.  
  5. Refrigerate or freeze.  Tie a cute ribbon or something crafty to it and give it as a gift!  
HAPPY HOLIDAYS!

Creamy Italian Tomato Sauce

Here’s another new recipe from the Worldwide Ward Cookbook that I reviewed here a little while back.  I’m not a big fan of red sauces, in general, so when I saw a creamy version I was very interested.  It’s got a nice flavor and is a perfect replacement for marinara or spaghetti sauce.  It also made a LOT.  I served my family a generous portion of rotini pasta and still had two quarts to spare.  Those went straight to the freezer for future meals.  My next adventure with this sauce will be to try it on pizza in place of traditional pizza sauce!

Ingredients:
2 Tbsp. olive oil
1 Tbsp. butter
1 Tbsp. dried basil
pinch of red pepper flakes
3 medium onions, chopped
1 tsp. minced garlic
dash salt
3 (29 ounce) cans tomato sauce
7 ounces Gouda cheese
1 pint heavy cream

1.  Heat olive oil and butter in large pot over medium to medium-high heat.  Add basil, red pepper flakes, onion, garlic, and salt and cook until onion is tender.
2.  Add tomato sauce and simmer over medium heat for at least 20 minutes.
3.  Cut Gouda cheese into chunks and add to sauce, stirring until melted.  Add heavy cream and remove from heat, stirring until well combined.
4.  Serve over pasta and top with grated Parmesan cheese.

Source:  adapted from Worldwide Ward Cookbook

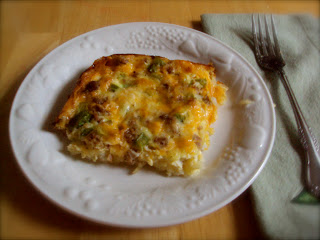
Hashbrown Quiche

This is one of our favorite breakfast-for-dinner meals.  Also nice for a holiday breakfast or brunch.  Try your own meat and veggie varieties.  It’s yummy! P.S.  I think I found this recipe in a Taste of Home Magazine about 10 years ago. 
Forgive me if I’m mistaken.  

Ingredients:
4c shredded hashbrowns, thawed and squeezed dry with paper towels
5T butter, melted
…………………..
1/2 lb Jimmy Dean (regular) bulk ground sausage, crumbled and cooked
1/2 c diced green pepper
1T dried onion
1 c (or more) shredded cheddar cheese
…………………..
4 eggs
1c milk
1/4 tsp pepper
Salt to taste (I will omit the salt if I use bacon instead of sausage)

  1. Preheat oven to 425* for baking the crust (you’ll change it for the quiche)
  2. Make sure as much of the moisture as possible is soaked out of the hashbrowns to make a nice crispy crust.
  3. Press the hashbrowns into the bottom of a 9×13 pan and drizzle with melted butter and bake at 425* for 25 minutes.
  4. While the crust is baking, prepare the filling.  Mix the meat, peppers, cheese and onions in one bowl.  Mix the eggs, milk, salt and pepper in another bowl.  
  5. When the hashbrown crust is done baking, change the oven temperature to 350*.  
  6. Pour the meat mixture into the pan and spread evenly over the crust. Then pour the egg mixture over the top.  
  7. Bake at 350* for 25-30 minutes.  Cool 10 minutes before cutting and serving.  

*We like to serve ours with a side of salsa…but we’re big fans of salsa… =)

Make Ahead Mashed Potatoes

I LOVE mashed potatoes. This recipe is pretty much amazing in my book. I hope you enjoy!

5 pounds potatoes, washed, peeled and diced
2 Tbsp. Butter
8 oz. Cream cheese
8 oz. Sour cream
2 tsp. Garlic Salt
Chopped Chives, optional

Bring water to a boil and cook potatoes until tender. Place into mixer add butter, and mash potatoes. Add cream cheese, sour cream, and garlic salt. Beat until fluffy. Pour into greased 9×13 casserole dish top with chives if wanted. Cover with foil.

You can either place in the fridge – it’ll stay great for up to 3 days or you can cook them right away.

Cook covered, at 350 for 30-45 minutes (based on if it’s chilled or warm).

Chicken Tortilla Soup

A very easy and delicious version of tortilla soup that can be made with food storage ingredients. Your kids will love helping with this one.  And guess what? 
 It has a hint of lime!  
Ingredients
2 cans (28oz or 3 1/2c) Chicken Broth
1/8c Taco Seasoning (or to taste)
A few shakes of garlic powder =)
Juice of 1 lime
2 chicken breasts, cooked and cubed*
1 can of corn with liquid
1 can of black beans, drained and rinsed
1 can of diced tomatoes with green chiles (Rotel offers Mild, Medium and Hot!) 
1 large avocado, peeled and diced
  1. Pour broth into soup pot, add taco seasoning, garlic powder and lime juice.  Stir until well blended.
  2. Add all other ingredients except avocado.  Bring to a boil, lower heat and simmer for 15 min or so.   
  3. Add avocado just before serving.  
  4. Serve with shredded cheddar cheese, sour cream and some crispy tortilla chips.  Mmmmm.  

Adapted from AllRecipes.com Six Can Chicken Tortilla Soup


*The original recipe calls for canned chicken, which works if you’re going for a food storage friendly recipe.  But I would argue that it’s much better with fresh or frozen chicken breasts.  =)  
*The amount of taco seasoning you add will add or decrease the spiciness of the soup, so if you like it spicy….bring it on!  
*ALSO…if you have Kids in the kitchen, they will love helping you empty the cans into the pot!  

Homemade Butterfingers

It’s not my normal recipe posting day, but I just had to go ahead and share this for two reasons.  One, it involves an ingredient that is going to be more prevalent right now and will, after Halloween, be on super sale.  Two, I seem to have an obsession with peanut butter and chocolate.  Butterfinger is one of my favorite candy bars, so when I saw this recipe floating around Pinterest, I had to give it a try.  I was skeptical because, really…three ingredients?  But one bite and I was forced to exclaim (exclaim, people!) “Oh my gosh, it tastes just like it!”  I hope you enjoy it.  I’ll be stocking up on some cheap candy corn this season!


Ingredients:
1 lb. candy corn*
1 lb. creamy peanut butter
1 lb. chocolate candy coating**
 
1.  Prepare an 8″x8″ pan with a light coat of cooking spray.  Lay parchment paper or wax paper in the pan so that it covers the bottom of the pan, leaving the ends hanging over two edges.  (You will use these “handles” to lift out the bars, making it easier to cut them and set them out for chocolate coating.)  
2.  Lightly coat a glass mixing bowl with cooking spray.   Place the candy corn in the bowl and microwave in 30 second increments, stirring in between, until the candy corn is melted.  Stir in the peanut butter and continue to stir until the mixture is smooth.  Pour this mixture into your prepared pan and spread evenly.  Chill until set.
3.  Remove the bars by lifting the parchment paper “handles” and place on a cutting board.  Cut into bars.  Place a piece of wax paper on a cookie sheet and set a wire rack over it.  Set bars one inch apart onto the wire rack.
4.  Melt the chocolate candy coating according to the directions.  Using a small spoon, pour chocolate on top of a bar along its length; then using an small offset spatula or a butter knife and spread the chocolate flat along the top.  The chocolate will ooze down the sides, so use the knife to spread the chocolate along the sides of the bars.  Allow to set, or place in fridge to set.


Note:
*The first time I made these I used the only candy corn I could find at Walmart, but it’s technically Indian Corn.  It’s the one with brown instead of yellow, and it DOES have a different flavor.  The final product was good but did not taste very much like Butterfinger and did not have that bright orange color.  So DON’T use anything but the traditional candy corn.  Also, the recipe calls for a pound, but I found it in 14 ounce bags.  That worked fine.
**You can find this in the baking aisle at the grocery store.  It usually comes in a flat package that has a tray inside that can be used as its own microwave container.  I was able to use it for 2 batches because I didn’t dip the entire bar in it, like the original recipe stated.


Source:  It’s on multiple sites and blogs, but I got it from Plain Chicken