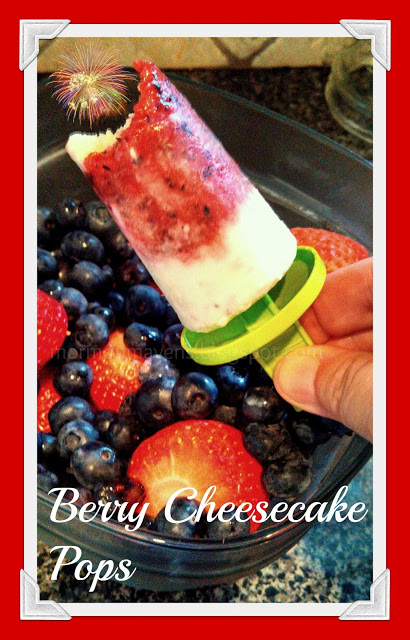
Berry Cheesecake Pops & Happy 4th!

How did I get so lucky to post on Independence Day?  I am honored to post on the 4th of July because I am a patriot.  I get teary-eyed when the national anthem is played and the Stars and Stripes are presented at ballgames.  Every time. 
For our followers who are not of the LDS faith, I would like to share a couple of our Articles of Faith–what we believe–that correlate with our celebrations today:
Article of Faith #11–We claim the privilege of worshipping Almighty God according to the dictates of our own conscience, and allow all men the same privilege, let them worship how, where, or what they may.
Article of Faith #12–We believe in being subject to kings, presidents, rulers, and magistrates, in obeying, honoring, and sustaining the law.
I just thought these were very appropriate as we celebrate our freedoms and the principles upon which this great country was established.

Now that I have given you food for thought, here is my food post for today.  Have you seen the new cookbook from our lovely Kate and Sara at OBB?  It is entitled, “Savoring the Seasons with Our Best Bites.”  Yummy stuff .  This recipe comes from that book and it is a perfect summer treat for this holiday.


Ingredients:

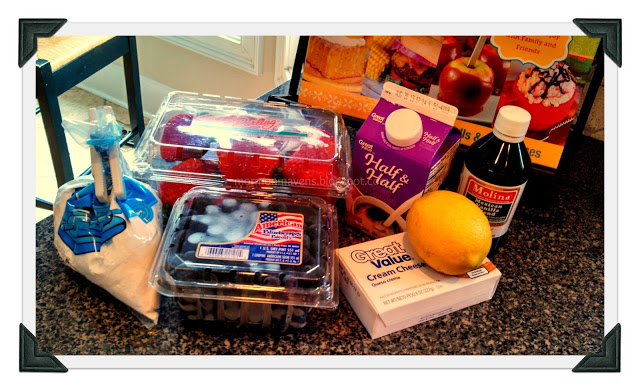
2 cups assorted berries (I used strawberries and blueberries)*
1/2 cup plus 3 tablespoons powdered sugar, divided
3 oz. cream cheese
1 cup Half-and-Half
1 teaspoon vanilla
2 teaspoons fresh lemon juice


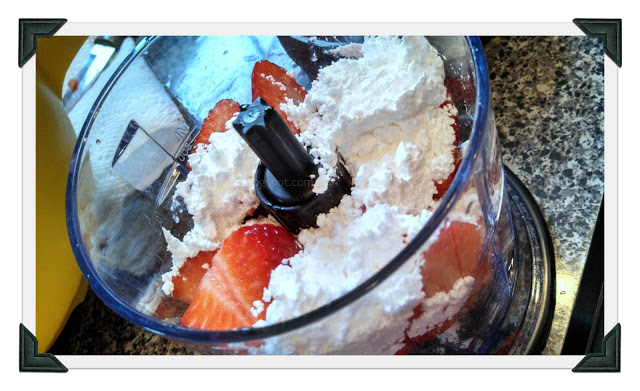
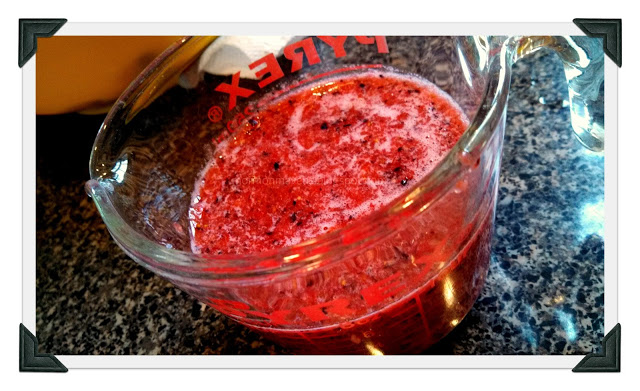
1.  Place berries and 3 tablespoons powdered sugar in a blender or food processor and roughly puree.  Add more sugar, if needed.  You should end up with about 1 cup of berry puree–smooth or chunky. Whatever you want.

2.  Transfer puree to a bowl or measuring cup with a pour spout and set aside.  Wash out food processor and place the cream cheese, half-and-half, vanilla, lemon juice, and 1/2 cup powdered sugar inside.  Puree until smooth–not going to show a picture but it is white and liquid.

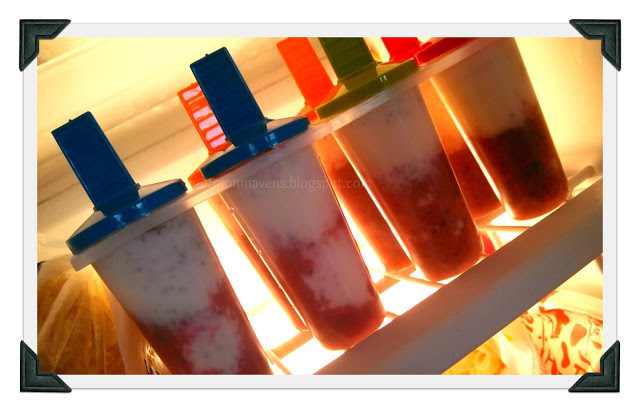
3.  Fill popsicle molds, alternating berry mixture and cream cheese mixture.  You can swirl it with a popsicle stick or leave in layers.  Freeze until slightly firm if you are adding your own popsicle stick.  My form came with stick/lids so I just put mine in at the get-go and froze them completely.

4.  To remove from molds, carefully run warm water around the outside of molds until popsicles are loosened.  Store in an airtight container or zip-top bag in the freezer.

Next time I make these I am going to try some of my freeze-dried fruit and see how that turns out.  Sounds like a good way to use that fruit from my food storage and it is a healthy snack–pretty much.


Source:  Savoring the Seasons with Our Best Bites, p. 124.

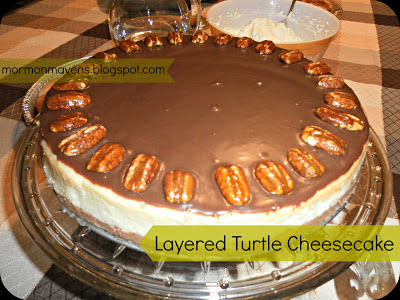
Layered Turtle Cheesecake

Ingredients

  • 1 cup all-purpose flour
  • 1/3 cup packed brown sugar
  • 1/4 cup finely chopped pecans
  • 6 tablespoons cold butter, cubed
  • FILLING:
  • 4 packages (8 ounces each) Cream Cheese, softened
  • 1 cup sugar
  • 1/3 cup packed brown sugar
  • 1/4 cup plus 1 teaspoon all-purpose flour, divided
  • 2 tablespoons heavy whipping cream
  • 1-1/2 teaspoons vanilla extract
  • 4 eggs, lightly beaten
  • 1/2 cup milk chocolate chips, melted and cooled
  • 1/4 cup caramel ice cream topping
  • 1/3 cup chopped pecans
  • GANACHE:
  • 1/2 cup milk chocolate chips
  • 1/4 cup heavy whipping cream
  • 2 tablespoons chopped pecans
  • Additional caramel ice cream topping, optional

Directions

  • Place a greased 9-in. springform pan on a double thickness of heavy-duty foil (about 18 in. square). Securely wrap foil around pan.
  • In a small bowl, combine the flour, brown sugar and pecans; cut in butter until crumbly. Press onto the bottom of prepared pan. Place pan on a baking sheet. Bake at 325° for 12-15 minutes or until set. Cool on a wire rack.
  • In a large bowl, beat cream cheese and sugars until smooth. Beat in 1/4 cup flour, cream and vanilla. Add eggs; beat on low speed just until blended. Remove 1 cup batter to a small bowl; stir in melted chocolate. Spread over crust.
  • In another bowl, mix caramel topping and remaining flour; stir in pecans. Drop by tablespoonfuls over chocolate batter. Top with remaining batter. Place springform pan in a large baking pan; add 1 in. of hot water to larger pan.
  • Bake at 325° for 1-1/4 to 1-1/2 hours or until center is just set and top appears dull. Remove springform pan from water bath; remove foil. Cool cheesecake on a wire rack for 10 minutes. Loosen sides from pan with a knife; cool 1 hour longer. Refrigerate overnight.
  • For ganache, place chips in a small bowl. In a small saucepan, bring cream just to a boil. Pour over chips; whisk until smooth. Cool slightly, stirring occasionally.
  • Remove sides of springform pan. Spread ganache over cheesecake; sprinkle with pecans. Refrigerate until set. If desired, drizzle with additional caramel topping before serving. Yield: 12 servings.

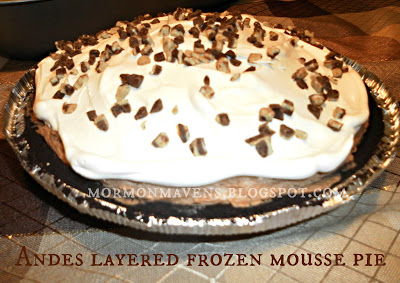
Andes Layered Frozen Mousse Pie

I LOVE Andes Chocolates. A few years ago I discovered their Creme de Menthe baking chips and I was so excited. On the back of the package was this recipe (you can also find it on their website http://www.tootsie.com/rec_moussepie.php) 
 I have made it multiple times for family gatherings around the holidays. I added the whipped cream and extra chips on top, but this pie is so delicious and rich. Definitely a family favorite.

Ingredients: 2 cups vanilla ice cream, softened
1 ready-to-use chocolate wafer crumb crust (6 oz. or 9-inch)
1-1/2 cups whipping cream, divided
2 cups Andes Crème de Menthe Chips or 2 packages 4.67 oz Andes Crème de Menthe Thins, chopped. (28 candies)
2 egg yolks

Directions:

Stir 1/2 cup of Andes Crème de Menthe chips into ice cream. Spread onto bottom of crust; freeze.

Melt remaining Andes chips with 1/2 cup whipping cream in saucepan over low heat stirring constantly. Remove from heat; stir in egg yolks. Continue heating over medium-low heat 3 to 5 minutes or until mixture begins to thicken. Do not allow to boil. Cool to room temperature.

Whip remaining 1 cup whipping cream until stiff peaks form; fold into Crème de Menthe mixture. Spoon over ice cream in crust. Freeze 4 hours or overnight.

Note: Allow pie to stand at room temperature for 10 to 15 minutes before cutting.

Pomegranate-Avocado Dip

I hope it’s not too late and that you can still find Pomegranates in the produce aisle. If it is too late, I’m really sorry, but put this recipe away for next year. Don’t be fooled by the variety of ingredients that you wouldn’t normally see together. It has just the right amount of sweet/savory to make it ADDICTING!

Ingredients:

1/4 tsp Chili Powder
1/8 tsp Cayenne (Red) Pepper

1 Tbsp Lemon Juice

1 small Onion, chopped (I used a yellow onion)
1 Roma Tomato, chopped
1-2 Avocados, sliced into bite-sized pieces
1 Pomegranate, seeded

1. Mix the chili powder, red pepper, and lemon juice in a small bowl and set aside.
2. Mix all the produce well in a Medium-sized bowl.
3. Pour the lemon juice mixture over and coat well.

Serve with your favorite chips or crackers. We like it with Club Multi-grained or some other multi-grained crackers.

Source: Aunt Beth

Sugary Peanut Butter Kisses

 
These are so yummy.  The kids enjoyed mixing the colors into the sugar, and then rolling the cookies in the different colored sugars.  So, this is a very kid friendly recipe and so good to eat!
 
Coloring sugar:
1-2 drops Wilton Gel Food Colors
1/2 c – 3/4 c Granulated sugar
 
Pour sugar into a ziploc bag and squeeze one drop of gel color into the sugar. Seal the bag and start squishing the color into the sugar unto all the sugar is colored.  You can darken the color  by adding more drops of the gel. You can lighten the color by adding more sugar.
 
 
Cookie Ingredients:
1/2 c. sugar
1/2 c. firmly packed brown sugar
1/2 c. real butter, softened
1/2 c. peanut butter
2 TBSP. milk
1 tsp. vanilla
1 egg
1- 3/4 c. self-rising flour
Hershey kisses, about 30 or more pieces, with the foil off
 
Preheat your oven to 375%. Cream together the white sugar, brown sugar and butter. Really give a few minutes to get nice and creamy. Scrape down the sides of your bowl and add the following peanut butter, milk, vanilla and egg. Mix well and scrape down the sides of your bowl. Whisk the flour and then scoop up the right amount needed.  Slowly add in the flour and continue to scrape down the sides of the mixing bowl.
 
Pour colored sugars onto paper plates. With a cookie scoop drop 1″ balls of the dough into the different colors of sugar and roll around. Place the cookies about 2″ apart on the cookie pan. Bake for 10 minutes for a soft chewy cookie, and 12 minutes for crunchy cookie.  (The cookie will flatten a bit as it bakes.)
 
Take cookies out of the oven and immediately press the hershey kiss into the cookie slightly! Move cookies to a rack to cool.  It takes a while for them to cool down because the hershey kiss melts a bit and then solidifies again.  So, give them time.  Then enjoy!


Favorite Cheeseball

I was given a Lion House Christmas cookbook as a wedding gift.  One of the very first recipes I tried from it was this cheese ball.  At the time, all cheese balls seemed to include canned pineapple and that just grossed me out!  I didn’t want any sweet in my savory!  It’s been my go-to recipe for cheese ball ever since.  My kids request it for when we do party food for different celebrations.  After 20+ years, it’s still a favorite!

Um, as for the spider….well, it was for a family reunion where we celebrated several holidays all in the same week (we called it Holiday Inn week) and I was in charge of Halloween.  I hope it doesn’t freak you out too much.  I hate spiders and it freaked me out a little to make it!

Ingredients:
2 8-ounce packages of cream cheese, softened
2 cups finely grated sharp cheddar cheese 
2 Tbsp. finely chopped green onions
2 tsp. Worcestershire sauce
1 tsp. lemon juice
1/2 tsp. lemon pepper
1.  In a mixing bowl, combine all ingredients and cream together until well-combined.
2.  Line a bowl with plastic wrap, leaving enough overhang to fold back over the cheese ball mixture you’re going to put in it.  Firmly press the mixture into the bowl.  Flatten the top and fold the plastic wrap over to cover.  
3.  Refrigerate until ready to use.  Let it sit out for at least half an hour before serving.
Notes:
  • Half a recipe makes about a 3-inch ball.
  • For a fancier looking cheese ball, you can form the ball inside wax paper or plastic wrap, then roll it in finely chopped pecans and finely chopped parsley, mixed together.  Then wrap it in plastic wrap to put in the fridge.  I don’t do this anymore as my kids prefer it without nuts.
  • You’ll have to eyeball what size bowl to use.  I usually use a wide soup bowl from my china, but I have also used other shaped bowls for a different look.
  • Serve with all types of crackers, pretzels, pita points, or bagel chips.  (Bagel chips are a favorite in my house!)

My Favorite Carrot Cake!

This is the best carrot cake I have ever had! Even people who think they do not really like carrot cake LOVE this one! 

My mom is famous for this cake! Her co-workers always request this for their birthday, and she is asked to bring it to family and church activities all the time. This is a picture of the one she made for our family Christmas party. I wish there was a “scratch and sniff” and a way you could have a little nibble. The texture is so amazing…mmmmm…and the flavor is just perfect! It’s very dense and so moist, and I love the nuts in it! But it’s the icing that I dream about!

Mom’s Famous Carrot Cake

2 1/2 cups all purpose flour
2 tsp baking soda
1 tsp cinnamon
1 tsp salt
2 cups white sugar
1 cup oil
2 tsp vanilla
2 eggs
2 cups shredded carrots (I like fine shreds)
1/2 cup drained crushed pineapple (this is what makes it extra amazing!)
1/2 cup chopped pecans (optional – I like lots!)
1/2 cup raisins (optional – you’ll never find them in MY cake!)

1. Preheat oven to 350 degrees. Grease and flour (or spray) a 9 x 13 pan.

2. In medium bowl, combine flour, baking soda, salt and cinnamon. Set aside.

3. In large mixing bowl, combine sugar, oil, vanilla and eggs. Beat well. Stir in flour mixture, then carrots, pineapple, nuts (and raisins if you insist.)

4. Pour into prepared pan. Bake for 50 – 60 minutes or until done in center.

Icing for Cake
(People have actually requested that my mom make an extra bowl of frosting, just so they can eat it by itself! This icing is AMAZING!!)

8 oz cream cheese, softened
2 1/2 cups powdered sugar
6 TBSP butter
2 tsp vanilla
1/2 cup chopped pecans 
1 cup shredded coconut 

1. In medium bowl, combine all ingredients and beat until smooth. Then stir in nuts and coconut. Spread over cooled cake. It’s sooooooo good! You are going to love it!

Notes:
Because this cake is so dense and moist, it might be difficult to make it into a 2 layer cake. Mom always keeps it one layer, which I think is perfect!


Source: My cute little mom, Brenda Joyner.

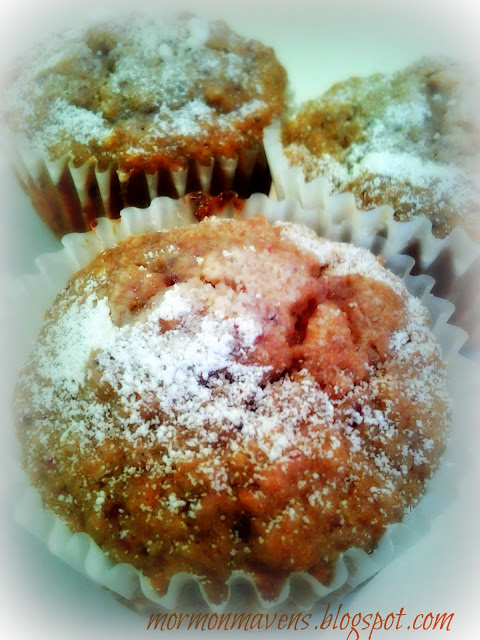
Cranberry Orange Muffins

These are some of our favorite Christmas eats! My sister-in-law Miriam Sellers passed the recipe onto me when I married into the family (she is a remarkable cook and can make healthy food taste sinful).  Enjoy!
1 3/4 c. Whole Wheat Flour
2 1/2 tsp. Baking Powder
1/4 tsp. Nutmeg
3/4 c. Sugar (or sweetener of choice)
1/4 tsp. Salt
1 tsp. Vanilla
1/3 c. Butter (melted)
1/2 c. Milk
1 Egg slightly beaten
1 tsp. Orange peel
1/2 c. chopped Cranberries
1/2 c. grated Apple
Preheat oven to 400 degrees.  Mix dry ingredients together.  Make a hole in the dry ingredients, add wet ingredients into the hole.  Mix until moistened, then add cranberries and apples.  Do not over mix   Place in lined or greased muffin tins.  Bake for 13-17 minutes, or until golden brown.  Lightly butter top and sprinkle with powdered sugar.  
Source: Miriam Sellers

Creamy Hot Chocolate

We found this recipe several years ago and hot chocolate has never been the same! This recipe beats every homemade concoction we’ve tried–and there are some goodies out there.

Ingredients:

1 (14 oz) can Eagle Brand Sweetened Condensed Milk (we’ve used other brands and they work, too.)
1/2 Cup unsweetened Cocoa (we usually use Hersey’s brand)
1.5 tsp Vanilla
1/8 tsp Salt
3 Cups Hot Water
3.5 Cups Milk*
Mini Marshmallows (opt)
Whipped Cream (opt)
Ground Cinnamon, Nutmeg, Chili Powder (opt)

1. In a large sauce pan, over Medium heat, combine Sweetened Condensed Milk, Cocoa, Vanilla, and Salt. Mix Well.
2. Mix in the water and the milk. Heat through, stirring frequently. Do not boil.

Serve with mallows or whipped cream and a dash of spice. Questioning the chili powder? Ever seen the movie “Chocolat“? That’s where we got the idea and it really is quite good.

*The original recipe called for 6.5 Cups Water, but we like it with the milk. It makes it creamy.

Source: All Recipes, with slight variation

Christmas Peanut Butter Crackers

      CAUTION!  CAUTION!  CAUTION!!  CAUTION!!  CAUTION!!  CAUTION!!  CAUTION!!

These are just about good enough to make you slap your momma!   Ha-Ha-Ha! No, seriously, these things are scrumptious and addicting.  We make these every year as part of our Christmas Treats Extravaganza! Some families probably just call that night Christmas Eve.  But, we call it our Christmas Treats Extravaganza!  (It’s fun to say. Use your biggest announcer’s voice.  Try it.)  We make a ton of different kinds of goodies/ treats and we eat them for dinner, and then we have plenty for our company that comes to visit.   You should try these, and I promise your family will love them! They almost taste like Nutter butter cookies!

Ingredients:
Creamy Peanut Butter
Ritz crackers
Almond Bark Candy
Wax Paper

Lay out a long piece of wax paper.  Spread peanut butter on a Ritz cracker and sandwich it with another Ritz cracker.  Make these using 1 whole sleeve of crackers.  Once you get this far, set them aside and break your almond bark into squares. Place them into a microwavable bowl, and melt them in the microwave for about 60 seconds.  Take the bowl out of the microwave and try to stir the squares and break them up as much as you can.  Then put the bowl back in the microwave for about 15 seconds.  Then stir and break up lumps. You will do this over if needed until the candy is all melted and smooth.  Then put a Ritz cracker sandwich into the candy and flip it over with the fork covering as much of the sandwich as you can.  You have to work quickly because the hot candy melts the peanut butter!  Then as you pick up the Ritz cracker sandwich with a fork (kind of scoop it up. don’t stab it with the tongs!) , you can tap the fork gently on the bowl to get off excess candy.  Then put the Ritz cracker onto the wax paper you have layed out.  Finish the entire sleeve of cracker sandwiches you have made. 

You can get about 1 & 1/2 sleeves of Ritz cracker peanut butter sandwiches dipped to one package of almond bark candy.