School Food Trays

Today I thought I would share one of my favorite tips for eating in front of the TV.  Yes, I know this is totally discouraged in this day of finding ways to keep you from overeating–and meals in front of the “boob tube”are taboo in the diet culture.  But, really, we all do it because, if there are just two of you and the kitchen island is covered with the stuff of life and the dining room table is just too big, and you want to watch “The Five,” then in front of the TV it is!

 Years upon years ago I read a wonderful book entitled “Simplify Your Life,”  The subtitle is “100 Ways to Slow Down and Enjoy the Things That Really Matter.”  Page 33 is on using food trays.  The author took herself on a personal retreat (awesome) and the place she stayed had a rule for taking food to your room–any food or drink leaving the kitchen had to be on a tray.  It saved on spills, crumbs, etc., and it’s a great idea for taking food from your kitchen at home to your family room so that you can eat and view simultaneously.  I picked mine up at a thrift store.  They are school lunch trays.  The food in my picture looks like school food, too, LOL..but it was really yummy–and low fat– and maybe I will share the recipes one day!

Source: Elaine St. James, Simplify Your Life.

“Boiled” Eggs

Oh, y’all…you have got to try this technique when you need to boil a large number of eggs.  Like a dozen or two.  So quick and easy!  I saw this on….wait for it…PINTEREST.  Yes and it was a success.  I did it quickly while I was preparing Veggie Shooters for a board meeting–which was my 9/27 post.

Ingredients:
Eggs (can’t get any simpler than that)

1.  Preheat oven to 325 degrees F.
2.  Place eggs in muffin pan.
3.  Bake for approximately 25 minutes.

Perfection and easier to peel than boiled.

Source: Pinterest. 

DIY All Natural Deodorant–non food

Is this a recipe? Yes.  Should you serve it with a side veggies? No.  But you could confidently wear it to a special dinner feeling fresh and dry. You can even count on it to eliminate odors.  After my husband became allergic to one deodorant after another, we gave up and decided to search out a more natural alternative.  My friend Cindy introduced us to this recipe.  For us, it literally works–ALL DAY.  And the most important benefit is that you get to miss out on all of the harmful ingredients that you find in store-bought Antiperspirants.  You can find a list of those HERE.  And it’s simple to make:

Ingredients:
1/3 C Coconut Oil (in it’s soft solid stage, room temp. Somewhat resembling Crisco)

1/4 C Baking Soda (You know…the greatest–all-time–odor absorber!??)
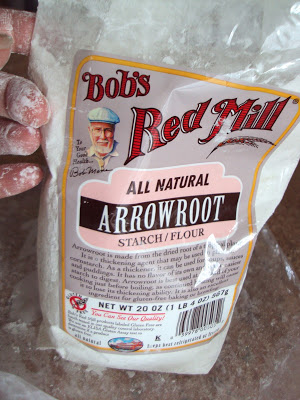
1/4 C Arrowroot Powder* (found in the whole food section or baking aisle or a whole foods store)
    *I’ve recently researched that you could substitute Corn Starch for the Arrowroot Powder, but I haven’t personally tried it.

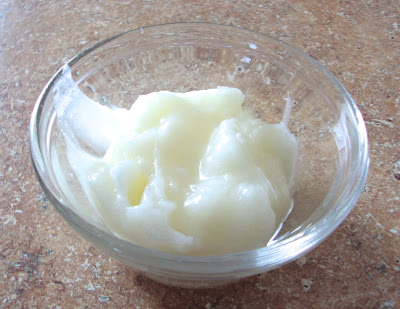
Measure and mix all ingredients in a small or medium size bowl until smooth and looking a bit like this:

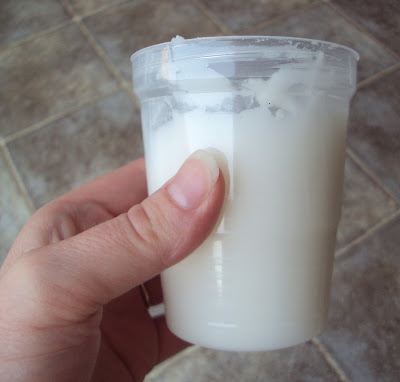
For a container, I used a small freezer jam jar. They’re plastic with a nice tight-fitting lid…and just the right size!  I made the mistake of trying to stir it all together in the jar.  What a mess!  Eventually we got it…but please, learn from my mistake.

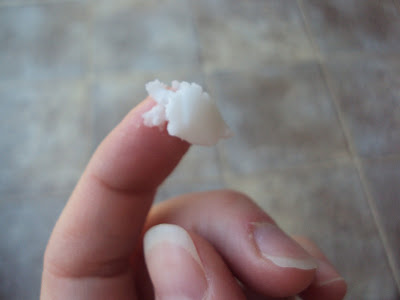
Now you’re ready to use it!  All you need is a small amount on the end of your finger tip for each application (I was going to say “for each pit” but that didn’t sound very lady-like…lol).  When you’re applying the deodorant in a paste, like this, just rub it in until you feel the coconut oil softening or melting. Then you’re good to go!

I’ve always wondered if I could somehow maneuver this mixture into an empty deodorant container. Hmm….Maybe I’ll try it sometime.

*Make sure to store in a cool area.
*If your Coconut Oil does liquify after you’ve made the mixture (like…you forgot and left it in the bathroom while you took a steamy shower), just stir it well and return to a cooler area.
*If you don’t over apply, this stuff will last you a long, long time!

–Jamie

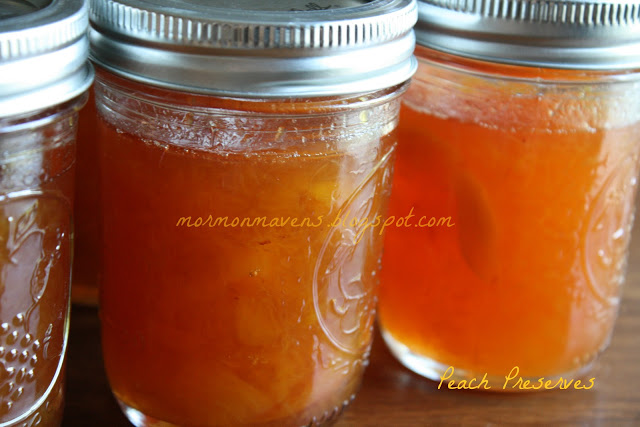
Peach Preserves

We moved two weeks ago into a new home on the Eastern Shore of Maryland.  The previous owner was an outdoor lover and put lots of time and care into her beautiful yard.  When we were moving into the home I glanced out the kitchen window and saw our new peach tree was OVERLOADED with peaches! Into my wanna be domestic mind came one thought, “Oh! I get to make peach preserves!”  Well, two weeks later as the peaches started to fall off the tree and the neighbors started coming over and asking if they could have some, I remembered I wanted to try my hand at making some preserves.  So, I stopped unpacking and arranging the house and set to making preserves.  Which, I have NEVER done before! Long story short, it wasn’t hard!  It went really great!  (Aside from the fact that I had the heat turned up too high at one point and it popped all over my arm while I tried to stir the concoction! That burned like crazy! But, I’m okay now.) This recipe is scrumptious!  And we have probably gained a few lbs this week because we can’t stop eating it! That probably has something to do with all the sugar in this, but I keep telling myself its the fresh peaches…they are so healthy for you!  This is my recipe. Its a combination of at least 3 or 4 I have read in preparation for this. And believe it or not, I didn’t add as much sugar as some of the recipes suggested! 

12 cups peaches, fresh whole peaches, peeled and chopped, about 20 peaches size of tennis ball
3 TBSP. lemon juice, freshly squeezed, no seeds please
8 cups white granulated sugar, for every 3 lbs of peaches use 3-4 cups of sugar
1 box of pectin
12- 1/2 pint sterilized canning jars and lids, and I also used 2 pint sized jars for immediate use.
tongs, to remove the jars from the canning process in the hot pot of water
wide mouth funnel, but I didn’t have one and all went well

     The first thing I did was set a big pot of water on the stove to boil.  Sterilize everything! Then set to dry on a sterile rack.
    Then boil some more water and get all the peaches washed while waiting for the water to boil.  I filled the sink with the peaches and then filled it with water. Washed them off really well again as I was draining the sink and rinsing it out.  Place all the peaches in a huge bowl and then one by one cut an “x” across the bottom of the peaches and placed them into the pot.  Add about 6-8 peaches at a time and let them boil for about 1-2 minutes.  Then take them out and place them into another large bowl. Add more peaches to the pot of boiling water.
     The purpose of this is to loosen the peach skin so you can peel it right off!  It works pretty well. Although, you might not find it necessary if you just want to dig in and start peeling away with your knife. But, I think the boiling method helps you save more of the peach flesh when peeling.
     After you have seeded and peeled and chopped all the peaches,you should do a bit of clean up and get out the sugar. Add 8 cups of white granulated sugar to the peaches in the bowl and stir really well. Let it sit for about 30 minutes to an hour.  Stir periodically to get the settled sugar off the bottom.
     Add the peach and sugar mixture to a big stock pot and stir in the pectin. Bring the mixture to a boil then lower it as needed to keep yourself from getting burned as you stir constantly to keep it from sticking. Boil and reduce this while stirring for about 30 minutes, maybe longer if it needs to thicken more. Cut off the heat. Funnel the peach preserves into the jars and tighten the lids.
     Bring another pot of water to boil that will be deep enough for your jars to sit in. Water should reach the lids. Add about 5 jars at a time and boil for about 10 min per group.  You should hear the lids popping.  That is the suction being created!  Remove and set aside on a rack to cool.  I even heard the popping after the jars had been removed!  It was like an applause for  a job well done!!!!
    We immediately spooned some hot peach preserves over ice cream and thought we had died and gone to heaven.  This stuff is divine!

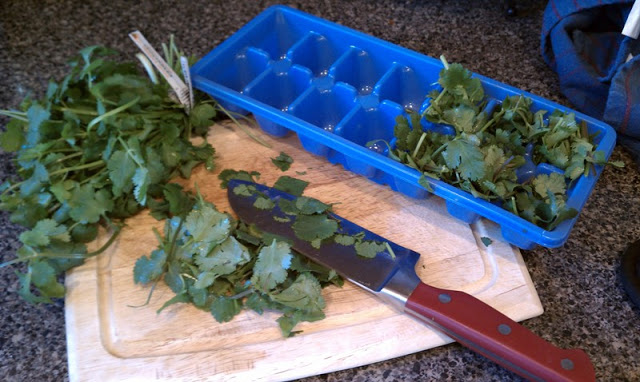
Save the Cilantro!

How much fresh cilantro have you had to throw out because it went bad before you could use the whole bunch? Me, too.  I hated that!  Then one day I was watching Emeril Live when a viewer shared a great cilantro tip…

1.  Coarsely chop the fresh cilantro.
2.  Place loosely in sections of ice cube tray.
3.  Fill each section with water.
4.  Place in freezer until frozen.
5.  Pop cilantro cubes out of tray and place in a plastic, zippered freezer bag.
Now you have fresh cilantro to put in soup, salsa, etc., and none goes to the trash can or down the garbage disposal.  Holla!
Source: Emeril Live

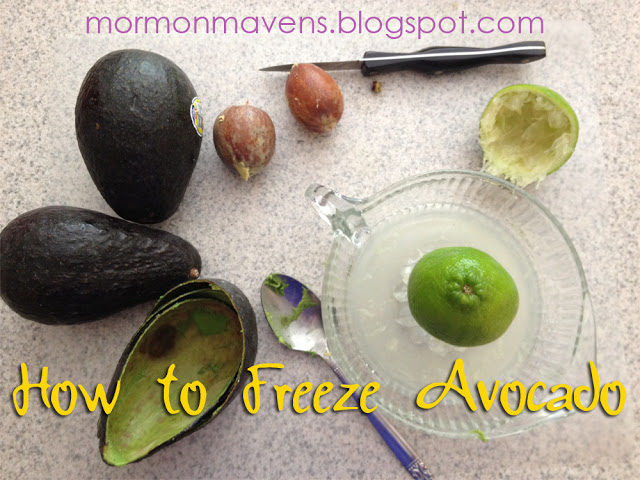
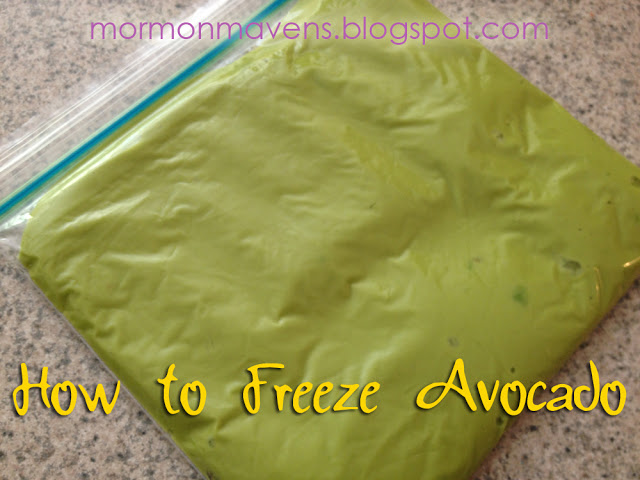
How To: Freeze Avocado

I love, love, love avocado and guacamole.  But most of my kids haven’t quite come to appreciate this green miracle yet.  So I’m always stuck with too much and it always goes bad too quickly.

Enter:  Pinterest.

How many times has Pinterest come to the rescue?

Well, at least this once.

I found instructions on how to freeze avocado and I knew I had to try it.  Worked like a charm.  If you are a chunky guac fan, you may be disappointed in the puree texture; but it’s still a great way to preserve this luscious goody and I’ll suffer through using it to make smooth guac if it means no more throwing away avocado halves and leftover guac!

Ingredients/Supplies:
ripe avocado
fresh lime juice (1 Tbsp. per avocado)
blender
zip top sandwich bags
wide, short glass
chopstick or pencils
cookie sheet

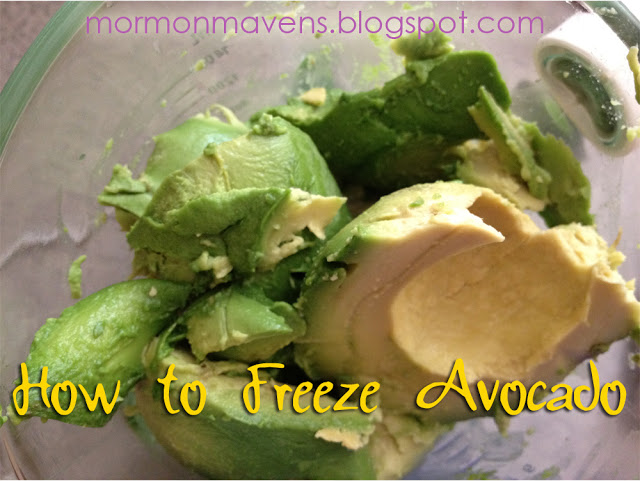
1.  Scoop avocado flesh into the blender.  To do this, I cut the avocado in half length-wise, around the pit.  Then I twist the two halves in opposite directions to separate them.  I cradle the pit half in my left hand and with my right hand I CAREFULLY chop down once into the pit to “grab it”…I use a small knife in case my insane klutziness gene decides to take over and dismember me.  With the knife embedded in the pit, I give it a slight twist and out pops the pit.  Usually.  Then I just scoop the flesh out with a spoon.

2.  Add the freshly-squeezed lime juice.  Puree until smooth.  Drool.  But not into the blender.  That’s gross.

3.  Take the wide but short glass and place the zip top bag into it, then fold the zippy edges of said bag out over the edge of the glass.  Spoon some of the puree into the bag (just eyeball it being half to three quarters full).  Fold the edges back up, carefully squeeze out as much air as you can, and seal the bag.

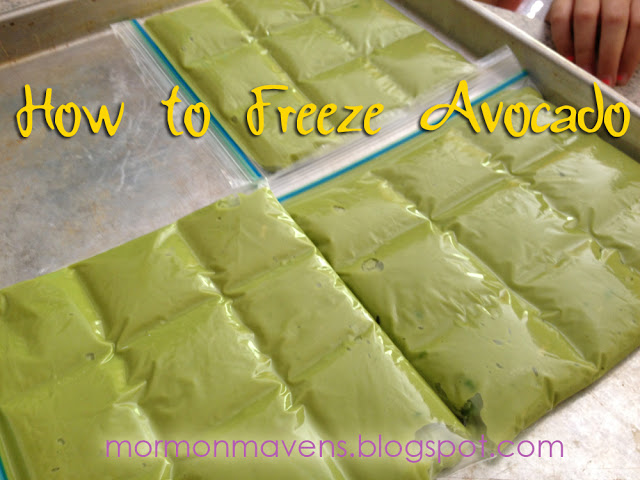
4.  Lay the bag flat on a cookie sheet, opening the bag a tad if you see anymore air trapped inside.  Using the chopsticks or pencils, make a tic tac toe board on the bag….two sets of parallel lines.  Is that too math-y?  Okay, just do like this:

5.  Place in freezer until totally firm.  Then you can take it out and store it vertically so it takes up less space.  (Incidentally, this is a great way to freeze and store soups, sauces, etc…..flat first, then vertically like files.  Not that I actually get around to doing that.  But I’ve thought of doing that.  And I think I should get credit for that.)

When ready to use, take out a bag and snap off as many squares as you think you’ll need (I used the edge of the counter as a fulcrum.  HA!  Fulcrum…that’s all science-y.  Did I just blind you with science?).  I ended up sacrificing the original bag this way, but that’s okay.  I just put the remaining squares into a new bag and placed them back in the freezer.

Source:  Traveling Spoon Blog via Pinterest

Hot Dog Buns

I’d been wanting to try this recipe for a while, since first seeing it on Annie’s Eats (one of my favorite cooking blogs).  When I saw an idea for Mexican-inspired hot dogs on Pinterest, I figured now was as good a time as any to give it a shot!  (Incidentally, those Mexi-Dogs are coming in a recipe post soon.)

Ingredients:
1 Tbsp. sugar
2 1/4 tsp. instant yeast
1/4 cup warm water (105-110 degrees F)
1 cup warm milk
1 Tbsp. vegetable or canola oil
1 tsp. salt
3-4 cups all-purpose flour
1 beaten egg with 1Tbsp. water
sesame seeds, optional

Directions:

  1. In the bowl of a stand mixer, combine the sugar, yeast, and warm water.  Stir in the milk, oil, salt, and 3 cups of the flour.  Using the dough hook, mix until well combined.
  2. One tablespoon at a time, add in more flour (up to one cup) until dough pulls away from the side of the bowl or until it is no longer wet/sticky.  The full cup may not be needed.  I used about 7 tablespoons this time.  Machine-knead on low for 5-7 minutes; the dough should be smooth and elastic at this point.
  3. Turn the dough into a lightly-oiled bowl, turning over to coat the entire surface.  Cover the bowl and let the dough rise until doubled, about an hour.
  4. Line your baking sheet with parchment paper.  Turn the dough out onto a work surface sprayed with nonstick cooking spray (I used a flexible cutting mat).  Use your kitchen scale (I used mine on “grams” for easier math!) to divide the dough into 9 equal portions.  Shape each portion into a ball, and then into a cylinder about 4 1/2″ long.  Place on the parchment paper, flattening each bun just slightly.  Place the buns next to each other to where they almost touch.  (They’ll kind of morph into each other as they sit there.)  Cover with a clean kitchen towel and allow to rise until almost doubled, about 45 minutes.
  5. Preheat oven to 400 degrees.  Brush bun tops with the egg wash; then sprinkle with sesame seeds, if desired.  Bake for 18-20 minutes or until golden brown.  Place the buns on a wire rack to cool.

Notes:
  • Upon sampling the buns plain, we all thought they needed a bit more salt.  But eaten with the actual hot dog and fixin’s, we didn’t even notice.  Still I may try a little more salt next time.
  • If you don’t have a kitchen scale, you really should get one.  I used to scoff at celebrity chefs who used them, but I’m a believer now.  I got an inexpensive one at Target that can be read with either grams or ounces/pounds.  I use both, depending on what I’m doing.
  • Parchment paper, too, seemed unnecessary to me at one time;  but after trying it, I have to admit that I love it.  Clean up is a breeze.  No more scraping things off the cookie sheet!
  • You can either cut the tops or the sides of these buns, but I prefer top-cut.
Source:  Annie’s Eats

Eco-friendly Multipurpose Cleaner

Since having a new baby in my home, I’m trying to be more eco-friendly and trying not to use cleaners that are harsh to our skin or the air we breathe. My sister has been using this cleaner for a while, I’m totally on the band wagon now. This is great, has a clean (vinegar) smell and cuts grime and grease really well too.

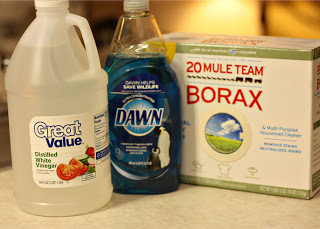
 Eco-friendly Multipurpose Cleaner

Ingredients
2 Tbsp. Distilled White Vinegar
1 Tsp. Borax
2 Tbsp. Dawn dish soap
1 C. Hot Water

Directions
Pour vinegar, borax and hot water into spray bottle.
Then continue filling spray bottle with cool water.
Add dawn dish soap last. No need to shake.

D.I.Y. Foaming Hand Soap

This method of refilling your soap helps reduce and reuse since you’ll use less soap over time and can use an old bottle.

Ingredients:
foaming soap dispenser
water
liquid soap
1. Add water to the soap dispenser, about 3/4 full. Keep in mind the size of your container and the size of the pump when the top is on.
2. Add several pumps of soap or 1-2 squeezes of a large refill container to the water, enough so that once shaken (see step 3) it’s the same watery consistency as it would be if you bought the foaming hand soap as is.
3. With one hand covering the top of the bottle, shake it so the water and soap mix. You don’t want to put the top back on before shaking because if water gets in the pump, it won’t make foam anymore.
4. Screw the top back on and test your soap. It may take a couple pumps to get the right foaminess. (Did you know foaminess is a word? I looked it up to make sure it didn’t need quotation marks.) If it’s still not quite right, adjust soap and water as needed (this part may take some experimenting).
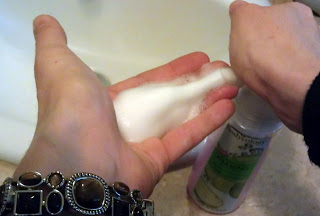
When I first starting using this method, I stuck to clear liquid hand soaps. After experimentation I’ve found it also works with the moisturizing type with a pearly sheen appearance (as pictured), but these soaps do make it a bit harder to get the right soap:water ratio since they’re thicker–so be careful not to add too much.

Source: Myself, basically. Years ago my mom bought some soap pumps from Pampered Chef that caused liquid soap to foam. All you had to do was add soap to a certain line, add water to the top line, and shake. (Yes, my instructions have you put the water in first…I think it sort of “pre-mixes” the solution for you.) So I figured I’d try it on an empty Bath and Body Works dispenser one day, and it worked!

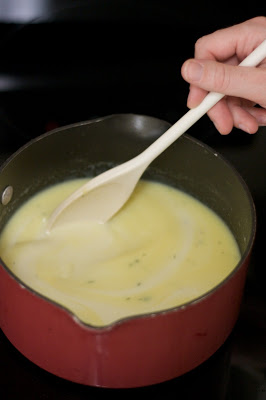
Cream of Chicken Soup

I don’t know when it happened, but I have become a “Cream of…Soup Snob.” I promise I didn’t mean for it to happen–and truth be told, I’d still use canned if I were in a pinch–but homemade is just SO MUCH BETTER. Plus, it’s fairly quick and it’s easy. What can be bad about that?

This recipe can be used as pretty much any kind of soup base. Use different bouillon for a different flavor.

Ingredients:
1/2 Cup (1 stick) Butter
6 Tbsp Flour
2 cups Milk, room temperature
2 tsp Chicken Bouillon (or two cubes)
salt/pepper to taste.

1. Measure milk into a 2 cup measuring cup and sit it on the counter.
2. Over Medium heat, melt butter. Add flour and stir constantly until a paste forms (aka: roux).
3. Add milk, bouillon, salt, and pepper, and stir until thickened–about 10 minutes.
4. This is now ready to use. Add more ingredients (cheese, potatoes, onions, etc) to make a soup or use as-is in a recipe.

Yeild: equivalent of 2 cans Cream of Chicken Soup

Source: allrecipes.com (Nell Marsh)

~Kara