Cooking Pasta

I was hanging out at my good friend Susan’s house and we were, of  course, in the kitchen.  I was looking through a pasta cookbook that she has and found these instructions for cooking pasta.  This is the only way I will cook pasta now!  So easy and you don’t have to throw those noodles up against the wall to see if they will stick–who still does that?  Come on, ‘fess up!
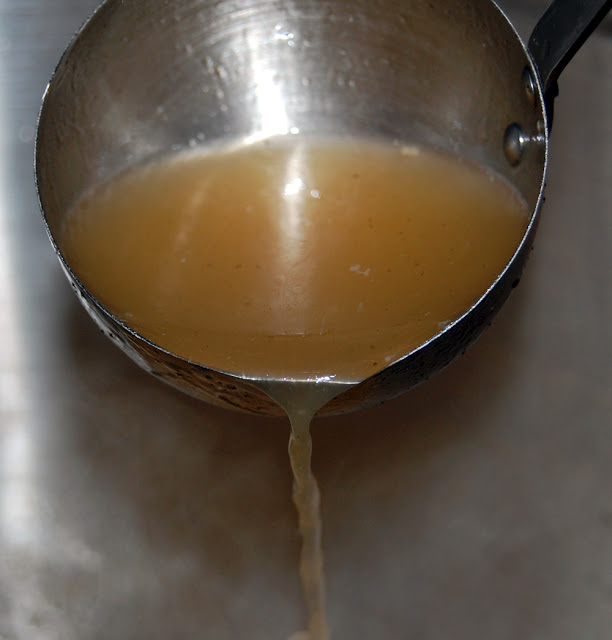
Photo by Suat Eman/FreeDigitalPhotos.net

1.  Bring 4 quarts of water to a rolling boil.
2.  Add desired amount of salt and pasta (you could put a little olive oil in if you are worried that it will stick).
3.  Stir pasta, constantly, for 2 minutes.
4.  Put lid on pot and remove from heat. 
5.  Set your timer for 10 minutes and go work on the rest of your meal.
6. After 10 minutes, drain your pasta and it is ready to rock and roll!
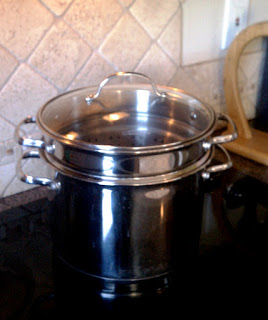
Here’s another tip:  get a pasta pot with the removable strainer.  It is well worth it and can be used for other things like boiling potatoes, corn, just about anything that you would need to drain water off of.  Seriously…I love mine.

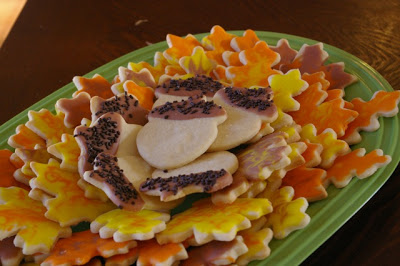
Sugar Cookies with Marbleized Icing


A good sugar cookie can be hard to come by. Who wants to eat cookies that are to floury, cakey or dry? This is a great basic sugar cookie recipe that is sure to be a hit! Crunchy on the outside and tender in the middle.
Ingredients:
1 C. real butter
1 C. sugar
1 egg
1 1/2 t. vanilla or almond extract
3 C. flour
1 1/2 t. baking powder
1/2 t. salt
Directions:
1. Cream butter and sugar until light and fluffy (about 2 minutes). Add in egg and extract and mix until incorporated.
2. In a separate bowl combine flour, baking powder and salt. Slowly add the flour mixture to the butter mixture and mix until completely combined.
3. Separate the dough into 2 balls and wrap each in waxed paper or plastic wrap. Flatten to speed up chilling time. Place in the fridge to chill about 1-2 hours.
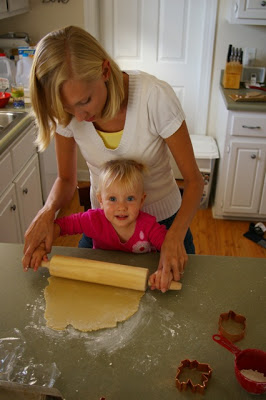
4. When the dough is properly chilled, sprinkle a small amount of flour on a work surface and roll dough out with a rolling pin. Roll to about 1/4 inch thick. (don’t use excessive amounts of flour while rolling. It toughens the dough.)
* lets take a break for some sugary cuteness!
5. Use cookie cutters or a paper pattern and knife to cut out your cookies to desired shapes.
*So easy a toddler can do it!

6. Place on an ungreased baking sheet and bake at 350 degrees F. for 8-12 minutes. The longer you bake, the crunchier your cookies will become. For soft cookies, go for about 7-8 minutes. Remove from pan to cool completely on a wire rack.

Now let’s get to the marbleized icing technique! The icing is a powdered sugar glaze, which stays bright and slightly glossy when it dries. Gorgeous!

Ingredients:
1 lb. powdered sugar
6 T. whole milk
6 T. light corn syrup (gives it that nice gloss)
1 t. vanilla or almond extract.
food coloring of your choice
Directions:
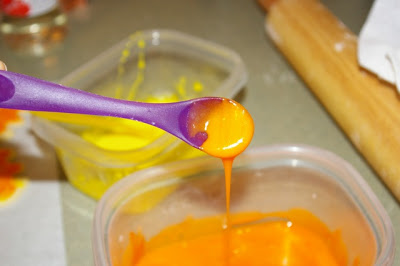
1. Wisk sugar and milk until smooth. Then stir in the corn syrup and extract. Glaze should be slightly thin and slowly run off a spoon.
2. Separate glaze to desired containers before adding different food colorings. If you want to have brown icing, use a spoonful of cocoa powder.
To marbleize the icing, start by spreading a base color all over the cookie.
Lightly drizzle a second color in a random stripes or dots on top of the base color. Then, run a toothpick through the glaze in several stripes diagonally, then again in the opposite direction diagonally. The glazes will run together and make a marbleized effect.
Let the icing dry completely, about 2-3 hours before trying to package them. Have fun and be creative!!
Sources: www.ourbestbites.com and Martha Stewart

Window Cleaner–334 views

Back in the 70’s when I was at Ricks College (you know it as BYU-Idaho) I had to make a presentation in one of my classes.  This was videotaped so that we could see ourselves in action, teaching something.  Complete with a flip mirror above my head so that the camera and audience could get a better view of what I was doing, I demonstrated how to make homemade window cleaner.  That was a fun assignment and I, of course, aced it!  In another class we all contributed tips, articles, ideas, etc. to help build each other’s Personal File.  That is where I got this “recipe” and no I do not remember who it came from.  I have used this cleaner, off and on, for years.
Ingredients:
2 tablespoons NON-sudsing ammonia
1 teaspoon liquid detergent
1 pint rubbing alcohol
1 gallon container
   water
   food coloring

1.  Add the first 3 ingredient to the gallon container, then fill with water. 
2.  Color to preference.
TIP–I would be careful with which color you choose.  Blue would be an obvious choice.  Pink or Purple might be too enticing for a little child who doesn’t know better and wants to check out the pretty water…Mine is light purple but I don’t have small ones at home, until the grandson comes over and then I just make sure he doesn’t have access.

Homemade Chicken Stock

I owe Ina Garten, The Barefoot Contessa, so much!  The kids and I used to love to watch her show on Food Network.  I found it so relaxing to watch her whip up all sorts of plain and fancy food.  But it was when I saw how she roasted chicken breasts that the quality of many of our meals changed for the better.

Ina Garten, The Barefoot Contessa

I now use nothing but bone-in, skin-on chicken breasts rubbed with olive oil and sprinkled with kosher salt and fresh ground pepper, baked at 350 degrees for one hour.  After the chicken has cooled, I remove the meat and pull it apart into bite size pieces.  It’s so moist and tender, even after it’s been refrigerated.  I ALWAYS SAVE THE SKIN, BONES, AND PAN DRIPPINGS and place them in a bag in the freezer!!  This is what I use to make one of my favorite ingredients…..homemade chicken stock.

Ingredients:
bones, skin, drippings from baked chicken
onions
carrots
celery
salt
pepper
herbs of your choice
water

1.  Place chicken “scraps” into a large stock pot.  Chop veggies in half and toss in the pot.  (You don’t even have to prep the veggies, beyond making sure that they are not dirty.  Carrot tops, celery leaves, and onion skins all add extra flavor.)
2.  Fill pot an inch or two above level of ingredients.  Bring to a boil, then to a simmer for several hours, adding more water as necessary.
3.  Once the stock is done, allow it to cool until it can be poured into freezer containers.  (I like to use these 32 oz containers from plasticcontainercity.com; they are awesome!)
32 oz plastic deli container
4.  Strain chicken stock through a sieve either before pouring into containers, or as you pour (depending on the size of your sieve).  Leave 1/2″ to 1″ head space.  Allow to cool until they are just warm before putting on lids, and placing in freezer.

To use:  Sometimes I remember to thaw a container or two, but usually I just run the container under hot water until the “stock block” slips out.  Then I put it straight into a pot on medium high heat until it has melted. This is great for homemade soups, risotto (obviously), and for cooking lima beans in instead of water.

Source:   adapted from Ina Garten’s recipe

Sweet Potato Puree


Before too long sweet potatoes will be in season. I love to go ahead and roast and puree them for the freezer so that I can pull out a bag to use them for Sweet Potato Chocolate Chip Muffins (recipe found here).

Sweet Potato Puree
1-Preheat oven to 400
2-Wash your sweet potatoes.
3-Line your pan with aluminum foil (easier clean-up-trust me).
4-Place unpeeled sweet potatoes on the pan.
5-Roast in oven for about an hour (or a fork inserts easily).
6-Remove and let cool.
7-Scoop out the flesh and puree in a food processor until smooth.
8-Use in your recipe immediately or freeze for future use.

*I put 2 cup values (2 cups or 4 cups) into a freezer bags so that it’s already pre-measured for making the Sweet Potato Chocolate Chip Muffins.

Source: Deceptively Delicious by Jessica Seinfeld

It’s Time to Get Fresh!

As the newest member of the Maven’s let me just begin by saying it is a privilege to be joining such great group of women! What to cook is the age-old dilemma, and it is great to have fresh ideas and unique perspectives each day.
And now, drumroll please………It’s time to get Fresh!

Here’s the assignment: Go to the farmer’s market. Take a good look around. That’s right, it’s locally grown, freshly picked fruits and vegetables! This food has not been in a box for 2 weeks or traveled 2000 miles. Someone may have plucked it from the ground or off a tree as the sun came up this morning.
This is the perfect time to visit the farmer’s market. There are so many delicious things in season right now, and it all tastes amazing!! I personally love supporting local businesses and growers, and if you think you can’t find great deals, you’re mistaken. Who can argue with giant slicing tomatoes for $1 a pound? The farmer’s market can also bring out the inner photographer. Here’s my favorite picture I snapped from the North Carolina State Farmer’s Market in Raleigh:

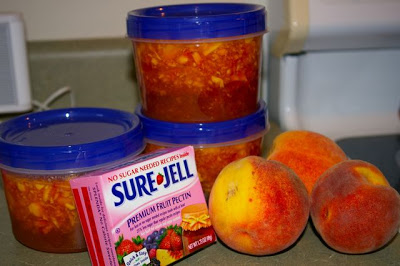
One fruit that is a true “must” when it comes to buying locally, is peaches. The flavor of freshly picked peaches just can’t be beat! A bowl full of fresh peach slices in a pool of cold milk with a dusting of sugar is my favorite summer midnight snack. Prime picking time for peaches may vary a bit from place to place but right now is the time for people like me in North Carolina. I can’t get enough! What should you do with all the peaches you buy after you go crazy at the farmer’s market? Jam, delicious peach jam. It is super easy, and you don’t even have to bottle it if you don’t have canning supplies.


All you need is:
*a few plastic containers with tightly sealing lids
*peaches peeled and chopped fresh or cooked and mashed
*sugar
*lemon juice (a little squirt so your peaches don’t go brown)
*box of pectin (preferably the no sugar needed type, even if you do add sugar it is deemed to be the easiest to work with. There are also no-cook pectins out there and then you don’t even have to boil anything!)
Follow the directions in your box of pectin for mixing your jam. Fill your containers, and cool if needed. Pop the extra containers in the freezer. Enjoy your fresh jam on toast or pancakes!! Your open container should be good in the fridge for about 3 weeks.

Dishwasher Detergent

I’m no stranger to homemade cleaning products.  We try to make our own window cleaner, all-purpose cleaner, and even laundry detergent.  But I guess I never let my brain explore the possibility of homemade dishwasher detergent.  About a week ago , though, I was cleaning the kitchen and loaded up the dishwasher only to realize we were out of detergent.  My husband asked if I had a “recipe” for a homemade version.  Well, I do now.  Other than a few tiny spots here and there, it works wonderfully well.

Ingredients:
1 part baking soda
1 part Borax

White vinegar

1.  Combine the baking soda and borax in a plastic container with a lid.  Use 2 Tbsp. per dish load.
2.  Pour white vinegar into the rinse compartment.  It will be your rinse agent.  (You don’t have to pour this in each time.  Just check it each time to make sure it has enough.  There should be a fill line on it to show you how much is in there.)

NOTE:  This is probably best used either as a backup to your regular detergent (if you run out suddenly like I did) or as a way to save some money by alternating with your regular detergent.  I say this because after a few cycles it tends to start leaving glass dishes looking kind of cloudy.

Source:  tipnut.com