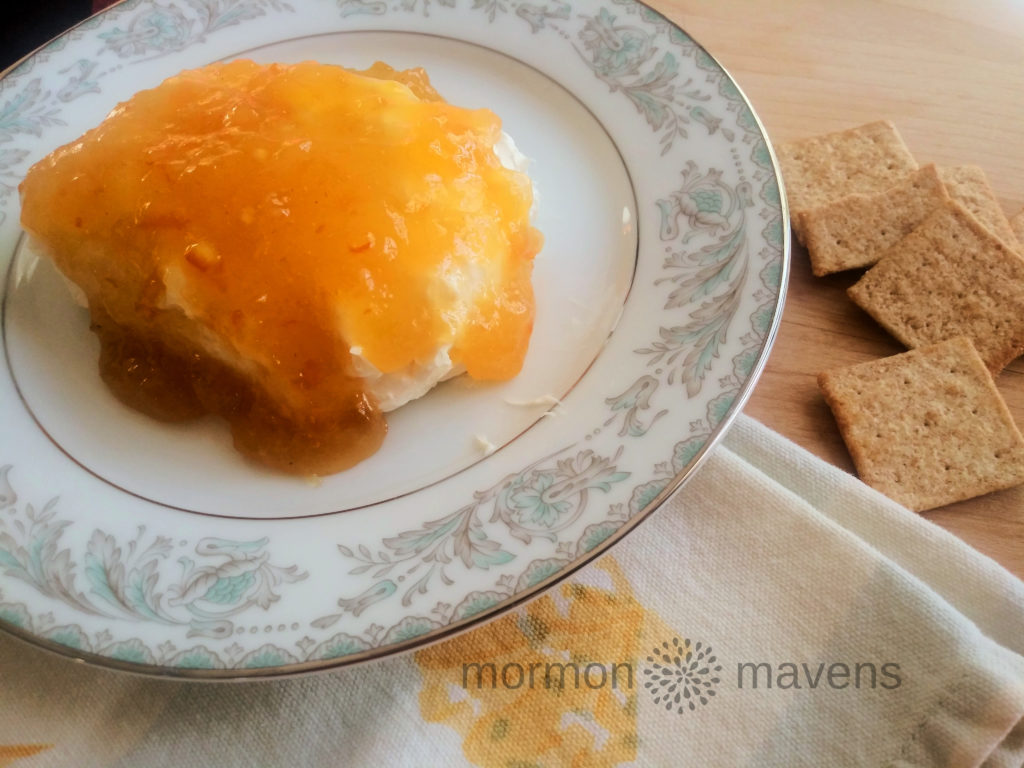
Jezebel Sauce

This was a very popular post from December 17,2015, especially during the holiday season and into the New Year.  Anna served it as part of her Christmas Eve meal appetizer offering this year.  Just can’t tell you how good this is so you will have to experience it for yourself.

Don’t be afraid of the horseradish!  It’s a subtle kick and the sweetness of the preserves and marmalade pair well with it.

I must apologize for the size of the cream cheese block on the image.  Someone–who shall remain nameless–decided to cut a chunk off for their bagel one morning.  Although the whipped cream cheese container was RIGHT NEXT TO IT.  Just sayin’.  I really need to label my blog recipe ingredients or something.

And a shout out for holding on to your Mom’s wedding china. This is served on a salad plate from her pattern.  I have this and a bread plate.  I try to use these treasured pieces from Mom, and from my grandmothers, to honor their memory and their homemaking.
Jezebel Sauce
Write a review
Print
Ingredients
  1. 18-oz. jar of pineapple preserves
  2. 18-oz. jar of apricot preserves
  3. 1/2 cup orange marmalade
  4. 3.5-oz. jar of prepared horseradish
  5. 1 tablespoon dry mustard
  6. 8-oz. pkg. of cream cheese (I use the lower fat Neufchatel version)
Instructions
  1. Combine all ingredients and store in refrigerator. This will keep well for about 2 weeks. Makes about 3 cups of sauce.
  2. To serve, pour over cream cheese and serve with snack crackers, or use your imagination! But it’s really good on cream cheese. I bet it would be great on a cream cheese bagel.
Adapted from Paula Deen
Mormon Mavens https://www.mormonmavens.com/

Deviled Eggs


Happy 4th of July!! 

I know there are a bazillion recipes for deviled eggs out there, but I hope you try this one for your July 4th festivities or just whenever you want some of these tasty morsels!

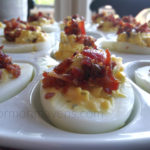
Who doesn’t love all things Magnolia? This recipe is adapted from Joanna Gaines’ Magnolia Table cook book. It is the first recipe that I have tried from her and it did not disappoint. I made it for a Linger Longer at church this past Sunday and the platter emptied pretty quickly. Let me add that there were other deviled eggs on the table besides these.

One thing that you will appreciate is that there is BACON on these eggs. Yep. With brown sugar. So, WIN-WIN. Let us proceed…

Deviled Eggs
Serves 8
Write a review
Print
Prep Time
30 min
Cook Time
35 min
Prep Time
30 min
Cook Time
35 min
Ingredients
  1. 12 large eggs
  2. 1/2 lb. bacon
  3. 1/4 c. packed light brown sugar
  4. 1 T. distilled white vinegar
  5. Kosher salt
  6. 1/2 c. mayonnaise (I used Hellmann's because Joanna prefers it)
  7. 2 T. dill weed (if you accidentally pick up sweet instead of DILL relish)
  8. 1 t. dry mustard powder
Instructions
  1. Preheat oven to 375 degrees F and line a rimmed baking sheet with foil. My bacon stuck to the foil so you could also add a cooling rack and lay the bacon on that. I will be doing that next time.
  2. Spread brown sugar on a plate and press both sides of the bacon slices into this to coat them. Lay slices on foil/cooling rack in the pan. Bake until crispy 14-16 minutes. Cool on baking sheet.
  3. While the bacon is cooking, place eggs in a single layer in a large saucepan, cover with water to 2 inches above the eggs. Use whatever trick you know to help the eggs peel easily, like adding baking soda to the water. The recipe uses the vinegar and salt. Bring the water to a full rolling boil, cover the pan, then remove from heat and let stand 10 minutes. The eggs will continue to cook off the heat.
  4. While the eggs are "cooking", prepare a large bowl of ice and water. When the eggs are done, drain them and put them immediately into the ice water. This will stop the cooking process and prevent you from getting egg yolks that are green around the gills. So to speak. Let the eggs stand in the water until completely cooled.
  5. Peel the eggs, rinse, then dry them. Slice in half lengthwise. Gently scoop out the yolks into a medium bowl, setting the whites aside. I put them on a sheet of parchment paper.
  6. Add mayonnaise, dill weed, mustard powder and 1/4 t. salt to the egg yolks. Mix well, mashing the yolks with the back of a fork to completely incorporate them. Use a spoon to gently fill the egg whites. I used a jam spoon which seemed just the right size. You could also place the filling in a small zip-top plastic bag, cut the tip off of one corner and squeeze the filling like a pastry bag, if you like.
  7. Chop the reserved bacon and generously top eggs with it.
  8. Arrange the deviled eggs on a platter, cover lightly, and chill in the refrigerator for at least 1 hour, or up 24 hours before serving.
Notes
  1. If you check out the original recipe you will notice that you can also dust the eggs with paprika or minced fresh dill and chives. I might try that next time myself--because next time I will get DILL relish instead of sweet.
Adapted from Magnolia Table
Mormon Mavens https://www.mormonmavens.com/

Soft Caramel Dip


I love this yummy dip.  It reminds me of all things fall, so I’m posting it today in honor of our first day of school which also reminds me of fall (even though technically it’s still summer!).  I usually serve it with cut up apples and bananas, but you could experiment with other fruits as well as pretzels and various types of cookies (I bet Ginger Snaps would be awesome).  It’s normal for small bits of caramel to never quite get mixed in.  Think of those as hidden treasures.


Ingredients:
1 8-oz. pkg cream cheese, softened
1 cup sour cream
50 store-bought caramels, unwrapped

1.  In a mixer, blend the cream cheese and sour cream together until smooth.
2.  Melt caramels in a microwave safe bowl.
3.  Immediately pour caramel into creamed mixture and blend well until smooth.
4.  Eat right away or store in the fridge.  You may need to warm it a bit in the microwave if it is too stiff from refrigeration.

Source:  my recipe box (no clue where it came from, sorry!)

Originally posted on August 22, 2011.

Pizza Dip


When I found this recipe on–where else?–Pinterest, I figured it would be pretty good.  I didn’t know it would be AWESOME.  I made the original dip but also made a second dip with different toppings.  Both were a hit. But I have some bad news. If you make this for an event or party, you will have no leftovers to enjoy.


Ingredients:
4 ounces cream cheese, softened
1/4 cup sour cream
1/4 cup mayonnaise
1/2 cup shredded mozzarella cheese
1/4 cup grated Parmesan cheese
1 cup pizza or spaghetti sauce
1/2 cup shredded mozzarella cheese
1/4 cup grated Parmesan cheese
pizza toppings of your choice

1.  Mix the cream cheese, sour cream, mayonnaise, 1/2 cup mozzarella, and 1/4 cup parmesan together in a bowl. Spread this into a shallow dish, like pie plate.
2.  Spread the pizza or spaghetti sauce on top. Sprinkle on the remaining cheeses and whatever toppings you like (I chose mini pepperoni slices for one and pineapple tidbits and Canadian bacon for the other).
3.  Bake at 350 degrees for about 20 minutes, or until it all looks deliciously melted and slightly bubbling along the edges.
4.  Serve with crackers of your choice, bread slices, bread sticks, etc.

For serving:  I got baguettes and sliced them diagonally, about 1/2″ thick.  I drizzled them with a little olive oil, sprinkled them with salt and pepper, and baked them for about 8 minutes in a 425 degree oven.
nomorepizzadip.jpg


Originally posted on April 29, 2013.


Bruschetta

Though this simple but satisfying snacketizer is best served with homegrown tomatoes, store-bought and out of season tomatoes still produce good results.  I don’t have any amounts listed….hope that’s copacetic with you.  Just adjust the amounts according to what YOU like.

Ingredients:
fresh tomatoes, diced
onion, diced (optional…I don’t like raw onion so I leave it out)
basil (fresh or dried)
garlic powder
salt
pepper
olive oil
red wine vinegar
baguettes, sliced 1/2-3/4″ thick
fresh parmesan cheese, grated

1.  Preheat oven to 400 degrees.  Place baguette slices on cookie sheet.  Drizzle lightly with olive oil.  Sprinkle with salt and pepper.  Bake for 8 to 12 minutes, or until edges are golden and middles feel like they’re starting to get crunchy.
2.  In a bowl, combine tomatoes and onions.  Add your basil (see notes below), garlic powder, and salt to taste (don’t over salt…you can always add more later).  Drizzle a little olive oil over it.  Then sprinkle on the red wine vinegar. Stir to combine.

How I Like to Eat It:
Okay….here we go.  Grab a toasted baguette slice.  Sprinkle on the grated cheese that I insisted you grate by hand.  Spoon the tomato mixture on top (yes, it is messy and you had better be doing this over a plate).  Sprinkle a little bit of salt over the top.  Now, take a crunchy bite and enjoy!

Notes:

    • Tomatoes–use whatever tomatoes look the most ripe and tasty.  
    • Basil–if you have fresh that’s great…simply chiffonade to get the right amount (use more with fresh).  If using dry, sprinkle in a bit at a time until you get the right taste.  Here’s a video on how to chiffonade fresh basil:

  • Garlic Powder–yes, you can use fresh, but I don’t like to bite into raw garlic so I use the powder. 
  • Olive Oil–I just put in enough so that I can tell each piece of tomato is bathed but not swimming in it.
  • Red Wine Vinegar–I love this!  I put in more vinegar than oil, but I still don’t have the whole thing swimming in it.
  • Baguettes–if you can help it, don’t buy the ones that are really flat on top.  When you slice it, you are creating a little bread plate for your tomatoes so a flat baguette will make for a narrow plate.  Find the roundest ones you can.
  • Parmesan Cheese–I really must insist <wink> that you buy the lovely triangular cheese and grate it on the large holes using your cheese grater.  The powdered stuff in a can will NOT give you the same tasty results.
Source:  Honestly, I have no idea.  I’ve been making this for years!  But I have no idea where I got it from.
 
Originally posted on April 15, 2013.

Stuffed Cherry Tomatoes

 
There are days when you just can’t think of a recipe to post, so you hit your trusty family cookbook to see if anything strikes your fancy–and if you already have most of the ingredients.  Today was that day.  After a quick trip to the store before work to pick up chives and cherry tomatoes, I was ready to prepare your post for the day.  This is actually a recipe that I taped into my cookbook without even trying it.  I have quite a few of those, from back in pre-Pinterest days, pre-save it to your computer days.  Yes, that long ago.  This one is clipped from a magazine.  I would guess at Better Homes & Gardens.  This is actually quite good and any leftover filling makes a great egg salad sandwich.
 
Ingredients:
36 large cherry tomatoes 
1/3 cup mayonnaise
1 T. Dijon mustard (I used regular because I forgot to get some at the store)
1/2 t. curry powder
2 T. chopped fresh chives
10 whole chives for garnish
 
1.  Cut a slice off the top of each tomato and use a spoon to remove the meat and seeds.  I actually cut off the bottom end so that the tomatoes would sit level on the platter.
 
2.  Set the tomatoes upside down on paper towels to drain.
 
3.  Put the peeled eggs in a bowl along with the mustard and mayo and mash with a fork until fairly smooth.  Add the remaining ingredients, mix well and taste so you can add spices if you need to.  I added a little bit of salt.
 
4.  About 1 hour before serving, fill each tomato with egg salad, garnish with several 2″ chive spears standing up in the middle of the tomato.  Makes a lovely appetizer, don’t you think?
 
 
Originally posted on March 12, 2015.

No-Bake Cheesecake Bites

Recently I had some ladies over to my house for a little get together and I wanted to serve something that looked pretty and tasted good but was super easy to make.  I searched the internet and finally decided to try these tasty little morsels.  I’m glad I did.  They were a success, and I’ll be using this recipe again for sure!  These are perfect for parties and showers.  You can make the filling ahead of time and fill the cups just before your guests arrive.  Definitely a keeper!

 
Ingredients:
2 Tbsp. packed brown sugar
1/4 cup. sour cream
1/4 tsp. vanilla
4 ounces cream cheese, softened
1 Tbsp. heavy whipping cream
15 mini Phyllo tart shells (1 package)
berries for garnish
 
1.  In a mixing bowl, beat the brown sugar, sour cream, and vanilla together until well blended.  Add the cream cheese and beat until smooth.  Add the whipping cream and beat until light and fluffy.
2.  If serving right away, simply spoon some of the mix into each tart shell.  If you want to chill it until later, spoon the mix into a zip-top bag, seal, and place in the fridge till you are ready.  Then take the bag out, snip one corner with scissors, and squeeze the mixture through the hole into the tart shells.
3.  Garnish with berries.
 
Source:  Kitchen Treaty (although that recipe adds 1 heaping teaspoon of lemon zest, which I omitted)
Originally posted on March 6, 2013.

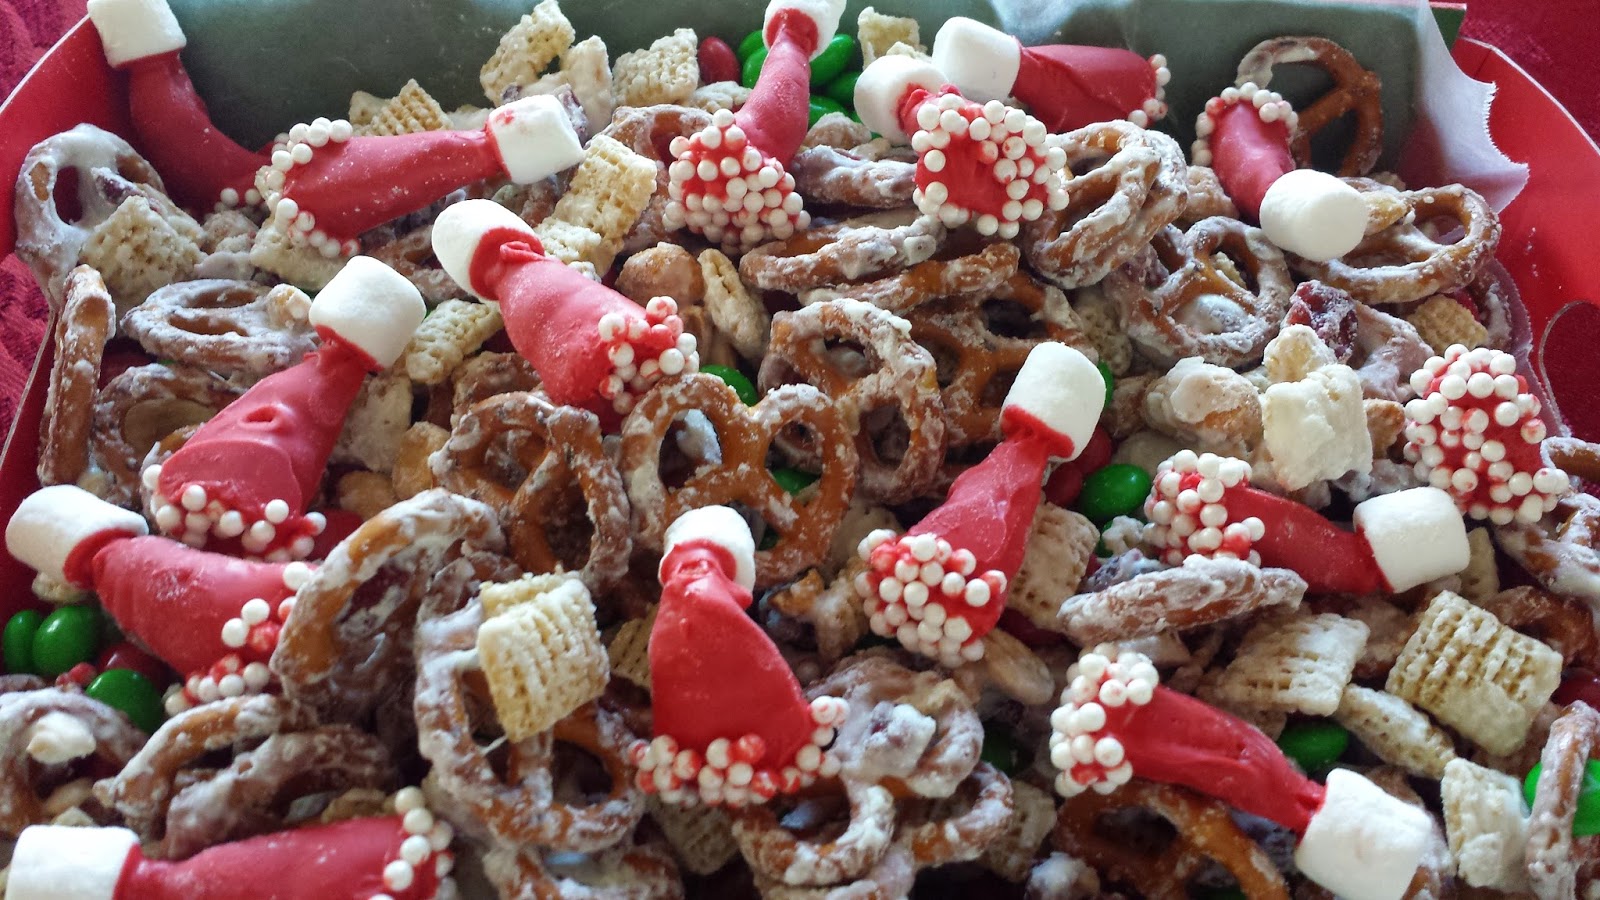
Santa Hat Party Mix

This recipe was originally published on December 16, 2014.  It is such a fun and tasty looking Christmas treat that we thought we would bring it back.  Hats off to Amy for sharing it! (pun intended)

This is so yummy and fun to make and to eat!  You’ll definitely want to take it to one of the many Christmas parties of the season.

Ingredients:

Santa Hats

  • Bugles
  • Red melting disks
  • mini marshmallows
  • white sprinkles (nonpareils)

Snack Mix

  • 3 c. mini pretzels
  • 1/2 c. craisins
  • 1 c. salted dry roasted peanuts
  • 2 c. Rice Chex
  • 2 c. holiday colored M&M’s
  • 8 oz. white chocolate for metling

How to Make

 
Santa Hats
 
1.  Melt the candy melts, along with a tablespoon of shortening (to help thin the melted candy), in 30 second intervals on half power in your microwave until melted.
2.  Immediately start dipping.
3.  Let them set up for 10 minutes or so on parchment or wax paper.
4.  When they are set, remelt the red candy disks (if necessary) and dip just the bottoms (the large part of the Bugle) into the white sprinkles.
5.  Then flip it over and dip the top in the melted candy and press a mini marshmallow on top.
6.  Let dry on wax paper.
 
Snack Mix
1.  Spread all your ingredients, EXCEPT M&M’s and Santa Hats, out on a baking sheet lined with parchment or wax paper.
2.  Melt your white chocolate according to package directions and drizzle over the pretzel mix.  Transfer to a large bowl.
3.  When chocolate is set, sprinkle M&M’s and Bugle Santa Hats over the mix.
 
Source:  cookiesandcups.com


Lemon Pie Tarts


lemon pie tartsWhen a recipe is not only easy and quick but also impressive-looking, you know you’ve got a keeper.  And these Lemon Pie Tarts fit the bill.
I had been seeing them on Pinterest but, not being much of a lemon-lover, I kinda ignored them.  But since I had a church event to plan food for, I decided to give them a try since they looked pretty easy.

I’m so glad I did.  These little guys are so easy but so cute!  And I think you could really use any pie filling you wanted to use.  Lemon is a no-brainer because it’s such a pretty pastel color.

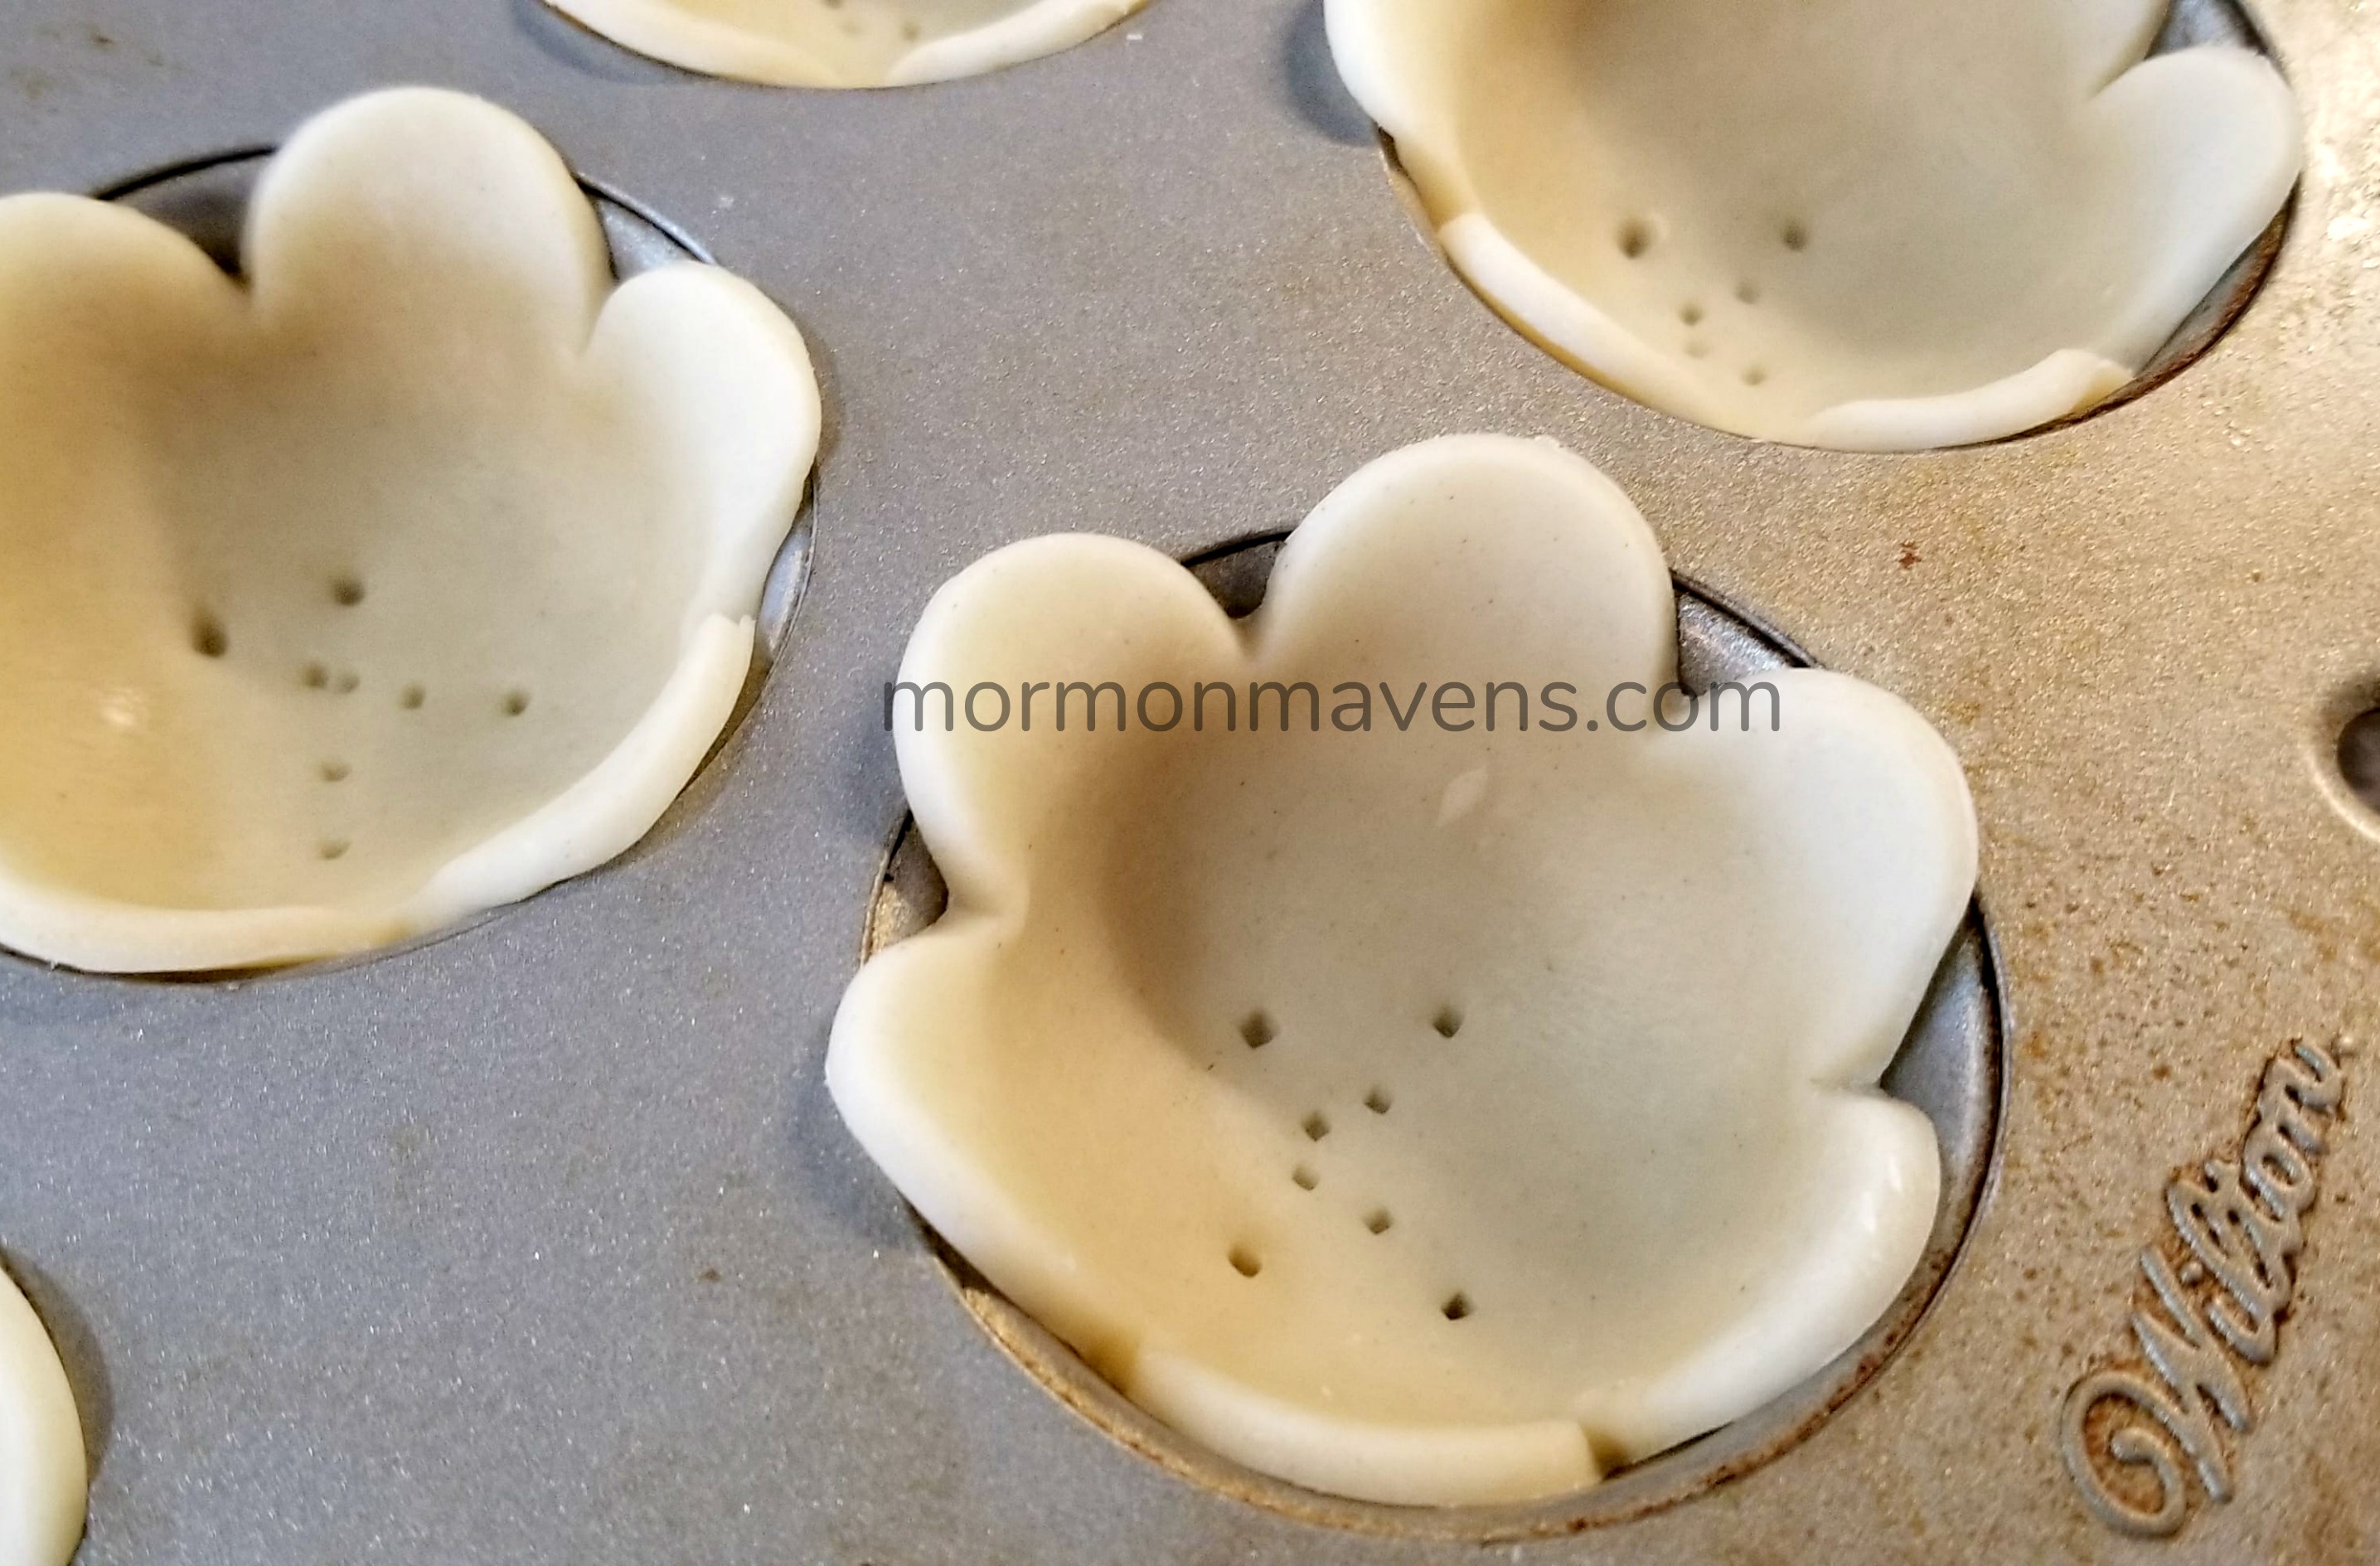
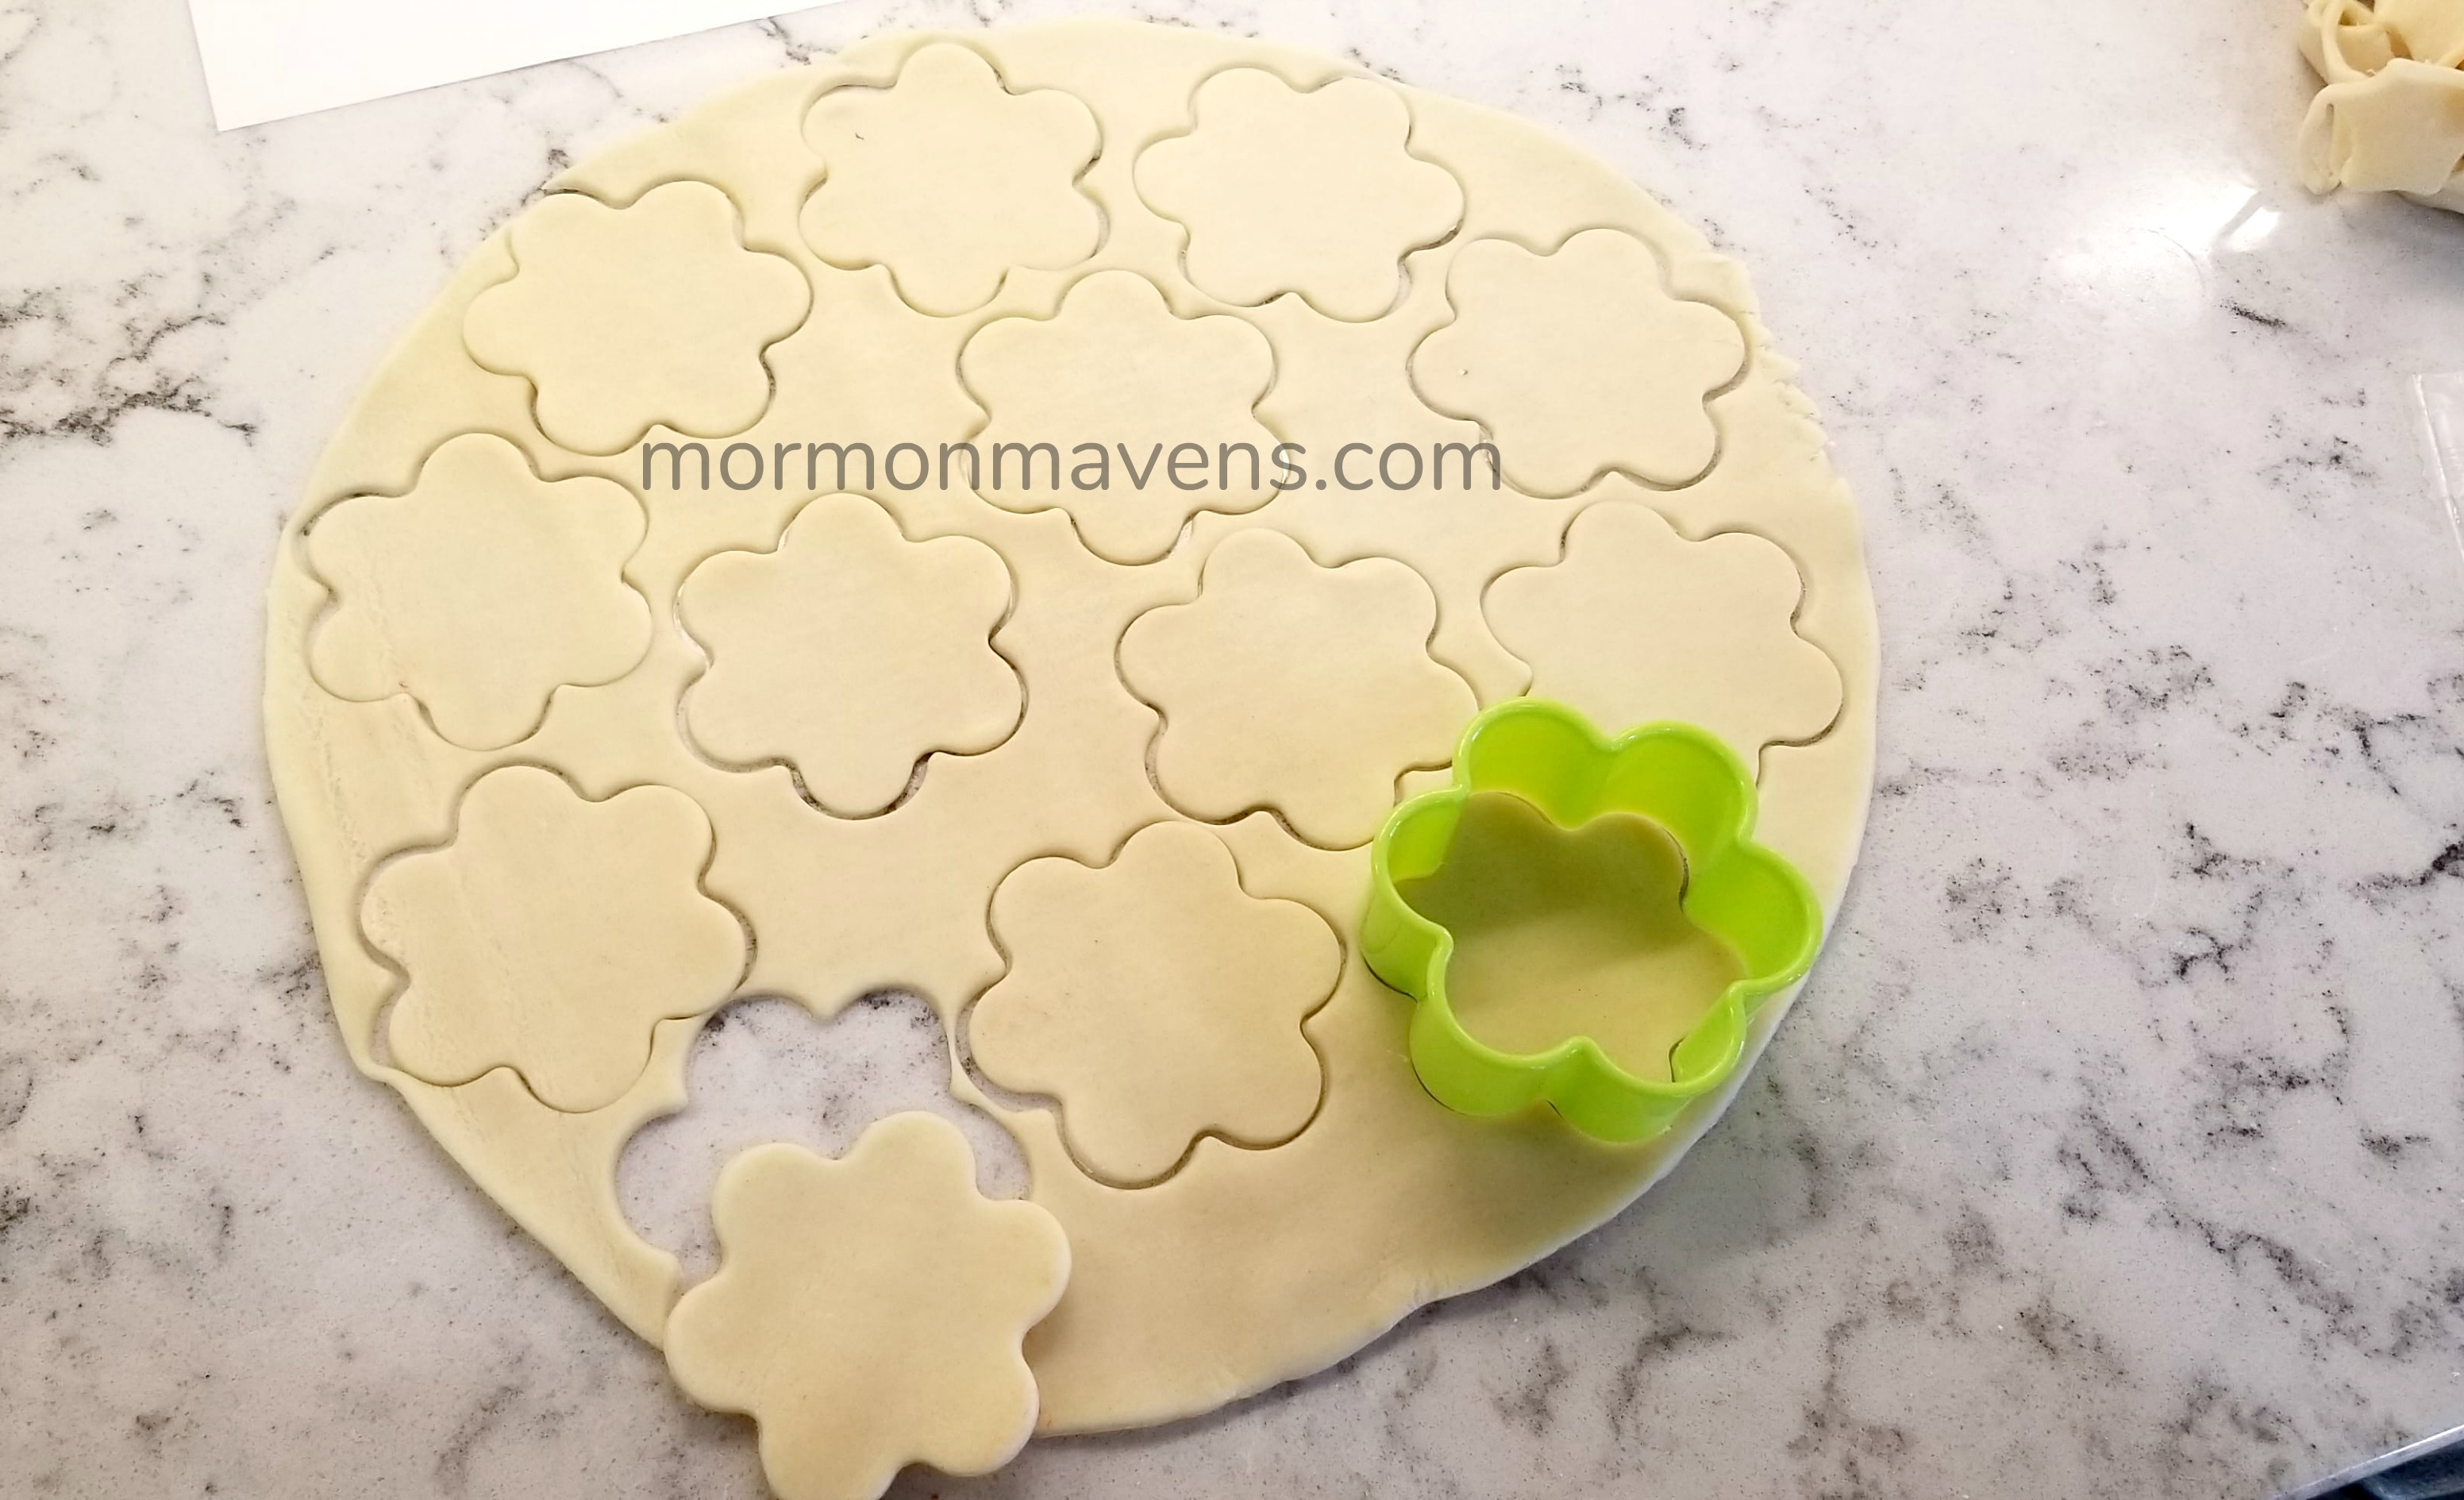
The original recipe I found (and several others) used much larger flower cutters.  This requires you to only use every other mini-muffin tin well when baking.  Well, call me lazy, but I really didn’t want to have to take twice as long to bake these suckers up.  So I chose a smaller flower cutter, which I think made the crust-to-filling ration even better!

lemon pie tarts cutting the crust

lemon pie tarts muffin tin

piercing the crust

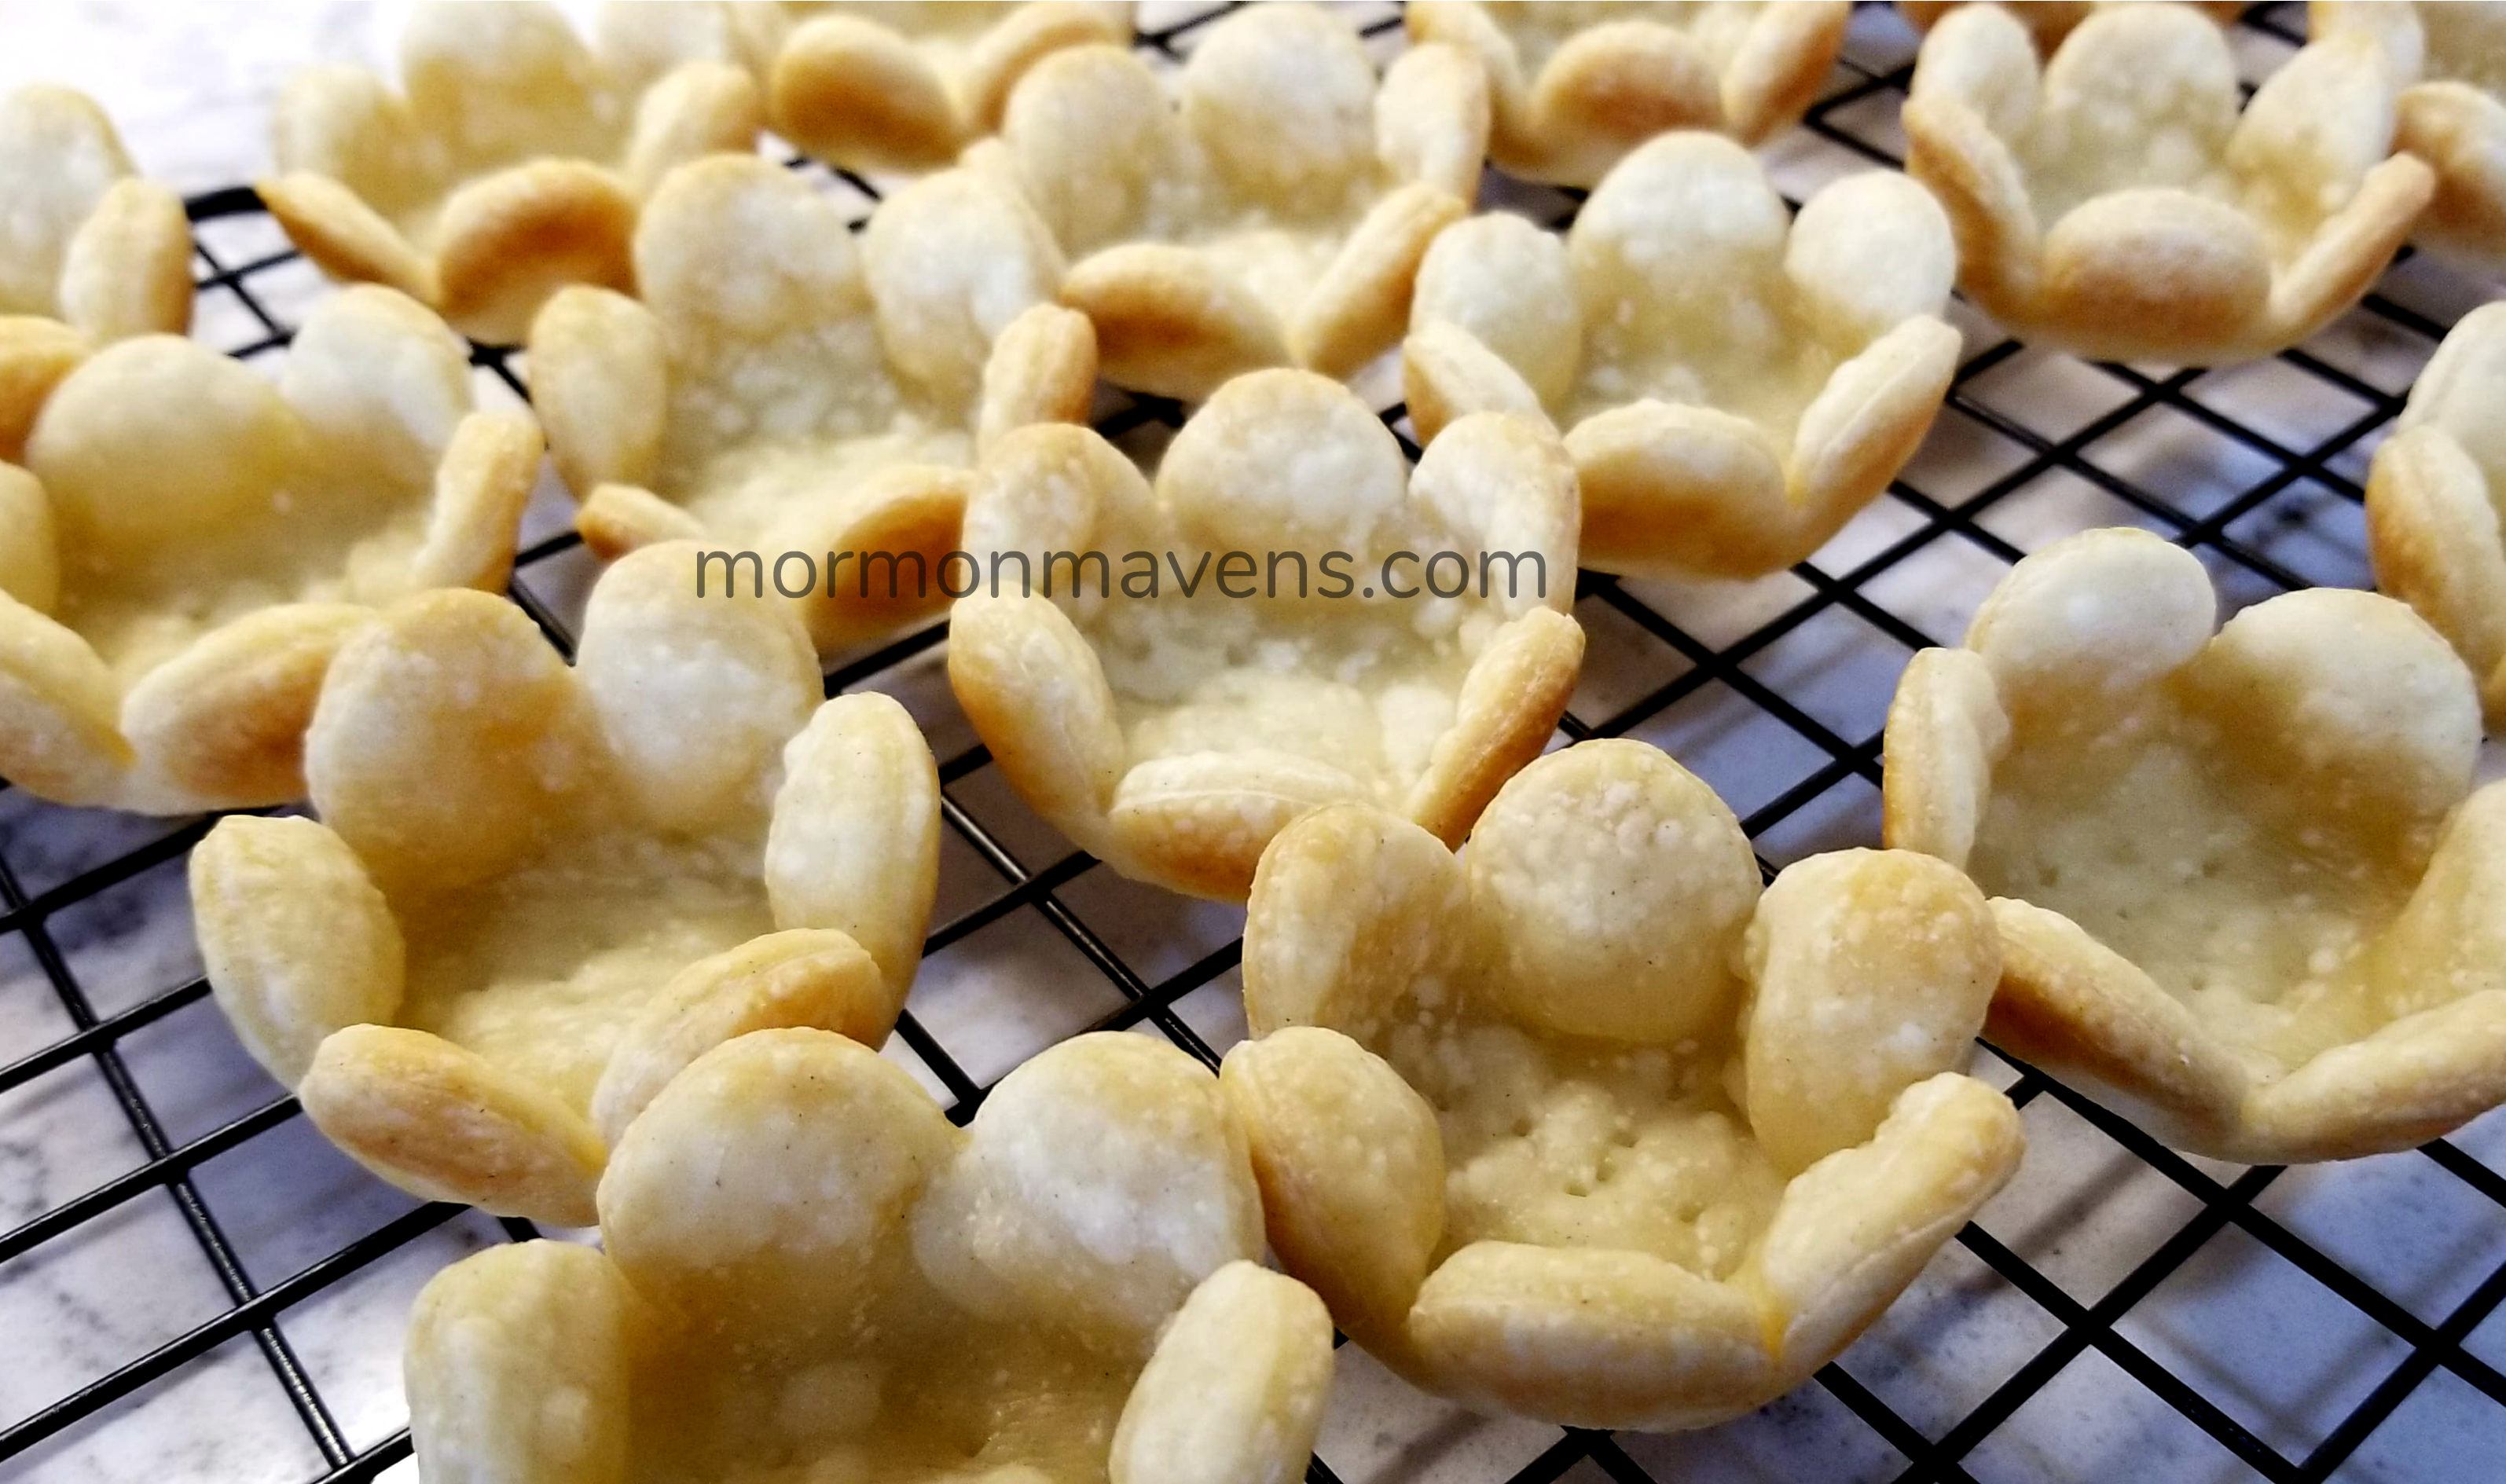
fresh out of the oven crusts

baked crusts ready for filling

Lemon Pie Tarts
Easy, quick, cute party food.
Write a review
Print
Cook Time
5 min
Cook Time
5 min
Ingredients
  1. 1 box ready-to-bake pie crusts (roll-out type)
  2. 1 can lemon creme (lemon pie filling in the baking aisle)
  3. powdered sugar
Instructions
  1. Set out your pie crusts so that they come to room temperature.
  2. When ready, preheat over to 450 degrees.
  3. Roll out the pie crust, then use your flower cutter to cut out as many flowers as will fit. I got about a dozen flowers using my cutter. It just depends on the size you choose.
  4. Place flower crusts into wells of a mini muffin pan. With smaller flowers, don't press all the way down. You want to have at least the edges of the petals flaring out a bit on the edge.
  5. Pierce the bottoms with a fork to prevent air bubbles.
  6. Bake for 5 minutes, or until lightly golden on the edges. Remove from pan and allow to cool.
  7. When ready to serve, dust the empty shells with powdered sugar. Open the lemon creme and spoon it into a pastry bag. Fill the shells with the filling and serve.
Notes
  1. If you don't have a pastry bag you can use a ziploc bag. Spoon the filling into the bag, seal it, then cut a small corner at the bottom of the bag to fill.
  2. The rolled out pie crusts come two to a box. I got a couple dozen flowers out of one box. Again, it depends on the size cutter you use.
Mormon Mavens https://www.mormonmavens.com/

Old Bay Shrimp Boil


I know this didn’t make it in time for your July4th shindig, but we had it for ours and it was amazing.  Have you ever tried one of these shrimp boils/low country boils/whatever boils?  So easy and so much fun to eat.  No plates or utensils required.  Easy-peasy clean up and easy to double or triple, depending on the size of your hungry crowd.  And kids even like it–have pizza delivered if there are a few hold-outs.  This was the first time that I have ever personally been in charge of making the boil–usually my sister Amy prepares it–but she wasn’t staying at the beach for the 4th and my Dad really wanted to have it for a big family meal.  He calls it a “Shrimp Dump.”  As you can see from the picture above, that is a good description.  

Here are a few time-saving tips if you can spare a few more dollars–and it is well worth it:

  • Buy the mini frozen ears of corn–I got store brand.
  • The mini red or white potatoes that are already washed and ready to cook work great
  • This can be cooked on your stove, but we have a propane-powered turkey fryer and it was so great being able to do this instead of having two large stock pots on the stove at the same time.
  • Have your Dad pay for and pick up the shrimp fresh the morning of your meal–ours was caught the night before and they were so fresh and tasty.
  • Use plastic, disposable tablecloths because when you are done with the meal and have put away any small amount of leftovers, you just roll those tablecloths up and toss them in the garbage can, shells and all.
  • I purchased some cute cardboard food trays that were displayed with the tablecloths and these were perfect for guests to put their shrimp shells into.

Get at it!

Shrimp Boil
Serves 8
Write a review
Print
Ingredients
  1. 1/2 cup Old Bay Seasoning
  2. 2 T. salt
  3. 1/2 c. minced onion (you can use large Vidalia onions cut in quarters)
  4. 4 quarts water
  5. 1-2 pkgs. of ready-to-cook baby white or red potatoes, skin on
  6. 2 lbs. Hillshire Farms Turkey Kielbasa, cut into 2-inch chunks
  7. 2 pkgs. (6 each) mini frozen corn cobs
  8. 4 lbs. medium shrimp, in shells
Instructions
  1. In an 8-qt. stock pot, bring Old Bay, salt and water to a boil.
  2. Add potatoes and onions; cook over high heat for 8 minutes.
  3. Add kielbasa; continue to cook on high for 5 minutes.
  4. Add corn and boil another 7 minutes.
  5. Add shrimp, shells on, and cook for about 4 minutes. Once they turn pink they are ready. DO NOT OVERCOOK.
  6. Drain your liquid from the pot and pour contents onto your table--make sure the tablecloths are on. You could also use newspaper.
Notes
  1. Original recipe calls for 1 (12-oz.) can of beer, but we don't drink so we just left it out and added a little more water.
  2. We use Crosse & Blackwell Cocktail Sauce and just pour it right onto the tablecloth in as many "piles" as you need.
  3. Also good to melt several sticks of butter and put into small bowls on the table so that guests can either dip their corn in it or maybe their shrimp. Or why not the spuds?
Adapted from Food.com
Mormon Mavens https://www.mormonmavens.com/