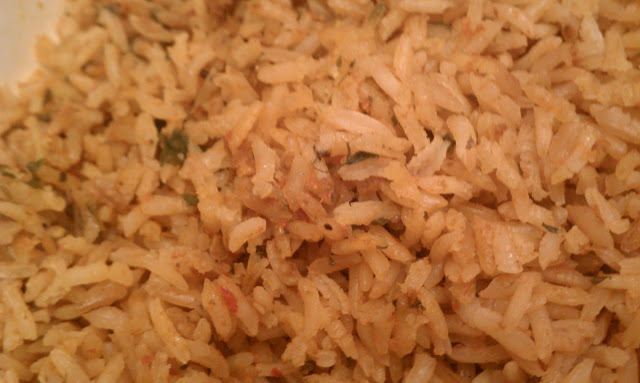
Arroz a la Mexicana (Mexican Rice)

This is an easy recipe for rice.  I know that there are packaged rices that are really good, but for our traditional Christmas Eve dinner I prefer to go with “scratch-made.”  For years I have finagled the process because I didn’t have a Dutch oven.  I would use a cast iron skillet and then transfer the mixture into a stone bowl and flip a round stone baker over that for a lid and bake it.  This year I finally bought a Dutch oven and oh my it is so much easier now!  Love my Dutch oven!  But I digress, this is about the rice…


Ingredients:
2 cups salsa
2 tablespoons olive oil
2 cups white rice, uncooked
1 1/2 cups chicken broth
1 teaspoon salt
1/2 cup coarsely chopped cilantro
 
1.  Preheat oven to 350 degrees.  In a 3-quart, oven-proof saucepan or small Dutch oven (with lid), heat the oil over medium heat.  Add the rice and cook, stirring regularly, until the rice is chalky looking, about 5 minutes.  If some kernels brown, it’s okay.
 
2.  Add the salsa–I use this recipe or just use any roasted tomato and jalapeno salsa–and stir for a minute as the salsa sears and reduces a little.
 
3.  Add the broth and a teaspoon of salt.  Bring to a boil, stir once, scraping down any rice that is on the sides of the pan.  Cover tightly and bake for 25 minutes.  Rice is done if you can bite into a grain and it is nearly cooked through. 
 
4.  If rice is ready, cover and let stand out of the oven for 5-10 minutes longer to finish cooking.  Sprinkle 1/2 cup of fresh chopped cilantro over the rice, then use a fork to fluff rice and fold in the cilantro.
 
Okay, here is a picture of my new Dutch oven.  Isn’t it pretty?  Better Homes and Gardens at Walmart….


Source: Rick Bayless’ Mexican Kitchen.

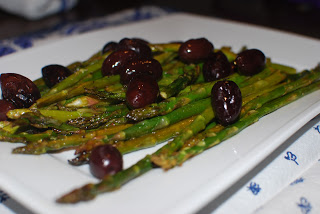
Roasted Asparagus with Olives

This is a quick and easy side dish and perfect for spring when asparagus is in season (and on sale!).

1 1/2 pounds asparagus, trimmed
1/2 cup kalamata olives, pitted
1 tablespoon extra-virgin olive oil
1 teaspoon lemon pepper seasoning

1. Preheat oven to 425°F. Line a baking sheet with aluminum foil.
2. Place asparagus and olives on prepared baking sheet. Drizzles with olive oil and sprinkle the lemon pepper. Toss to coat.
3. Roast in preheated oven for 10 to 12 minutes (depending on thickness of the asparagus).

Source: Sandra Lee Semi-Homemade 20-minute meals

The Ultimate Homemade Green Bean Casserole


Forget those canned onions. This is not yo’ mama’s green bean casserole! Don’t be alarmed at the length of directions. It’s quite simple, really.

Ingredients:

1 lb. shallots, peeled and sliced 1/8 inch thick on a mandoline
2 cups canola oil
kosher salt
1 1/2 lbs. white button mushrooms, rinsed and spun in a salad spinner
2 t. soy sauce
2 t. lemon juice from 1 lemon
2 cups low sodium chicken stock
1 1/2 cups heavy cream
2 T. butter
2 cloves garlic, finely minced
1/4 cup flour
freshly ground pepper
2 lbs. green beans, ends trimmed and cut into 2 inch segments

Directions:

1. Combine shallots and oil in a wok or medium non-stick saucepan. Shallots should barely stick
out above level of oil. Place over high heat and cook, stirring frequently until shallots are
completely soft, about 12 minutes. Meanwhile, line rimmed baking sheet with 6 layers of
paper towels.

2. Continue to cook, stirring constantly until shallots are light golden brown, about 8 minutes.
Immediately strain through a fine mesh strainer set in heat proof bowl or saucepan. Set
shallot oil aside. You should have about 2 cups of fried shallots.

3. Transfer fried shallots to paper towels. Lift up one end of top paper towel and roll shallots
off onto second. Blot with first towel to absorb excess oil. Repeat 4 more times, transferring
shallots from one paper towel to the next until only one paper towel remains. Season well with salt. Allow to cool completely, about 45 minutes. Once cooled, transfer shallots to sealed airtight container. Shallots can be made up to 1 month in advance.

4. Smash mushrooms under bottom of large skillet until broken into 1/4 to 1/2 inch pieces. Roughly chop into pieces approximately 1/8 to 1/4 inches large. Set aside. Combine soy sauce, lemon juice, chicken stock, and heavy cream in 1 quart liquid measure or medium bowl.

5. Add 2 tablespoons reserved shallot oil (save remainder in an airtight container for another use) and butter to 12 inch non stick skillet. Heat over high heat until butter is melted and foaming subsides. Add mushrooms to skillet and cook, stirring occasionally, until liquid is evaporated and mushrooms begin to sizzle, 6 to 10 minutes. Reduce heat to medium high. Add garlic and cook stirring constantly, until fragrant, about 30 seconds. Add flour and cook, stirring constantly until light golden blonde, 1 to 2 minutes. Whisking constantly, add stock and cream mixture. Bring to a boil, reduce to a simmer, and cook until mixture achieves a texture between pancake batter and heavy cream, about 5 minutes. Season to taste with salt and pepper.

6. Adjust oven rack to lower-middle position and preheat oven to 350. Bring 1 gallon of water and 1/4 cup kosher salt to boil over high heat. Fill large bowl with 1 quart ice cubes and 2 quarts water. Add green beans to water and boil until tender but still bright green, about 5 minutes. Drain through colander set over sink and immediately transfer to ice water until completely cooled. Drain green beans and set aside.

7. Combine green beans, mushroom sauce, and 1 cup fried shallots. Transfer to 9×13 rectangular casserole or 10×14 oval casserole. Bake until hot and bubbly, 15 to 20 minutes. Top with remaining cup fried shallots and serve.

Source: Serious Eats

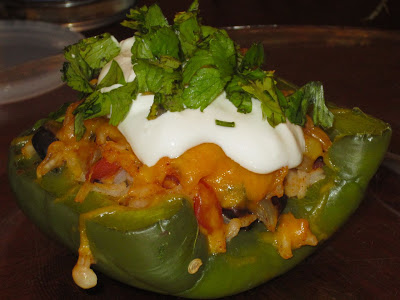
Stuffed Peppers

This stuffed pepper recipe is adapted from an America’s Test Kitchen recipe. Who can resist Christopher Kimball with his tiny round glasses, bow tie, and apron….*wink, *wink!
At any rate, these southwestern gems pack tons of flavor and texture. A great vegetarian option, and the filling and be frozen for another meal down the road!

Ingredients:

4 large sweet bell peppers (green is pictured, but I would recommend using red, yellow or orange)

1 T. salt
1/2 C. white rice
2 T. olive oil
1 onion, diced
3 cloves garlic, minced
1/2- 1 jalapeno, minced (or you could use a 3 oz. can of mild green chilies)
1 14 oz. can black beans, drained and rinsed.
1 C. corn (canned or frozen, whichever you prefer)
2 green onions, sliced
1/2- 1 tsp chipotle chili powder (start with less and add more to taste)
1 tsp. kosher salt
1/4 tsp. black pepper
1 14.5 oz. can diced tomatoes
1 1/4 C. cheddar or pepperjack cheese, divided
3-4 T. chopped fresh cilantro
Directions:
1. Preheat oven to 350 degrees F.
2. Prepare peppers by washing, slicing tops off and removing insides. Bring 4 quarts of water to a boil and add 1 T. salt. Boil whole peppers for 3-4 minutes, until they begin to soften. Remove from water with tongs and place on paper towels to drain.
3. Add rice to the already boiling water and cook until tender, about 13 minutes. Drain carefully and throughly.
4. Heat oil in a 12-inch skillet over medium-high heat. Add onions, garlic, and jalapeno (or chilies) and cook until softened, about 5 minutes.
5. Add corn, beans, green onions, chili powder, kosher salt, and pepper. Stir until corn and beans are heated through, about 5 minutes.
6.Remove skillet from heat and add rice, tomatoes, 1 cup cheese, and cilantro. Stir to combine. Taste the mixture and add any salt, pepper, or more chili powder as desired.
7. Place peppers in a baking dish whole and upright, or slice them in half (pictured) and lay them in the baking dish. Evenly divide mixture between the peppers.
8. Top peppers with remaining 1/4 C. cheese.
9. Bake at 350 for about 30 minutes.
Serve with sour cream and fresh chopped cilantro, you could also add some crispy tortilla strips.

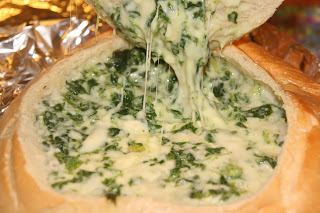
Spinach Dip

BEWARE: Once you take this dip to a party, it’s the only thing your friends will ask for in the future. It is THAT GOOD! And I’m not even a Swiss Cheese fan. I mean, LOOK at all that cheesey goodness!

Ingredients:
2 (9 oz) packages of Creamed Spinach*, thawed (found in the frozen veggie section)
3 2/3 Cups Shredded Swiss Cheese
3 Tbsp Parmesan Cheese
1/2 Cups Sour Cream
1/2 tsp Salt
1/2 tsp Pepper
1 Loaf Sour Dough Bread

1. Mix all ingredients, except for the bread bowl, in a large bowl and set aside.
2. Using a knife (we use a steak knife), cut into the bread bowl diagonally, making a circle–much the same as a jack-o-lantern top– and remove the top. Trim off extra bread to make the underside flat, and set both aside.
3. Cut all the way around the inside of the bread bowl, leaving 1/2″ wall. Carefully remove the bread from inside the bowl. We try to leave fairly big chunks of bread. Store all the extra bread pieces in an air tight ziplock bag for later.
4. Empty the cheesey contents from the mixing bowl into the bread bowl.
5. Put the “lid” back on the bread bowl.
6. Wrap the entire thing in tin foil (we use 2 sheets. One wrapped one way, the other for the other way) and bake at 450 degrees F for 45 minutes.

Serve immediately with extra chunks of bread or your favorite crackers. Our favorites are Club and Multigrain Toppers, although really, ANY cracker will do! Refrigerate and reheat leftovers…if there are any.

*One time I couldn’t find creamed spinach anywhere–honestly, what is WRONG with grocery stores these days?  I used 1 10 oz. (or less) bag of frozen chopped spinach instead and it still turned out deliciously. Thaw the spinach and dab away any excess water with a paper towel. Kind of eyeball the amount you put in. There should be more cheese than spinach. Add a few Tbsp cream, evaporated milk, or regular milk to help with consistency.

When the dip is gone, rip into the bowl!  Go ahead. Say, “Ahhh…” and take a bite!

Source: I can’t remember, but Mr. Blue Eyes actually made this round of dip. So the credit is all his!
~Kara

Three Cheese Roasted Vegetables

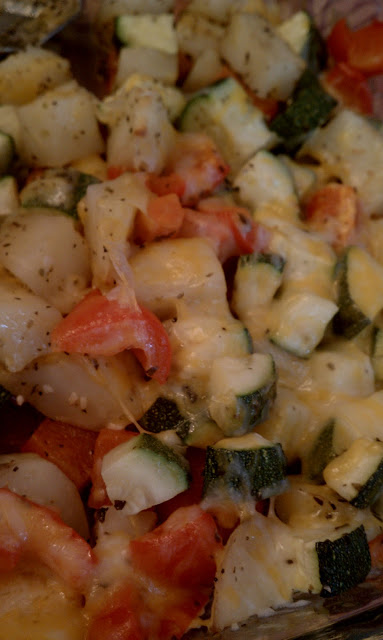
This is one of our family’s favorite side dishes and is actually healthy and easy to prepare.  I read an article–I think it was Family Circle, but it could have been Woman’s Day–by a mother who was trying to prepare healthy, tasty food for her family.  I clipped several of her recipes so maybe you will see some more in future blogs.  This recipe is also visually appealing.  Try it.

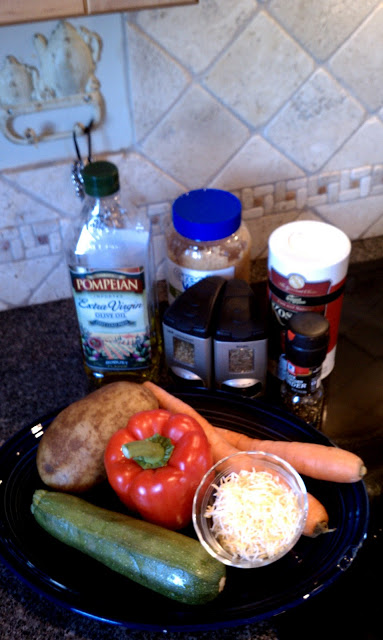
Ingredients:
2 medium russet potatoes, peeled and cut into 1-inch pieces
2 medium carrots, pared and cut into 1/2-inch slices
1 tablespoon olive oil
1 teaspoon each basil and oregano, crushed
1/4 teaspoon each salt and freshly ground black pepper
1 large zucchini, cut into 1/2-inch pieces
1 large red bell pepper, cut into 1-inch pieces
2 cloves garlic, minced
2 cups (8-oz.) 4-cheese blend (I use Mexican)

1.  Place potatoes and carrots in greased 13 x 9-inch baking dish. Drizzle with oil; sprinkle with basil, oregano, salt and pepper.  Toss lightly to coat.
2.  Bake at 425 for 20 minutes.  Add zucchini, red pepper and garlic; stir vegetables.  Return to oven and bake 20 minutes more, until vegetables are tender.
3.  Sprinkle with cheese; return to oven about 2 minutes more to melt the cheese.

This could have been a full picture including a lovely dish, but we dug in before I could get the shot!

TIP:  When I need to save time, I cut up my vegetables ahead of time and place them in plastic bags and store in the fridge until I am ready to use them.


Source:  Family Circle or Woman’s Day Magazine, 1990’s


Spinach Salad

After all of the holiday treats I have been eating, I thought I probably should throw in a salad..or 3! This spinach salad was served at our Relief Society Enrichment Night (women’s group at church) with lasagna and garlic buttered french bread. It was really delicous! I changed the recipe to fit our likes and thought I’d share it with ya’ll! The recipe calls for oil, but was substituted with water! So refreshing!

SALAD:
1 pkg. of spinach
1 pkg of iceburg garden salad
1 small red onion, 1tsp grated for dressing and slice the rest
1/2 lb. any white cheese
1/2 lb. bacon crumbled

DRESSING:
1/3 cup sugar
1/3 cup vinegar
1/2 cup oil OR 1/2 cup water
1/4 tsp. salt
1 tsp. grated red onion
1/2 tsp. dry mustard

Dump all of the salad packages into a huge bowl. Slice red onion over top and sprinkle cheese and bacon over top. Toss with dressing..really well!

Butterfly Crescent Rolls

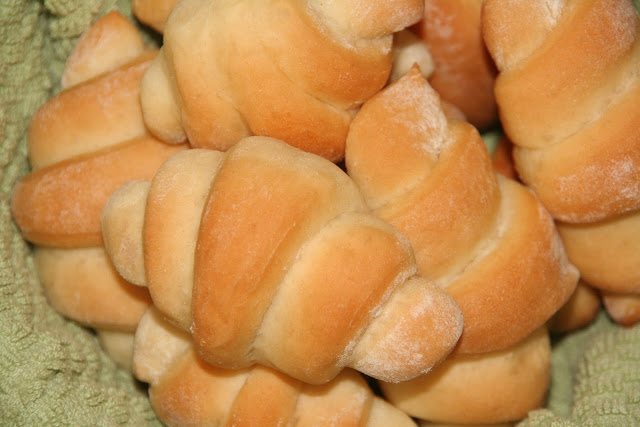
Nothing takes me back “home” more than the smell of freshly baked bread permeating the air. Grandma and Mom are the best bread bakers I know and, with Grandma’s permission, I share this delicious recipe. Big holiday dinners just would not be the same without these rolls!

Ingredients:

1 Cup Boiling Water
1/4 Cup Sugar
1/2  Cup (1 stick) BUTTER
1 Egg
1 Tbsp Yeast
4 Cups Flour (divided)
1/2 tsp Salt
1/2 tsp Baking Powder
1. Preheat the oven to 350 degrees.
2. In your favorite mixer* (I own a Kitchen Aide, which I LOVE–but I’d prefer a Bosch for bread…here’s to someday!), mix the water, sugar and butter until the butter is melted.
3. Add the eggs and the yeast. (Test the temperature before dumping in your yeast. If it’s too hot, the water will kill it.) Mix well.
4. Add half of the flour, and all of the salt and baking powder. Mix until fully incorporated.
5. Add the remaining flour. The dough should be slightly stiff.
6. Let your machine knead the dough for 10 minutes.
7. Move your dough to a Large Bowl (optional) and cover with a towel. Let rise until doubled in size.
8. Punch the dough down.
9. On a lightly floured surface, roll 1/2 of the dough out in a circle (pizza shaped) until 1/2 an inch thick.
10. With a sharp knife (I use a pizza cutter), cut the dough like you would a pizza into several slices. The number of slices depends on what you’re making the rolls for. The fewer the slices, the bigger the rolls–good for sandwiches. The more slices, the smaller the rolls–good for a dinner side!

11. Take a slice by the fat end and roll it up to the point.
12. Place on a slightly greased cookie sheet, point down so it doesn’t come unrolled while baking and make bird shaped bread–NOT that I’m speaking from experience! *ahem*. Place them about 2 inches apart.
13. Continue until all the slices are shaped into rolls and on cookie sheets.
14. Cover with a towel and let rise until doubled.
15. Repeat steps 9 – 14 for the other 1/2 of the dough.
16. Bake rolls for 15 – 20 minutes, or until the rolls are a nice golden brown color.
Doubles easily.

*If you don’t have a mixer, that’s fine! I used to make these by hand. When you get the kneading part, turn the dough out onto a floured surface and knead by hand, turning about 200 times or for 10 minutes.

Source: My wonderful grandma, KaraLyn Taylor

ENJOY!
~Kara

Sweet Potato Bake

Ingredients:

Filling:
3 cups sweet potatoes, mashed
3/4 cup sugar
1/3 cup butter, melted
2 eggs
1 teaspoon vanilla
1 teaspoon ground cinnamon
1/4 cup heavy cream

Topping:
1 cup brown sugar
3 tablespoons butter, melted
1/3 cup all-purpose flour
1 cup pecans, chopped

1. In a large pot or bowl, beat together all of the filling ingredients except for cream.
2. Add cream and mix well.
3. Pour into a greased casserole dish.
4. In a seperate bowl, mix together topping ingredients.
5. Sprinkle topping over top of casserole.
6. Bake at 325 degrees for 25-30 minutes.

Source: Paula Deen, of course!

Triple “Grilled” Cheese

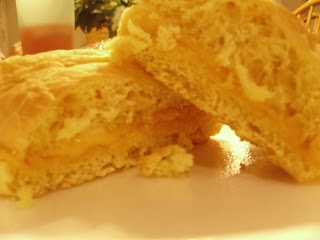
This is a twist on an old favorite and very easy. This is baked instead of grilled on French, Italian, or homemade Sweet Potato Bread. No butter is used, making it lower in fat. Baking also gives a light crispiness throughout the bread coupled with the blend of the three cheeses – this is Yummy!

Ingredients;
2 Loaves French Bread cut in half horizontally
Garlic Powder (optional)
8 slices cheddar cheese
3/4 cup shredded (not powdered) Parmesan Cheese
1 1/2 cups shredded Mozzarella Cheese
1. Place cut bread halves on cookie sheet
2. Lightly sprinkle halves with garlic powder
3. Place 4 slices of cheddar cheese on one side of each set of halves
4. Sprinkle Parmesan Cheese on opposite side of each set of halves
5. Sprinkle Mozzarella Cheese on top of Parmesan Cheese
7. Bake at 400 for 10-15 minutes depending on how crispy you like your bread
8. Remove from oven, place halves together, and cut in desired lengths – Enjoy!

Source: A Jennie original