Tater Tot Breakfast Casserole


It was one of those days when I felt the urge to serve breakfast for supper.  

And so I did.  

Fortunately, I was watching Pioneer Woman while ironing a million white shirts earlier in the day and she was preparing a brunch which looked mighty delicious. I went to the Food Network site and found her show…and this recipe.

Now, she was prepping for a brunch with friends for “the next day” and so she put the recipe together, covered it, and then put it in the fridge overnight.  I didn’t do that, but I did have it in the fridge for about 4 or 5 hours, so it still worked.

It was delicious and it is gone now.  We ate it up pretty quickly.


Due to technical difficulties today, we are using the older format for our recipe.  


Ingredients:

1 16-oz. bag frozen tater tots
Butter for your baking dish
1 T. olive oil
1 lb. spicy bulk breakfast sausage (I used 1 cup Thrive)
1 medium onion, finely diced (who wants to do that?  I used Thrive)
1 cup milk
1/2 cup half-and-half
1/4 t. seasoned salt
1/4 t. cayenne 
4 large eggs
1 red bell pepper, finely diced
1 green bell pepper, finely diced
2 cups grated Cheddar cheese (I used Mexican blend, on hand)
1 cup grated pepper jack cheese (I used regular jack, on hand)
Kosher salt and freshly ground black pepper

Instructions:

  1.  Line up the tater tots in a buttered 9 x 13 baking dish.
  2. Add the olive oil to a large skillet over medium heat.  Add the sausage and onion and cook, breaking the sausage up with a wooden spoon , until browned and cooked through, 8-10 minutes. OR…do what I did and use Thrive foods.  Scoop 2 cups of Sausage Crumbles and about 1/4 cup of already refreshed Thrive chopped onion.  Toast up for a few minutes–seriously, like 4 minutes– in the olive oil.
  3. Set meat aside and let cool a little, then sprinkle over tots.
  4. In a large bowl, mix the milk, half-and-half, seasoned salt, cayenne, eggs, bell peppers and half of each cheese and salt and pepper to taste.  Pour over the tots/sausage mixture, then top with the rest of the cheeses.  Cover with foil and refrigerate overnight or until you need to cook it.
  5. Preheat oven to 350 degrees F.
  6. Bake, covered, for about 25 minutes.  Remove foil and continue to bake until the cheese is brown and bubbly and the casserole is cooked through–about 20-35 minutes.
  7. Cut into squares and serve with sliced tomatoes, grapes or other appropriate sides.


SOURCE:  Ree Drummond, The Pioneer Woman on FoodNetwork.


Bagel Quiches

bagel quicheIt’s a new look for bagels…and quiches!

If you’re bored with the same-old, same-old for breakfast, give this a shot.  We’re always using Thrive Life ingredients in our home, but you could easily sub your own ingredients; Thrive Life just makes prep easier. 

Try some different combinations of flavors!  I think a Caprese combo would be great, and it’s next on my list to try:  basil, tomato dices, and mozzarella!


Bagel Quiches
Serves 1
Quiche in a bagel!
Write a review
Print
Prep Time
10 min
Cook Time
25 min
Prep Time
10 min
Cook Time
25 min
Ingredients
  1. 1 bagel, sliced in half
  2. 2 eggs
  3. 1 pn. salt and pepper to taste
  4. 2 tbsp. THRIVE Red Bell Peppers - Freeze Dried
  5. 2 tbsp. THRIVE Mushroom Pieces - Freeze Dried
  6. 2 tbsp. THRIVE Shredded Cheddar Cheese - Freeze Dried
Instructions
  1. Preheat oven to 375 degrees.
  2. Measure out your Thrive Life veggies/cheeses/meats and place them in a small container with a tight-fitting lid. Add in about a Tablespoon of water and close the lid. Toss every couple of minutes to refresh the ingredients while you prep the other items. (If using non-freeze dried, prep and chop ingredients and set aside.)
  3. Cut a trench into each bagel half by cutting about 1/4" away from the outside edge and the inside hole. Use your fingers to carefully remove the bagel bread from between the cuts; again, being careful not to tear all the way through the bottom.
  4. Cradle each bagel half in foil and place on a baking sheet.
  5. Whisk the eggs in a small bowl or glass measuring cup. Add in the salt and pepper while whisking. Pour enough of the egg into each bagel half to cover the bottom of the trench.
  6. Drain the container with the Thrive Life veggies/cheeses/meats if needed. Using your fingers, sprinkle these ingredients over the egg in your bagel halves. Add more whisked egg over top but do not overfill the bagel (just fill to the top).
  7. Bake for 20-30 minutes or until egg is set (25 minutes in my oven at home). Serve!
Notes
  1. Depending on the size of your bagel, you will use anywhere from 4-8 Tablespoons of Thrive Life ingredients (or your non-freeze dried ingredients).
  2. Try adding Thrive Life's Chef Choice Seasoning or our delicious freeze dried herbs (or whatever herbs you have on hand)!
  3. Use any combo of ingredients you like.
  4. Could be a great way to use up those leftover veggies from dinner!
  5. I used presliced bagels, but would have preferred bakery bagels that are unsliced. Too often, presliced bagels are uneven--the top is thinner than the bottom. Still, it worked. 🙂
  6. You can also use our Thrive's Scrambled Egg Mix! It comes in handy if you're out of eggs, and I promise it is delicious. Even my pickiest eater eats it!
Adapted from Recipe Girl
Mormon Mavens https://www.mormonmavens.com/

Fresh Basil


Have you ever grown your own fresh Basil? There is something so fulfilling and productive about going outside and picking your own food.  This is the closest I have gotten to doing that in over a decade.

We had fresh Caprese Salad the other night for supper–one of our favorite summer dishes. Oh my goodness, it smelled so fresh and tasted so delicious.  

Not quite sure how my Basil fared the hail storm yesterday.  We will just have to wait and see…


Use-it-Up Jam Bars

jam bars

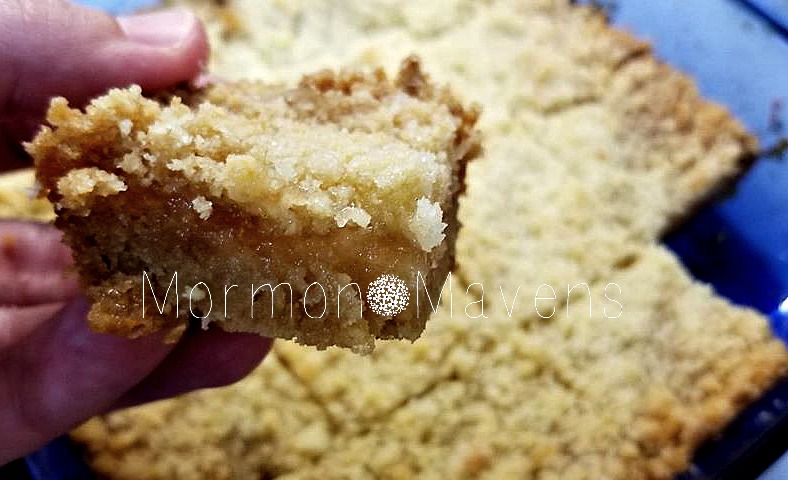
If you have too many jam jars in the fridge and you’d like to free up some space, this recipe is for you.  And the beauty of it is that you can just mix together whatever jam flavors you’ve got!  

Now for this particular batch, I had a jar of pear jam that I wanted to use up (nobody would eat it on toast).  Once I made it into a cookie bar creation, it was a hit!

But I’ve taken a few jars and simply combined what was left of the jam residue…..just need a cup total.  The results are always tasty.

Hmmm….wonder how it would be with fruit butters!  I’ll have to try that next.

I make this with Thrive Life’s Vanilla Sugar Cookie Dough Mix because that’s what I always keep on hand, but you can use another mix.

Use-It-Up Jam Bars
Yields 16
A tasty way to use up leftover jams and jellies from the fridge.
Write a review
Print
Prep Time
10 min
Cook Time
35 min
Total Time
45 min
Prep Time
10 min
Cook Time
35 min
Total Time
45 min
Ingredients
  1. 2 1/4 cups Thrive Life Vanilla Sugar Cookie Dough Mix
  2. 1/2 cup cold butter
  3. 3 Tbsp. water
  4. 1 cup jam or jelly
Instructions
  1. Preheat oven to 375 degrees. Grease an 8x8-inch baking pan.
  2. Cut the cold butter into large dices. Place the cookie mix and the butter into a food processor with the water. Pulse until the mixture resembles coarse crumbs. Remove 1 1/2 cups of this mixture and set aside.
  3. Pour remaining crumb mixture into the baking dish and evenly spread it out. Using the bottom of a measuring cup, press the mixture down to form the bottom crust.
  4. Spread the jam over the bottom crust evenly.
  5. Sprinkle the reserved crumb mixture evenly over the jam.
  6. Bake for 30-35 minutes. Allow to cool completely before cutting into squares and eating.
Notes
  1. Use any combination of fruit jams and/or jellies to equal the 1 cup of jam in the ingredient list.
Mormon Mavens https://www.mormonmavens.com/

Sew, Have You Tried This?


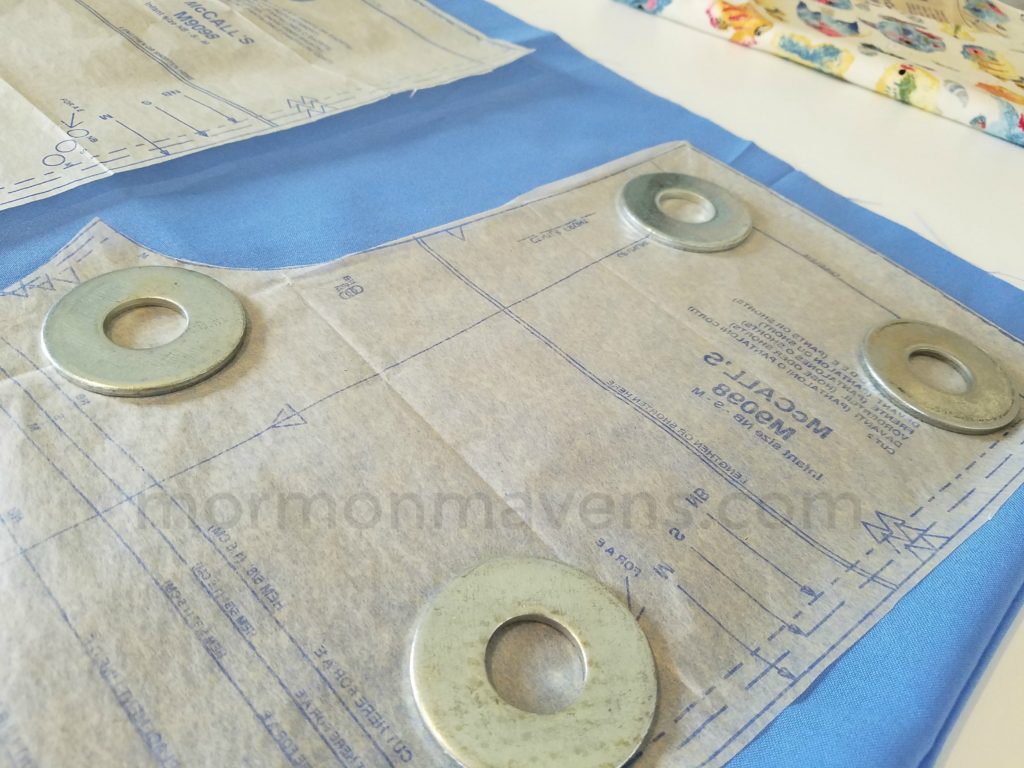
Guess what is better than straight pins for laying out and cutting a pattern?  WASHERS!!  For real.  

Way back in time, like maybe 2000, I was asked to help make costumes for a regional youth dance festival that our church was putting on as part of their annual Youth Conference.  The lady in charge had us meet at the stake center to lay out and cut the pattern pieces that we would then take home and sew.

The costumes were very simple, but the coolest thing about this experience was that I learned a great sewing trick that I continue to use to this day.  Get you some 2-inch stainless (I think) washers.  The middle hole is about 7/8 inch.  I have about 20 or so in a little plastic container that I found at home somewhere.


It is so great to lay these washers (sometimes you might want to stack 2 of them together) right on top of the pattern piece.  It saves a lot of time/fingers/stress.  

Fresh Lemonade Syrup


Ever had a craving for some homemade, fresh lemonade?  I was craving recently and decided to do something about it.  

There is NOTHING like homemade lemonade.  Honestly, you can’t buy that taste.  All the others out there are too tart/too sweet/too processed and don’t even taste like lemonade–more like…I don’t even have the words to describe that, but you know what I’m talking about.  

Now if you want to grab something on-the-fly, Chick-fil-A has the best lemonade from a fast food restaurant that I have ever had.  But if you have less than 30 minutes at home, make it yourself.

The recipe today has been taped into my Brew Family Cookbook for DECADES and I have never used it.  Really. And I think I cut it out of an old “Make A Mix” Cookbook. 

Try a cold glass of this (you could put a wet glass mug in the freezer and let it frost!) and go sit out on your deck under the river birch tree.  Ahhh….

Fresh Lemonade Syrup
Yields 3
Write a review
Print
Ingredients
  1. 9 lemons*
  2. 1 cup water
  3. 2 cups sugar
  4. 1/8 t. salt
Instructions
  1. Cut lemons in half crosswise; juice lemons to yield 1 3/4 cups of juice.
  2. Reserve 2 juiced lemon halves and cut into quarters.
  3. Put lemon juice in a 1-quart container and set aside.
  4. In a small pan, combine quartered lemon halves, sugar, water and salt. Bring to a boil, reduce heat and simmer uncovered for 5 minutes.
  5. Remove from heat and cool (I poured the mixture into a glass container and placed it in the fridge to cool quickly).
  6. Stir cooled sugar mixture into lemon juice.
  7. Cover and refrigerate for up to 1 month.
Notes
  1. To make fresh lemonade, pour 1/4 cup of lemonade syrup into a glass, add 3/4 cup (or more) iced or carbonated water; stir. Serve NOW!! Then, turn around and do it again. Seriously, you won't believe how tasty and refreshing this is. I will never buy a mix again.
  2. *My lemons were just average size and only yielded 1 1/2 cups of juice. I would suggest using large lemons.
Adapted from Make A Mix Cookbook
Mormon Mavens https://www.mormonmavens.com/

Super Moist All Bran Muffins


Have you ever had a really moist, delicious bran muffin somewhere and then they don’t serve them anymore?  Back in the late 90’s, I think, McDonald’s was trying to offer more healthy options at breakfast.  You know, because how many Egg McMuffins can you really take?

My favorite thing was their bran muffin.  It came in it’s own little cellophane pouch so they could warm it for you if you preferred.  And then, just like that, they weren’t serving them anymore.  I haven’t been able to find a replacement for lo these many years.

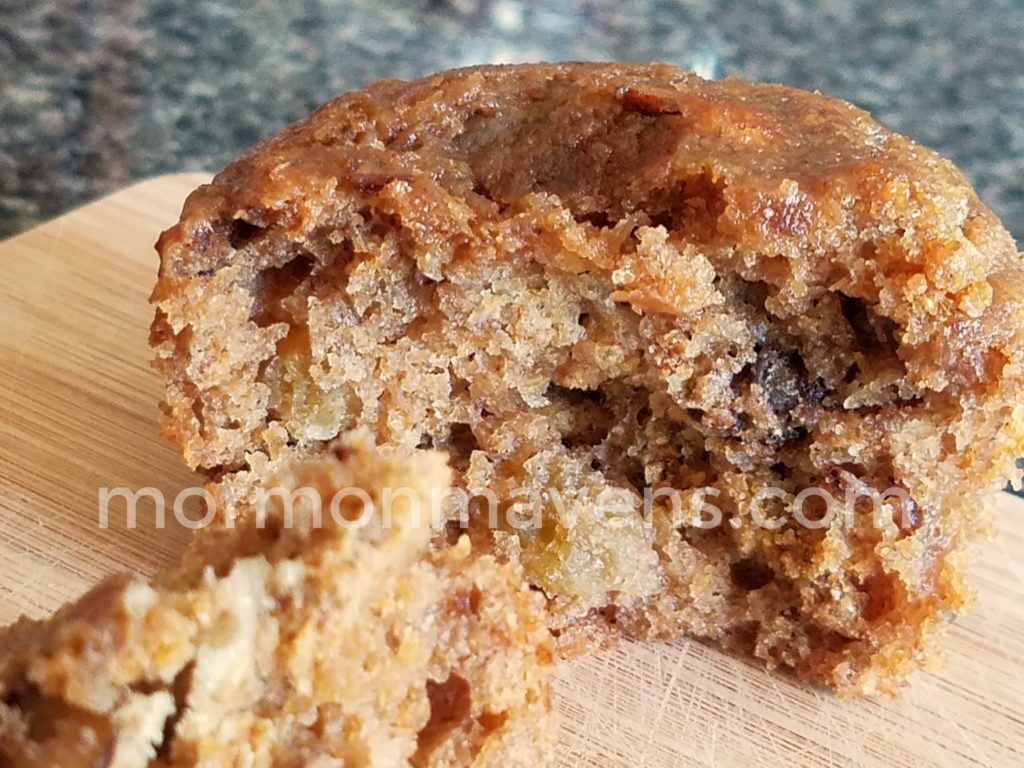
Last week I was determined to Google and find a good recipe and this is the first one I found.  It is moist and delicious and, HELLO, has apple butter in it. Come on, don’t tell me you aren’t drooling over it right now.

I am also excited to use up my supply of cute cupcake papers that I just HAD to buy.  But since I have no kids at home, I haven’t been asked to make any cupcakes for school stuff, ya know?  No bake sales, no fundraisers, no kids’ birthdays at school…


Super Moist All Bran Muffins
Yields 18
Write a review
Print
Ingredients
  1. 1 1/2 c. all-bran cereal
  2. 1/2 c. boiling water
  3. 1/4 c. canola oil
  4. 1 egg
  5. 3/4 c. sugar
  6. 1 c. buttermilk
  7. 1 1/4 c. all-purpose flour
  8. 1 1/4 t. baking soda
  9. 1/2 t. salt
  10. 3/4 c. apple butter
  11. 1/2 c. chopped walnuts
  12. 1/2 c. chopped pecans
  13. 1/2 c. golden raisins
  14. Honey to drizzle
Instructions
  1. Preheat convection oven to 375 degrees F (regular oven--400).
  2. In a large mixing bowl, pour boiling water over 1/2 cup of the bran cereal, mix in oil , then set aside.
  3. In another bowl mix egg, sugar and buttermilk.
  4. Add sifted flour, soda, salt and remaining dry cup of bran to the wet bran mixture, then add wet buttermilk mixture and stir.
  5. Stir in apple butter, nuts and raisins. Mix thoroughly.
  6. Line muffin tins with cupcake liners and scoop batter into each. My batch made 18.
  7. Bake for about 12 minutes (16-18 non-convection).
  8. Drizzle honey on top of muffins.
  9. Transfer muffins to wire racks to cool.
Notes
  1. Original recipe notes that in lieu of cupcake liners you can grease the muffin pan or stoneware. I didn't know you could grease stoneware...
Adapted from Kevin is Cooking
Mormon Mavens https://www.mormonmavens.com/

Kim’s Yummy Cake


You can pick up the best recipes at baby & bridal showers, don’t you think?  That’s where I got this yummy, fresh recipe from my friend Kim, who used to work for a caterer.  Just sayin’.  

I just recently made this for a Cinco de Mayo-themed church dinner because it LOOKS like a tres leches cake.  Do not be fooled into thinking it will be oozing with all those milks in it, but it is still very good.

My favorite topping is a combination of fresh strawberries, mango and kiwi.  I tried to use mango on this one, but it was just way too ripe.  I guess I could have put shredded mango on there…nah.  The blueberries were a nice substitute.

And please don’t use canned frosting.  Ew.

Kim's Yummy cake
Write a review
Print
Ingredients
  1. 1 white cake mix
  2. 8 oz. pkg. cream cheese @ room temperature
  3. 8 oz. (1 cup) of powdered sugar
  4. 8 oz. Cool Whip
  5. Fresh fruit for topping--suggested: mango, strawberries, kiwi
Instructions
  1. Make cake according to directions on the box. Don't over bake! Cool completely.
  2. Mix the cream cheese, powdered sugar and Cool Whip until well blended, then spread on cake.
  3. Done!
Notes
  1. I have always made this in a glass 9 x 13 pan. But wouldn't it look cool as a naked layer cake with the frosting in between layers and on top and then the fruit? Yeah, I think so.
Adapted from Kim Henderson, Lewisville, NC
Mormon Mavens https://www.mormonmavens.com/

Mandarin Sunburst Salad


Father’s Day was celebrated a day early for us this year so that we could get together with our oldest daughter and her family.  They were reserving Sunday for her husband to enjoy an easy day at home after church. 

We picked up some amazing deep-fried barbecued chicken from Maw Maw’s Kitchen–a local southern diner. That was my husband’s idea because he really didn’t want to man the grill on his day.

I needed to add a couple of sides, so this ramen-inspired salad was just the ticket.  I also added Frosted Salad.  Great pairings! 

We had a delicious meal and then topped it off with Apple Pie and ice cream.  Good thing I had yoga the following Monday morning to start off a new week of working out at the Y.  Oh goodness. 

Mandarin Sunburst Salad
Write a review
Print
Ingredients
  1. 2 pkg. ramen noodles, chicken flavor
  2. 1 pkg. (14-oz.) Cole Slaw
  3. 1 can (15-oz.) Mandarin oranges, drained
  4. 1 pkg. (5 or 6 oz.) dried sweetened cranberries
  5. 4 green onions, thinly sliced on the diagonal
  6. 12-16 snow peas, cut diagonally into thirds
  7. 1/2 cup toasted, sliced almonds, divided (Opt. if you have nut allergies)
  8. 1/2 cup canola oil
  9. 1/3 cup sugar
  10. 1/4 cup white vinegar
Instructions
  1. Preheat oven to 325 degrees F.
  2. Open noodles packages. Reserve one seasoning packet for dressing and save other for future use, if desired.
  3. Break up ramen noodles into small pieces.
  4. Arrange noodles on an ungreased baking sheet and bake 10-13 minutes or until lightly browned. Cool on a wire rack covered with waxed paper.
  5. In a large bowl, combine Cole slaw, oranges, cranberries, onions, snow peas, 1/4 cup almonds and cooled noodles.
  6. Whisk oil, sugar, vinegar and reserved seasoning in a small bowl until well blended. Pour over slaw mixture and toss to coat evenly and combine all other ingredients. Sprinkle remaining 1/4 cup almonds over salad.
Notes
  1. This can be prepared 1-2 hours ahead of time and refrigerated to soften noodles. But you do want a little crunch!
Adapted from Fine Cooking
Mormon Mavens https://www.mormonmavens.com/

Apple Pie and A Family Connection


Father’s Day weekend means I am in the kitchen making apple pie from scratch.  Sometimes, if anyone else wants some pie, I end up making two–one for “Dad” and one for the rest of us.

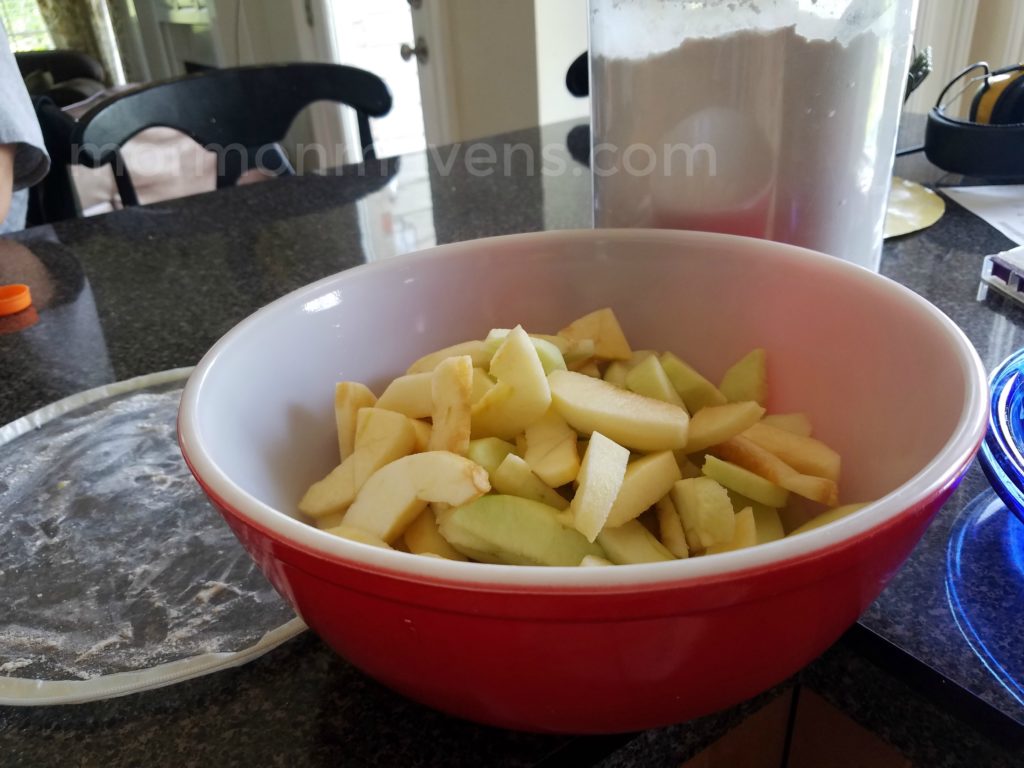
I already had several bowls out for various other dishes that I was preparing for a Saturday Father’s Day dinner, so I reached for this vintage red and white Pyrex bowl that used to be my Grandma Davis’.  I also have the small yellow and white one, but I have no idea whatever happened to the two in between.

I prepped the apples and placed them in this bowl to await the pie crusts being ready–they were chillin’–and realized that I was standing in my kitchen, using Grandma’s pie recipe and using her mixing bowl.  No doubt she had used this very one to make many a pie.

That was such a sweet moment for me.  Grandma passed away many years ago after battling Alzheimer’s–Mom passed only 2 years ago from the same horrible disease.  

Mom actually shared the recipe in our family cookbook as “Mother’s Apple Pie” (she called her mom “Mother”). So this really was a double serendipitous moment.

Connections like these are important.  They bind us to our families–earthly and beyond the veil–in ways we don’t even realize.  

Looking forward to more moments like these.

Have a great Sunday.