Crunchy Cinnamon Ebelskivers


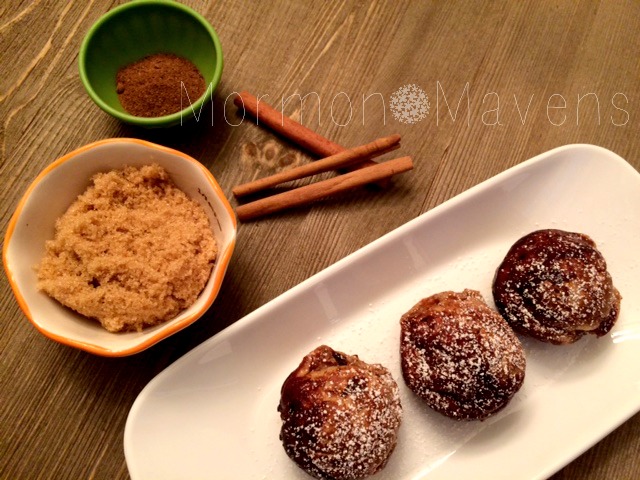
Ebelskivers (pronounced “able-skeevers”) are snacks or desserts–hailing from Denmark–traditionally served during holidays and celebrations.  These puffy, sphere-shaped pancakes can be served in a variety of ways, from sweet to savory, and can include toppings and/or fillings.  I have tried them only a couple of times in my kitchen and each time I learn a little something new about how to prepare them.  

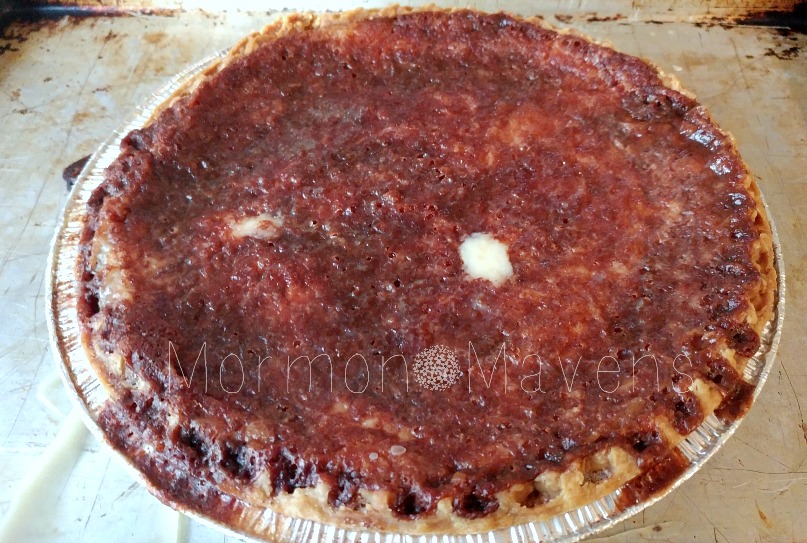
I am still learning how to NOT cook them so long, and maybe someday when I have a gas range again–instead of an electric or ceramic cook top–I will be able to better control the heat and not overcook so many!  But I did manage to salvage a few for the post today and I hope you will give me some grace and try the recipe even if you don’t they they look all that awesome.  I plan to keep honing my ebelskiver skills, so one day you might just see something amazing!

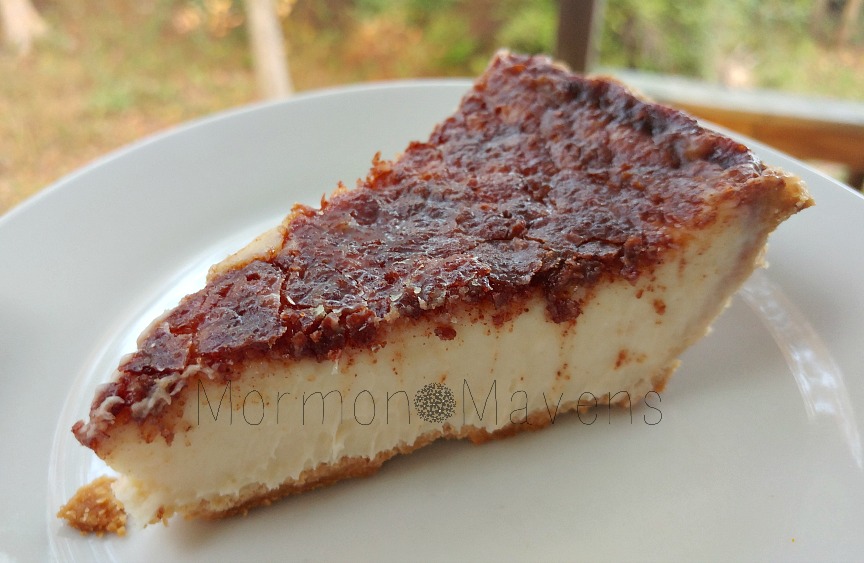
The only necessary tool is a seven-welled pan that forms the pancake’s cool shape.  You can use wooden skewers to turn them or purchase special ebelskiver turners–yes I did–which help flip these babies nicely.  I also have a really cool ebelskiver cookbook and that is where I got the recipe that I am sharing with you today.  According to the cookbook, the brown sugar and butter that ends up as the topping should crack brulee-style with every bite.  Still waiting on that!

Crunchy Cinnamon Ebelskivers
Write a review
Print
Ingredients
  1. 1 cup all-purpose flour
  2. 1 1/2 t. sugar
  3. 1/2 t. baking powder
  4. 1/4 t. salt
  5. 2 large eggs, separated
  6. 1 cup whole milk
  7. 3 T. unsalted butter, melted and slightly cooled,divided
  8. 2 t. ground cinnamon
  9. 1/4 t. nutmeg
  10. 3 1/2 T. light brown sugar
Instructions
  1. In a large bowl, whisk together the flour, sugar, baking powder, salt, cinnamon, and nutmeg.
  2. In a small bowl, lightly whisk the egg yolks, then whisk in the milk and 2 T. of the melted butter.
  3. Add the yolk mixture to the flour mixture and, using a wooden spoon, stir until well-blended--batter will be lumpy.
  4. In a clean bowl, using an electric mixer on high speed, beat the egg whites until stiff--but not dry--peaks form. To lighten the batter, use a rubber spatula and gently fold 1/3 of the egg whites into the batter, then fold in the rest of the egg whites just until no white streaks remain.
Notes
  1. Cooking Tip: You might want to cook these on a little lower temperature if your stove tends to cook things a little too hot. Trust me on this.
Adapted from Ebelskivers: Filled Pancakes and Other Mouthwatering Miniatures
Mormon Mavens https://www.mormonmavens.com/

Strawberry Pretzel Bark

I love quick and easy recipes.  Especially when they look impressive!

This beautiful, swirly chocolate treat is a fun way to enjoy a little decadence–you could even give this as a gift!  Just remember to keep it cold as the chocolate warms easily to the touch and the freeze dried strawberries will have a better texture cold.

pretzel-bark

(this recipe is also shared in my Thrive Life recipes….hence my Thrive website url)

Strawberry Pretzel Bark
Easy but elegant, sweet and salty.
Write a review
Print
Prep Time
5 min
Cook Time
5 min
Total Time
10 min
Prep Time
5 min
Cook Time
5 min
Total Time
10 min
Ingredients
  1. 12 ounces semisweet chocolate chips
  2. 8 ounces white chocolate for baking (could also use vanilla candy melts)
  3. 1 cup freeze dried strawberry slices (I used Thrive, of course!)
  4. 1/2 cup salted pretzel sticks
  5. sprinkles of your choice
Instructions
  1. Line a baking sheet with waxed paper or parchment paper.
  2. Place the chocolate chips in a microwave safe bowl and melt for 30 seconds at a time, stirring after each time, until the chocolate is smooth and melted completely.
  3. Pour 3/4 of the chocolate onto the paper lined baking sheet. Use an offset spatula to spread the chocolate into a thin, even layer so that it ends up in a rectangle about 9"x 12".
  4. Melt the white chocolate in the microwave in the same way you did the chocolate chips. Drop by spoonfuls onto the chocolate rectangle. Use the remaining melted chocolate chips to drop spoonfuls over top of the white chocolate spoonfuls. Swirl with a toothpick.
  5. Immediately place the pretzel sticks and strawberry slices on the surface, pressing down lightly.
  6. Refrigerate until set. Slide the bark with the paper onto a cutting surface and cut the bark into pieces. Serve right away, or store in the fridge in a covered container.
Notes
  1. You can use different freeze dried fruits--blueberries, raspberries, cranberries. All sorts of combos! And if you like it a little saltier, sprinkle on some sea salt too.
Adapted from Five Heart Home
Mormon Mavens https://www.mormonmavens.com/

Peppermint Bark Rice Krispie Treats

This recipe was originally posted on February 16, 2012.  We thought we would bring it back for the holidays!

These are a tasty rendition of the classic Rice Krispie Treat and are great for any holiday involving chocolate and mint–and they are so pretty!  I have made these for our youth at church and for several family gatherings and they are a big hit.  Personally, I can’t stay away from the platter–so many favorite flavors.

Peppermint Bark Rice Krispie Treats
Write a review
Print
Ingredients
  1. 1 10.5 oz. bag of peppermint mini marshmallows*
  2. 4 tablespoons butter, plus extra to butter the pan
  3. 5-6 oz. krispy rice cereal
  4. 3 tablespoons semi-sweet or dark chocolate chips
  5. 3 tablespoons white chocolate chips
  6. 1/2 teaspoon vegetable oil, divided (I used shortening)
  7. a few drops peppermint extract
  8. 2-3 medium sized candy canes, crushed
Instructions
  1. Line a 9×13 pan with foil and lightly butter bottom of pan and about 1 inch up the sides.
  2. Melt butter in a very large bowl in the microwave. Add marshmallows and stir to coat. Microwave on high for 30 seconds at a time until melted and smooth, stirring as you go.
  3. Add the krispy rice cereal and stir to evenly combine. With buttered hands, press mixture into pan.
  4. Place the white chocolate chips and about 1/2 teaspoon or less of shortening in a small bowl. Heat in microwave in 30 second intervals on 50% power, stirring in between until melted and smooth. Repeat same process with the semi-sweet chocolate chips and add a few drops of peppermint extract.
  5. Drizzle both chocolates on top of the treats and sprinkle with the crushed candy canes–I used those that are more porous, you know, the kind you can stick into a hole in an orange and suck the juice through? Really…have you never tried that? Anyway, let sit until chocolate is set. You can put it in the refrigerator to speed up the process. Cut into squares and oh my goodness….
Notes
  1. * If you can’t find the peppermint marshmallows, use regular and add about 1/4 teaspoon peppermint extract to the melted marshmallow mixture.
Adapted from Our Best Bites
Mormon Mavens https://www.mormonmavens.com/


Easy Toffee

toffee
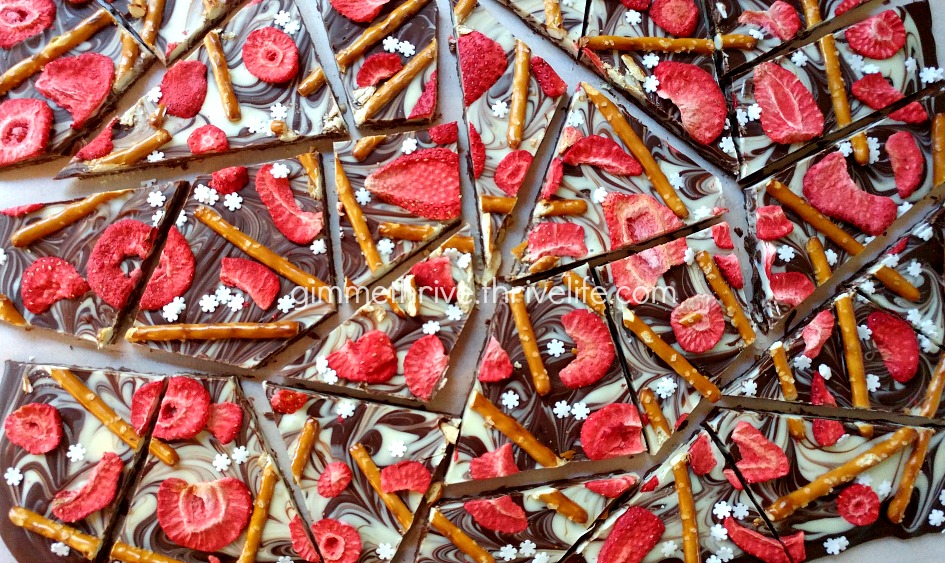
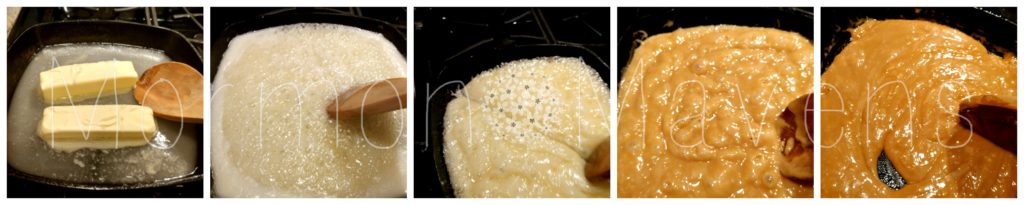
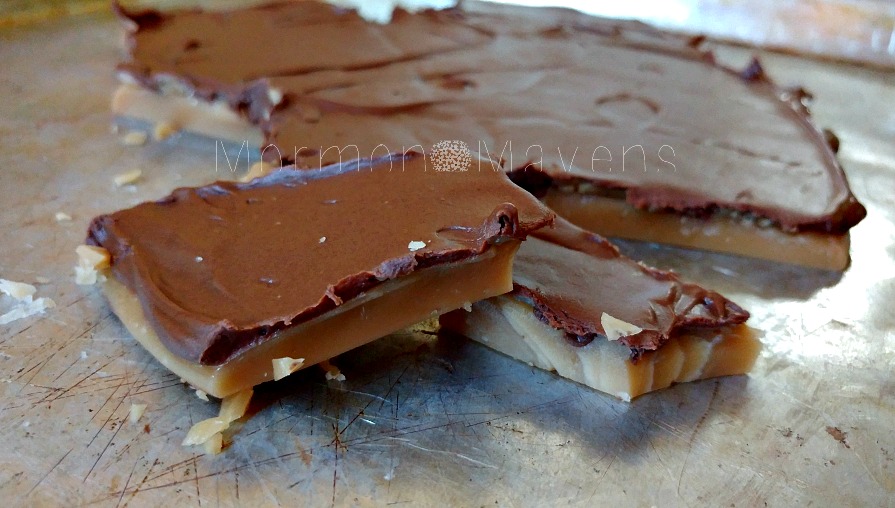
I have a friend who makes THE most amazing toffee.  

Seriously.  It’s total food crack.

And as much as I’ve always thought I would like to know her secret recipe, I actually kinda wish I hadn’t found this recipe (which is super close to hers, although I will always prefer hers!).  

Why?

Because I can’t stop eating it when I make it!

I made three batches to test it in different ways and each time I ate until I was sick!  I seriously have to watch myself around this stuff.

And I’m so happy that this recipe does NOT involve a candy thermometer.  I really hate those things.


toffee-collage

from left to right: just starting, all melted and boiling, beginning to thicken, the right color!, after the vanilla and ready to pour


Easy Toffee
A little salt gives this delicious toffee a beautiful flavor.
Write a review
Print
Prep Time
5 min
Prep Time
5 min
Ingredients
  1. 1 cup butter
  2. 1 cup sugar
  3. 5 Tbsp. water
  4. 1/2 tsp. kosher salt
  5. 2 tsp. vanilla
  6. 1 cup milk chocolate chips
Instructions
  1. Place a baking sheet on top of several towels or a wooden cutting board.
  2. In a cast iron skillet, melt the butter with the sugar and water. Once the butter is melted, adjust the heat until there is a consistent boil. Stir CONSTANTLY.
  3. Continue to adjust heat and stir for 10-15 minutes or until the mixture is caramel colored. Remove from heat.
  4. Add the salt and vanilla and stir well.
  5. Immediately pour onto the baking sheet.
  6. Wait a couple of minutes and then pour the chocolate chips evenly over the top. Allow the chips to melt completely, then spread the chocolate evenly with an offset spatula.
  7. Allow the chocolate to set completely before cutting/breaking up the toffee.
Notes
  1. You need the towels or wooden cutting board as a protection for your countertop. The toffee will make the baking sheet VERY hot!
  2. I tried this twice with milk chocolate block and could never get it to melt smoothly. I highly recommend using milk chocolate chips, which are formulated differently from block chocolate. They melt way better!
Mormon Mavens https://www.mormonmavens.com/

#LIGHTtheWORLD

light-the-world-pac

Amid the hustle and bustle of the holiday season, it can be hard to lose sight of what’s truly important.

God.  People.  Relationships.  Love.

Isn’t it interesting that a holiday season technically focused on gratitude and peace on earth could be so cluttered up with things that, while fun, are not what’s most important?

Would you like to reconnect with what’s really important?

Would you like to find a way to reach out to others?

Would you like to reconnect with God?

Then, “LIGHT THE WORLD!!!!  In 25 Ways.  Over 25 Days”.

From mormon.org:
During Christmas, we are reminded that Jesus Christ is the light of the world. This year, we have an amazing opportunity to share that light by resolving to do the things Jesus Christ did. Every day leading up to Christmas, we will focus on a different Christ-like behavior and provide suggestions for ways we can emulate His example. You’re encouraged to participate using the outline below as you plan your Christmas activities.


light-the-world-page-1

light-the-world-page-2

It’s so easy.  Print off the calendar (from here or from mormon.org). Just take a little time each day and choose an activity (either one listed on the chart or do your own thing!) that celebrates and demonstrates the Christ-like character focus of the day. 

Will you?  Will you take a few moments and make this spiritual connection to feel more love, gratitude, peace, and joy this holiday season as we celebrate the birth of the Savior of the world?


Ham & Egg Cups

ham-egg-cups


I am sure that you have probably seen a gazillion recipes for this one.  I have seen a few myself–like back in the 70’s–and I had not even tried one yet. So I was going through that stack of Paleo recipes I was telling you about a couple of weeks ago and came across this super simple egg cup recipe and thought it was high flippin’ time I tried one.  This was so easy, you won’t believe it.  As a matter of fact, the original recipe title is Kid Simple Ham and Egg Cups.  There you go.  Your kids could totally make this for breakfast.  And who doesn’t love that little tidbit of something that will help you out, Busy Mama!  Two ingredients, a muffin tin and some cooking spray–BAM!!

Ham & Egg Cups
Write a review
Print
Ingredients
  1. Thin-sliced ham (2 per cup)
  2. 1 egg for each cup
  3. Spices like salt & pepper, ground mustard, etc.
Instructions
  1. Preheat oven to 375 degrees F.
  2. Spray muffin tins with cooking spray.
  3. Place 2 slices of ham in each cup.
  4. Crack an egg into each cup.
  5. Sprinkle with your chosen spices or you can do it later if you forget to.
  6. Bake for 20 minutes.
  7. You're done.
Notes
  1. These egg cups don't even require utensils. You can just pick them up and eat them on the go, if needed. And don't you just love the curly edges of the ham? It's all about the presentation, you know.
Adapted from PaleoBurn Fat Burning Cookbook
Mormon Mavens https://www.mormonmavens.com/

Egg-less Creme Brulee Pie

eggless-creme-brulee-pie-2

Yes, I know.  Eggs are a huge part of Creme Brulee so how can I call it that when there are no eggs?

Because it’s a free country, that’s why!

Okay, all sass aside.  I just can’t get past the creaminess of the pie the brulee-ness of the top layer.

Yes, I know.  Brulee-ness is not a word so how can I call it that when it’s not a word?

Because it’s a free country, that’s why!

Okay, we’re getting off-topic here.  The point is, you need to try this.  It’s such a simple pie and so good!  Even my pickiest eaters loved it!

eggless-creme-brulee-pie

Egg-less Creme Brulee Pie
Serves 12
A really simple but, yet it is so good! You'll be surprised!
Write a review
Print
Prep Time
20 min
Cook Time
35 min
Prep Time
20 min
Cook Time
35 min
Ingredients
  1. 1 Deep Dish Pie Crust, at room temperature
  2. 4 Tbsp. cornstarch
  3. 3/4 cup sugar
  4. 4 Tbsp. butter, melted
  5. 2 1/4 cups heavy cream
  6. 1 Tbsp. vanilla
  7. 4 Tbsp. butter, melted
  8. 1/3 cup cinnamon sugar (mix it to your liking)
Instructions
  1. Preheat your oven to 325 degrees. Use a fork to pierce the bottom of the pie crust. Place it on a baking sheet and bake for 10 minutes. Remove from oven and set aside.
  2. In a small bowl, combine the sugar and cornstarch and mix well with a whisk until thoroughly combined.
  3. In a medium saucepan, melt 4 Tbsp of butter. Then add the cream and the sugar/cornstarch mixture. Whisk well to combine; then continue whisking over medium heat until the mixture is very thick and creamy.
  4. Remove from heat and add the vanilla.
  5. Pour this mixture into the pie crust, spreading out the mixture evenly. Pour the final 4 Tbsp. of melted butter carefully over the top. Then sprinkle evenly with the cinnamon sugar.
  6. Bake at 325 for about 25 minutes. Remove from the oven and turn on the broiler. Set pie under broiler for about a minute. Watch it carefully so it will not burn.
  7. Remove from oven and carefully set the pie tin on a cooling rack to cool. Allow it to cool to room temperature, then refrigerate it for at least an hour so it can set.
  8. Store any leftovers in the fridge.
Notes
  1. It has to be a Deep Dish pie crust. The regular crusts are not big enough to hold it. You can also use refrigerated crusts or make your own. The crust in the pie tin just needs to be at room temperature.
  2. For the cinnamon sugar: I keep a jar of premixed cinnamon and sugar so I'm not sure on the amounts because I go by how it looks! But you could mix 1/3 cup sugar and put in 2-3 teaspoons of cinnamon.
Adapted from The Domestic Rebel
Mormon Mavens https://www.mormonmavens.com/

The Miracle of Us

A week in bed, basically.  Another week of limited mobility.  Two more weeks of restriction from exercise.  Another two weeks of restriction from anything but low-impact exercise.

Yep.  That’s what surgery will do to you.

I recently had surgery on my left ankle to repair a partially torn tendon.  All went well.  Hardly any pain.  But I did have a fair amount of frustration with my limited mobility. 

What do they say?  You don’t know what you’ve got till it’s gone.

I thought I would enjoy a reason, an excuse, to lay in bed and be waited on.  And while the first few days of pain meds, napping, and Netflix were easy, what came after was a growing impatience for my freedom of movement.  

And I became very aware of how much I take the ability to walk normally for granted.  To bend, stoop, hop, even wear normal shoes.

Please don’t think I’m trying to garner sympathy.  My recovery has been pretty easy and basically pain-free.  And relatively short!  It just gave me a renewed appreciation for my body and the abilities that I have.

So I thought I would share this wonderful video about what miraculous, divine beings we are.  We truly are His greatest creations.


Sweet Orange-Berry Butter

sweet-orange-berry-butter


Don’t you just love Our Best Bites ? I followed them for several years and then stopped and now I am ready to follow again–I have missed those girls.  A few years back I printed off this recipe so that I could substitute some THRIVE freeze-dried fruit and thereby find even more ways to use this great stuff! So here you go–and just so you know, the original recipe is a different color.  It all depends on how you use your fruit.  It’s delicious either way.  Be sure and try this on those Banana Bread Paleo Muffins from last week’s post!  Pretty tasty.

Sweet Orange-Berry Butter
Write a review
Print
Ingredients
  1. 1 c. real butter, at room temperature
  2. 3 T. honey
  3. 2 T powdered sugar
  4. 1 or 2 drops of Wild Orange Essential oil *
  5. 1/4 to 1/2 c. freeze-dried berries (I used strawberries/blueberries/raspberries)
Instructions
  1. Place all the ingredients in a food processor and whip until creamy and lovely.
  2. Serve at room temperature on just about any kind of sweet bread, muffin, etc.
Notes
  1. * A story--so I whipped up my berry butter and tasted it and thought "Okay, that's pretty good." Then I was looking over my recipe and realized I had left out the orange zest--and my oranges were sitting right over there on my kitchen island! I had already put my processor in the sink, so I got out my Wild Orange Essential Oil and added a couple of drops to the spread and stirred it up really well. Oh my goodness! That orange really sets this off. DO NOT FORGET TO DO IT!!
Adapted from Our Best Bites
Mormon Mavens https://www.mormonmavens.com/

Waffle Cookies

waffle-cookies

My kids looooooove it when I make these.  They are old enough now to make them for themselves (although they still ask me to make the frosting most of the time because it, um, has no recipe–it’s in my head–but they made their own for this batch!).  

It’s a favorite for Family Night treat.  

They’re really easy to make.  

And, hello, FUN!  Cookies with a waffle iron? YES!!

Waffle Cookies
Easy, tasty, fun cookies that are a family favorite!
Write a review
Print
Prep Time
10 min
Prep Time
10 min
Ingredients
  1. 1 1/2 cups sugar
  2. 1 cup butter, softened
  3. 4 eggs
  4. 2 tsp. vanilla
  5. 1/2 cup unsweetened cocoa powder
  6. 2 cups flour
  7. 1/8 tsp. salt
Instructions
  1. Cream together the butter and sugar well.
  2. Add remaining ingredients and mix well.
  3. Drop using a medium cookie scoop onto a heated waffle iron sprayed with non-stick cooking spray to keep the cookies from sticking.
  4. Close waffle iron and allow to cook for 2-3 minutes. Carefully lift out with fork and set aside to cool.
  5. Frost with your favorite frosting.
Notes
  1. No recipe for the frosting, but here's what I do....I start with 1/4 cup of soft butter and cream it with some unsweetened cocoa (maybe 1/3 cup?), a teaspoon of vanilla, and a pinch of salt. Then I just start adding in powdered sugar. When it's too stiff to stir, I drizzle in a little milk. I keep this up till I get the taste and texture I want!
Mormon Mavens https://www.mormonmavens.com/