Ham & Veggie Skillet Dinner

ham and veggie skillet


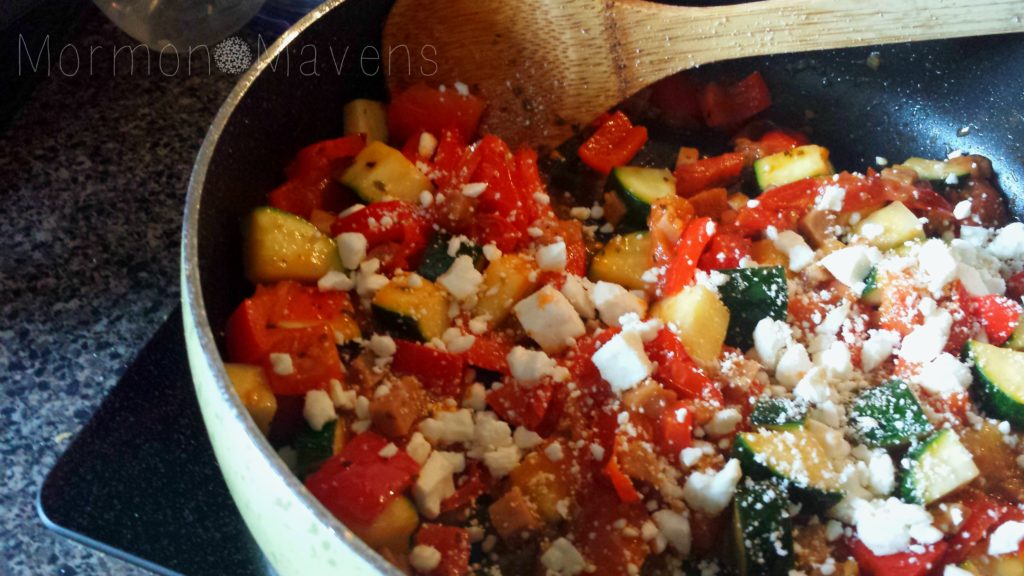
I am forever throwing stuff together into a skillet and seeing how it cooks up.  Seriously.  Do you do this, too?  I had some produce I needed to use up and some Thrive Ham Dices that I needed to use, so I just kind of cut it all up and came up with today’s post.  It was really good!  And filling!  And healthy!  The meal trifecta.  

Ham & Veggie Skillet Dinner
Delicious, healthy, quick way to use leftovers.
Write a review
Print
Ingredients
  1. Fresh Zucchini, cut up
  2. Fresh Red Bell Pepper, cut up
  3. Fresh Cherry Tomatoes, halved
  4. Thrive Ham Dices or any diced ham
  5. Olive Oil
  6. All Purpose Seasoning
  7. Sea Salt
  8. Feta Cheese
Instructions
  1. Heat up olive oil in a medium to large skillet. Add all ingredients except cheese. Saute until veggies are cooked, but not mushy. Add in Feta Cheese and stir to combine. Serve.
Mormon Mavens https://www.mormonmavens.com/

Chocolate Raspberry Shortcakes

chocolate raspberry shortcakes


If you like a light, not too sweet dessert, this one is for you–Be forewarned:  this is not a sweet, fudgy cookie. Super easy to put together, this recipe uses Thrive Foods right from your home store.  I made the whipped topping earlier in the day and put the rest of the dessert together after work–along with making the rest of the meal–just in time for supper with friends.

Chocolate Raspberry Shortcakes
Rich chocolate shortcakes, raspberry sauce and whipped topping. Great combo.
Write a review
Print
For the shortcakes
  1. 1/4 cup unsweetened cocoa powder
  2. 1 cup Thrive White Flour *
  3. 1 cup Thrive White Sugar * ( Next time I will add a little more)
  4. 1 1/2 t. baking powder
  5. 1/2 t. Thrive Baking Soda *
  6. 1/4 t.Thrive Salt *
  7. 4 T. cold butter, cubed (original recipe calls for unsalted. I will do that next time.)
  8. 1/2 cup heavy cream
For the raspberry filling
  1. 3 cups Thrive Raspberries (freeze dried)
  2. 2 T. Thrive White Sugar, or to taste
  3. 2 t. vanilla extract
  4. Vanilla Whipped Topping (future post) or whipped topping of choice
Instructions
  1. Preheat oven to 425 degrees F.
  2. To make the shortcakes: In a large mixing bowl, sift together the cocoa powder, flour, sugar, baking powder, baking soda, and salt. Cut in the cold butter with a fork or pastry cutter. Blend the mixture until it resembles a coarse meal. Add the heavy cream and stir the mixture with a fork until it forms a dough.
  3. Roll out the dough on a floured surface (should be 1/4 inch thick). Using a biscuit cutter, cut out 4 shortcakes (depending on the size of biscuit cutter you use, you will end up with more shortcakes than what you need for this recipe). Place shortcakes on a lightly greased baking sheet (I used a reusable parchment sheet), and bake for 12 minutes (a toothpick placed in center should come out clean). Put the shortcakes on a wire rack to cool.
  4. In a small bowl, cover the raspberries with warm water. Let sit for about 5-10 minutes until softened and rehydrated. Drain. In another bowl mash 3/4 cup of the raspberries with a fork, stirring in the white sugar and vanilla. Blend in the remaining raspberries.
  5. Carefully cut the shortcakes in half horizontally with a serrated knife--this was surprisingly easy to do. Transfer the bottom half of each cake to an individual plate. Place a spoonful of the raspberry sauce and a spoonful of vanilla topping on each bottom piece. Place the top parts on each dessert and dust with powdered sugar, if desired. Or maybe use clear sugar sprinkles! Yes, next time I am trying that idea.
Notes
  1. * I am finding ways to "Thrive-alize" recipes in order to use Thrive items from my home store. You can still use your regular store-bought items for this recipe.
Adapted from Thrive Cookbook
Mormon Mavens https://www.mormonmavens.com/

Chicken & Wild Rice Pilaf

Chicken & Wild Rice Pilaf

I am all about quick and easy and this recipe is, as well.  I used one of our Thrive Life Express Meals–Wild Rice Pilaf–and added chicken to give it a little protein boost.  So delicious, so easy, so quick, so also goes well in a flour tortilla.  You could use your own pilaf recipe or boxed rice pilaf and leftover chopped chicken.  I tend to go to my Thrive Foods because I like to find ways to incorporate these items from my Home Store on a regular basis.  Either way, this is yummy and your family will enjoy it, especially if it keeps your kitchen time down during a laid back or busy summer.  Well, any season for that matter.

Chicken & Wild Rice Pilaf
Quick & easy side or main dish!
Write a review
Print
Ingredients
  1. 1 pkg. Thrive Life Wild Rice Pilaf Express Meal (or your choice of pilaf)
  2. 1 - 2 cups Thrive Chopped Chicken, rehydrated
  3. Butter
Instructions
  1. Mix contents of package with 2 1/2 cups boiling water.
  2. Add 2 T. butter to the rice. Simmer for 5 minutes, covered.
  3. Let stand for 5 minutes, then add the chicken. Stir to mix well.
  4. Serve.
Adapted from Thrive Life Express Meals
Mormon Mavens https://www.mormonmavens.com/

Quick Po’Boy Sandwich

po boy


Have you ever eaten a Po’ Boy sandwich?  I have had one in my entire life.  This past week we spent a few days at the beach and of course had to hit a local seafood joint to get me some shrimp!  I brought the leftovers back to the beach house.  Mostly I just ate the cold shrimp right out of the take-out carton, but one day I was thinking I should be a little more creative.  And here you have another tasty concoction from leftovers…


Quick Po' Boy Sandwich
Great way to use leftovers!
Write a review
Print
Ingredients
  1. Hamburger Bun (or a baguette or other kind of roll of choice)
  2. Leftover shrimp
  3. Lettuce, shredded
  4. Mayo or mustard
Instructions
  1. Assemble your sandwich and enjoy.
Notes
  1. Po' Boys can be made of different kinds of items, so be creative!
Mormon Mavens https://www.mormonmavens.com/

Tomato & Corn Salad

Corn & Tomato Salad 2


Isn’t it fun to be creative with your leftovers?  Recently I served Slow Cooker Roast Beef, garden peas, sweet corn, and mashed potatoes for dinner when two of our missionaries from church joined us for supper.  Comfort food.  Real food.  Surprisingly, there were some leftovers of the vegetables so I used them for sides with my next meal which was a Thrive Express Meal of Fettuccine Alfredo.  (future post, so stay tuned).  I put the peas in with the Fettuccine.  That was yummy.  For the corn, I decided to combine that with some grape tomatoes that I needed to use up and added a few more things to dress it up.  So that is how we get this recipe.

Tomato & Corn Salad
Great way to use leftover veggies!
Write a review
Print
Ingredients
  1. grape tomatoes, as many as you want
  2. Thrive Sweet Corn
  3. Thrive Green Peas
  4. Mozarella cheese, shredded
  5. Red Wine Vinegar
  6. Thrive Chef's Choice All-Purpose Seasoning
  7. Salt to taste
Instructions
  1. Combine all ingredients except the salt, and toss. Taste and then add salt as needed and toss again.
  2. Serve cold.
Mormon Mavens https://www.mormonmavens.com/

Removing Burnt-on Food from Ceramic Cook Top

??????????????

You will have to trust me on this one.  I had a yucky, stubborn black, burnt blob–well, in the shape of a blob but by now it just looked like a stain– on my ceramic cook top.  I have been trying everything to remove that.  Needless to say, the “Ceramic Cook Top Cleaner” didn’t do the trick.  Where do you turn to find everything you need to know about everything?  I mean besides Pinterest.  GOOGLE!!  I found a list of possibilities so clicked on one and watched the YouTube video. Yeah, not too crazy about that one.  Clicked on the next one and BINGO. Tried it out. NAILED IT!!!  For real, with stuff I already had at home.  Sure wish I could have thought to take a BEFORE shot, but who knew this would work so well that I would want to share it with the world?

Removing Burnt-on Food from Ceramic Cook Top
Great way to remove those pesky burnt on food stains from your cook top!
Write a review
Print
Ingredients
  1. Small Dish
  2. Baking soda
  3. Lemon juice
  4. Microfiber cloth
Instructions
  1. Mix a paste of baking soda and water in a small dish. It should be the consistency of toothpaste.
  2. Spread the paste over the burnt area and allow it to set for about 12 minutes. Do not allow to sit too long or it will dry out. Really it will.
  3. Pour a little lemon juice (bottled worked for me!) over the paste and let it fizz to help release tougher stains.
  4. After 12 minutes, gently scrub the area with a soft cloth or plastic scrubber. Do not use anything abrasive or it will scratch the surface. Found that out the hard way one time.
  5. Repeat as necessary until food is gone. GONE I tell you! So happy right now.
  6. Clean off surface with a wet cloth or paper towel.
Notes
  1. Once I can find my source again I will include a link where you can get complete instructions. I only included the portion that applied in my situation. You're welcome.
Adapted from from How to Clean Stuff
Mormon Mavens https://www.mormonmavens.com/

Baklava Cookies

My first bite of these cookies, warm out of the heaven, was a heavenly experience!  You just gotta eat ’em warm.  They’re still good once they’ve cooled, but warm? Holy Macaroni!–as my 7-year old would say. 🙂

To learn more about how you can get Thrive ingredients in YOUR kitchen, visit my website.

(This pic was submitted by me to the Thrive Life recipe site and is labelled with my Thrive Life website url.)

Ingredients:
6 tbsp. butter
 3/4 c. THRIVE Powdered Sugar
 5 tbsp. THRIVE Honey Crystals
1 tbsp. water
1 c. almonds or walnuts, finely chopped
 1/2 tsp. Ground Cinnamon
 1 c. butter, softened
 2 tbsp. water
 1 egg
 3 1/3 c. THRIVE Vanilla Sugar Cookie Mix


Directions:
1. In a small saucepan, melt the 6 T. of butter over low heat. Stir in the powdered sugar, honey crystals, and 1 T. of water.
2. Bring to a boil, then remove from heat and add nuts and cinnamon. Set aside to cool for 30 minutes.
3. Preheat oven to 325 degrees. Spray a cookie sheet with nonstick cooking spray.
4. In a mixer, cream the 1 cup of butter for a few minutes until smooth and fluffy. Add in 2 T. water and egg and mix well, scraping down sides part way through.
5. Add in the sugar cookie mix. Mix well, until dough begins to clean the sides of the bowl.
6. Using a 1.25″-diameter cookie scoop, place cookie dough on cookie sheet leaving 2″ spacing around each cookie.
7. Bake for 10 minutes.
8. Remove cookie sheet from oven and top each cookie with 1/2 to 1 Tablespoon of the nut mixture.
9. Return cookies to oven and bake for 3 minutes.
10. Allow to cool on the pan for a few minutes, then remove cookies to a wire rack to cool.

To use this recipe without Thrive cookie mix, substitute your own cookie recipe, mix, or dough for the last four ingredients.  To use without Thrive honey crystals, use 4-5 tablespoons of honey.

Guava Punch

guava punch 2
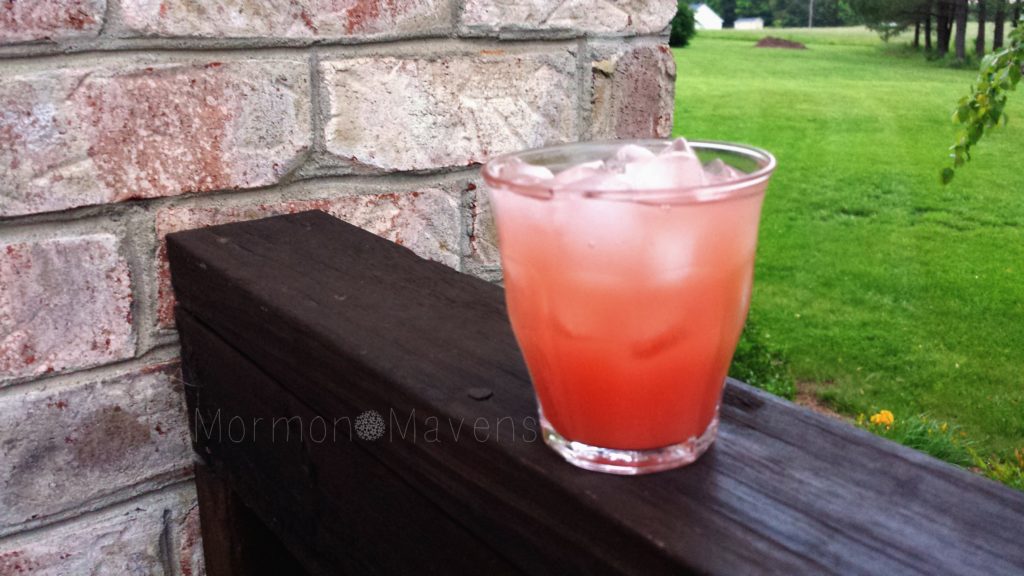
One of the great things about moving around a lot is that you get to collect awesome recipes from new friends across the country.  Our 6 1/2 year stint in El Paso, Texas brought me some amazing recipes, collected from many bridal/baby showers, church functions and meals with friends.  This punch recipe was from a baby shower (I think) at my friend Connie’s house.  I could not stop drinking it and finally asked her for the recipe.  There is not an easier recipe on the planet, let me tell you.  And I have served this punch at many functions–like both of my daughters’ wedding receptions!  

Guava Punch
Versatile, tasty punch recipe.
Write a review
Print
Ingredients
  1. 1 carton (half gallon) Welch's Guava Juice (Guava Pineapple also works), chilled
  2. 2 liter bottle of Sierra Mist (really, that little taste of grapefruit makes a difference), chilled
  3. ice
Instructions
  1. Pour the guava juice into a punch bowl.
  2. Add Sierra Mist to taste, but it is usually the whole bottle.
  3. Add crushed ice (if you have a Sonic Restaurant nearby, go get a bag of that ice!)
Notes
  1. One cool thing I did for the wedding receptions was to get extra Guava juice and pour into molds and freeze them. They make great "ice rings" and keep the punch cold. Do this in place of the crushed ice. I put the frozen punch in individual gallon or quart size zip top bags and store in freezer until needed.
Adapted from Connie Chesshire, El Paso, Texas
Mormon Mavens https://www.mormonmavens.com/

Lemon-Guava Pound Cake

lemon guava pound cake
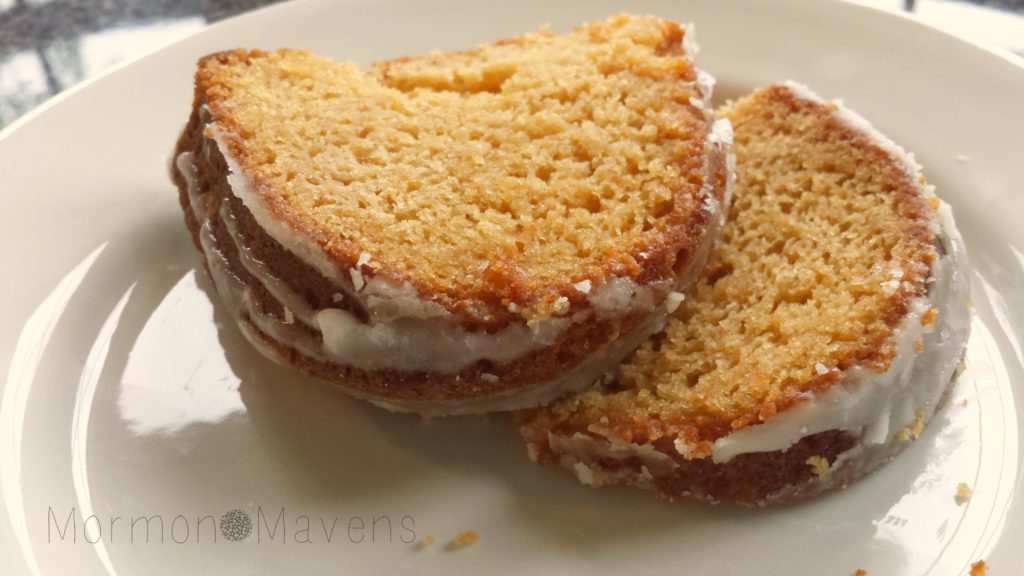
My mother-in-law made some yummy cakes, but this one is my favorite because it is so different from other pound cakes.  Her original recipe (a special shout-out to my sister-in-law Gayle for providing the recipe since Verna Mae kept recipes in her head!) is Lemon-Apricot Pound Cake, but one time I had some guava nectar at the house that I needed to use and I thought I would try it with this recipe.  Oh goodness.  So moist and delicious.  I. Can’t. Even.

Lemon-Guava Pound Cake
A moist, delicious easy cake to share.
Write a review
Print
Ingredients
  1. 1/2 cup sugar
  2. 1 Duncan Hines Lemon Supreme Cake Mix
  3. 3/4 cup coconut oil (or Crisco oil)
  4. 1 cup guava nectar (or apricot)
  5. 4 eggs
Glaze
  1. 2 cups powdered sugar
  2. juice from 2 lemons
Instructions
  1. Mix cake, sugar, oil and nectar together. Add eggs one at a time.
  2. Bake in a greased tube or bundt pan at 325 degrees F. for approximately 1 hour.
  3. Mix glaze ingredients and pour over warm cake.
Notes
  1. I had no lemons when I made this today, so I substituted a few drops of lemon essential oil, about a tablespoon of leftover guava nectar and enough milk to get the glaze consistency that I needed. Goodness, that was some tasty stuff!
Adapted from a recipe from Verna Smith Jenkins
Mormon Mavens https://www.mormonmavens.com/

Sweet & Sour Meatballs

sweet and sour meatballs

Sometimes I like to share recipes that help me use my Thrive foods from my Home Store.  It is always a good idea to “store what you eat and eat what you store.”  I threw together this meal in record time thanks to the cooked ground beef and some other Thrive ingredients that I had on hand.  This recipe was a huge hit.  I had one serving left, only because I had taken some out to get a picture for the blog.  I didn’t use that one and used my filled plate instead.  

Sweet & Sour Meatballs
Quick and delicious version of a classic recipe.
Write a review
Print
Ingredients
  1. 2 cups THRIVE Cooked Beef, Ground
  2. 1/2 cup seasoned dry bread crumbs
  3. 1/4 cup THRIVE Instant Milk, re-hydrated (3/4 T. powder + 1/4 cup water)
  4. 2 T. THRIVE Chopped Onions (FD--freeze-dried)
  5. 1 t. THRIVE Iodized Salt
  6. 1/2 t. Worcestershire sauce
  7. 1 THRIVE Whole Egg, re-hydrated (1 T. powder + 2 T. water)
  8. 1/2 cup THRIVE Brown Sugar, packed (I just used brown sugar from the store)
  9. 1 T. cornstarch
  10. 1 20-oz. can pineapple tidbits with juice
  11. 1/3 cup apple cider vinegar
  12. 1 T. soy sauce
  13. 1/8 cup THRIVE Mixed Bell Peppers
  14. 5 cups THRIVE White Rice, prepared (I used rice from the store)
Instructions
  1. Re-hydrate freeze-dried meat by bringing 4 cups water to a boil. Add beef and boil for 5 minutes. Drain excess water.
  2. Mix meat, dry bread crumbs, milk, onions, salt, Worcestershire sauce, and egg together; shape into twenty 1 1/2 inch sized balls.*
  3. Place in skillet and cook over medium heat, turning occasionally until brown (about 20 minutes) OR (and this is what I did, so I could be working on something else like setting the table) Bake in an ungreased 9 X 13 pan at 400 degrees F for 20-25 minutes, until light brown.
  4. Mix brown sugar and cornstarch in a skillet. stir in pineapple with juice, vinegar, and soy sauce.
  5. Heat to boiling, stirring occasionally. Reduce heat to medium, then add meatballs and peppers.
  6. Cover and let simmer, stirring occasionally, for 10-15 minutes. Serve over cooked rice.
Notes
  1. I made my meatballs ahead of time, put them in the fridge, and then baked them when I got home from work. They are quick to come together anyway, because the ground beef comes precooked, but any little thing I can do ahead of time is good when you work until 5:00 and your guests are coming at 6:00, you know?
Adapted from Thrive Cookbook
Mormon Mavens https://www.mormonmavens.com/