Herbed Greek Chicken Salad


Another venture into Mediterranean recipes brought me this delicious, yet simple, salad with chicken.

I didn’t realize how much I loved the subtle tastes of these foods until I took my first bite of salad.  My eyes closed and all I could say was “Mmmm…this is really good.”

This is a pretty healthy dish–protein, veggies, some healthy fats.  Sounds like a pretty good option for lunch today, right?
Herbed Greek Chicken Salad
Write a review
Print
Ingredients
  1. 1 teaspoon dried oregano
  2. 1/2 teaspoon garlic powder
  3. 3/4 teaspoon black pepper, divided
  4. 1/2 teaspoon salt, divided
  5. Cooking spray
  6. 1 lb. thin sliced skinless, boneless chicken breasts, cut in 1-inch cubes
  7. 5 teaspoons fresh lemon juice, divided
  8. 1 cup plain yogurt
  9. 2 teaspoons tahini (sesame seed paste)
  10. 1 teaspoon bottled minced garlic
  11. 8 cups chopped romaine lettuce
  12. 1 cup peeled, chopped English cucumber
  13. 1 cup grape tomatoes, halved
  14. 6 pitted Kalamata olives, halved
  15. 1/4 cup feta cheese, crumbled
Instructions
  1. In a small prep bowl, combine oregano, garlic powder, 1/2 teaspoon pepper, and 1/4 teaspoon salt.
  2. Place the cubed chicken in a medium bowl toss with the herb mixture.
  3. Heat a non-stick skillet over medium-high heat. Coat pan with cooking spray, then add the chicken. Saute until chicken is done. Drizzle with 1 tablespoon lemon juice and stir. Remove from pan.
  4. In another small bowl, combine remaining 2 teaspoons lemon juice, 1/4 teaspoon salt, 1/4 teaspoon pepper, yogurt, tahini and garlic. Stir well.
  5. Combine lettuce, cucumber, tomatoes and olives in a large bowl.
  6. Place 2 1/2 cups of lettuce mixture on each of 4 plates. Top each serving with 1/2 cup chicken and 1 tablespoon cheese. Drizzle each serving with 3 tablespoons yogurt mixture.
Notes
  1. I was not able to drizzle the yogurt dressing because it was pretty thick. You will probably need to thin this out, maybe with a little milk? I wouldn’t increase the amount of lemon juice.
  2. I found tahini by the peanut butter at my local Wal-Mart.
Mormon Mavens https://www.mormonmavens.com/

Nacho Mama’s Taco Salad Nachos

Taco Salad has been a mainstay in my family of origin for as long as I can remember (nachos ain’t too shabby either!).   It also became a fixture at family beach house get-togethers.  And I love it.  But leftovers don’t keep well.  Like, at. all.  So I decided to start serving it as more of a Taco Salad Bar, where all the ingredients are in separate serving dishes and you just put it together on your own.  And that worked out great.

But recently, as we were having our traditional BYO (Build Your Own) Taco Salad with my own family, I kept wondering if there was an easier way to eat it.  Trying to maneuver taco meat, cheese, tomatoes, lettuce, and Doritos all in the same mouthful is a challenge, to say the least.  Should I just use a spoon?  Should everything be cut super tiny….chopped salad style?

And then it came to me.

Nacho Mama's Taco Salad Nachos

NACHOS.  What if I made them like nachos instead?

And it worked.   Beautifully!

The recipe does not show ingredient amounts, and that’s another great benefit of Taco Salad.  You can just make what you are hungry for!  A regular size bag of Doritos was PLENTY for about 6 people with generous portions.  Adjust accordingly!  We used the classic flavor, but you can use any Doritos flavor you like.  The ingredient list reflects what my own family likes in our Taco Salad, but you may wish to add sliced black olives, avocado, diced green onions, etc.  Whatever you decide to top your Nacho Mama’s Taco Salad Nachos with, I’m sure it will be delicious!


Nacho Mama's Taco Salad Nachos
Serves 6
All the tastiness of your favorite taco salad with a more fun delivery method! The perfect way to enjoy all your favorite taco fixin's!
Write a review
Print
Total Time
30 min
Total Time
30 min
Ingredients
  1. Doritos (any flavor)
  2. shredded cheddar cheese
  3. taco meat
  4. shredded lettuce
  5. chopped tomatoes
  6. Catalina dressing
  7. ranch dressing
  8. salsa
  9. Cholula sauce
Instructions
  1. Prepare the taco meat. Use as much as you need. I typically use one pouch of taco seasoning (or the homemade equivalent) for 1 pound of ground beef.
  2. Drain the taco meat once it's cooked through.
  3. Preheat oven to 425 degrees.
  4. On a sheet pan, arrange the Doritos in a single layer with as little pan showing through between chips as possible. Top with shredded cheese in an even layer.
  5. Add drained taco meat over top of the cheese.;Bake for 8-10 minutes or until cheese is fully melted.
  6. While the nachos are baking get your toppings ready. In our family that's lettuce (must be shredded for nachos), tomatoes, sometimes drained canned kidney beans, Catalina dressing, and ranch dressing.
  7. Once the nachos are done baking, immediately serve onto plates and let your diners customize their nachos with the supplied toppings.
  8. Enjoy!
Notes
  1. If this is served as a main dish, I'd say 6 generous servings is about right.
Mormon Mavens https://www.mormonmavens.com/

November Favorites


The Beach

I can’t get there fast enough and get my toes in the sand!  Growing up, our family summer vacation was going to the beach every summer for a week.  Our parents would save all year to rent an old, ocean-front cottage and the week was filled with Dad surf-fishing, Mom carrying the beach quilt out and placing it on the sand, and my 3 sisters and I spending the day out in the shallow part of the incoming waves.  We played in the sand and jumped around in the water for hours.  Of course, there was plenty of Coppertone Sun Tan Lotion (I will use no other because that is the smell of BEACH)–it wasn’t called sunscreen back then because it was for TANNING–and pimiento cheese or bologna sandwiches for lunch.  Sometimes Dad would catch fish for supper. Over the years the weekly summer vacations eventually turned into my parents buying a beach house and now that’s my most favorite place to be.  Something about the rhythm of the ocean and the smell of salty ocean breezes, and lots of family memories.


eBags

These are packing MAGIC!  The first time I watched their video online, I was mesmerized by how efficient these were and they were having a sale so I just had to buy them, of course.  I can’t pack without them now!  Seriously, I tried to do that about a week ago–could not get a sports bag to work to save me.  Out came the eBags and my carry-on and BAM!  I was packed for a week…at the beach, of course. I have actually lived out of my carry-on for about 5 or 6 weeks with these bags packed to the brim.  Long, but true, story.


Envy Apples

Have you even ever heard of this apple?  My sister just told me about them a couple of weeks ago and she said I could get them at Walmart.  Well, off I went to buy a few, and they are absolutely delicious!  I can’t wait to make an apple pie  with them.  And they are gorgeous!


Modere Dish Wash

You may not have heard of this company, and neither had I until a few months ago when my daughter became a “social influencer” for them. We wanted to help her out by getting her some orders, so I thought I would order their Clean and Fresh Collection.  The dish wash smells so light and fresh and I am thinking that it keeps my dish cloths from getting that nasty yucky smell so quickly.  I ran out of it the other day and had to use another dish liquid and my cloth got smelly in less than a day!  Don’t judge.  I do use mine for several days if they smell good. Also, the suds last a lot longer, even if I put a greasy dish or skillet in the water. I just run a little more hot water in with my sprayer and it foams right back up.

Pumpkin Bread Trifle


Pumpkin Season is here!  I am not usually one to make too much of that but I am really feeling it this time around.  I pulled this recipe from my November 2018 Better Homes & Gardens magazine–mostly because I have a trifle dish and wanted to make something pretty in it.

Just a note–I had issues with the syrup that was going over the pecans.  I think it was supposed to be kind of like a brittle or something?  Well, it didn’t work for me so I just toasted the pecans in some butter in a skillet for a few minutes.  It was still yummy!  I am just sharing my version today, but if you want the full recipe, check it out here.

Pumpkin Bread Trifle
Layered tastes of the season, right here.
Write a review
Print
Ingredients
  1. 3 c. granulated sugar
  2. 1 15-oz. can pumpkin
  3. 1 c. vegetable oil
  4. 2/3 c. water
  5. 4 large eggs
  6. 3 1/3 c. all-purpose flour
  7. 2 t. baking soda
  8. 2 t. pumpkin pie spice
  9. 1 1/2 c. chopped pecans
  10. 2 1/2 c. heavy cream
  11. 1 8-oz. carton sour cream
  12. 1 c. powdered sugar
  13. 2 T. milk
  14. Opt--Caramel ice cream topping, pomegranate seeds or sweetened dried cranberries
Instructions
  1. Preheat oven to 350 degrees F. Grease bottoms and 2 inches up the sides of two 9 x 5 inch loaf pans.
  2. In a large bowl stir together the granulated sugar, pumpkin, oil, 2/3 c. water, and eggs until combined.
  3. In a medium bowl whisk together flour, baking soda, pumpkin pie spice and 1 t. salt. Stir into pumpkin mixture. Spoon into prepared pans.
  4. Bake 1 hour or until a toothpick put into the center comes out clean. Let cool in pans on a wire rack for 10 minutes. Remove from pans, place on racks and let cool completely.
  5. In a medium skillet, melt 2 T. of butter over medium-high heat and then add the pecans and a dash of sea salt. Toast the pecans until fragrant, stirring constantly. Remove from heat and set aside.
  6. In a bowl beat heavy cream, sour cream, powdered sugar and milk with mixer on high until stiff peaks form.
  7. Cut one loaf of pumpkin bread into 1-inch cubes. (Freeze other loaf up to 1 month or eat it!) In a large trifle dish, alternate layers of pumpkin bread cubes, pecans, cream, cranberries, and drizzled caramel sauce 3 times.
  8. Serve immediately or chill up to 8 hours.
Notes
  1. NOTE: Another pecan option is listed in the original recipe.
Adapted from Better Homes & Gardens Magazine
Mormon Mavens https://www.mormonmavens.com/

Sausage Okra Gumbo

This gumbo is a much-requested family dish and our friends ask for the recipe whenever we serve it up.  Kelsey Teague, a former Maven–who is also my daughter–shared the recipe on our original blog and then we re-posted it here.

I hope you will like this dish as much as we do.  And you might need to double it for your family if they want seconds.  Just sayin’.

Sausage Okra Gumbo
Write a review
Print
Ingredients
  1. 1 1/2 lbs. Polska Kielbasa ( I just use 2 packages)
  2. 2-3 T. butter
  3. 3 T. flour
  4. 2 cups chicken broth
  5. 18-oz. frozen gumbo vegetables*
  6. 14-oz. can of tomatoes, chopped, with juice
  7. 1 1/2 t. salt (you may want to adjust down, depending on how salty your meat choice is)
  8. 1/4 t. garlic powder
  9. 1/4 t. ground red pepper
  10. 1 T. Old Bay Seafood Seasoning
  11. 3 cups hot, cooked rice
Instructions
  1. Saute cut sausage for a few minutes in a Dutch oven or large pot. Even though these are precooked, I think it improves the overall taste to brown them up just a little bit and it also helps your roux. Remove and set aside.
  2. Melt the butter in the Dutch oven. Add flour and cook, stirring constantly, until mixture is deep brown, about the color of an old penny (this is known as making a roux)
  3. Add broth, vegetables, tomatoes, seasonings, and sausages. Bring to a boil.
  4. Reduce heat, cover and simmer for 25 minutes.
  5. Remove from heat, ladle gumbo into bowls and top with a scoop of rice. Some people think you should put a bunch of rice in the bowl and then add the gumbo on top. Personally, I like less of a rice ratio to my gumbo. A little scoop of rice on top is perfect for me.
Notes
  1. You can use a combination of okra, corn, onions, celery and sweet red pepper instead of the frozen vegetables. These days that combo is hard to find in the frozen food section.
Adapted from Pat Brew, Brew Family Cookbook, vol.1
Mormon Mavens https://www.mormonmavens.com/

Halloween Bat Cupcakes

Want a great alternative to candy, candy, candy for your kids or grand kids at Halloween time?   These fun Bat Cupcakes are a great choice, and their little friends, clementine “pumpkins”, are a healthy sidekick.  Pair these with some green milk and you have a great treat to serve.

Fall is my favorite season and each year I think of how cool it would be to host a little family Halloween party at my house–not quite to the standards of  Tim “The Tool Man” Taylor–but fun, nonetheless.  It would be mostly for my grandchildren, but I think the rest of the family would enjoy it, as well.

But alas, every year I let the precious moment slip by without doing anything but a quick goodie bag for the 3 grands that live close by and a rushed package sent out to the other two who live way out in Utah.  I am lucky to even get it together in time for them to have their goodies before October 31st!  Do ya feel me?

Well, this year I set the intention to do it, and I did!  Yay me!

It wasn’t really a party, but we had a fun Taco Bar for supper and then I had the boys stay in the front room while I got out the treats and arranged them beside our Halloween Tree on the kitchen island.

Let’s just say that they loved the Taco Bar and were thrilled with their fun treats.  I might make this a tradition and maybe add to it as we go.

Halloween Bat Cupcakes
Serves 24
Write a review
Print
Ingredients
  1. 1 box Betty Crocker SuperMoist Dark Chocolate Cake Mix
  2. 1 1/4 cups buttermilk
  3. 1/2 cup vegetable oil
  4. 3 large eggs
  5. 1 pkg. Oreo Mini Chocolate Creme Sandwich Cookies--crush 1 cup & save 24 whole cookies for the bat bodies
  6. Betty Crocker Rich & Creamy Chocolate Frosting (I made my own because I prefer that to the store-bought kind)
  7. 24 Keebler Grasshopper Cookies, cut in halves
  8. White decorating cookie icing (you won't need a lot)
  9. 48 candy eyes
Instructions
  1. Heat oven to 350 degrees F (325 for dark or nonstick pans). Place paper baking cup in each of 24 regular muffin cups. I doubled up on the papers because it just looks nicer when you take them out of the pan.
  2. In a large bowl, beat cake mix, buttermilk, oil and eggs on low speed for 30 seconds, then on medium for 2 minutes. Stir in crushed cookies. Divide batter evenly among muffin cups.
  3. Bake 15 minutes or until toothpick inserted in center comes out clean. Cool 10 minutes in the pans, then remove to cooling racks to cool completely.
  4. Frost cupcakes. Insert 1 grasshopper cookie half on each side of cupcake top to look like bat wings. Squeeze 2 small dots of icing onto each of the 24 mini Oreos and attach candy eyes. Place 1 mini Oreo between bat wings for the body.
Notes
  1. The original recipe does not list food coloring as an ingredient, but makes reference to it in the instructions. They don’t mention a color so I added some black to darken the frosting. It doesn’t really need it because the bat is brown anyway. But, whatever squeals your wheels.
Adapted from Betty Crocker
Mormon Mavens https://www.mormonmavens.com/


Cilantro Citrus Rice

cilantro citrus rice

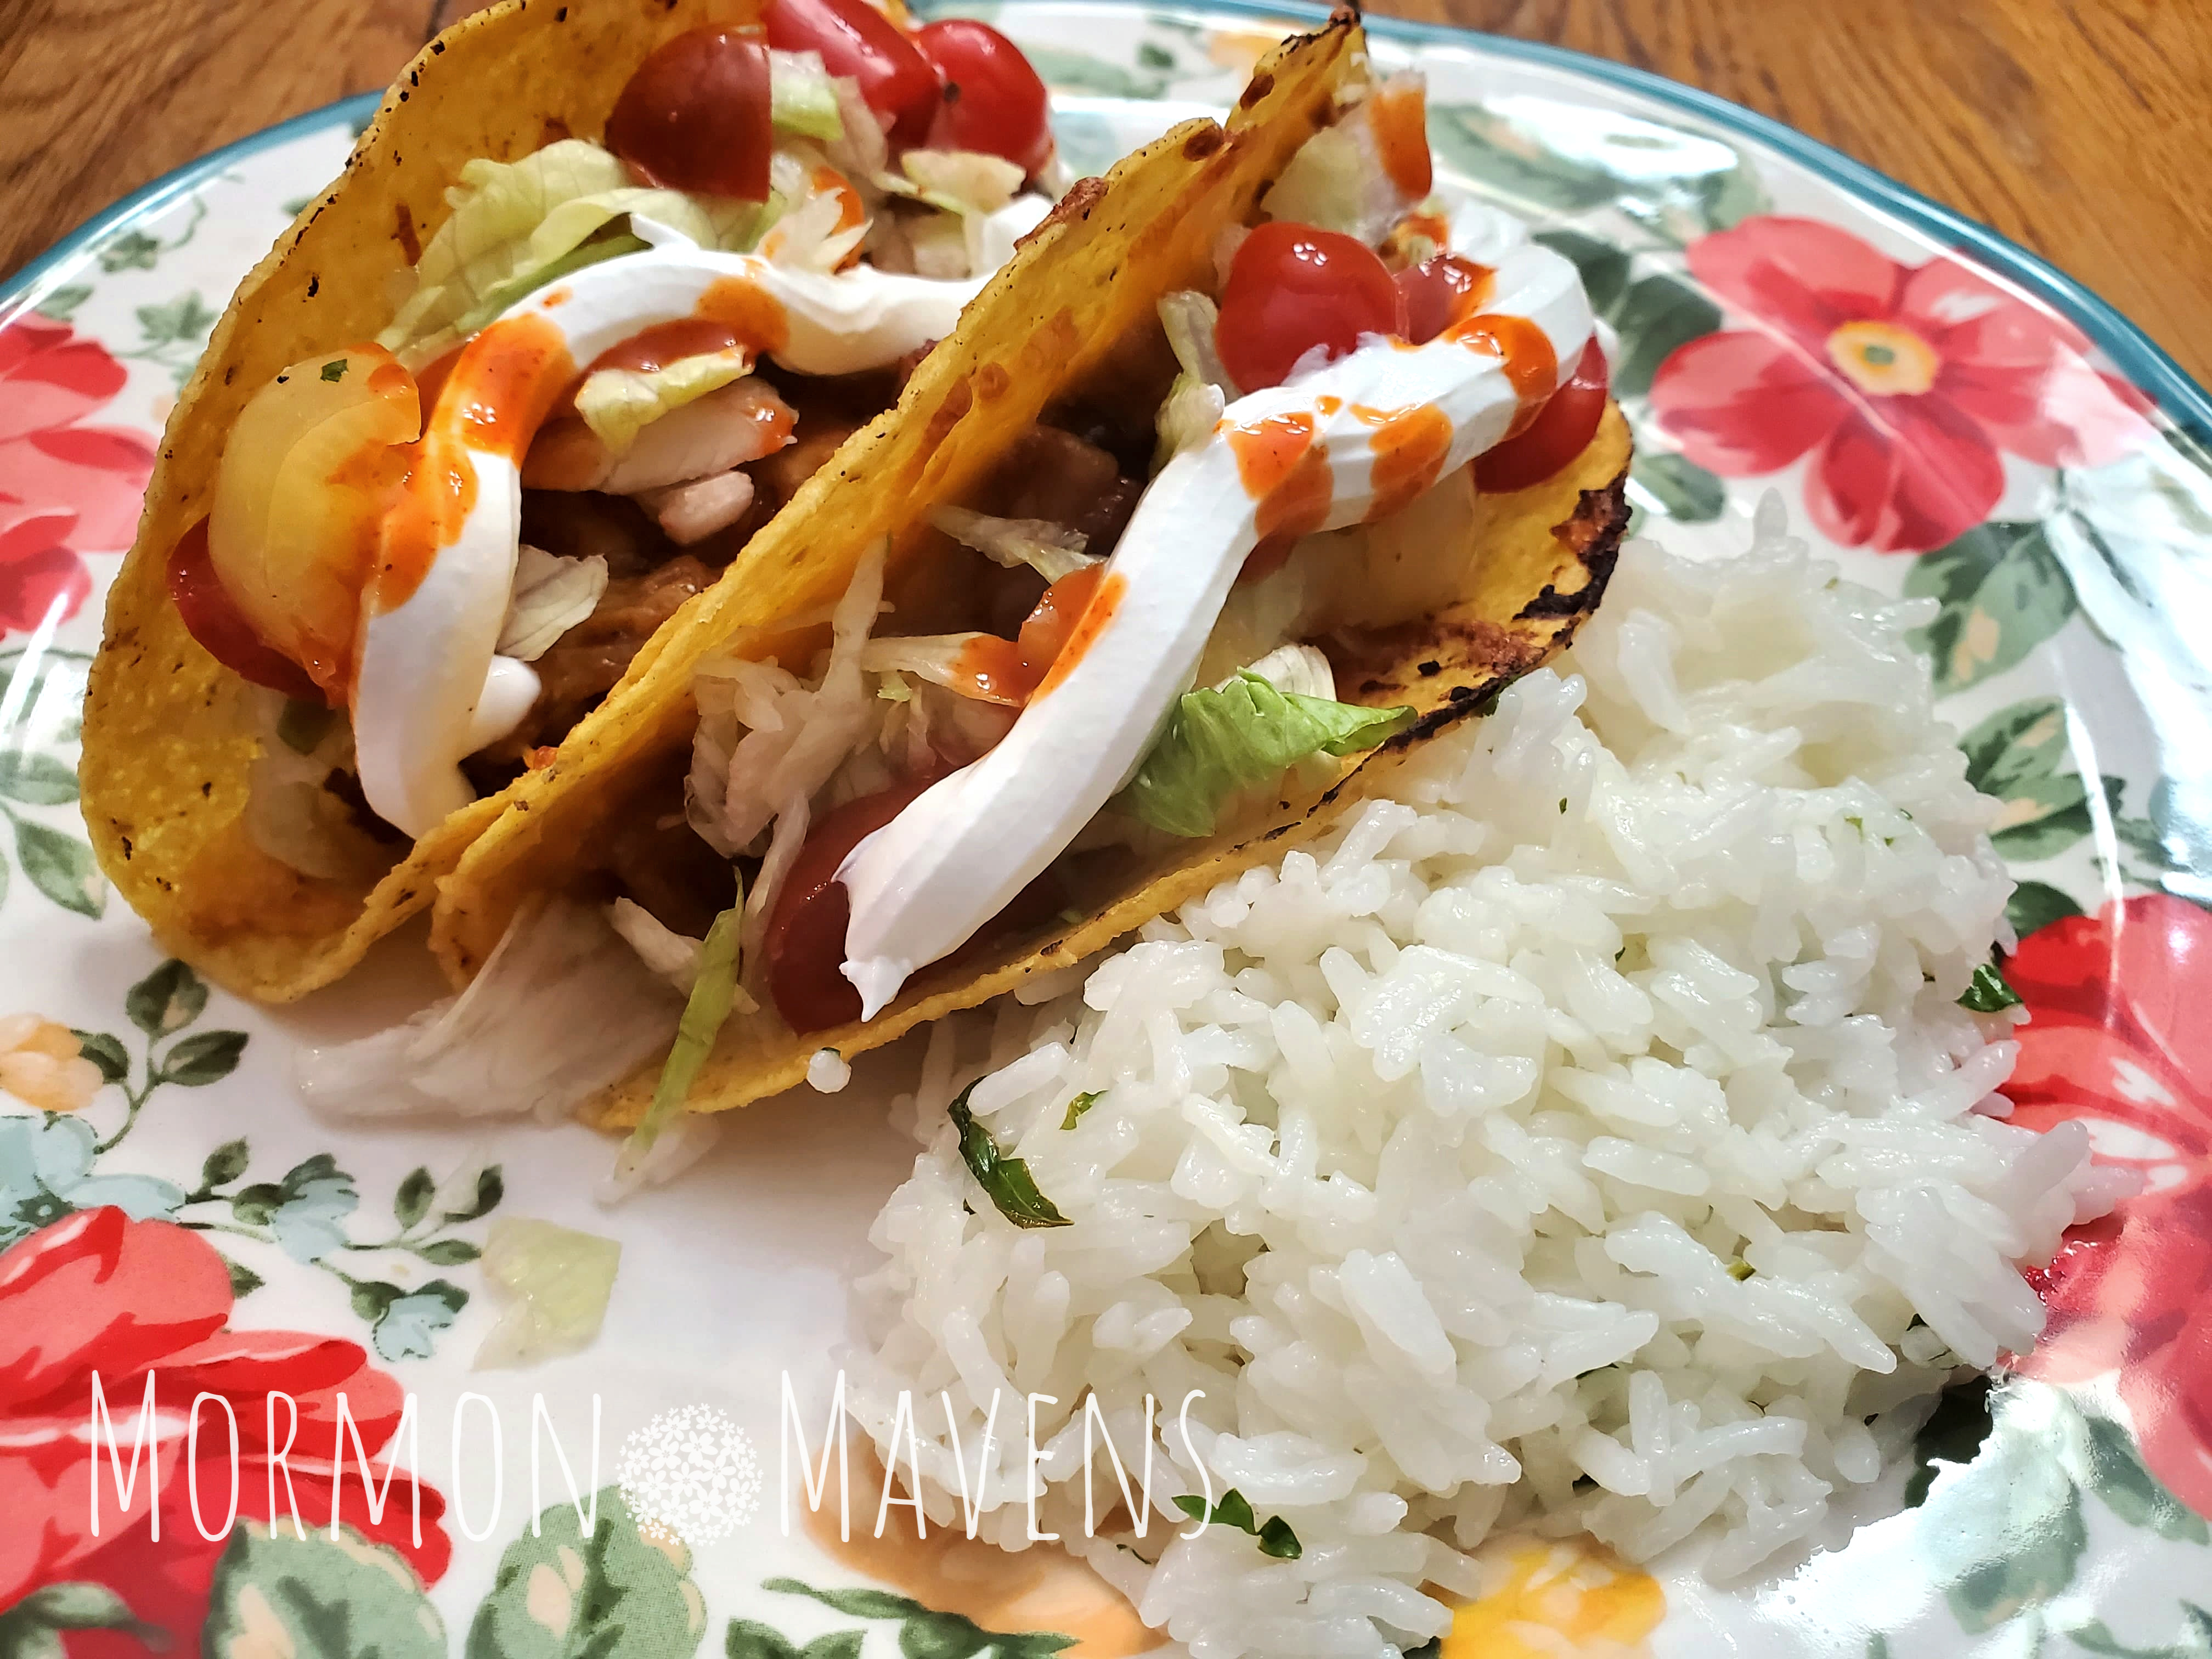
Cilantro Citrus Rice is the perfect accompaniment to your Mexican-inspired main dishes or even as the base for Hawaiian Haystacks!  Don’t let my boring picture fool you.  The flavors are beautiful and subtle, which is good for people like me who don’t love cilantro; I couldn’t get enough!  If you want more flavor, simply double the cilantro and citrus juices.

Because of its ease of cooking and consistently successful outcome, a pressure cooker is my preferred way to make my rice.  But don’t despair if you don’t have a pressure cooker (and jasmine rice is my preferred rice).  This Cilantro Citrus Rice can be prepared using just about any rice method and type you like.  Your basic set up is the same.

If you use the stove top to prep your rice, you will still follow the same steps after the rice is cooked.  Want to use microwaveable rice?  Same thing.  Just start the recipe after rice prep and adjust the amounts accordingly.  Cilantro Citrus Rice makes 3 cups of rice; next time I think I’ll double it as it is TASTY!!

The original recipe says it’s a copycat for Chipotle’s rice, but my husband said it tastes better than that!  Give it a try and let me know if you agree with him!

Cilantro Citrus Rice
Yummy jasmine rice with lime, lemon, orange, and cilantro flavor
Write a review
Print
Total Time
20 min
Total Time
20 min
Ingredients
  1. 1 cup long-grain jasmine rice
  2. 1 1/2 cups water
  3. 1 Tbsp. butter or oil
  4. 1 bay leaf
  5. 2 tsp. kosher salt
  6. 1 Tbsp. finely chopped fresh cilantro
  7. 1 Tbsp. fresh lime juice
  8. 2 tsp. fresh lemon juice
  9. 1 tsp. orange juice
Instructions
  1. In your pressure cooker, combine the rice, water, butter or oil, and bay leaf. Follow manufacturer's instructions for cooking. For me this is 3 minutes on HIGH pressure then 7 minutes natural pressure release.
  2. While the rice is cooking prep your other ingredients. When the rice is done, remove and discard bay leaf. Fluff the rice with a fork and add the salt, cilantro, and juices. Stir to combine.
Mormon Mavens https://www.mormonmavens.com/

Lemon Basil Shrimp & Pasta


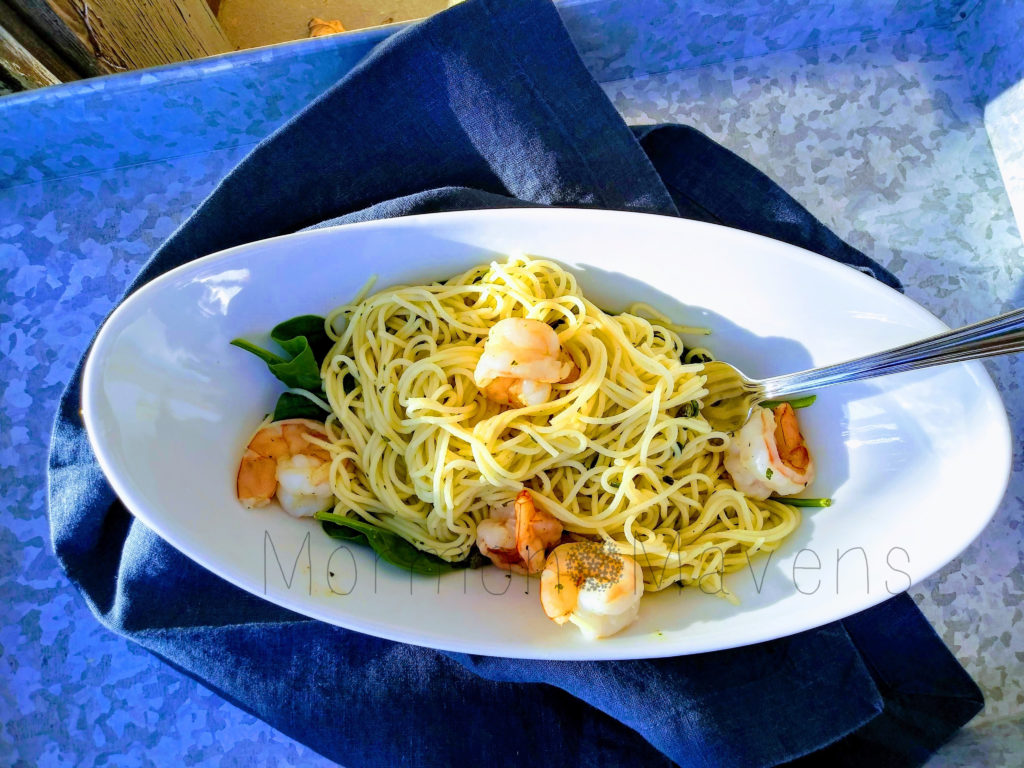
I am a huge fan of one-pot meals and this shrimp & pasta dish did not disappoint.

Not only was it delicious, but it also provides about 31 grams of protein.  How cool is that?  Now, it does have capers and that will add to your sodium intake so make adjustments as needed. If you don’t have fresh basil–I had a few tiny leaves left on my plant in the garden–you can also use this.

I’m telling ya, I felt like I was at a restaurant when I served this meal.  The only thing missing was some crusty bread.

Now I need to try a shrimp & pasta recipe with lemon butter sauce…

Lemon Basil Shrimp & Pasta
Serves 4
Write a review
Print
Ingredients
  1. 3 quarts water
  2. 8 ounces uncooked angel hair pasta
  3. 1 lb. peeled & deveined extra large shrimp
  4. 1/4 c. chopped fresh basil (I used a combo of fresh and lightly dried)
  5. 3 T. drained capers
  6. 2 T. extra virgin olive oil
  7. 2 T. fresh lemon juice
  8. 1/2 t. salt
  9. 2 c. fresh baby spinach
Instructions
  1. Bring 3 quarts of water to a boil in a large pot or Dutch oven, adding a little salt, if desired. Add pasta and cook for 8 minutes.
  2. Add shrimp to the pot and cook for 3 more minutes or until shrimp is done and pasta is al dente. Drain.
  3. Place pasta in a large bowl and stir in basil, capers, olive oil, lemon juice and salt.
  4. Place about 1/2 cup of baby spinach into each serving dish and top with 1 1 /2 cups of pasta mixture.
Adapted from My Recipes
Mormon Mavens https://www.mormonmavens.com/

Italian Roasted Potatoes

italian roasted potatoes


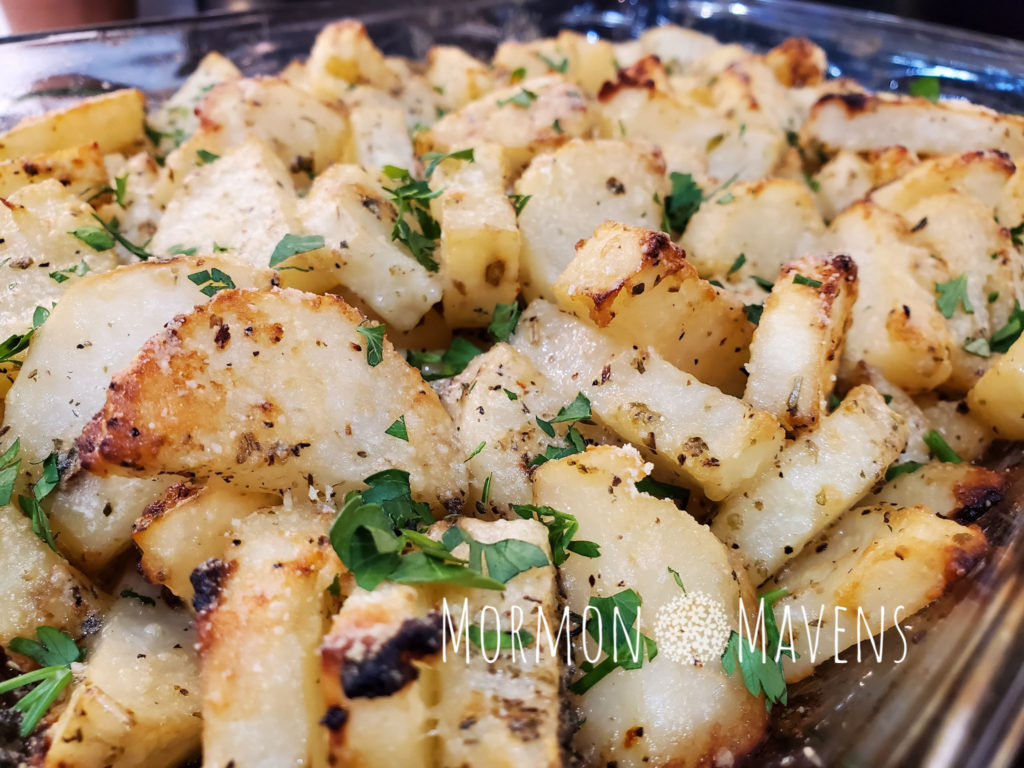
You can’t go wrong with a good potato recipe, and if you add Parmesan, garlic, Italian seasoning, and olive oil….well, then, you just have bliss, don’t you?   Seriously, the combo of all these ingredients just makes your kitchen smell heavenly while it’s roasting.  No wonder so many comfort foods contain potatoes!  National Potato Day is coming up on October 27th, so why not celebrate with Italian Roasted Potatoes?!

You could use dried parsley for this, but the fresh cut parsley looks so great and is just so appetizing.  I used powdered Parmesan cheese, but you could opt for freshly grated Parmesan if you prefer.   When you measure out the Italian seasoning, pour it into the palm of your hand and then use the pads of your other hand to crush and rub the seasoning before adding it. In this way, you’re essentially making a kind of a mortar and pestle with your hands.  Crushing the seasoning in this way will allow more flavor to be released.

If you can swing it, use a good, high-quality olive oil as it will make a big flavor difference.  For example, my favorite olive oils come from Beaufort Olive Oil Company.  (And by the way, that’s pronounced “BOW-fert” in North Carolina, as opposed to the South Carolina “BYUU-fert.”)  Using a flavored olive oil might also be a fun thing to experiment with, but I prefer using a medium intensity, all-purpose olive oil such as a Picual or a Frantoio.

Great as a side to your dinner’s main dish, Italian Roasted Potatoes would also make a great addition to a brunch where you could serve it alongside egg dishes or Anna’s Fresh Tomato and Basil Pie.  Whatever food companion you decide to serve this alongside, I’m sure you’ll be happy with result.  I mean, who doesn’t love potatoes?

Italian Roasted Potatoes
Serves 10
Potatoes, garlic, Parmesan cheese, olive oil, and Italian seasonings come together to create this aromatic, delicious side dish.
Write a review
Print
Total Time
1 hr 10 min
Total Time
1 hr 10 min
Ingredients
  1. 4 pounds Russet potatoes, peeled
  2. 1/2 cup extra virgin olive oil, divided
  3. 2 tsp. Italian seasoning
  4. 6 cloves garlic, minced
  5. 2 tsp. salt
  6. 1 tsp. pepper
  7. 1/2 cup grated Parmesan cheese, divided
  8. fresh chopped parsley
Instructions
  1. Preheat oven to 400 degrees. Prepare a 9"x13" baking dish by generously greasing with shortening or cooking spray.
  2. Cut the potatoes in half length-wise. Then lay each half on its cut side and cut in half length-wise again. Cut each of these width-wise into 1/2" chunks. Place the cut potatoes into a large mixing bowl.
  3. Add 4 Tbsp of the olive oil to the potatoes and toss to coat. Then add the Italian seasoning, garlic, salt, pepper, and half the Parmesan cheese. Toss to coat.
  4. Pour this mixture into your prepared pan and sprinkle with half of the remaining Parmesan cheese. Drizzle 2 Tbsp. of olive oil evenly over the top of the potatoes.
  5. Bake for 30 minutes, remove from oven, and carefully toss. Sprinkle with the remaining cheese and olive oil and return to the oven.
  6. Bake for 25 minutes, remove from oven, and toss. Take a taste and make sure it's seasoned with enough salt and pepper.
  7. Sprinkle with parsley before serving.
Mormon Mavens https://www.mormonmavens.com/
at addition to a brunch where you could serve it alongside egg dishes or Anna’s Fresh Tomato and Basil Pie.  Whatever food companion you decide to serve this alongside, I’m sure you’ll be happy with result.  I mean, who doesn’t love potatoes?

Hawaiian Haystacks

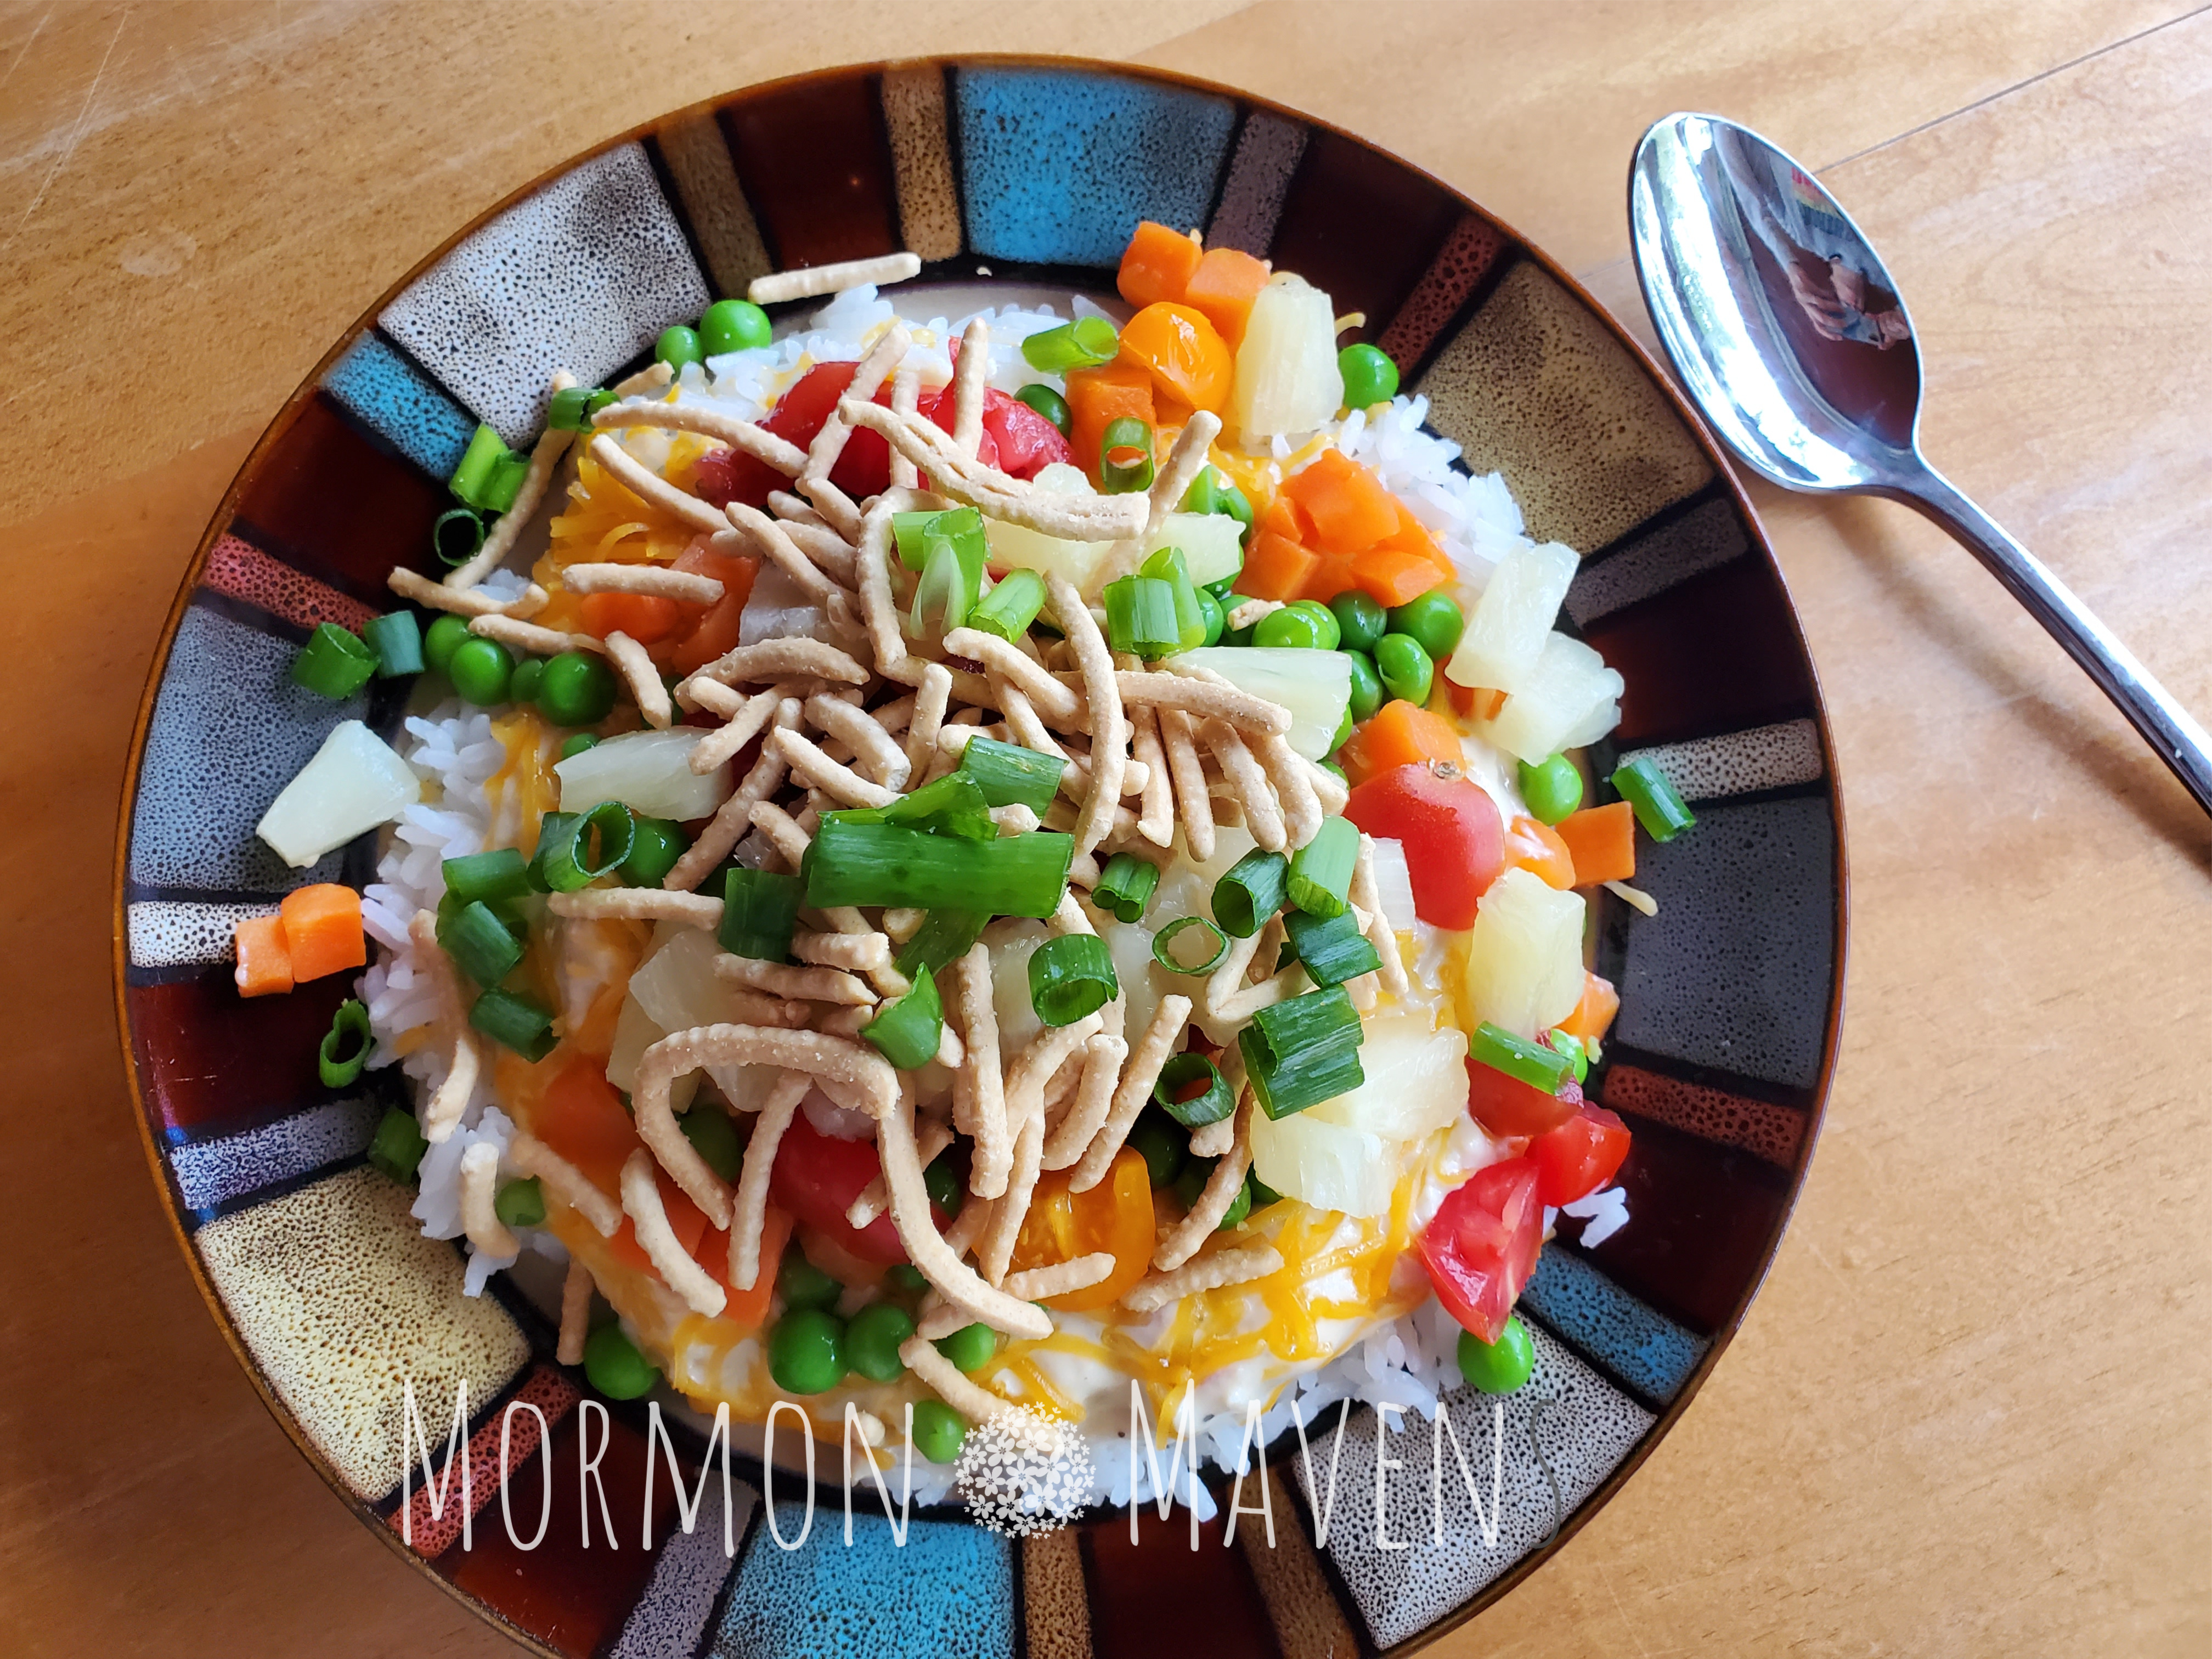
Way back when our recipe blog first began, a recipe for Hawaiian Haystacks was posted by one of our original recipe authors, Kara.  It was one of our most viewed recipes so I figured it was time to post another version of it and, I must say, I’m pretty in love with this one.   Fortunately, it’s a bit quicker than other recipes, but just as delicious!

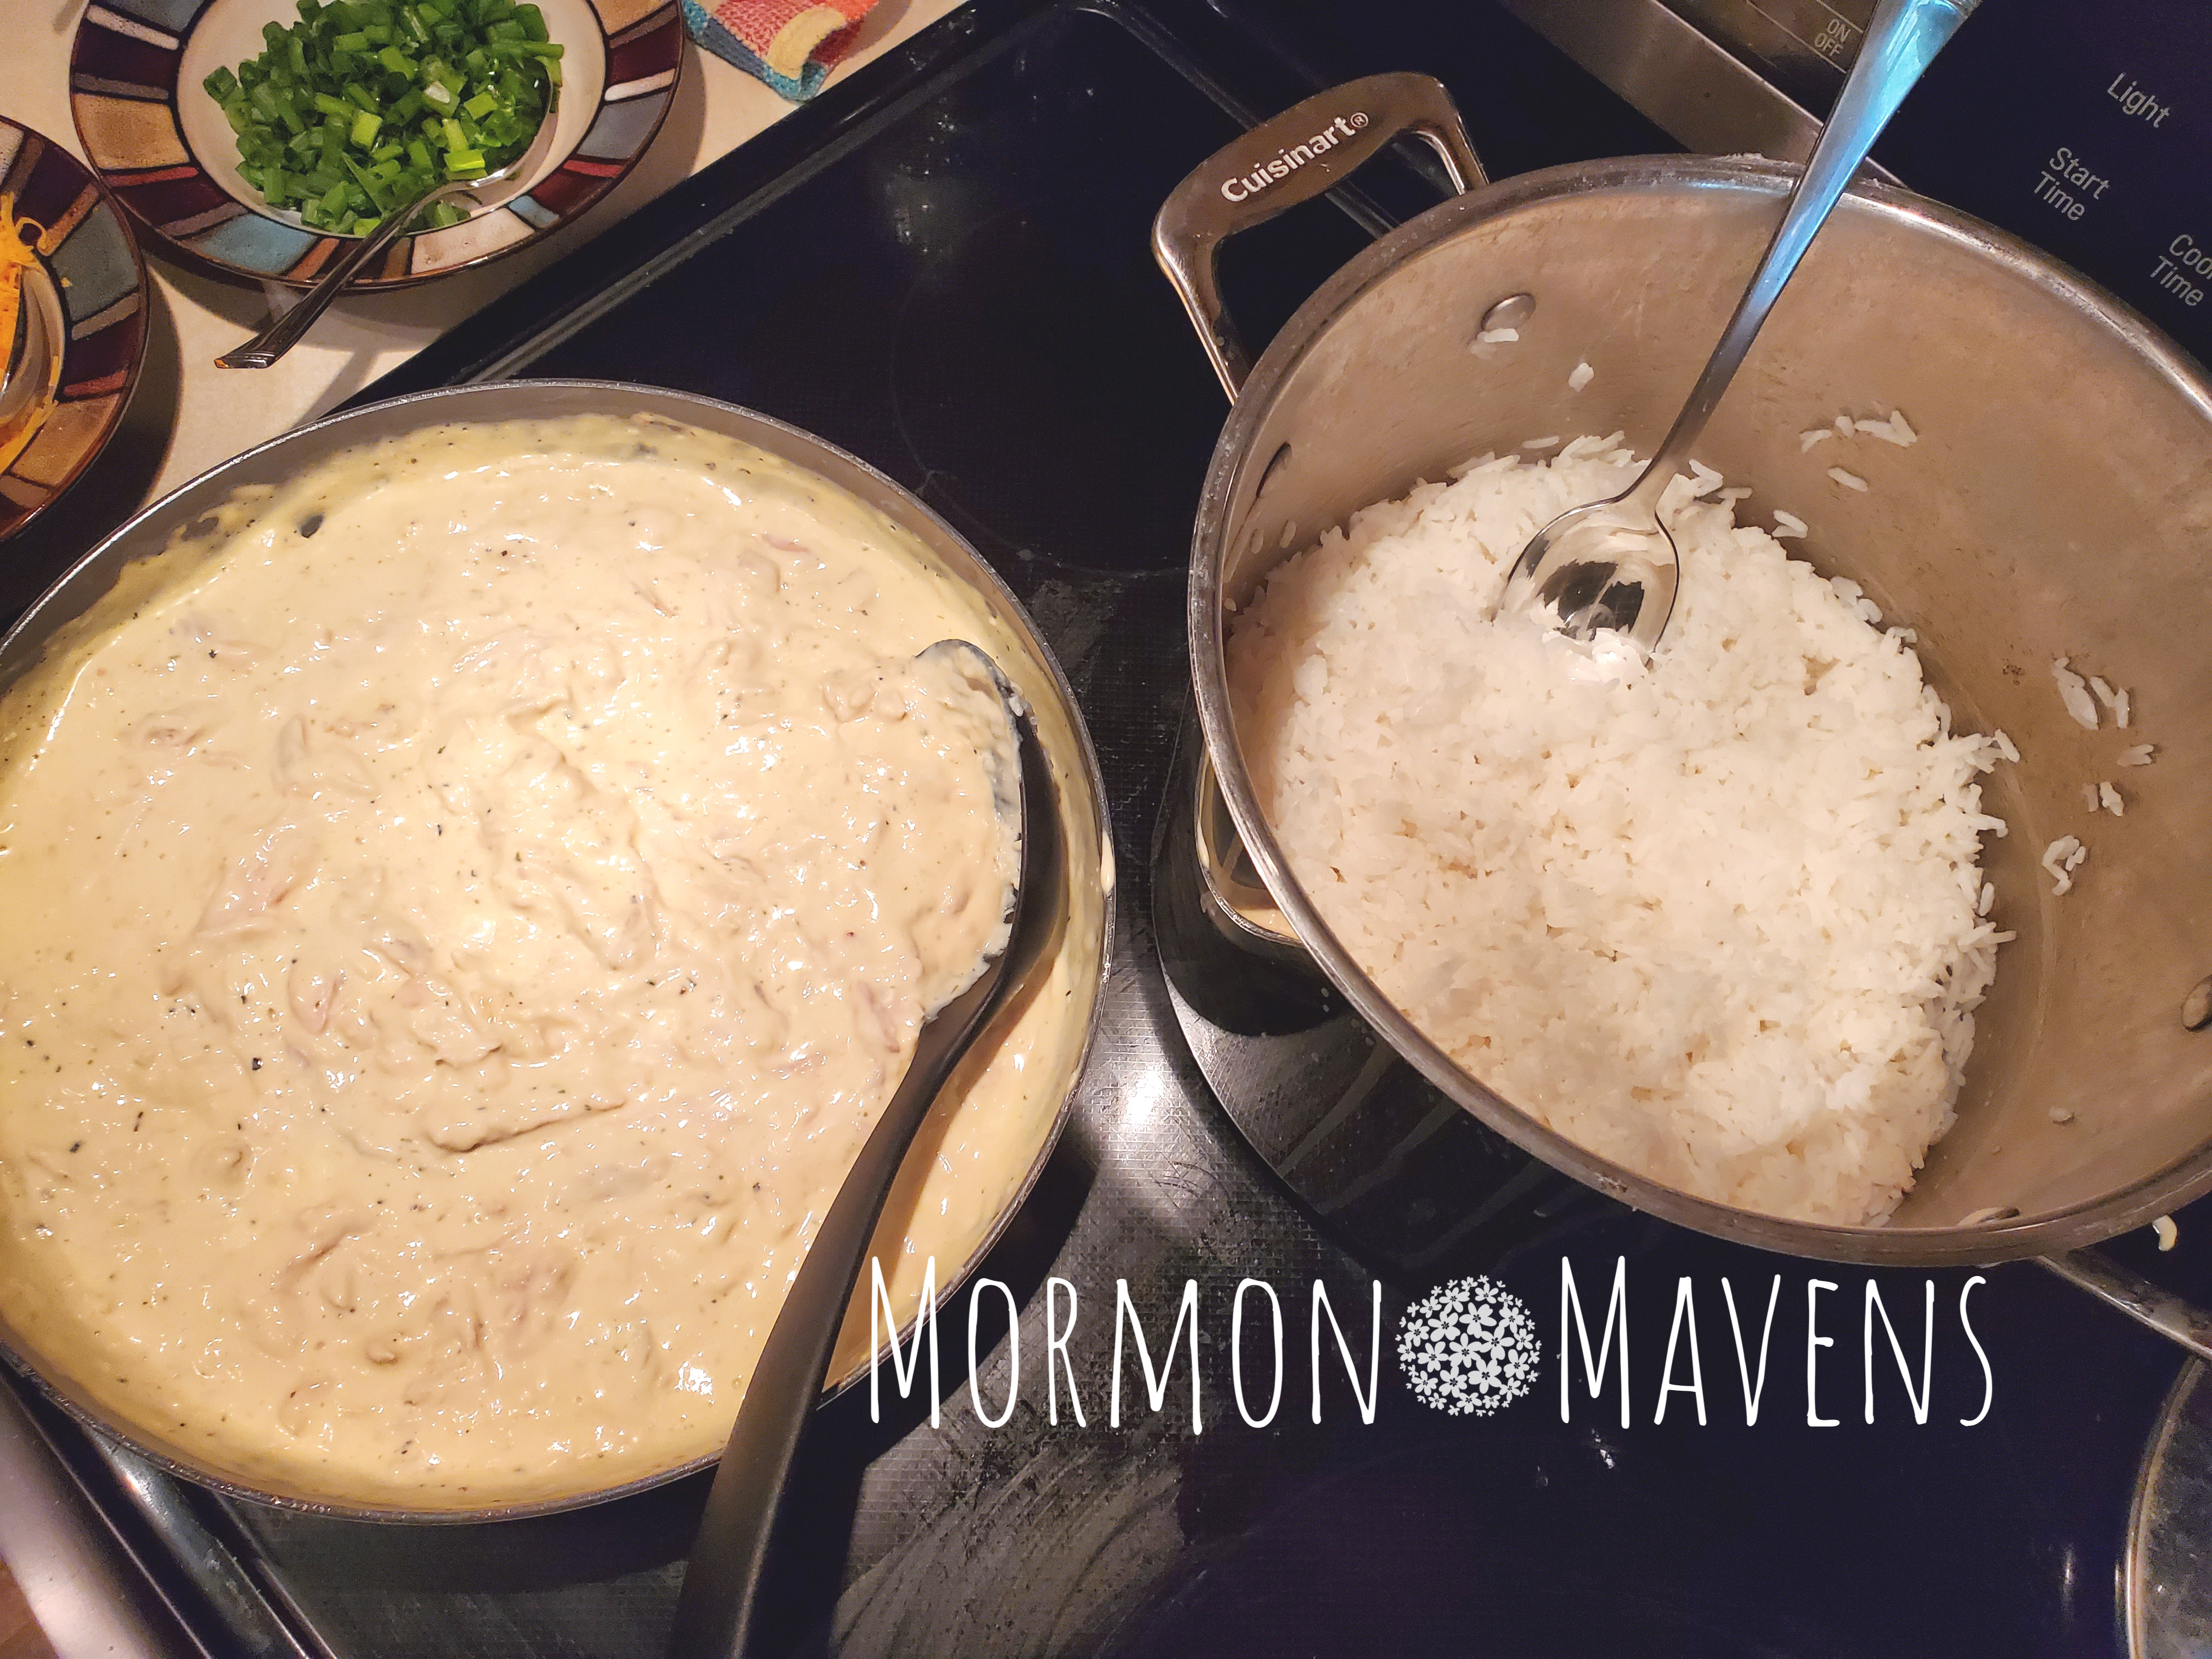
My family tried this recipe out recently during a weekend trip to a VRBO in Virginia.  Although the pics aren’t great (dark and small kitchen) the dish was still delicious.  No pressure cooker so I cooked the rice the old-fashioned way on the stove top.  Either way I think that the timing–starting the rice then prepping the chicken/gravy and toppings while the rice cooks–works out about the same.

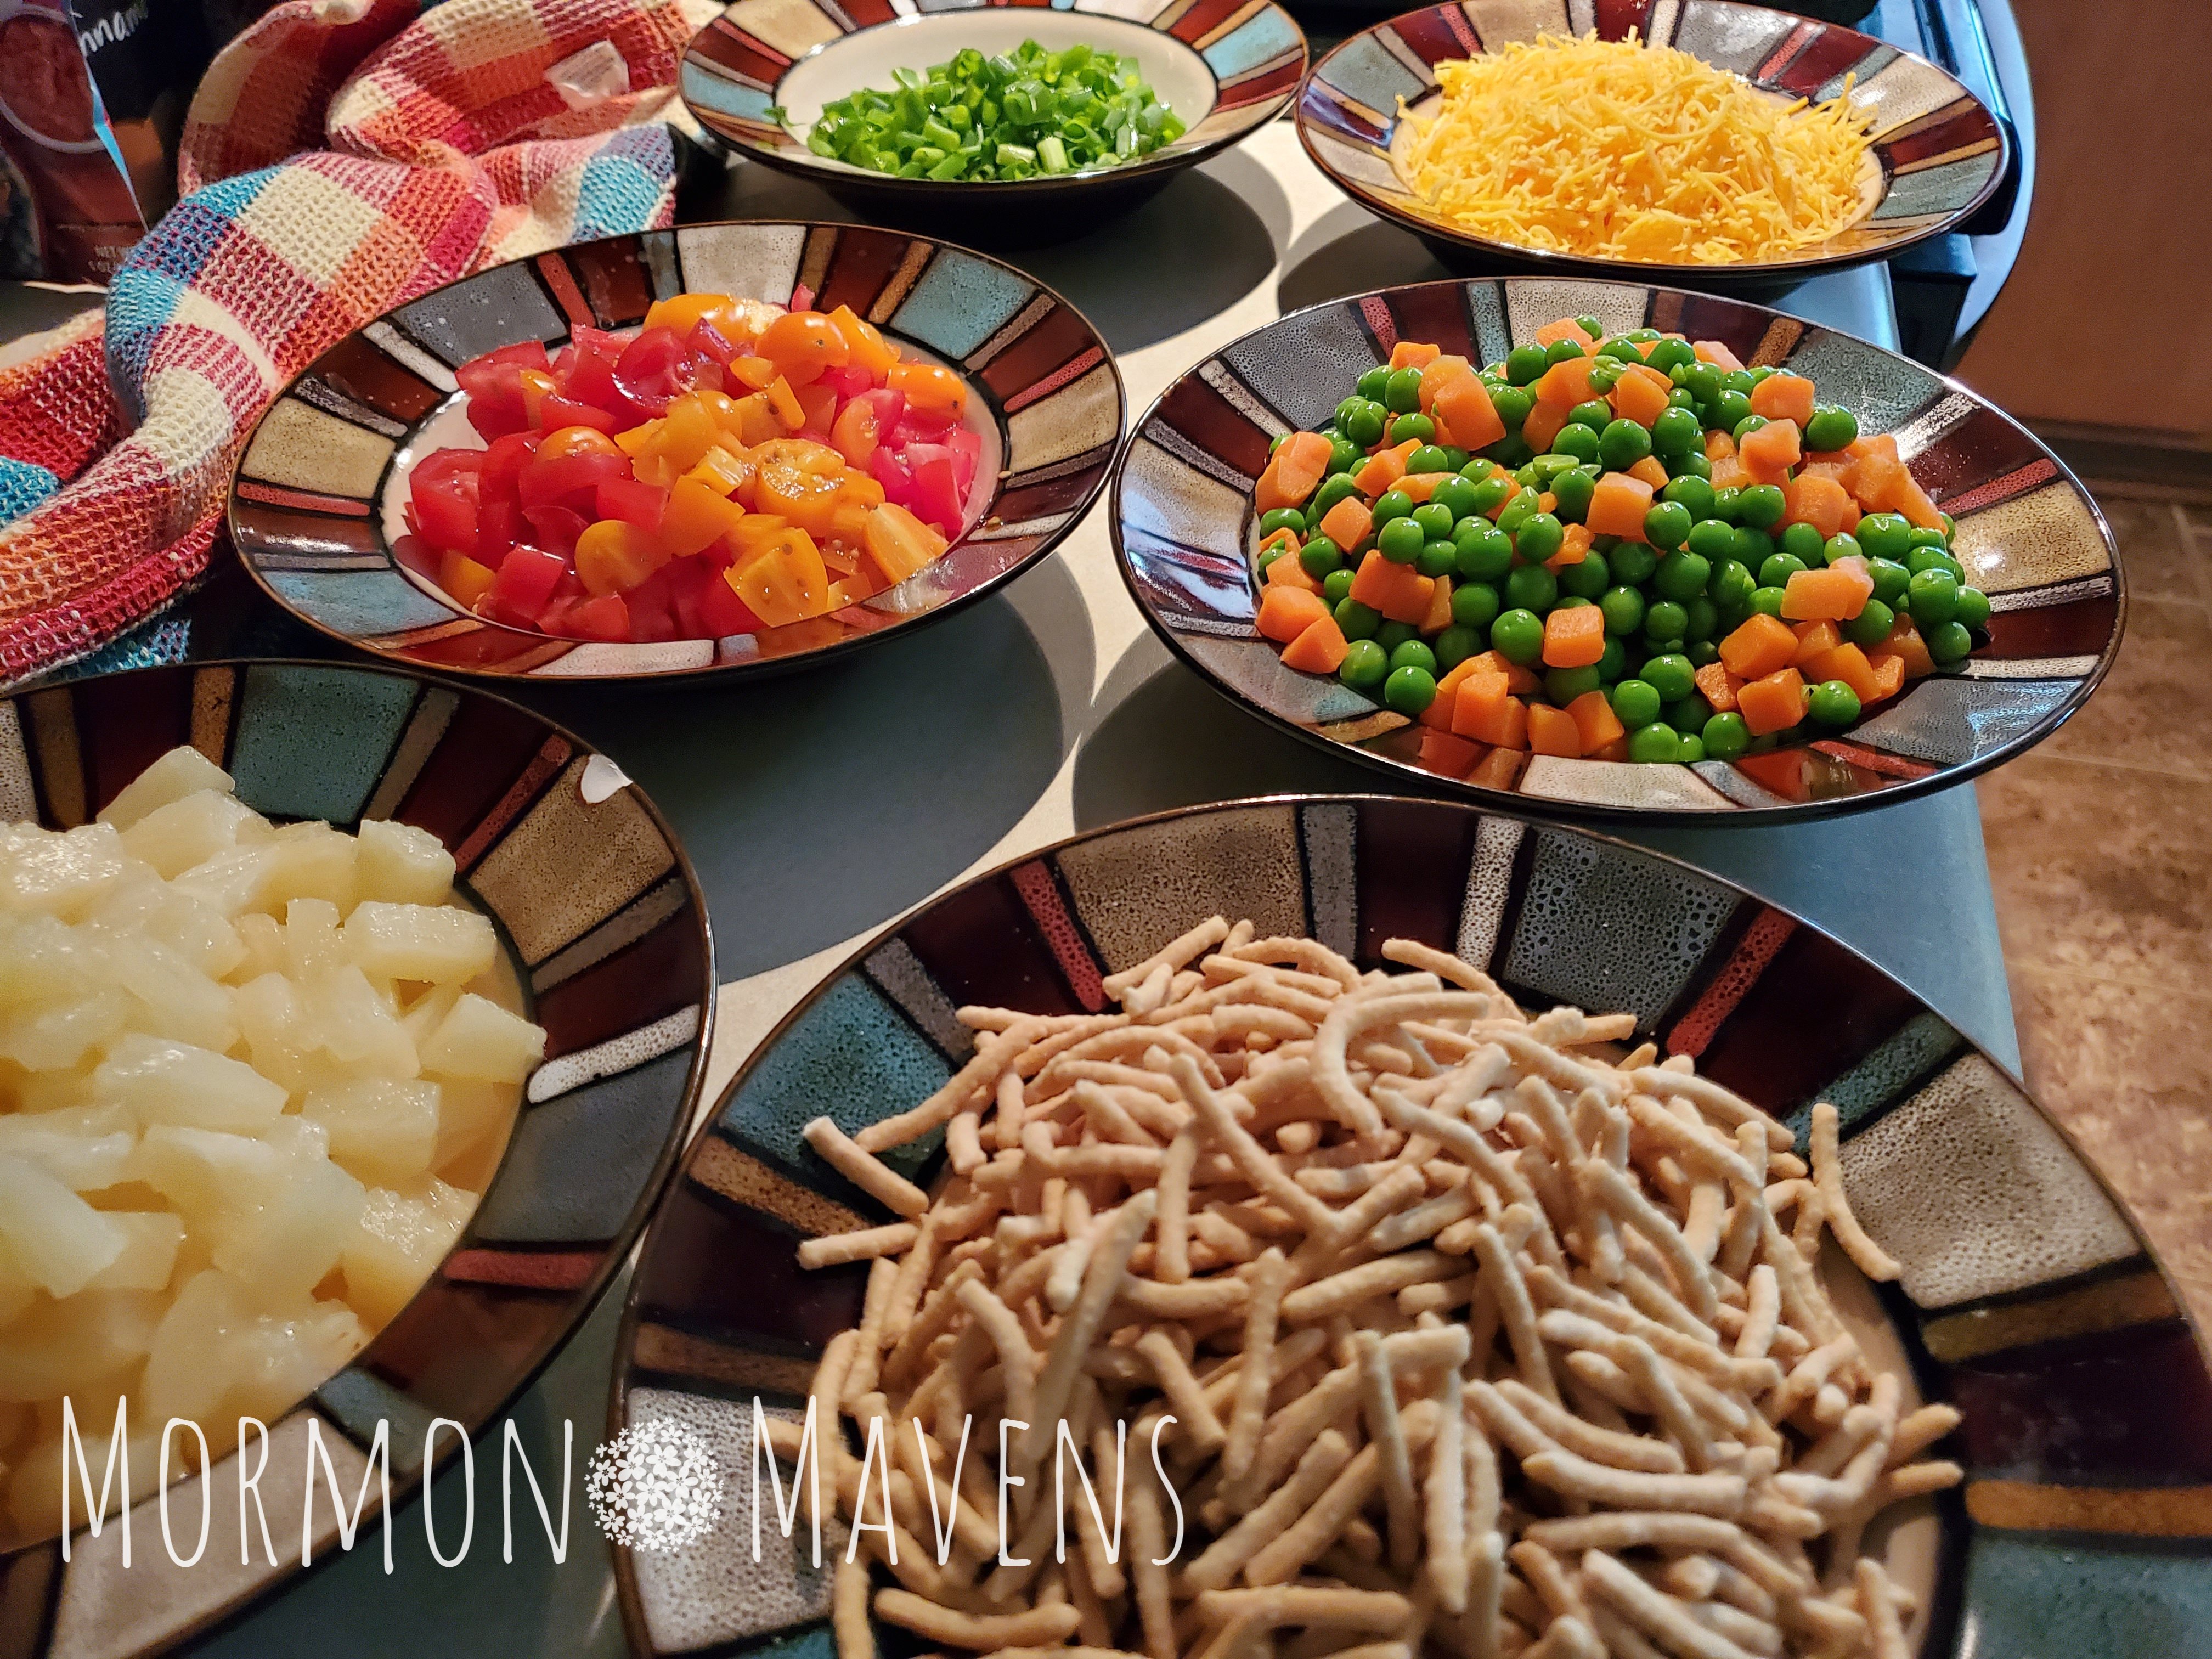
hawaiian haystacks toppings

I’m a big fan of rotisserie chicken for convenience and flavor, so when I saw a recipe using it as the chicken base I knew I had to try it.  I tweaked a few things to make it fit my family and my preferences and I invite you to do the same.  Make it your own by incorporating toppings your family loves!

hawaiian haystacks chicken and rice

Jasmine rice is my very much preferred choice for just about anything rice-related!  And I really like to use my pressure cooker for it.  But you could use leftover rice from another meal (I often will make way more rice than I need so I can use it for other meals).  Because there are so many rice options (leftovers, minute rice, pressure cooker, stove top, microwave rice) I have not included rice cooking instructions.  So just make whatever rice you want in whatever method you want.  Just use your judgement here:  if you are “long” cooking (pressure cooking or stove top) start the rice first then do the rest of the ingredients.  If you are using a “quick” cook (leftovers warmed up, microwave, minute, etc).  Do that at the end.  See, it’s versatile!

Now, as for toppings…I’ve only listed what *I* like.  Many people include sliced black olives but I don’t because, gross.  From Kara’s original recipe, she also lists diced celery, sunflower seeds, slivered almonds, and sliced water chestnuts.  But you do you…..do whatever toppings float your boat, tickle your Elmo, etc.  By the way, you can find crunchy chow mein noodles in the Asian aisle at the grocery store.

So, what are your favorite toppings for Hawaiian Haystacks? 

Hawaiian Haystacks
Jasmine rice topped with rotisserie chicken and gravy and then topped with whatever yummy toppings you want! It's a delicious, quick dinner!
Write a review
Print
Total Time
30 min
Total Time
30 min
Ingredients
  1. 6 cups of prepared jasmine rice (start cooking first, then prep the rest)
  2. 4 cups of shredded rotisserie chicken
  3. 2 (10.5 oz) cans Cream of Chicken soup (with or without herbs)
  4. 8 ounces sour cream
  5. 1/2 cup milk
Toppings
  1. shredded cheddar cheese
  2. canned pineapple tidbits, drained
  3. peas and carrots (from freezer section....thaw)
  4. diced green onions
  5. diced tomatoes
  6. crunchy chow mein noodles
Instructions
  1. Prepare your rice on the stove top (follow directions on rice package...1 cup dry=3 cups cooked)) or pressure cooker (follow directions for appliance).
  2. While the rice is cooking, add the chicken, soup, sour cream, and milk to a large skillet and heat over medium heat, stirring often. Remove from heat when it's well-combined and heated through.
  3. As the chicken mixture is heating through, prep your topping ingredients and place them into individual bowls or into a serving platter that has separate divisions for toppings.
  4. When the rice is done cooking, remove from heat and fluff with a fork.
  5. Set your items up buffet style and let everyone build their own custom haystack.  Start with rice, then add the chicken gravy, then cheese (so it will melt), and whatever else your little heart desires!
Mormon Mavens https://www.mormonmavens.com/