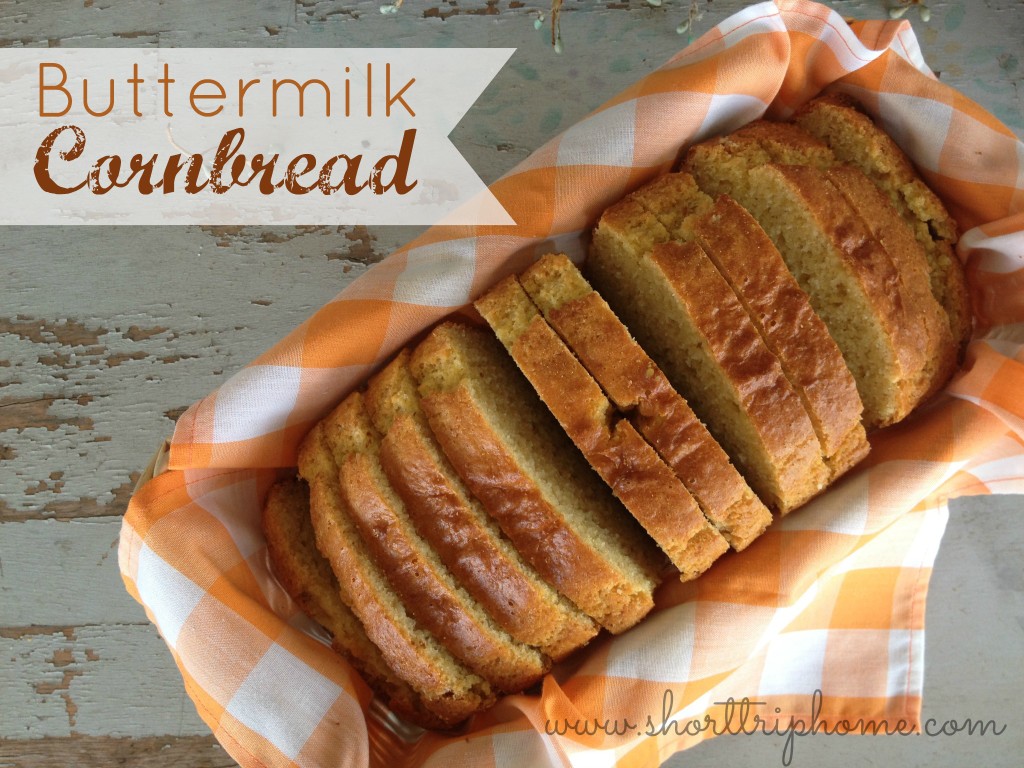
Buttermilk Cornbread


Cornbread just reminds me of my childhood, of old-fashioned eating, and of my own grandmother.  To me, a chili meal is not complete with out it.


Ingredients:
1 1/2 cups all-purpose flour
1 cup yellow cornmeal
1/3 cup sugar
2 teaspoons baking powder
1 teaspoon salt
1/2 teaspoon baking soda
1/2 cup vegetable shortening
1 1/3 cups buttermilk
2 large eggs


1.  Preheat oven to 375°F.  Grease or spray an 8 1/2 × 4 1/2-inch loaf pan; set aside.
2.  In a large bowl combine the flour, cornmeal, sugar, baking powder, salt and baking soda and stir to combine. Cut in the shortening with a pastry blender until it resembles coarse crumbs or small peas.  Don’t overwork it.
3.  In a small bowl whisk the eggs and buttermilk together. Add the buttermilk-egg mixture to dry ingredients and stir to form a stiff, lumpy batter. Spread evenly in the greased loaf pan.
4.  Bake until a toothpick or knife inserted in center comes out nearly clean, with just a few crumbs on it, 50 to 55 minutes. Cool in the pan for 10 minutes then remove the cornbread from the loaf pan and cool for another 10 minutes before slicing.

Notes:

If you don’t have buttermilk, just put 4 teaspoons of apple cider vinegar into the bottom of your measuring cup; then add enough milk to measure 1 1/3 cups (I use a Pyrex 2-cup glass measure for this).
If you are old school you can use some bacon grease for some of the shortening.  I happened to have some so I used about half bacon grease, half shortening.  It really adds to the flavor!

Source:  Grandma’s Kitchen


Originally posted on May 1, 2013.

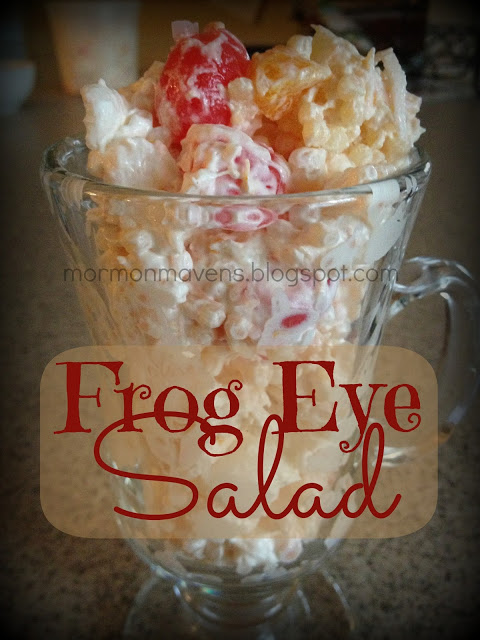
Frog Eye Salad

Although this recipe has been around quite a while, it still seems to be unknown to many.  At a recent church function I was asked two questions about it:  “What is this?” and “Can I have the recipe?”  It makes a lot and is a very satisfying side dish or light dessert.

Ingredients:
1 cup sugar
2 Tbsp. flour
1 tsp. salt
1 3/4 cup pineapple juice (reserved from canned pineapple)
2 eggs, beaten
1 tsp. lemon juice
1 16-ounce package Acini de Pepe pasta
2 11-ounce cans mandarin oranges, drained
1 20-ounce can crushed pineapple, drained and juice reserved
2 20-ounce cans pineapple chunks, drained and juice reserved
1 9-ounce carton non-dairy whipped topping
marshmallows
coconut
maraschino cherries, halved

1.  Combine sugar, flour, pineapple juice, and eggs in a medium saucepan stirring well to combine.  Cook over medium heat until thickened stirring often.  Remove from heat, add lemon juice and stir to combine.  Set aside to cool.
2.  Cook Acini de Pepe pasta according to package directions.  Drain, rinse with cool water, and set aside to cool.  (Unless you have a sieve-type large colander, you may have to line your colander with paper towels like I did…..otherwise the pasta will escape through the holes!)
3.  In a large bowl, combine the cooled egg mixture and the cooled pasta.  Cover tightly with plastic wrap (or lid if you have it) and refrigerate until serving time.
4.  When ready to serve add the fruit, whipped topping, marshmallows, coconut, and cherries.

Notes:

  • The amounts for the marshmallows, coconut, and cherries are up to you.  I like a lot of each, so I added almost a whole bag of mallows, about half a bag of coconut, and a large jar of cherries.
  • This salad keeps well in the fridge after the initial serving but is always best right after the last ingredients are added.  To “freshen” it up a bit after it’s been in the fridge, just add some more whipped topping.
  • Acini dep Pepe pasta is not hard to find in most grocery stores.  It’s just with all the other pastas, not in a special section or anything.  It looks like little balls….it’s the “frog eye” in this salad.
Source:  I got it for the first time from my sister, Amy (fellow Maven known as “Amos”)
 
Originally posted on April 1, 2013.

Bruschetta

Though this simple but satisfying snacketizer is best served with homegrown tomatoes, store-bought and out of season tomatoes still produce good results.  I don’t have any amounts listed….hope that’s copacetic with you.  Just adjust the amounts according to what YOU like.

Ingredients:
fresh tomatoes, diced
onion, diced (optional…I don’t like raw onion so I leave it out)
basil (fresh or dried)
garlic powder
salt
pepper
olive oil
red wine vinegar
baguettes, sliced 1/2-3/4″ thick
fresh parmesan cheese, grated

1.  Preheat oven to 400 degrees.  Place baguette slices on cookie sheet.  Drizzle lightly with olive oil.  Sprinkle with salt and pepper.  Bake for 8 to 12 minutes, or until edges are golden and middles feel like they’re starting to get crunchy.
2.  In a bowl, combine tomatoes and onions.  Add your basil (see notes below), garlic powder, and salt to taste (don’t over salt…you can always add more later).  Drizzle a little olive oil over it.  Then sprinkle on the red wine vinegar. Stir to combine.

How I Like to Eat It:
Okay….here we go.  Grab a toasted baguette slice.  Sprinkle on the grated cheese that I insisted you grate by hand.  Spoon the tomato mixture on top (yes, it is messy and you had better be doing this over a plate).  Sprinkle a little bit of salt over the top.  Now, take a crunchy bite and enjoy!

Notes:

    • Tomatoes–use whatever tomatoes look the most ripe and tasty.  
    • Basil–if you have fresh that’s great…simply chiffonade to get the right amount (use more with fresh).  If using dry, sprinkle in a bit at a time until you get the right taste.  Here’s a video on how to chiffonade fresh basil:

  • Garlic Powder–yes, you can use fresh, but I don’t like to bite into raw garlic so I use the powder. 
  • Olive Oil–I just put in enough so that I can tell each piece of tomato is bathed but not swimming in it.
  • Red Wine Vinegar–I love this!  I put in more vinegar than oil, but I still don’t have the whole thing swimming in it.
  • Baguettes–if you can help it, don’t buy the ones that are really flat on top.  When you slice it, you are creating a little bread plate for your tomatoes so a flat baguette will make for a narrow plate.  Find the roundest ones you can.
  • Parmesan Cheese–I really must insist <wink> that you buy the lovely triangular cheese and grate it on the large holes using your cheese grater.  The powdered stuff in a can will NOT give you the same tasty results.
Source:  Honestly, I have no idea.  I’ve been making this for years!  But I have no idea where I got it from.
 
Originally posted on April 15, 2013.

Stuffed Cherry Tomatoes

 
There are days when you just can’t think of a recipe to post, so you hit your trusty family cookbook to see if anything strikes your fancy–and if you already have most of the ingredients.  Today was that day.  After a quick trip to the store before work to pick up chives and cherry tomatoes, I was ready to prepare your post for the day.  This is actually a recipe that I taped into my cookbook without even trying it.  I have quite a few of those, from back in pre-Pinterest days, pre-save it to your computer days.  Yes, that long ago.  This one is clipped from a magazine.  I would guess at Better Homes & Gardens.  This is actually quite good and any leftover filling makes a great egg salad sandwich.
 
Ingredients:
36 large cherry tomatoes 
1/3 cup mayonnaise
1 T. Dijon mustard (I used regular because I forgot to get some at the store)
1/2 t. curry powder
2 T. chopped fresh chives
10 whole chives for garnish
 
1.  Cut a slice off the top of each tomato and use a spoon to remove the meat and seeds.  I actually cut off the bottom end so that the tomatoes would sit level on the platter.
 
2.  Set the tomatoes upside down on paper towels to drain.
 
3.  Put the peeled eggs in a bowl along with the mustard and mayo and mash with a fork until fairly smooth.  Add the remaining ingredients, mix well and taste so you can add spices if you need to.  I added a little bit of salt.
 
4.  About 1 hour before serving, fill each tomato with egg salad, garnish with several 2″ chive spears standing up in the middle of the tomato.  Makes a lovely appetizer, don’t you think?
 
 
Originally posted on March 12, 2015.

Breakfast Tostadas

breakfast tostadas
 

I am currently in a breakfast funk. It’s hard to come up with healthy choices when you are used to just throwing some milk and Cheerios in a bowl.   Anyone else out there grow up with cold cereal for the first meal of the day?  I would bet there are a lot of us.  Nothing against Mom–she did the best she could for her kiddos.  I can even remember a time when she was trying to get creative with some healthier options, but we just didn’t cooperate very well, except with the frozen banana with peanut butter and wheat germ.  That is STILL a winner!  Maybe that should be a future post!  Stay tuned.

Anyway, as I was scouring my Pinterest folders for some ideas for my post this week, I found this gem and thought it would be a great recipe to share, plus maybe I will love breakfast again.  Plus, their picture looked so colorful and amazing.  By the way, this dish is so easy to prepare and you can do it with the messiest of counters. I had just gotten back from work and the store, plus as I was putting food away I noticed how nasty the fridge looked.  Took all the stuff off the shelves and out of the drawers and that was also on my counters, and I was able to make my tostada amidst the chaos.  Score!  And after my tostada, I cleaned/reorganized the fridge.


Ingredients:

1  16-oz. can of refried beans
6 tostada shells
6 eggs
1/4 cup crumbled Queso Fresco
1 avocado, sliced
cilantro
hot sauce

 
1.  Preheat the oven to 325 degrees F.  Place tostada shells in a single layer on baking sheet.  Bake 6-7 minutes or until crisp.
 
2.  Place re-fried beans in a small saucepan.  Heat over medium heat until warmed through. For those using freeze-dried beans, follow the directions on the package/can.  Mine was super easy and I made only as much as I needed.
 
3.  Cook eggs according to preference–I like slightly under cooked.
 

4.  Assemble the tostadas–put equal amounts of re-fried beans on each tostada and spread evenly.  Top each with queso, a few avocado slices.  Place an egg on each one and season with salt and pepper.  You can also use cilantro and some hot sauce or salsa, if you like.  I used hot sauce because, unfortunately, I did not have any fresh salsa ready.  Serve warm.


Source:  Taste and Tell via Pinterest.

Originally posted on September 10, 2015. 
Breakfast Tostadas
Write a review
Print
Ingredients
  1. 1 16-oz. can of re-fried beans
  2. 6 tostada shells
  3. 6 eggs
  4. 1/4 cup crumbled queso fresco
  5. 1 avocado, sliced
  6. cilantro
  7. hot sauce
Instructions
  1. Preheat the oven to 325 degrees F. Place tostada shells in a single layer on baking sheet and bake 6-7 minutes or until crisp.
  2. Place re-fried beans in a small saucepan. Heat over medium heat until warmed through. For those using freeze-dried beans, follow the directions on the package/can. Mine was super easy and I made only as much as I needed.
  3. Cook eggs according to preference–I like fried and slightly under cooked.
  4. Assemble the tostadas–put equal amounts of re-fried beans on each tostada and spread evenly. Top each with queso, a few avocado slices. Place an egg on each one and season with salt and pepper. You can also use cilantro and some hot sauce or salsa, if you like. I used hot sauce because, unfortunately, I did not have any fresh salsa ready. Serve warm.
Adapted from Taste and Tell
Mormon Mavens https://www.mormonmavens.com/
 

No-Bake Cheesecake Bites

Recently I had some ladies over to my house for a little get together and I wanted to serve something that looked pretty and tasted good but was super easy to make.  I searched the internet and finally decided to try these tasty little morsels.  I’m glad I did.  They were a success, and I’ll be using this recipe again for sure!  These are perfect for parties and showers.  You can make the filling ahead of time and fill the cups just before your guests arrive.  Definitely a keeper!

 
Ingredients:
2 Tbsp. packed brown sugar
1/4 cup. sour cream
1/4 tsp. vanilla
4 ounces cream cheese, softened
1 Tbsp. heavy whipping cream
15 mini Phyllo tart shells (1 package)
berries for garnish
 
1.  In a mixing bowl, beat the brown sugar, sour cream, and vanilla together until well blended.  Add the cream cheese and beat until smooth.  Add the whipping cream and beat until light and fluffy.
2.  If serving right away, simply spoon some of the mix into each tart shell.  If you want to chill it until later, spoon the mix into a zip-top bag, seal, and place in the fridge till you are ready.  Then take the bag out, snip one corner with scissors, and squeeze the mixture through the hole into the tart shells.
3.  Garnish with berries.
 
Source:  Kitchen Treaty (although that recipe adds 1 heaping teaspoon of lemon zest, which I omitted)
Originally posted on March 6, 2013.

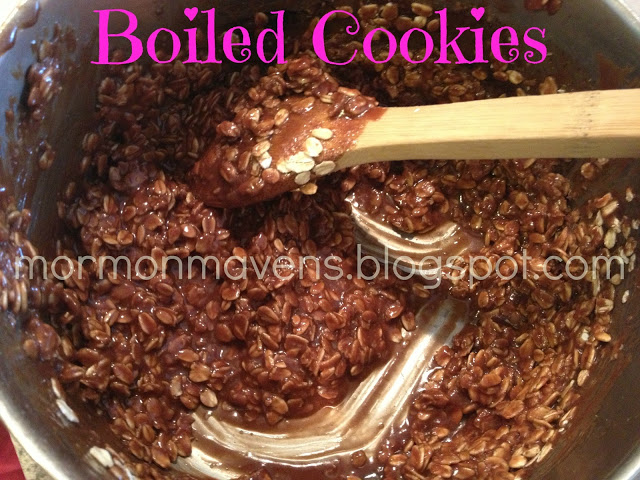
Boiled Cookies

I had a friend once who thought this was a disgusting name for a cookie.  She said in her family they called them Gorilla Poops.  Not sure why my family’s title won the gross-out award over hers.  Anyhow, it’s a tried and true recipe that brings back lots of memories for me.  Sunday afternoons were the traditional occasions for these quick treats when I was growing up, and it’s a tradition I’ve kept going in my own family.

Ingredients:
1/4 c. butter
1/2 c. milk
3 Tbsp. cocoa
1/4 tsp. salt
2 c. sugar
1 tsp. vanilla
1/2 c. peanut butter
2 1/2 c. oats (quick or old-fashioned)

1.  Combine the butter, milk, cocoa, salt, and sugar in a large saucepan and bring to a boil.  Cook for 1-2 minutes more and then remove from heat.
2.  Stir in vanilla, peanut butter, and oats.  Drop by spoonfuls onto waxed paper and allow to set.

Makes about 3 dozen

Notes:

  • My personal favorite way to make these is to omit the cocoa from the boiling mixture, and then add in 1/2 cup or so of coconut after the boil.  Yum!
  • I used to always use quick oats until I experimented with old-fashioned, which I use more often.  Quick oats give a bit softer texture, but I like them with the old-fashioned oats better.
  • You can pour the mixture into an 8″x 8″ pan, sprayed with cooking spray, but it takes a lot longer to set before you can cut it into bars.
  • My ten-year-old made this batch and has become quite an expert at the process!
  • We like to use a cookie scoop for easy portioning onto the waxed paper.
 
Source:  my mom, but this recipe has been around forever!
Originally posted on February 4, 2013.

Yummy Healthy Smoothie

So, how many of you are doing the “set a goal to lose weight” goal AGAIN this year?  Oh, come on, you know you did.  It’s like the number one New Year’s Resolution EVER!!  

Anyway, it hit me tonight, as I looked at my calendar (didn’t have time to check it yet this week.  What is that about?) that it was my week to post on Thursday.  

After cleaning the kitchen and living room this morning, vacuuming up copious amounts of pine needles from the Christmas tree, going to my 3rd Zumba workout this week, doing a couple of loads of laundry, going back to work after the long Christmas break, working like crazy to catch up at said work, getting my entry ready for our Arts Council photo contest, running to the bank, yadda, yadda, yadda….I got home from work and had about 30 minutes to breathe and throw down a fold-over ham sandwich before a 6:00 planning meeting at church, prior to the youth meeting at 7:00 pm.

I did NOT have time to whip up an amazing recipe to post, but I do have time to make a smoothie for my breakfast in the morning!  So I am going to go do that right now and snag a few pictures and then I will  be sharing that smoothie recipe with you!  Now we can work on our weight loss goal together!

Ingredients:
2 cups of frozen fruit, we like blueberries
1 cup low fat vanilla yogurt, we like to use 2 containers of Activia yogurt
1/3 cup of Whey Protein, chocolate flavor
1 heaping tablespoon low fat peanut butter
Honey, to preference
Ground flax seed, about a tablespoon or so
1/2 banana
1/4 cup quick oats (or less), or a packet of instant oatmeal of desired flavor
6 oz. low fat milk, we use 1%


1.  Place the fruit in a blender, food processor, or “Ninja” and process for a few seconds.
2.  Add remaining ingredients and process until desired consistency.
3.  Pour desired amount in a glass and ENJOY your healthy beverage.


Originally posted on January 3, 2013.


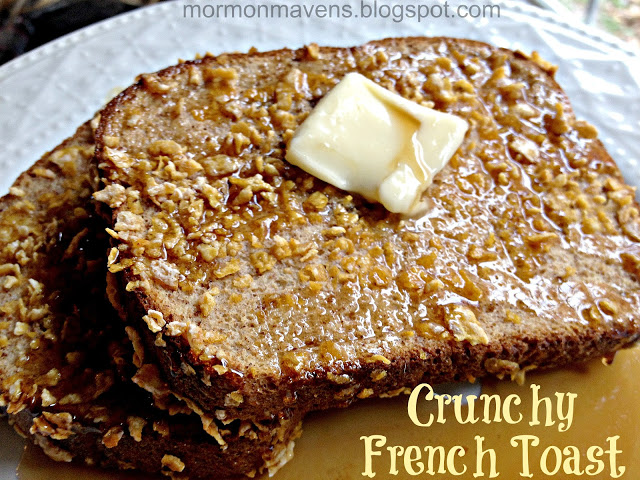
Crunchy French Toast

Looking at the menu plan in horror, I realized that the Baked French Toast I had planned for the next morning was just not going to happen.  Didn’t have the right bread.  Could make bread but it wouldn’t be the right texture since it would be fresh.  Didn’t really want to run to the store late at night.  Hmmm….what to do?    Go to bed and hope that the Baked French Toast Fairy would come.

She didn’t.  (True story.)

So that morning, after looking online for a jazzed up French toast recipe (that didn’t require overnight soaking!), I decided to just go rogue and make it up as I went along, using a few ideas I’d seen online.   I was quite pleased with the result!  Try it and see what you think.

Also, if you could tell that Fairy that she owes me a breakfast, I’d be much obliged.

Ingredients:
16 slices of bread
4 eggs
3/4 cup heavy cream
3/4 cup skim milk
3 Tbsp. sugar
1 tsp. vanilla
1 tsp. cinnamon
4 cups frosted flakes or plain corn flakes

1.  Preheat oven to 425 degrees.  Place aluminum foil in the bottom of two large baking sheets.  Place a large cooling rack into each pan.  Spray racks with nonstick cooking spray.
2.  Measure the flakes into a plastic food bag and use the bottom of a 1-cup measure to crush the flakes into small pieces.  Pour the crushed flakes into a bowl (make sure the bowl is wide enough to allow you to lay a piece of bread in it).
3.  Whisk together the eggs, cream, milk, sugar, vanilla, and cinnamon.  One at a time submerge the bread into the egg mixture, lift it out, and use your fingers to gently squeegee off any excess.  Then place the dipped bread slice into the bowl of crushed flakes, pressing gently.  Flip the bread over and gently press the other side.  Then place each slice on the cooling rack.  Repeat this with all the slices, making sure to whisk well after ever two or three dippings (the sugar has a tendency to settle at the bottom and the cinnamon likes to float at the top).
4.  Bake for 20-25 minutes, flipping slices over halfway through the baking time.  Serve with butter and syrup and enjoy!

Notes:

  • I used store-bought whole wheat bread.  Different breads will soak up the egg mixture differently and so may require more or less of the mixture.
  • To promote more even cooking, I also rotated the position of the baking sheets halfway through the cooking time.  I just had them switch places in my oven.
  • To check for doneness, I just poked the bread gently in the middle to see if it was still squishy (that’s the technical term).  It should be dry but still soft.
Source:  me!  (well, with a little inspiration from the internet)
 
Originally posted on November 26, 2012.

(Amazing!) Mint Brownies

I’ve tried many brownie recipes over the 20+ years that I have been married.  I recently found a great basic brownie recipe that has served us well so far.  But recently I found a special brownie recipe that is….well, I’ll just say it….life-changing.

Okay, well maybe you’d have to be married to a man who is in love with mint to call this recipe life-changing!  But even I adore these mint brownies; and I only like mint as a friend.


Ingredients:
4 ounces unsweetened baking chocolate
1 cup butter (2 sticks)
4 eggs
2 cups sugar
1 tsp. vanilla
1 1/4 cups flour
1/2 tsp. baking powder
—–
Frosting:
1-2 Tbsp. milk
2 cups powdered sugar
1/4 cup butter, softened (1/2 stick)
1 1/2 tsp. peppermint extract
green food coloring (2-3 drops)
—–
Glaze:
6 ounces semisweet chocolate chips
6 Tbsp. butter

1.  Set oven to 350 degrees.  Line a 9″x 13″ pan with foil, making sure the foil can extend over the edge by a couple of inches (you’ll lift the brownies out later with that).  Spray with cooking spray.
2.  Chop your unsweetened chocolate and the butter into chunks.  Place in a microwave-safe bowl and microwave for 30 seconds at a time, stirring in between, until the chocolate is melted and smooth.*  Set aside to cool.
3.  In a mixer, beat eggs, sugar, and vanilla for two minutes.  While that’s beating, mix together the flour and baking powder in a separate bowl.  With the mixer running, slowly pour in the melted chocolate and beat until it is well-combined.  With the mixer on low, add the flour mixture by spoonfuls and mix just until combined.**  Pour batter into pan and bake for 20-30 minutes, or until a knife poked into the center comes out clean.
4.  Cool brownies completely on a wire rack for better air circulation around the pan.  Once the brownies are room temperature, make the frosting.  Combine all the ingredients, starting with 1 1/2 Tbsp. of milk and adding more after mixing if necessary.  Spread evenly over the brownies and chill while you make the glaze.
5.  Place the chocolate chips and butter in a microwave safe bowl.  Microwave in 30-second increments until melted, making sure to stir well in between.  Set this aside to cool for about 15 minutes, then pour atop the brownies and carefully spread it out over the mint frosting.  Chill again.  When the chocolate has set, lift the brownies out of the pan with the foil “handles”.  Cut and serve.***

Notes:
*Don’t over heat.  Stirring well in between will help the chocolate melt a little more.  It should just barely have melted all the way.
**It’s okay for a bit of flour to not be mixed in.  Over-mixing the batter will mess up the texture.
***I cut mine in a 4 x 6 grid to get 24 brownies.

Source:  Our Best Bites: Mormon Moms in the Kitchen (I didn’t realize how close our blog name is to their cookbook until our blog had already been named.  At any rate, they have a wonderful website and an exceptionally beautiful cookbook!)

Originally posted on June 25, 2012.