Life’s Plain, Common Work


I found this poem by Robert Louis Stevenson that I just really like.  He is one of my favorite poets–did you learn about him in elementary school?  I did and even then I could tell he was way cool.  Anyway, just wanted to share this because it really helps me to be grateful for the simple things…


Life’s Plain, Common Work

The best things in life are nearest:
Breath in your nostrils, light in your eyes,
flowers at your feet, duties at your hand,
the path of right just before you.
Then do not grasp at the stars,
but do life’s plain, common work as it comes,
certain that daily duties and daily bread are the sweetest things in life.

 
Ahhh…I am enjoying the breath in my nostrils right now. Or is that baby formula?  Because I think that is what is going on in the photo. Correct me if I’m wrong.


Image by Flickr.com/photos

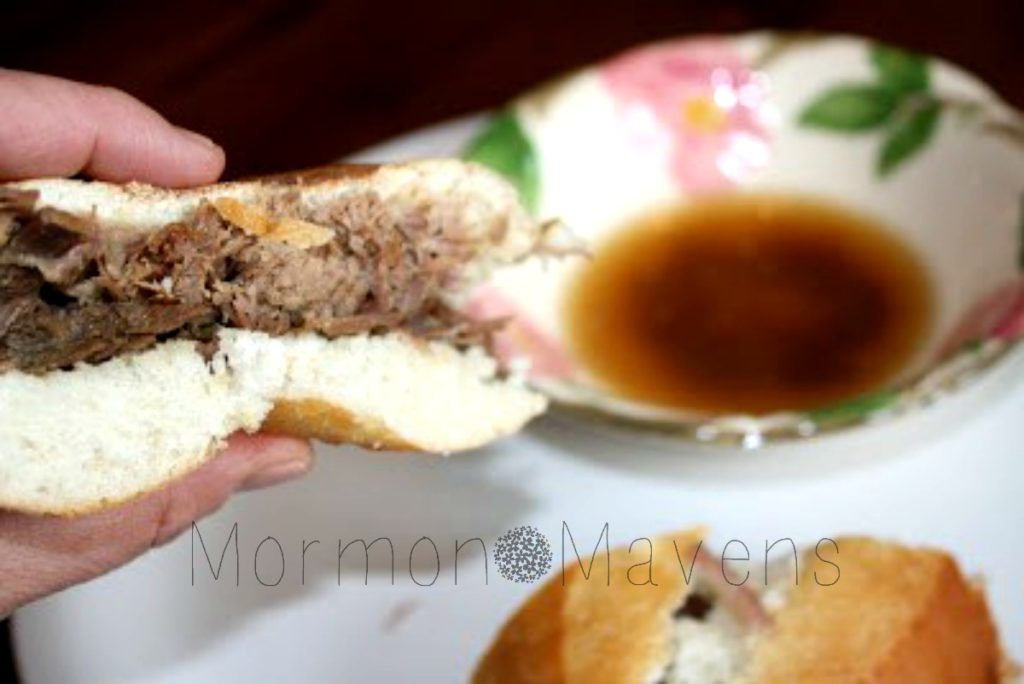
Slow Cooker French Dip Sandwiches


Is it Throwback Thursday, or do they still do that?  It’s the time of year when you want to pull out the slow cooker and make your house smell like “yum”.  This post is an oldie but a goodie from a past Maven.  Enjoy!

“Oh my goodness these are delicious! My family was completely quiet while they ate these. It was so funny! No one had time to talk…too busy eating! We were so craving a roast for Sunday dinner. I wanted something a bit different. I found a recipe for French Dip sandwiches and tweaked it for my family and this is what happened! Very yummy.”

3-1/2 lbs beef chuck roast
16 oz beef broth
1- 10.5 oz can condensed French onion soup
1/4 cup red wine vinegar
1 tsp. garlic powder
2-3 TBSP. Worchestershire sauce
salt and pepper, to taste
4-6 French rolls
olive oil
sliced provolone cheese, optional

1.  Trim excess fat off beef roast and season meat with salt and pepper.

2.  Into the slow cooker add the following ingredients: beef broth, condensed French onion soup, red wine vinegar, garlic powder, Worchestershire sauce and mix well. Then add the beef roast.

3.  Set your slow cooker on high! Set the time for 5 1/2 to 6 hours. This will be falling apart when you next look at it! But, you need to adjust this to your slow cooker. My slow cooker cooks really hot and fast. So think about yours before you set it. If you have time, put this on earlier in the day and set it to low. Since this is cooking in liquid it will not dry out.

4.  When it’s time, take beef out and rest it, covered with aluminum foil, for about 15 minutes. Slice beef and return to slow cooker on low for another 20 minutes.

5.  Slice French rolls and brush them with olive oil. Lay cut side down onto baking sheet and toast them to your liking. If someone wants cheese on their sandwich add the cheese onto roll to melt in the oven face up!

6.  Divide beef onto rolls and spoon the au jus sauce into little bowls for each person. (no one wants to share their au jus sauce!) Serve while hot! Your family will love this!

Originally posted on March 6, 2012.


Quick Bean Dip


It was one of those nights when I needed a really quick meal because it had been a busy day of Body Pump, Yoga, a couple of errands–one out of town–finishing up the mowing, paying bills, updating files…  Oh sorry.  I guess you didn’t need all those details, but you get my point.

I just wanted to relax and not have to go out to eat (yes I really said that) or spend a lot of time in the kitchen.

Have you tried any of the Delimex Taquitos? They used to be a good back-up entree back when the girls were little, before we were all freaking out about processed foods, and when we lived in a predominantly Hispanic city and anything Mexican was where we went.

Usually I just put these guys in a baking dish, sprinkle grated Mexican cheese blend on them and top them with green enchilada sauce.  Pop them in the oven for 14 minutes and there you go. 

Today I just wanted them a little crunchier so I actually followed the directions on the box and laid them out on a cookie sheet NAKED (the taquitos not the cook!) and baked them.  Well of course I would need some kind of sauce or dip, so I whipped up (literally in like 4 or 5 minutes) a small batch of Thrive Refried Beans, added sour cream, the shredded Mexican blend cheese and some spicy, tasty salsa.

SCORE!!

Quick Bean Dip
Write a review
Print
Ingredients
  1. 1 3/4 c. Thrive Instant Refried Beans
  2. 1 c. water (I added about 2 T. to thin them out a little)
  3. 1/4 c. sour cream
  4. 1/3 c. shredded Mexican Blend cheese
  5. 2-3 T. Herdez Guacamole Salsa
  6. salt to taste
Instructions
  1. Whisk water into beans in a medium saucepan. Bring to a simmer over medium heat for about 3-4 minutes.
  2. Add sour cream, cheese, and salsa and stir to combine.
  3. You're done!
  4. Serve with taquitos or tostadas, whatever your little heart desires.
Mormon Mavens https://www.mormonmavens.com/

Conference Nuggets 2018


It’s that time of year again, folks.  The Semi-Annual Conference of the Church of Jesus Christ of Latter-day Saints happened last weekend and here are the nuggets I would like to share with you:


  • Our Sunday meeting schedule has been restructured so that we can have a more home-centered, Church supported Gospel study experience.  
  • A renewed emphasis on the name of our church–The Church of Jesus Christ of Latter-day Saints–so that we may better represent who we are and whose Church this is.
  • We live in a remarkably revelatory time in the restored Church.
  • Center yourself in Christ, hold fast to what you already know and wait on further instruction.
  • Keep on the covenant path.
  • Achieve the conversion the Lord expects you to.
  • Establish righteous patterns.
  • Know the WHO and WHY of serving the Lord.
  • If we will make Jesus Christ the center of our lives, everything else will fall into place.
  • Trials happen because this is mortality.
  • Pray to the Father to bring you to someone for Him.
  • Our Heavenly Father knows how to exalt YOU.
  • The Lord requires our help to minister to His flock and gather His sheep.


Wow!  And that isn’t all but I didn’t put them all in here.  If you watched the conference, then you have probably noted some of these same nuggets and added more of your own as you felt inspired.

Have a peaceful Sabbath Day…

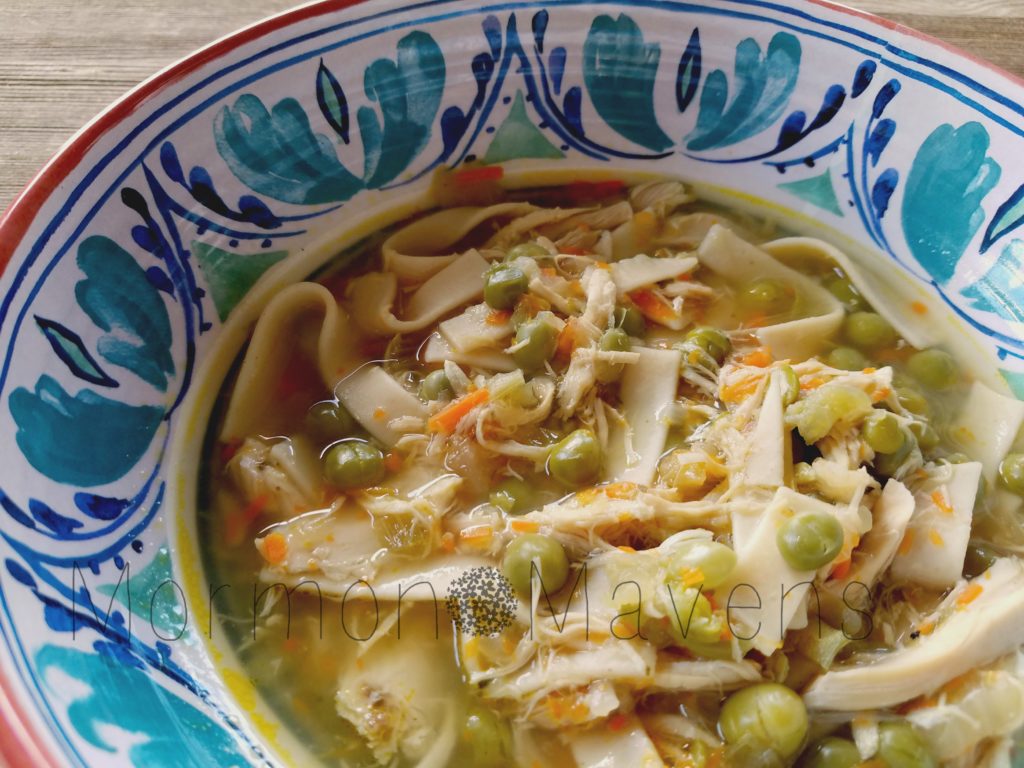
Chicken Noodle Soup


I used to love volunteering at my girls’ elementary schools.  Yes plural on schools.  They went to two different ones because we moved in the middle of those years.

One of my favorite places to volunteer was in the school library.  All those books!  And the librarian at their second school became a good friend–before working in the library she was one daughter’s 2nd grade teacher.  She was amazing.

Anyway, one aspect of volunteering in the library was working the Scholastic Book Fairs and, since I had been a bank teller for several years in my single days, I usually worked “register” and did the deposit at the end of the fair.

Why am I telling you all of this?  Well, when you work at the book fairs you have early access to the books on sale and I would always check them out to see if their were any books that appealed to me.  Cookbooks were a favorite and I still have one called “Rise and Dine America”, full of Bed & Breakfast recipes from across the country.  Perhaps I will share a few at some point.  

Today’s recipe comes from one of those book fair cookbooks, entitled “Is it Soup Yet?”   I haven’t tried very many of these soups but this happens to be the very first recipe in the book and we really like it.  I actually have substituted Thrive Foods for several of the ingredients, and have noted that in the recipe.

It’s Fall y’all, and at some point–not right now because in the South we are still pretty darn warm–you are going to be craving some good old comfort food and that will include soups and stews, so get ready!

Chicken Noodle Soup
Write a review
Print
Ingredients
  1. 3 lb. fryer
  2. 3 bay leaves
  3. 6 peppercorns
  4. 7 stalks of celery (I used 3 stalks, then 2 cups of sliced Thrive celery, cut up)
  5. 2 cups chicken broth (I used Thrive Chicken Bouillion)
  6. 1 large onion minced (1.5 cups Thrive Chopped Onion)
  7. 3 carrots, julienne sliced
  8. 1 T. dried parsley (Thrive)
  9. 1/2 lb. thin egg noodles (Thrive)
  10. 1 (10 oz.) package frozen peas (Thrive)
  11. 3 t. salt (Thrive)
  12. 1 t. ground white pepper
  13. 1 t. of your favorite all-purpose seasoning
Instructions
  1. Remove the neck and gizzard pack from the cavity of the chicken.
  2. Place the chicken into a 6 quart stock pot and cover with water. Add the bay leaves, peppercorns and 3 stalks of celery, broken in half.
  3. Cook over high heat until the water comes to a boil. Reduce the heat and simmer for 1 hour or until the chicken falls off the bone.
  4. Remove the chicken to cool and strain the broth.
  5. Return the liquid to the pot, then add 2 cups of chicken broth, minced onion, 4 stalks of celery minced or Thrive celery slices cut up, carrots, dried parsley, and egg noodles. Cook over high heat until the noodles are soft.
  6. Chop the chicken into bite size pieces and add along with the peas to the broth.
  7. Season with salt, white pepper and other seasoning of choice.
  8. Cook for approximately 10 minutes or until the peas are heated through.
Notes
  1. Original recipe calls for Accent seasoning but I did not include that. I had a packet of Thrive seasoning left from something else and wanted to use it instead. I believe that Accent actually contains MSG, so no.
Adapted from Is It Soup Yet?
Mormon Mavens https://www.mormonmavens.com/

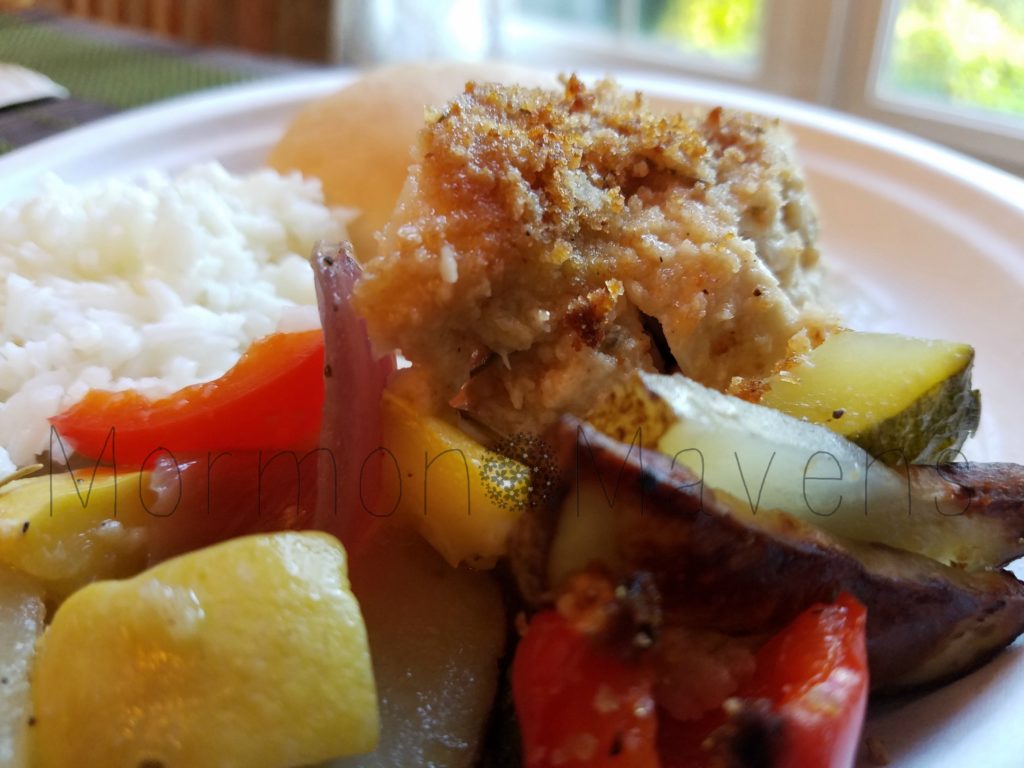
Pan-Roasted Chicken & Vegetables


Have you ever purchased anything from The Pampered Chef and received a cute little multi-folded “brochure” on how to use the particular item that you ordered?  So, they usually include recipes for you to use with that item.  Somewhere in time, I saved the this recipe to use at some later date.  Much later date, obviously.  

I have seen a lot of these one pan wonders on Facebook and Pinterest recently and knew that I wanted to prepare this dish.  It smells divine while it’s baking and it is so delicious.  Easy peasy, too.  I even had some leftover rice that I paired with it!  Doesn’t get much easier than that.

Pan-Roasted Chicken & Vegetables
Serves 4
Write a review
Print
Ingredients
  1. 2 large unpeeled baking potatoes, cut into 1/4-inch slices
  2. 1 each medium zucchini, yellow summer squash and red bell pepper, cut into 1-in. pieces
  3. 1 medium red onion, cut into wedges
  4. 4 T olive oil, divided
  5. 2 garlic cloves, pressed
  6. 1 t. crushed dried rosemary, divided
  7. 1/2 t. plus 1/8 t. salt divided
  8. 1/8 t. ground black pepper
  9. 1 egg
  10. 1/2 c. seasoned dry bread crumbs
  11. 4 boneless, skinless chicken breast halves (about 1/4 lb)
Instructions
  1. Preheat oven to 425 degrees F.
  2. Cut potato slices crosswise in half. Place vegetables into large bowl and toss with 2 T. of the olive oil, garlic, 1/2 t. of the rosemary, 1/2 t. salt and the black pepper; mix well.
  3. Arrange vegetables around the inside of a baking dish--I used the one that is slightly larger than a 9 x 13--leaving an opening in the center for the chicken.
  4. Lightly beat egg in a flat bowl. Combine bread crumbs, remaining rosemary and salt in another flat bowl. Add remaining oil to crumb mixture; mix well.
  5. Dip chicken into egg and then into crumb mixture, coating completely. Place chicken in center of baking dish.
  6. Bake 22-25 minutes or until chicken is no longer pink in center.
Adapted from The Pampered Chef
Mormon Mavens https://www.mormonmavens.com/

Caprese Flatbread


I got a text from my husband today with a link to a recipe. 

Interesting. 

Anyway, I tried it out today and holy moly, y’all–it was absolutely delicious! 

Crispy, buttery but not, healthy magic.

Healthy?  I know you’re thinking this is just craziness, right?

The secret?  Olive oil, not butter.  But it tastes buttery.

And Caprese with the tomatoes, fresh mozzarella, fresh basil.  I can’t talk. 

Caprese Flatbread
Write a review
Print
Ingredients
  1. 4 (3/4-inch) slices of sourdough bread, preferably homemade
  2. 3 T. olive oil, plus more for drizzle
  3. 2 T. minced garlic (adjust to taste)
  4. 1 cup grape tomatoes, halved
  5. 6 -8 fresh basil leaves, or use dried basil, to taste*
  6. 24 fresh mozzarella pearls
  7. sea salt and freshly ground pepper to taste
Instructions
  1. Combine oil and minced garlic. Allow to sit for 15 minutes so flavors marinate. Halve the cherry tomatoes and chiffonade the basil.
  2. Brush each slice of bread with the olive oil/garlic mixture and place in a toaster oven on broil or in your conventional oven. Watch carefully and remove when golden brown, brush the other side with the olive oil/garlic mixture and broil that side until golden.
  3. Top each slice of bread with about 6 tomato halves and 6 mozzarella pearls, fresh basil, salt and pepper. Drizzle with a little oil if desired. I also used just a little bit of white balsamic vinegar.
Notes
  1. Original recipe calls for thawed yeast rolls but I had some yummy homemade sourdough bread that I wanted to try with this recipe. I don't know how the yeast rolls were with this recipe, but oh my goodness the sourdough...
  2. Chiffonade. That's a funny word and I didn't think I had ever done that before. But I have. And so have you! Cutting your basil into shreds. I have a garnishing tool that looks like scissors with 5 or 6 blades. Amazing tool and it chiffonades like a beast!
  3. I noticed after posting this that the basil was not listed, and it's not listed in the original recipe from Rhodes Rolls! I am guessing on the amount of fresh or dried basil, so just eyeball it.
Adapted from Rhodes Rolls Recipes
Mormon Mavens https://www.mormonmavens.com/

Breakfast PLT


What are some of your favorite cooking shows on TV?  I have several and one of them is Giada at Home . First of all, she lives at the beach and being able to see the ocean from the window behind her is awesome.  Second, she whips up some of the most delicious looking dishes I have ever seen on television and she makes it look so easy.  

Don’t even get me started on the episodes she films in her outdoor kitchen in Italy.  Oh my!

One day I happened on her show and she was in that outdoor Italian kitchen and making items that she likes to prepare for herself and her daughter for breakfast.  Her daughter isn’t much of a breakfast gal, but Giada always manages to make something she is willing to eat.  

Like, who is not going to eat something Giada makes–plus she is the mom.

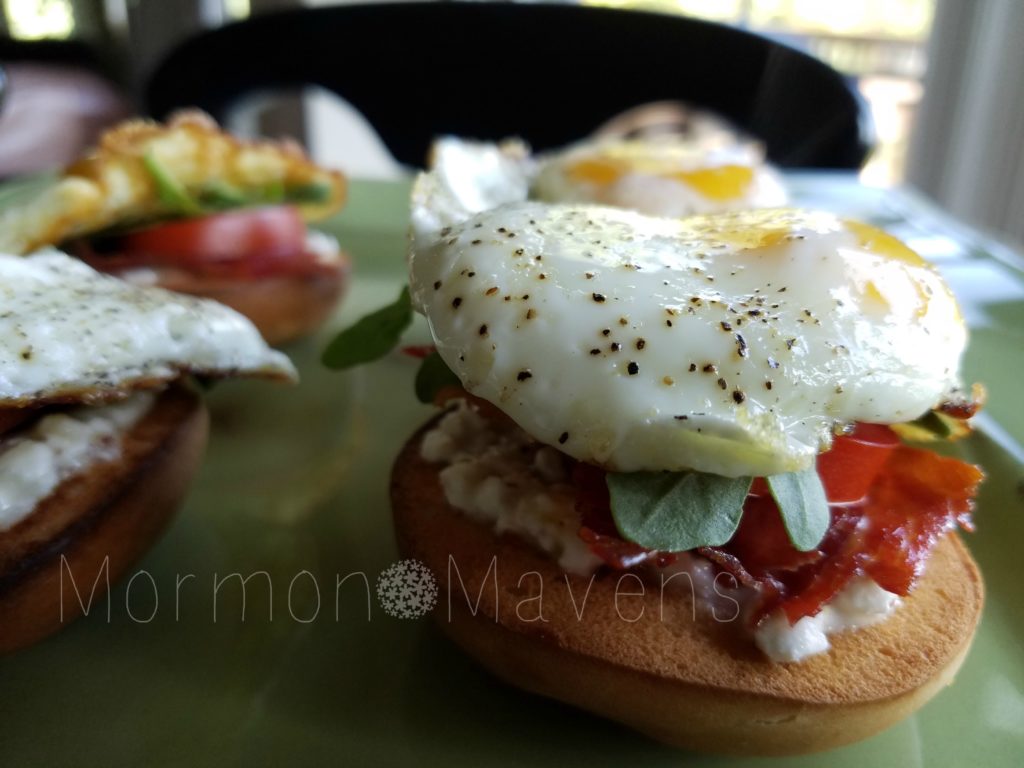
The Breakfast PLT (Pancetta, Lettuce & Tomato) is one of the coolest looking dishes that I have seen on the show.  It’s a crazy take on the tradition BLT sandwich we all know and love, but this one is served at breakfast.    

I made these this morning before church, and honestly it was so easy to prepare.  I don’t know why I waited so long to share the recipe.  I even bought the pancetta way long ago.  Let me tell you, that “Italian bacon” has a long out-date!  I still have a couple of weeks to use it up.

Breakfast PLT
Write a review
Print
Ingredients
  1. 1 T. whole-grain mustard
  2. 1/4 cup water
  3. 1/2 cup small curd cottage cheese (original recipe calls for 4 oz. fresh goat cheese at room temperature)
  4. 4 mini bagels, split
  5. 2 t. extra-virgin olive oil
  6. 8 thin slices pancetta
  7. 8 small eggs, room temperature (original recipe says quail eggs)
  8. kosher salt and freshly ground black pepper
  9. 2 Roma tomatoes, cut into 1/2-inch slices
  10. 1 cup baby arugula (or romaine or butter lettuce would be good)
Instructions
  1. In a small saucepan over medium heat, bring the mustard and 1/4 cup water to a simmer. Whisk in the cottage or goat cheese until combined. Set aside; it will thicken as it cools.
  2. Toast the bagels until golden brown and crispy. Set aside.
  3. In a medium nonstick skillet, heat 1 t. of the olive oil over medium heat. Add 4 slices of the pancetta and cook until golden brown and crispy on both sides, about 2-3 minutes per side. Drain the pancetta on paper towels. Repeat with remaining pancetta.
  4. Heat the remaining 1 t. of olive oil in a small frying pan over medium-low heat. Crack the eggs, into the pan. If using small eggs, two at a time works. Quail eggs, 4 at a time. Sprinkle with salt and pepper and cook until the whites are set but the yolks are still runny, 2-3 minutes. If you are not using quail eggs you will need to "train" your egg whites so that they won't be too big for the PLT. I just use my spatula and try to corral the whites closer to the yolk. Remove to a plate and repeat with the remaining eggs.
  5. To build the PLT: Spread each bagel half with 1 T. of the cheese sauce. Layer with a slice of pancetta, slice of tomato, and some arugula. Top with the fried egg and a grind of freshly ground black pepper. Serve.
Notes
  1. This makes 8 servings and that is fine if you are serving other foods along with these. If not, this would be more like 4 servings--2 per person.
Adapted from Giada at Home
Mormon Mavens https://www.mormonmavens.com/

Pesto Grilled Cheese


Pesto Grilled Cheese. <sigh>

So my son came back from a recent trip to visit his girlfriend in Utah, and mentioned that he’d had a grilled cheese with pesto. 

“Mom, can we make pesto?”

Duh.  Thrive Life has freeze dried basil, and why have I not tried that before and why am I drooling right now typing this?

Cuz I stinkin’ love basil, that’s why.

So, shaking my head in wonder as to why I’d never thought to make homemade pesto before, I pulled out my phone and searched the Thrive Life recipe site because I just knew our Chef Todd had a recipe for it.  He did.  Yay! 

I told my son he could make it.  (You gotta make them do the things, right?)

IT. WAS. AMAZING.

So of course, I have to share it with you!  The pesto is exactly the same as Chef Todd’s recipe, we just smeared it on our grilled cheese.  We’ve used Gouda, Provolone, Cheddar, and Colby Jack so far.  My fave is Cheddar.  Experiment with your fave cheeses and let me know which turned out best for you!

Pesto Grilled Cheese
Serves 4
This is by far my favorite way to eat a grilled cheese sandwich! If you love pesto.....well, you're welcome.
Write a review
Print
Prep Time
5 min
Cook Time
5 min
Total Time
10 min
Prep Time
5 min
Cook Time
5 min
Total Time
10 min
Ingredients
  1. 1/4 c. pine nuts
  2. 1/4 c. Grated Parmesan Cheese
  3. 1/2 tsp. minced garlic
  4. 2 tbsp. water
  5. 1/4 c. THRIVE Basil
  6. 1 tbsp. THRIVE Parsley
  7. 1/4 tsp. Salt, Table
  8. 1/8 tsp. THRIVE Peppercorn
  9. 1/4 c. really good olive oil
  10. The Sandwich
  11. 8 sli. bread of your choice
  12. 16 sli. cheese of your choice (thin sliced is what we used)
  13. 8 tbsp. butter
Instructions
  1. Using a food processor, pulse together the pine nuts, parmesan, and garlic until well-combined. Add in water, herbs, and salt & peppercorn and pulse again until combined.
  2. Add in the olive oil slowly through the chute while the processor is running. Once combined, remove pesto to a bowl and stir by hand to incorporate all the oil.
  3. Heat a griddle or skillet to medium heat.
  4. Butter one side of each slice of bread. Have your pesto and cheese slices at the ready.
  5. When cook surface is at temperature, place one slice of bread (butter side down) on the griddle, add 2 slices of cheese and spread a heaping tablespoon of pesto over the cheese. Top with a slice of bread, butter side up.
  6. Cook on both sides until golden brown. Enjoy!
Notes
  1. Make up the pesto and keep it in the fridge. Then you can have a pesto grilled cheese anytime you want!
  2. I like my pesto with just a little more salt than Chef Todd's recipe. Adjust according to your tastes.
  3. We've tried Cheddar, Colby Jack, Gouda, and Provolone in these. I think Cheddar is my favorite!
  4. We actually used our George Foreman grill for this at home. An advantage to using this, if you have one, is that you can use much thicker bread and it will compress. We were able to use up some thick sandwich rolls this way!
  5. Really good olive oil? I use a Picual from Beaufort Olive Oil Company. It makes a difference, in my opinion. But use what you have.
Mormon Mavens https://www.mormonmavens.com/

Sticky-Buns in Cast Iron

sticky buns in cast iron

Buns of Iron?

Okay, that was pretty lame.  But I couldn’t help it.

I’ve never made sticky buns before but when I saw a recipe making them in a cast iron skillet I knew I had to try it.  I love my cast iron cookware and use it all the time.  I especially love finding recipes where I can bake with it.

I followed the original recipe directions and made 9 large buns, but next time I will make smaller ones.  I think the sticky-to-bun ratio is better that way.  I also used my Thrive Life Country White Dough Mix for the bread.  Use any basic bread dough recipe you like.  Or maybe you love the frozen roll dough!  That’s even easier than using a mix.  Whatever works for you!  My dough mix recipe is for one loaf’s worth of dough.

I used a 9″ square cast iron skillet (my grandmother’s).  So to make it mathematically easy, I’ll divide the dough into 16 equal pieces and do a 4×4 arrangement.

Do you like cast iron?  If so, what’s your favorite piece?

Sticky Buns in Cast Iron
Bread, butter, sugar.....like seriously....do I need to say more?
Write a review
Print
Prep Time
1 hr 20 min
Cook Time
25 min
Prep Time
1 hr 20 min
Cook Time
25 min
Ingredients
  1. The Bun Dough
  2. 1 c. warm water
  3. 2 tbsp. warm water
  4. 2 1/4 tsp. Active Dry Baker's Yeast
  5. 2 tbsp. honey
  6. 3 3/4 c. THRIVE Country White Dough Mix
  7. The Sticky Stuff
  8. 1/2 c. butter, softened
  9. 1/2 c. brown sugar
  10. 1 tsp. Ground Cinnamon
  11. 3 tbsp. honey
  12. 1 pn. salt
  13. 1/4 c. pecan halves
Instructions
  1. Prep the Dough
  2. Add the water, yeast, and honey to the bowl of a stand mixer equipped with the dough hook. Slowly add in the dough mix. Once it's all incorporated, knead in mixer for about 5 minutes.
  3. Spray a medium bowl with cooking spray. Form the dough into a ball and place in the bowl, turning to coat it with the cooking spray. Cover and allow to rise for about 40 minutes.
  4. When dough has doubled in size, punch it down and divide it into 9 pieces (or 16 as mentioned in the description). Set aside while you prep the sticky stuff.
  5. Prep the Sticky Stuff
  6. Combine all but the pecans in a medium bowl and stir well to combine everything.
  7. Spread this onto the bottom and up the sides of the cast iron skillet.
  8. Place the pecan halves evenly over the sticky stuff. (If you want it to be pretty, make sure you have the flatter side of the pecan facing up.)
  9. Dough + Sticky Stuff
  10. Take the dough pieces and roll into balls. Place these evenly over the sticky stuff. Cover and allow to rise about 30 minutes.
  11. Preheat oven to 375 degrees.
  12. Bake the skillet, uncovered, for 20-30 minutes or until rolls are golden and dough is cooked through. Allow to sit for 15 minutes once you remove it from the oven.
  13. Place a large plate upside-down over the skillet and carefully flip so that the rolls release onto the plate. Enjoy!
Notes
  1. Makes 9 large rolls, but you could make smaller rolls. I would make 16 for my square skillet.
Adapted from Rie McClenny
Mormon Mavens https://www.mormonmavens.com/