Best Chocolate Chip Cookies Ever


I. Can’t. Even.  How many chocolate chip recipes are there in the world?  I have no idea.

The best ones I had ever had, UNTIL NOW, were from The Cookie Place in Rexburg, Idaho.  Seriously.  Four big cookies in a box for $12, but so dang worth it!

Then one day I was making chocolate chip cookies with Thrive’s Classic Cookie Dough Mix and my husband said add pecans. So I did.  And then he asked “What’s Thrive Macaroon Cookie Mix?”  And I said that it was a little piece of coconut heaven, so we added that as well.

The results were simply life changing.  Enough said.  Try them for yourself. You’re welcome.


Ingredients:

3 1/3 cups Thrive Classic Cookie Dough mix

2 sticks of butter (1 cup), softened

1/4 cup Thrive Macaroon Cookie Mix

1 1/2 cups semisweet chocolate chips

1 cup chopped pecans

3 T. water


  1. Preheat oven on convection bake to 325 degrees F., or regular bake at 350 degrees.
  2. Place the butter in a stand mixer and mix until creamy.
  3. Add in the cookie mixes, semisweet chocolate chips, pecans, and water.  Mix until well combined.
  4. Line two cookie sheets with parchment paper and drop cookie dough on each.  I used a medium cookie scoop and got about 13 cookies on each sheet.
  5. Bake on convection for about 12 minutes–we like our cookies a little softer so 12 minutes worked for us.


Source: Thrive Classic Cookie Dough Mix recipe on can with my variations.

Brenda’s Rolls


Who doesn’t love the smell of homemade bread or rolls in their home?  Even better is that first warm bite that just fills your soul.

About 18 years ago, or so, I was introduced to the best bread/roll recipe that I have ever had the pleasure of tasting.  

Two sister missionaries–whose apartment had a gas leak–were given permission to sleep over at our house one Sunday evening.  Monday was their P-Day, which stands for preparation day–missionaries use the first portion of this day to clean, shop for groceries, run errands, do laundry, etc.  I was lucky to have these girls in my home on P-Day because one of them asked permission to do some baking.  Um, yeah.  You sure can!

I took off for errands and picking the girls up from school and came home to a house that was oozing with the wonderful aroma of homemade bread and cinnamon rolls.  I was into my second piece of amazing before I even knew it.  Melt-in-your-mouth cinnamon rolls that would rock your world.  They sure rocked mine.

I was able to get the recipe and wrote it inside my family cookbook.  I have only used it once.  I don’t know why!  Maybe because I would eat the whole batch.

I decided it was time to pull that recipe out and make rolls for Christmas Eve dinner.  It makes a lot so I divided it and used the other half for some delicious orange rolls.

You’re welcome!!!!

We are still having Recipe Card format issues, so I am going to copy this straight from how I wrote it in my cookbook. Read through the recipe to make sure you have all of your ingredients, which I have written in BOLD.


  1. Combine 4 T. yeast, 2 t. sugar, 1 cup warm  water (110 degrees F.) and set aside.
  2. Mix 4 c. flour, 1/2 c. instant powdered milk, 4 c. water, 1 and 1/3 c. sugar, 3 beaten eggs,  and 4 t. salt.
  3. Add 2 sticks of melted butter (1 cup).
  4. Add yeast mixture and mix well, stirring in 10 cups of flour.
  5. Turn dough onto a floured surface and knead for 5 minutes.
  6. Grease a large bowl and place the dough in that. Cover with plastic wrap and let rise until doubled.

I divided my dough into two bowls since I was doing a batch of rolls and a batch of orange rolls.

Once the dough has doubled, take it out of the bowl and place it on a floured surface.  Roll out and cut for rolls, place in a greased or buttered pan and bake at 350 degrees F for about 15 minutes.

If you are baking bread, form loaves and place in greased loaf pans and bake at 350 degrees F for about 30 minutes.


If you want delicious orange rolls, do the following:  a regular size navel orange will yield the orange zest and juice you will need.

  1.  Preheat oven to 400 degrees F.  
  2.  Stir together 1/2 t. cinnamon, 1 T. orange zest and 1/3 c. of sugar in a small bowl and set aside.
  3.  Spray counter top with non-stick cooking spray and roll dough out into a large rectangle about 1/4 inch thick.  Brush dough with 3 T. melted  butter, then spread with cinnamon/sugar/orange zest mixture.
  4.  Starting with one of the long sides of the rectangle, roll dough up tightly, working from one end to the other end horizontally, then back again.  pinch the seams closed at the end.  Use a sharp, thin knife (I like to used non-waxed/unflavored dental floss) to cut the roll in half, then each half in half.  You will have 4 sections. cut each section  into thirds.
  5. Set rolls in a greased or buttered  9 x 13 pan and bake for 12-14 minutes.
  6. Whisk together 2 c. powdered sugar, 2 T. melted butter and 3 T. orange juice. Spread over warm rolls.


Roll Recipe Source:  Sis. Stanger of the Arizona Tucson Mission of the Church of Jesus Christ of Latter-day Saints, ca. 1996-2002.

Orange Rolls Variation Recipe:  Butter with a Side of Bread.

Changing Your Christmas Experience

Photo by Tyler Delgado on Unsplash


It’s beginning to look a lot like Christmas.  Everywhere you go.  My decorating, however, has still not happened but I have finally taken down my fall decor.  I left it up as long as possible because it is my favorite season AND it took forever for the leaves to change this year in our part of the world. On the other hand, once it got here it lasted a good long while.

How about other Christmas prep?  Are you done with your shopping?  Have you hit the stores as often as I have?  Actually, Wal-Mart meets my prep needs pretty darn well.  Don’t you even turn your nose up at that.  I like to shop local and also avoid all the traffic and drama in the larger cities.  My family has simple tastes and they don’t demand the trends like some.  I am grateful for that.

I have had discussions with the family this year about simplifying Christmas and I feel that the small things we are doing to take some of the stress out of our December will be good.  Here is a great article from Power of Moms that I recently read about transforming Christmas — one family’s experiment with giving experiences.

With 4 grandchildren and another on the way, I am hoping we can make a difference in our family’s Christmas experience.  We want them to know what the true meaning of the Christmas season is–celebrating the birth of our Savior, Jesus Christ–and how important it is to savor family over stuff.

The Christmas season is also the perfect time to serve others as Christ did. Here is a great little video about that.  Fit some of this into your Christmas List this year.  And you don’t have to do it just at Christmas, you kn0w.


Holiday Swirled Sugar Cookies


These cookies look pretty similar to the ones I saw on the Food Network site, and were a big hit at a Cookie Swap I attended last week. In typical ME fashion, I tried a new recipe to make cookies for the swap and this was also my first time working with Royal frosting.

But it’s all good.  Everyone asked how I did the cool swirl and we all thought they were quite tasty.  I squirreled away more of the cookies that I brought than any other cookie on the table.  I can be selfish, right?  Everyone was so full from the dinner we had that I don’t think they noticed.  LOL!!

One of the reasons the cookies were so good was that I used  Thrive Foods Vanilla Sugar Cookie Mix . What a time saver!

Still experiencing technical difficulties with the recipe format, so enjoy the old school way!


Ingredients:

COOKIES:

Thrive Vanilla Sugar Cookie Mix, pantry can

2 T. flour

3/4 c. butter

1 egg

2 T. water


ROYAL ICING:

1 lb. powdered sugar

2 T. meringue powder

Red and Green gel food coloring

White sugar sprinkles


Instructions:

  1. Follow the directions on the can of cookie mix, adding the 2 T. of flour to the dry cookie mix (for rolled and cut cookies).
  2. Shape the dough into a disk, wrap and refrigerate until firm, about 1 hour*.
  3. Line 2 baking sheets with parchment paper.
  4. Generously dust your work surface with powdered sugar and roll out the dough to 1/2 inch thick.
  5. Cut cookie dough with a 2-inch round cookie cutter, re-rolling scraps and cutting more cookies.
  6. Place cookies about 2 inches apart on the prepared baking sheets.
  7. Refrigerate cookies until firm, about 1 hour.
  8. Place oven racks in the upper and lower thirds of the oven and preheat to 325 degrees F. on Convection bake (350 degrees for regular oven).
  9. Bake the cookies, rotating the pans halfway through, until lightly browned around the edges, 9-11 minutes.  Cool completely on cookie sheets.
  10. For the Royal Icing: combine the powdered sugar and meringue powder in a large bowl.  Add 7 T. water and beat with an electric mixer on medium-high speed until soft glossy peaks form, adding up to 8 T. of water  if necessary to make a smooth icing that thickly coats the back of a spoon.
  11. Line a baking sheet with parchment and set a cooling rack on top.
  12. Put 1/4 c. icing into each of 2 small bowls.  Add 9 drops red food coloring to one bowl, stirring until evenly combined. Add 2 drops of green food coloring to the second bowl and stir until evenly combined.
  13. Pour the remaining white icing into a clean, rimmed baking sheet and spread or shake evenly to coat it.  Drizzle the red icing over the white, then the green icing.
  14. One at a time, put the cookies face-down into the icing, taking the cookies out one at a time, shaking gently to let excess icing drip off.
  15. Place cookies right side up on the prepared cooling rack. Decorate with sprinkles, if desired.
  16. Let icing harden completely before serving, about an hour.


Note: you can place the dough in the freezer if you are short on time.  That’s what I had to do!

Source: adapted from Food Network.

Copper Penny Carrots


Remember that post where I said I could share some of our family’s favorite Thanksgiving recipes? Yes, that one.  

Today I am sharing one of the top requests for Thanksgiving dinner–Copper Penny Carrots.  So delicious and the only complaint I get is that I only make it once a year.  Why is that?  It’s super easy and everyone loves this dish.

Next year when you are planning your feast, think about including this tasty dish.  Or you can make it now.  I guess I am going to have to start making it more often.

If you can’t think like an onion or a carrot or a tomato, you may be a technician, but you won’t understand what you’re doing, and your dish will be flat.

Eric Ripert

Due to technical issues, the recipe is in our older format.


Ingredients:

2 lbs. carrots, 1/4″ slices (4 1/2 cups)3 boiler onions, thinly sliced & separated into rings

1 medium green pepper, cut in thin strips

1 can tomato soup

3/4 cup apple cider vinegar

2/3 cup sugar

1/2 cup vegetable oil

1 t. Worcestershire Sauce

1 t. prepared mustard

1/2 t. salt


Instructions:

1. Cook carrots in small amount of boiling salted water until just tender, about 8-10 minutes. Drain.

2. Combine carrots with the onion and green pepper in a large bowl.

3. Stir together remaining ingredients and pour over vegetables.

4. Cover and marinate in refrigerator for several hours or overnight.

5. When ready to serve drain, reserving marinade.  Serve in lettuce-lined bowl, if desired.

6. Return any leftover vegetables to marinade and keep refrigerated.


NOTE–Once the vegetables are all gone, save the marinade.  Someone in the house will undoubtedly want to dip bread in it.  Seriously, this happens at my house. I am married to a “sopper”.

SOURCE–Brew Family Cookbook, Vol. 1.

Happy Thanksgiving Back!


(Photo by Priscilla Du Preez on Unsplash)


Every year I quote this movie during Thanksgiving.  I can’t help myself.  And I have even written the quote on my kitchen chalkboard.

Hope you are all having a wonderful Thanksgiving with friends and family.

Maybe you can find YOU’VE GOT MAIL on Netflix and stream it over the next few days!


Thanksgiving Menu Share


Hi everyone!  I am sitting here at my desk organizing my Christmas and Thanksgiving planners–I like to have everything for each of these holidays in 1-inch binders so I can grab them and go when I have time to prep.  

Every year I tell myself I will be ready earlier than the previous year, and this year is no exception.  We will have Thanksgiving at our place this year with a couple of extra family members driving in from down east. 

I love a houseful for holidays, don’t you?  

I thought that I would share our traditional Thanksgiving Menu, just so you can see what I will be doing over the next week..wait WHAT?!  Yes, it’s a week away. 

OMGracious. (see what I did there?  Because “thanks” giving…)

Where does the time go? Seriously.  So here is that menu–got a little sidetracked–and I have provided a link to the dishes that we already have recipes for here on the blog. 

If you see another one on the list that you would like to have the recipe for just let me know! For the yeast rolls, we have several recipes to choose from but the one I use is not on the blog yet.

I will be glad to post an extra recipe this week to help out with your big feast. It might not have a photo because I really won’t be making it until next week, but I can add that later, right?


Thanksgiving Menu from Our House to Yours

Deep Fried Turkey
Mother’s Southern Cornbread Dressing
Sweet Potato Pudding/Souffle
Cranberry Relish
James’ Fruit Salad
Copper Penny Carrots
Seasoned Baby Lima Beans
Giblet Gravy
Homemade Yeast Rolls
Pumpkin Pie with Homemade Whipped Cream


Well, that’s a mouthful–which is why I am using Chinet Platters this year.

Feel free to share your Thanksgiving favorites in the comments!  We love hearing from you.


Cranberry Relish

cranberry-relish
 
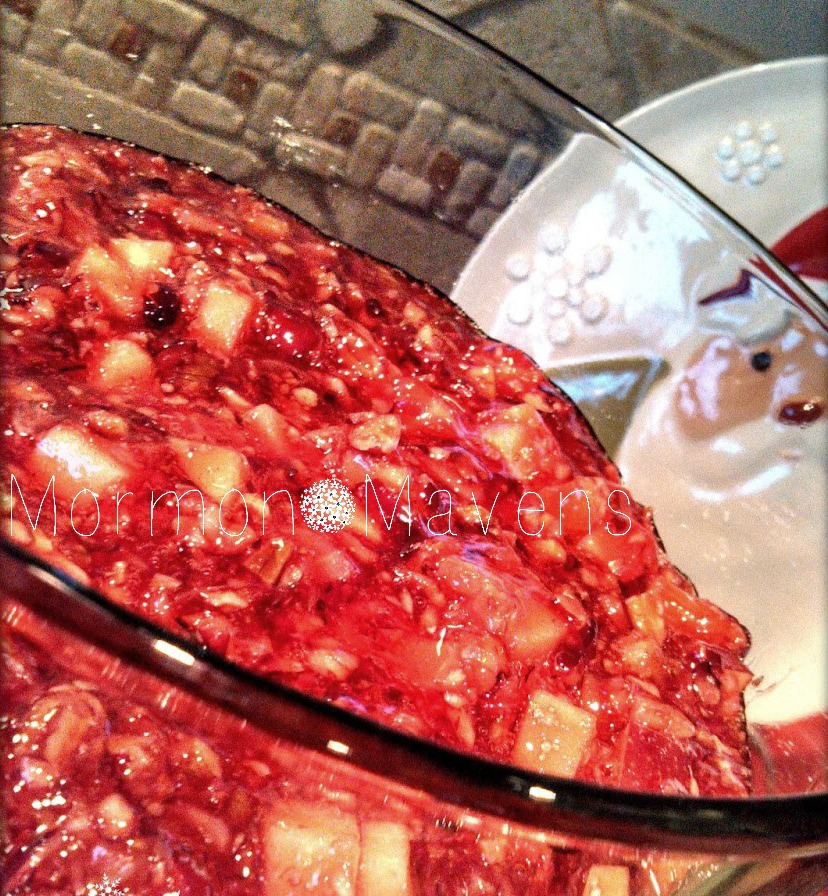
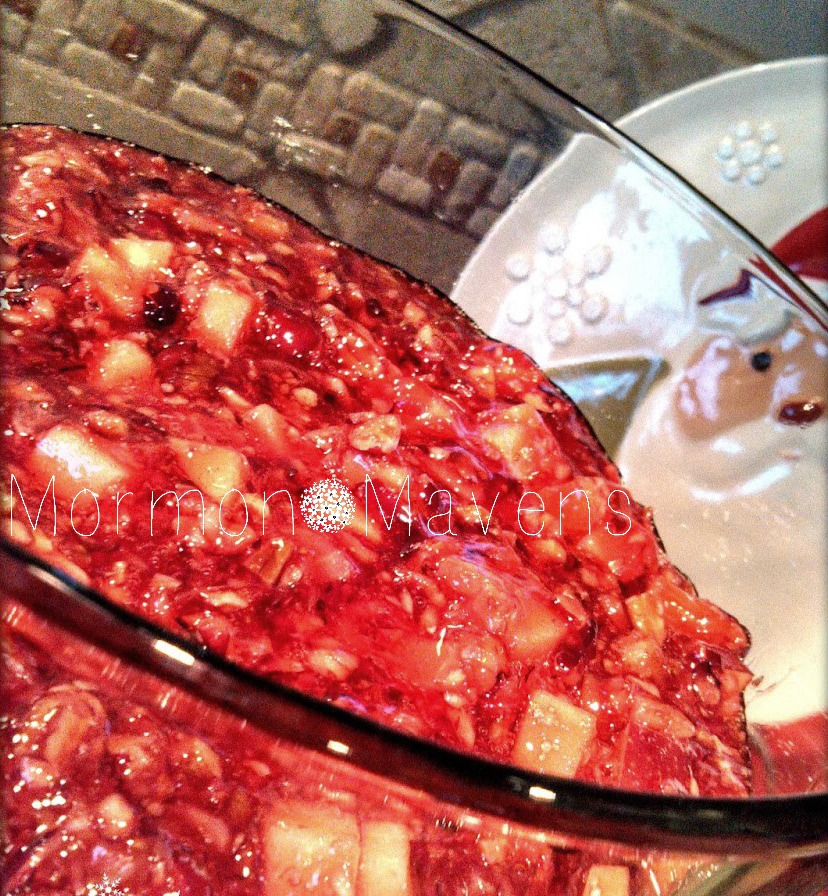
This recipe was originally posted on December 19, 2013 as a Christmas dish, but we also have it at Thanksgiving.  Thought we would share it this week in case you would like to include it in your Thanksgiving Feast.  I need to start my cooking plans now because, even though it’s November 1st, the feast will be upon us before you can sing Over the River and Through the Woods!  I am also posting this in memory of my good friend Phyllis Mecham who passed away two years ago this month.  This was her recipe.
 
Just in the St. Nick of time (and notice, by the way, how he is eyeballing the relish)! Be sure and add this to your Christmas menu.  My good friend Phyllis brought this dish to a church Christmas party one year and gave me the recipe so that I could add it to our holiday meal traditions.  It is a big hit with everyone and full of yummy goodness.
Cranberry Relish
Write a review
Print
Ingredients
  1. 2 cups ground fresh cranberries (I just zap mine in the Ninja blender)
  2. 1 cup sugar
  3. 2 small pkgs. Cherry Jell-O
  4. 1 15-oz. can crushed pineapple, drained and juice reserved
  5. 1 apple, unpeeled (Red Delicious is good) sliced and chopped
  6. 2 oranges (regular oranges NOT navel.  Tried that.), peeled, sliced and chopped
  7. grated rind from one orange
  8. 1 cup chopped pecans
Instructions
  1. Mix Jell-O with 2 cups boiling water, 1 cup sugar and reserved pineapple juice.  Let thicken in refrigerator. DO NOT LET IT SET COMPLETELY.
  2. Add other ingredients, already mixed together.
  3. Place in refrigerator until ready to serve.
Notes
  1. You can substitute cranberry Jell-O for the cherry.
Adapted from Phyllis Mecham, Mocksville, North Carolina
Mormon Mavens https://www.mormonmavens.com/


Life’s Plain, Common Work


I found this poem by Robert Louis Stevenson that I just really like.  He is one of my favorite poets–did you learn about him in elementary school?  I did and even then I could tell he was way cool.  Anyway, just wanted to share this because it really helps me to be grateful for the simple things…


Life’s Plain, Common Work

The best things in life are nearest:
Breath in your nostrils, light in your eyes,
flowers at your feet, duties at your hand,
the path of right just before you.
Then do not grasp at the stars,
but do life’s plain, common work as it comes,
certain that daily duties and daily bread are the sweetest things in life.

 
Ahhh…I am enjoying the breath in my nostrils right now. Or is that baby formula?  Because I think that is what is going on in the photo. Correct me if I’m wrong.


Image by Flickr.com/photos

Quick Bean Dip


It was one of those nights when I needed a really quick meal because it had been a busy day of Body Pump, Yoga, a couple of errands–one out of town–finishing up the mowing, paying bills, updating files…  Oh sorry.  I guess you didn’t need all those details, but you get my point.

I just wanted to relax and not have to go out to eat (yes I really said that) or spend a lot of time in the kitchen.

Have you tried any of the Delimex Taquitos? They used to be a good back-up entree back when the girls were little, before we were all freaking out about processed foods, and when we lived in a predominantly Hispanic city and anything Mexican was where we went.

Usually I just put these guys in a baking dish, sprinkle grated Mexican cheese blend on them and top them with green enchilada sauce.  Pop them in the oven for 14 minutes and there you go. 

Today I just wanted them a little crunchier so I actually followed the directions on the box and laid them out on a cookie sheet NAKED (the taquitos not the cook!) and baked them.  Well of course I would need some kind of sauce or dip, so I whipped up (literally in like 4 or 5 minutes) a small batch of Thrive Refried Beans, added sour cream, the shredded Mexican blend cheese and some spicy, tasty salsa.

SCORE!!

Quick Bean Dip
Write a review
Print
Ingredients
  1. 1 3/4 c. Thrive Instant Refried Beans
  2. 1 c. water (I added about 2 T. to thin them out a little)
  3. 1/4 c. sour cream
  4. 1/3 c. shredded Mexican Blend cheese
  5. 2-3 T. Herdez Guacamole Salsa
  6. salt to taste
Instructions
  1. Whisk water into beans in a medium saucepan. Bring to a simmer over medium heat for about 3-4 minutes.
  2. Add sour cream, cheese, and salsa and stir to combine.
  3. You're done!
  4. Serve with taquitos or tostadas, whatever your little heart desires.
Mormon Mavens https://www.mormonmavens.com/