Bruschetta

Though this simple but satisfying snacketizer is best served with homegrown tomatoes, store-bought and out of season tomatoes still produce good results.  I don’t have any amounts listed….hope that’s copacetic with you.  Just adjust the amounts according to what YOU like.

Ingredients:
fresh tomatoes, diced
onion, diced (optional…I don’t like raw onion so I leave it out)
basil (fresh or dried)
garlic powder
salt
pepper
olive oil
red wine vinegar
baguettes, sliced 1/2-3/4″ thick
fresh parmesan cheese, grated

1.  Preheat oven to 400 degrees.  Place baguette slices on cookie sheet.  Drizzle lightly with olive oil.  Sprinkle with salt and pepper.  Bake for 8 to 12 minutes, or until edges are golden and middles feel like they’re starting to get crunchy.
2.  In a bowl, combine tomatoes and onions.  Add your basil (see notes below), garlic powder, and salt to taste (don’t over salt…you can always add more later).  Drizzle a little olive oil over it.  Then sprinkle on the red wine vinegar. Stir to combine.

How I Like to Eat It:
Okay….here we go.  Grab a toasted baguette slice.  Sprinkle on the grated cheese that I insisted you grate by hand.  Spoon the tomato mixture on top (yes, it is messy and you had better be doing this over a plate).  Sprinkle a little bit of salt over the top.  Now, take a crunchy bite and enjoy!

Notes:

    • Tomatoes–use whatever tomatoes look the most ripe and tasty.  
    • Basil–if you have fresh that’s great…simply chiffonade to get the right amount (use more with fresh).  If using dry, sprinkle in a bit at a time until you get the right taste.  Here’s a video on how to chiffonade fresh basil:

  • Garlic Powder–yes, you can use fresh, but I don’t like to bite into raw garlic so I use the powder. 
  • Olive Oil–I just put in enough so that I can tell each piece of tomato is bathed but not swimming in it.
  • Red Wine Vinegar–I love this!  I put in more vinegar than oil, but I still don’t have the whole thing swimming in it.
  • Baguettes–if you can help it, don’t buy the ones that are really flat on top.  When you slice it, you are creating a little bread plate for your tomatoes so a flat baguette will make for a narrow plate.  Find the roundest ones you can.
  • Parmesan Cheese–I really must insist <wink> that you buy the lovely triangular cheese and grate it on the large holes using your cheese grater.  The powdered stuff in a can will NOT give you the same tasty results.
Source:  Honestly, I have no idea.  I’ve been making this for years!  But I have no idea where I got it from.
 
Originally posted on April 15, 2013.

No-Bake Cheesecake Bites

Recently I had some ladies over to my house for a little get together and I wanted to serve something that looked pretty and tasted good but was super easy to make.  I searched the internet and finally decided to try these tasty little morsels.  I’m glad I did.  They were a success, and I’ll be using this recipe again for sure!  These are perfect for parties and showers.  You can make the filling ahead of time and fill the cups just before your guests arrive.  Definitely a keeper!

 
Ingredients:
2 Tbsp. packed brown sugar
1/4 cup. sour cream
1/4 tsp. vanilla
4 ounces cream cheese, softened
1 Tbsp. heavy whipping cream
15 mini Phyllo tart shells (1 package)
berries for garnish
 
1.  In a mixing bowl, beat the brown sugar, sour cream, and vanilla together until well blended.  Add the cream cheese and beat until smooth.  Add the whipping cream and beat until light and fluffy.
2.  If serving right away, simply spoon some of the mix into each tart shell.  If you want to chill it until later, spoon the mix into a zip-top bag, seal, and place in the fridge till you are ready.  Then take the bag out, snip one corner with scissors, and squeeze the mixture through the hole into the tart shells.
3.  Garnish with berries.
 
Source:  Kitchen Treaty (although that recipe adds 1 heaping teaspoon of lemon zest, which I omitted)
Originally posted on March 6, 2013.

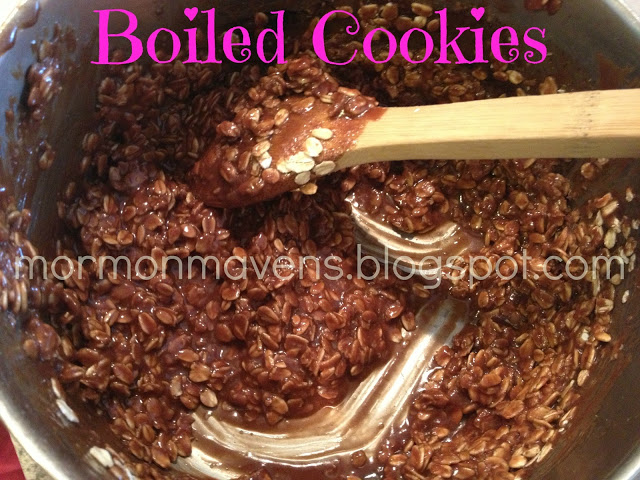
Boiled Cookies

I had a friend once who thought this was a disgusting name for a cookie.  She said in her family they called them Gorilla Poops.  Not sure why my family’s title won the gross-out award over hers.  Anyhow, it’s a tried and true recipe that brings back lots of memories for me.  Sunday afternoons were the traditional occasions for these quick treats when I was growing up, and it’s a tradition I’ve kept going in my own family.

Ingredients:
1/4 c. butter
1/2 c. milk
3 Tbsp. cocoa
1/4 tsp. salt
2 c. sugar
1 tsp. vanilla
1/2 c. peanut butter
2 1/2 c. oats (quick or old-fashioned)

1.  Combine the butter, milk, cocoa, salt, and sugar in a large saucepan and bring to a boil.  Cook for 1-2 minutes more and then remove from heat.
2.  Stir in vanilla, peanut butter, and oats.  Drop by spoonfuls onto waxed paper and allow to set.

Makes about 3 dozen

Notes:

  • My personal favorite way to make these is to omit the cocoa from the boiling mixture, and then add in 1/2 cup or so of coconut after the boil.  Yum!
  • I used to always use quick oats until I experimented with old-fashioned, which I use more often.  Quick oats give a bit softer texture, but I like them with the old-fashioned oats better.
  • You can pour the mixture into an 8″x 8″ pan, sprayed with cooking spray, but it takes a lot longer to set before you can cut it into bars.
  • My ten-year-old made this batch and has become quite an expert at the process!
  • We like to use a cookie scoop for easy portioning onto the waxed paper.
 
Source:  my mom, but this recipe has been around forever!
Originally posted on February 4, 2013.

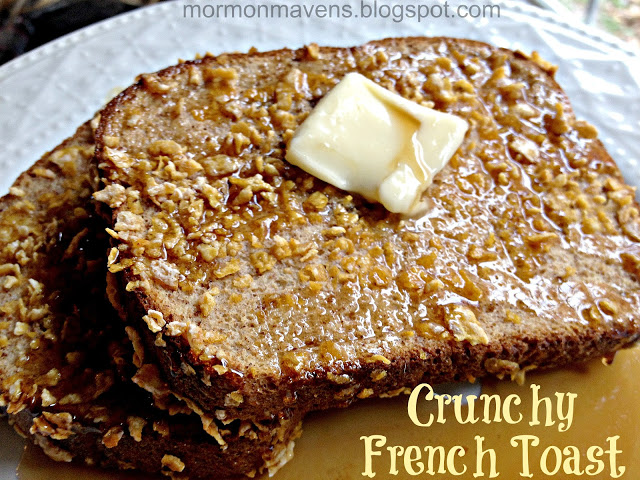
Crunchy French Toast

Looking at the menu plan in horror, I realized that the Baked French Toast I had planned for the next morning was just not going to happen.  Didn’t have the right bread.  Could make bread but it wouldn’t be the right texture since it would be fresh.  Didn’t really want to run to the store late at night.  Hmmm….what to do?    Go to bed and hope that the Baked French Toast Fairy would come.

She didn’t.  (True story.)

So that morning, after looking online for a jazzed up French toast recipe (that didn’t require overnight soaking!), I decided to just go rogue and make it up as I went along, using a few ideas I’d seen online.   I was quite pleased with the result!  Try it and see what you think.

Also, if you could tell that Fairy that she owes me a breakfast, I’d be much obliged.

Ingredients:
16 slices of bread
4 eggs
3/4 cup heavy cream
3/4 cup skim milk
3 Tbsp. sugar
1 tsp. vanilla
1 tsp. cinnamon
4 cups frosted flakes or plain corn flakes

1.  Preheat oven to 425 degrees.  Place aluminum foil in the bottom of two large baking sheets.  Place a large cooling rack into each pan.  Spray racks with nonstick cooking spray.
2.  Measure the flakes into a plastic food bag and use the bottom of a 1-cup measure to crush the flakes into small pieces.  Pour the crushed flakes into a bowl (make sure the bowl is wide enough to allow you to lay a piece of bread in it).
3.  Whisk together the eggs, cream, milk, sugar, vanilla, and cinnamon.  One at a time submerge the bread into the egg mixture, lift it out, and use your fingers to gently squeegee off any excess.  Then place the dipped bread slice into the bowl of crushed flakes, pressing gently.  Flip the bread over and gently press the other side.  Then place each slice on the cooling rack.  Repeat this with all the slices, making sure to whisk well after ever two or three dippings (the sugar has a tendency to settle at the bottom and the cinnamon likes to float at the top).
4.  Bake for 20-25 minutes, flipping slices over halfway through the baking time.  Serve with butter and syrup and enjoy!

Notes:

  • I used store-bought whole wheat bread.  Different breads will soak up the egg mixture differently and so may require more or less of the mixture.
  • To promote more even cooking, I also rotated the position of the baking sheets halfway through the cooking time.  I just had them switch places in my oven.
  • To check for doneness, I just poked the bread gently in the middle to see if it was still squishy (that’s the technical term).  It should be dry but still soft.
Source:  me!  (well, with a little inspiration from the internet)
 
Originally posted on November 26, 2012.

(Amazing!) Mint Brownies

I’ve tried many brownie recipes over the 20+ years that I have been married.  I recently found a great basic brownie recipe that has served us well so far.  But recently I found a special brownie recipe that is….well, I’ll just say it….life-changing.

Okay, well maybe you’d have to be married to a man who is in love with mint to call this recipe life-changing!  But even I adore these mint brownies; and I only like mint as a friend.


Ingredients:
4 ounces unsweetened baking chocolate
1 cup butter (2 sticks)
4 eggs
2 cups sugar
1 tsp. vanilla
1 1/4 cups flour
1/2 tsp. baking powder
—–
Frosting:
1-2 Tbsp. milk
2 cups powdered sugar
1/4 cup butter, softened (1/2 stick)
1 1/2 tsp. peppermint extract
green food coloring (2-3 drops)
—–
Glaze:
6 ounces semisweet chocolate chips
6 Tbsp. butter

1.  Set oven to 350 degrees.  Line a 9″x 13″ pan with foil, making sure the foil can extend over the edge by a couple of inches (you’ll lift the brownies out later with that).  Spray with cooking spray.
2.  Chop your unsweetened chocolate and the butter into chunks.  Place in a microwave-safe bowl and microwave for 30 seconds at a time, stirring in between, until the chocolate is melted and smooth.*  Set aside to cool.
3.  In a mixer, beat eggs, sugar, and vanilla for two minutes.  While that’s beating, mix together the flour and baking powder in a separate bowl.  With the mixer running, slowly pour in the melted chocolate and beat until it is well-combined.  With the mixer on low, add the flour mixture by spoonfuls and mix just until combined.**  Pour batter into pan and bake for 20-30 minutes, or until a knife poked into the center comes out clean.
4.  Cool brownies completely on a wire rack for better air circulation around the pan.  Once the brownies are room temperature, make the frosting.  Combine all the ingredients, starting with 1 1/2 Tbsp. of milk and adding more after mixing if necessary.  Spread evenly over the brownies and chill while you make the glaze.
5.  Place the chocolate chips and butter in a microwave safe bowl.  Microwave in 30-second increments until melted, making sure to stir well in between.  Set this aside to cool for about 15 minutes, then pour atop the brownies and carefully spread it out over the mint frosting.  Chill again.  When the chocolate has set, lift the brownies out of the pan with the foil “handles”.  Cut and serve.***

Notes:
*Don’t over heat.  Stirring well in between will help the chocolate melt a little more.  It should just barely have melted all the way.
**It’s okay for a bit of flour to not be mixed in.  Over-mixing the batter will mess up the texture.
***I cut mine in a 4 x 6 grid to get 24 brownies.

Source:  Our Best Bites: Mormon Moms in the Kitchen (I didn’t realize how close our blog name is to their cookbook until our blog had already been named.  At any rate, they have a wonderful website and an exceptionally beautiful cookbook!)

Originally posted on June 25, 2012.

Baked Broccoli


I like broccoli.  A couple of my kids like broccoli.  My husband likes broccoli.  But now, we LOVE broccoli.  Seriously, we went from buying some once a month or so to buying the BIG bag from Sam’s (we used half that big bag the other day for dinner!).

Ever since trying this recipe (first seen on Pinterest), I crave it.  I have kids asking for thirds, for crying out loud!  I don’t know that I will ever make broccoli any other way again.

Baked Broccoli

Ingredients:
fresh broccoli
olive oil
salt and pepper


1.  Preheat oven to 425 degrees.  Wash broccoli and make sure it is cut into bite-size pieces.  That big ol’ broccoli tree on the right will still be tasty but trust me, you want smaller pieces for cooking time and for taste.  Trust me.  I know we don’t know each other well, but you really can trust me.  Honest.
2.  Spread out in pan and drizzle with olive oil right in the pan.  I don’t measure because I don’t always make the same amount.  I just fill the pan in a single layer of broccoli and then drizzle the oil and toss with salt and pepper.  Right in the pan.  (sorry for the blurry pic…I was my own photographer and “I am not left-handed!”)
3.  At this point, try to look over the broccoli heads to find any dry ones.  Take these dry heads and brush them around on the pan to pick up some olive oil.  As you can see, they are not swimming in it.  Best case scenario, they all have shiny but not drippy heads.
4.  Place in oven for 30 minutes.  When the broccoli comes out, it will have shrunk and have brown crunchy spots (these are mighty tasty!).  Serve immediately.  (You may like your broccoli more tender or more crispy…play with the time till you get it right.  Remember that the more crowded the pan, the longer the broccoli will need to cook.)

Enjoy!

Source:  adapted from several recipe sources found on Pinterest;  some use lemon juice and steak seasoning, but I really enjoy the plain salt and pepper


Originally published on March 19, 2012.

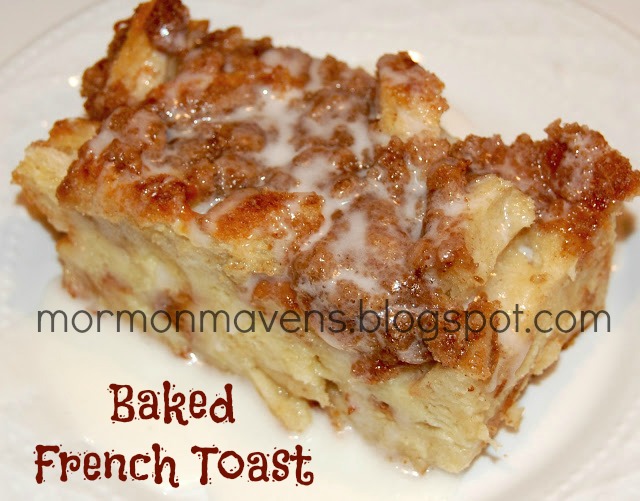
Baked French Toast


Originally posted on November 16, 2011.

It’s not my day to post a recipe, but I couldn’t help sharing this absolutely delicious recipe with y’all!  It.  is.  so.  good.

I found it last night while searching for a make-ahead recipe for breakfast (I’m trying to get as much done the night before as possible so I can get all my exercising in early….which is a good thing ‘cuz this ain’t no diet-friendly recipe!).  I started searching Pinterest for overnight breakfasts, but then thought, “Oooh, I bet P-Dub has something good on her site!”  I was not disappointed.

I told my kids this morning that we were trying a new recipe from Pioneer Woman.  My oldest daughter said, “Oh, then it’ll be really good.”

And it is.

Really good.

Like, make you wanna slap yo’self good.

Ingredients:
1 loaf sourdough bread (I used Pepperidge Farm, 1.5 pound loaf)
8 eggs
2 cups milk (I used 1%)
1/2 cup heavy cream
3/4 cup sugar
2 Tbsp. vanilla

Topping:
1/2 cup all-purpose flour
1/2 cup packed brown sugar
1 tsp. cinnamon
1/4 tsp. salt
1 stick cold butter, cut into pieces (1/4 lb.)

1.  Grease a 9 x 13 pan with butter.  Tear bread into bite-size chunks and place evenly in the pan.
2.  Mix together the eggs, milk, cream, sugar, and vanilla.  Pour evenly over bread.  Cover tightly and store in the fridge for several hours (I put mine in overnight….it was about 12 hours).
3.  In a medium bowl mix together the flour, brown sugar, cinnamon, and salt.  Cut in the butter with a pastry blender until it all looks nice and crumbly (like small pebbles, according to P-Dub).  Place in a ziploc bag and put in fridge.
4.  When ready to bake, take pan and bag out of fridge.  Remove wrap and evenly sprinkle the crumb mixture over the top.  Bake for 1 hour at 350 degrees (or 45 minutes if you like it more soft and pudding-like).

Notes:
Update:  IMPORTANT!!!!!!!  You must use a dense bread or this dish will turn out soggy.  After getting a few comments below about soggy outcomes, I figured I’d better make sure you understand that.  You can’t use regular ol’ sandwich bread because it will NOT soak up the egg mixture!  I highly recommend starting with the bread listed in the ingredients above as this has ALWAYS turned out perfectly for me.

  • You can serve with syrup, but we made a quick glaze with powdered sugar and milk.  Delish!
  • If you don’t have brown sugar, mix 1/2 Tbsp. molasses with 1/2 cup sugar until well blended.
  • Like I said, you can bake it for less time if you like it softer, but I love how the top gets crispy when it’s baked for an hour.  The underneath part is still somewhat soft.  One hour in my 350-oven was just right.
  • The directions said to scoop out, but I wanted to be able to control the portions so I cut it into 12 servings (they were large, and this is rich, so you could serve other breakfast dishes and use this as more of a side dish and get 24 servings).
  • If you have a hot oven, cover the dish with foil for the last 15 minutes or so if you notice that it’s starting to get too brown (I have never had to do this, though).
  • If you don’t have a pastry cutter, use two knives moving away from each other to cut in the butter for the topping.  Do NOT use a fork to mash!  It will be a globby mess!
 
Makes 12 large servings
 
Source:  slightly adapted from The Pioneer Woman Cooks

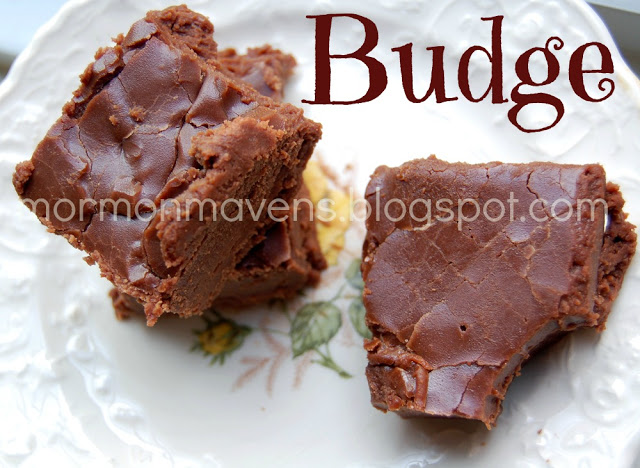
Budge


Originally posted on November 28, 2011.

This recipe comes from Worldwide Ward Cookbook by Deanna Buxton.  I’s original title is “Chapel Fudge” but we renamed it in honor of our toddler, King Henry V (well, Henry, but he’s the fifth child and pretty much rules our kingdom).  

We named it Budge in honor of Henry for two reasons:  (1)  when he tries to say “fudge” it comes out “budge”, and (2) while it was cooling on the counter, he proceeded to dig into it with his hands, prompting an emergency bath!  

Whatever it’s called, it’s good.  I’m not normally much of a fudge eater, but I really do like this recipe and plan to use it often.


Ingredients:
4 cups sugar
1 (12 oz) can evaporated milk (1 1/3 cups)
20 large marshmallows
2 tsp. vanilla
1 cup butter
1 (12 oz) package semisweet chocolate chips

1.  In a large pot, cook sugar, milk, and marshmallows on medium to medium-high heat, stirring constantly.  When mixture comes to a rolling boil, set timer for 10 minutes and continue stirring constantly.  (I had to reduce the heat a bit here as it start to burn just a tad.)  Remove from heat and add vanilla.
2.  Place butter and chocolate in a large mixer bowl.  Pour the hot mixture into this bowl, over the butter and chips.  Beat for 5 minutes.  (I used my Kitchen Aid with the whisk attachment.)
3.  Spread into lightly buttered 9×13 pan and let cool.  Cut when set.  (This took several hours in the fridge.)

Makes 35-40 pieces of fudge

Source:  Worldwide Ward Cookbook by Deanna Buxton.

Pink Grapefruit Sorbet


loooooove Ruby Red grapefruit.  So when I saw a recipe for it on Pinterest, I had to give it a shot.  But when I cut into what should’ve been two Ruby Reds, I was shocked to see just your regular ol’ grapefruit.  So disappointed.  But then I remembered that I had a large can of pink grapefruit juice in the pantry.  Surely that would do, even though fresh would be so much better.  So I used it, and it worked!  So delicious.

 
My next step after that was trying it with Agave Nectar instead of granulated sugar.  Still delicious!  If you love grapefruit, you’ll love this.  You can adjust the amount of tart to sweet by adjusting the amount of juice and sweetener.  Taste it just before you’re ready to put it into the machine and make your adjustments accordingly.
 
 
Ingredients (original):
1 1/2 cups fresh or canned grapefruit juice
2 cups sugar

2 cups water

1.  Combine sugar and water in saucepan and bring to boil over medium-high heat.  Reduce heat to low and simmer until sugar is dissolved.  Cool completely.
2.  When cool, add grapefruit juice and stir to combine.  Pour into freezer bowl of ice cream maker.  Turn machine on and freeze until slushy.  Transfer to an air tight container and freeze until firm, about 2 hours.

OR

Agave recipe:
1 1/2 cups fresh or canned grapefruit juice
1 cup agave nectar
2 cups water

1.  Combine juice, nectar, and water and stir until well mixed.
2.  Pour into freezer of ice cream machine and freeze as stated above.

Source:  can’t remember, sorry!

Sausage Pancakes


Originally posted on February 25, 2011.

I hate cooking sausage patties.  Love the flavor, but hate cooking them.  They never seem to get done in the middle unless the outsides are overdone.  Cooking ground sausage, however, is much easier.  (We often mix sausage crumbles with scrambled eggs and shredded cheddar and serve that on toasted English muffins, like a breakfast sandwich.)  If you love the flavor of sausage and maple syrup, you will love these pancakes.  They are very filling.  My pickiest eater requests these all the time.
Sausage-Pancakes


Ingredients:
2 cups flour (white, wheat, or a mixture)
2 tsp. baking powder
1 tsp. salt
1/2 tsp. baking soda
2 eggs (or use egg powder)
2 cups buttermilk or sour milk*
2 Tbsp. oil
1 lb. ground sausage, cooked and drained

1.  Mix dry ingredients together in a large bowl.
2.  Mix eggs, milk, and oil together with a whisk until well blended.
3.  Add wet ingredients to dry ingredients.  Do not over-mix.
4.  Pour on hot, greased griddle and cook on both sides till golden brown.

*Sour milk–place 2 Tbsp. white or apple cider vinegar in a 2-cup measure.  Add milk to the 2-cup measuring line.  Let sit for a few minutes.

To freeze, layer pancakes with wax paper in between them and place them all in a freezer bag or container.

Source:  The Hows and Whys of the Year Supply by Melissa Coombs