This recipe is going to SHOCK you!
I’ve been trying to eat better so I can drop a few pounds and improve my health. BUT I LOVE A WARM HOMEMADE CHOCOLATE CHIP COOKIE!!! I have to get my cookie fix, so I searched and found this healthy alternative.
How can a deep dish cookie pie be healthy? BEANS! You might be skeptical, but just read it and try it! It will take the guilt out of your guilty pleasure!
Deep Dish Cookie Pie
Ingredients:
2 cans white beans or garbanzos (drained and rinsed)
1 cup quick oats
1/4 cup unsweetened applesauce
3 tbsp oil (canola, vegetable, or coconut)
2 tsp vanilla extract
1/2 tsp baking soda
2 tsp baking powder
1/2 tsp salt
1 and 1/2 cups brown sugar (I only used 1 cup) *see notes for sugar free
1 cup chocolate chips (maybe not truly healthy, but definitely yummy!)
Directions:
1. Blend all of the ingredients in a food processor, except the chocolate chips. If you do not have a food processor, mash the beans as well as you can first, and then use a hand mixer or Bosch or Kitchen Aid (or something like it) to mix the batter.
2. Mix in chips, and pour into an oiled pan. I used a deep dish pie pan, but you can use a small casserole dish, a springform pan, etc.
3. Cook at 350 degrees for about 35-40 minutes. Let it cool for 10 minutes or so before cutting and removing from the pan.
4. Serve with ice cream, chocolate syrup, nuts and whipped cream….or whatever your heart desires. YUM!
Notes:
* If you want to go sugarless, you can omit the brown sugar and use 4 packets of Stevia, and/or 2 cups of pitted dates, blended up in a food processor. You might want to half the recipe and play around with it a bit to suit your tastes and dietary needs. This definitely has the potential to be an amazing treat that is gluten free and sugar free! I don’t mind having a little sugar, and I thought it was great with 1 cup of brown sugar, but my children would have preferred it to be a little sweeter. I’m making it with dates next time!
Source: Chocolate Covered Katie
Melissa
Cowboy Caviar
Cowboy Caviar
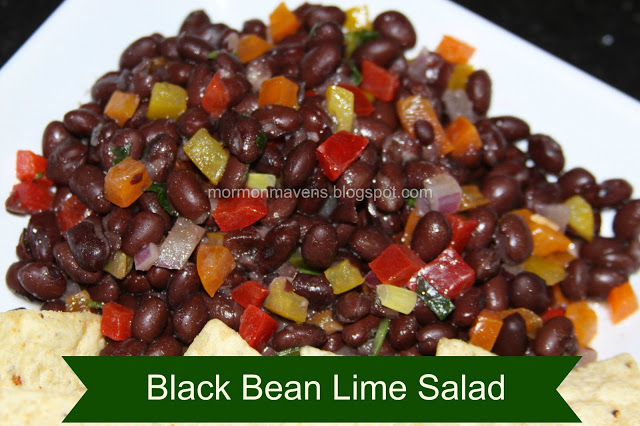
Black Bean Lime Salad
This is a DELICIOUS black bean salad that I had to share with you! It’s light, and fresh, and perfect for summer parties or barbecues. The lime juice makes it extra tasty. You can serve this with chips, as a topping for a taco/burrito bar, or as a side for hamburgers or grilled chicken. Great recipe!!
Black Bean Lime Salad
Ingredients:
3 cans black beans, rinsed
2 colored peppers, diced (or a mixture of red, yellow, orange, green – whatever you like!)
1/3 cup red onions, diced small
A large handful of chopped cilantro
Zest of 1 lime
Juice of 2 limes
1/4 cup of olive oil
A little salt to taste
Optional – diced avocado – add right before serving
Instructions:
Add all ingredients together in a bowl, gently toss until mixed, cover and put in fridge for at least an hour to let flavors blend. If you are adding avocado, add right before serving. Enjoy!
Notes:
To add a different kick, you can add 1/4 cup of apple cider vinegar instead of the lime juice. Or you can add both if you would like.
Source: My amazing sweet friend, Liz Zimmerman.
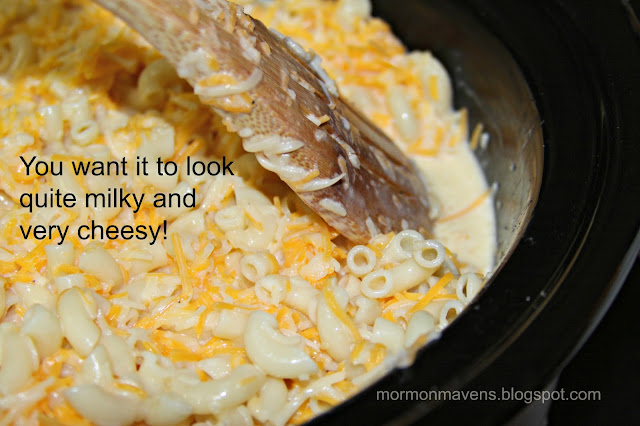
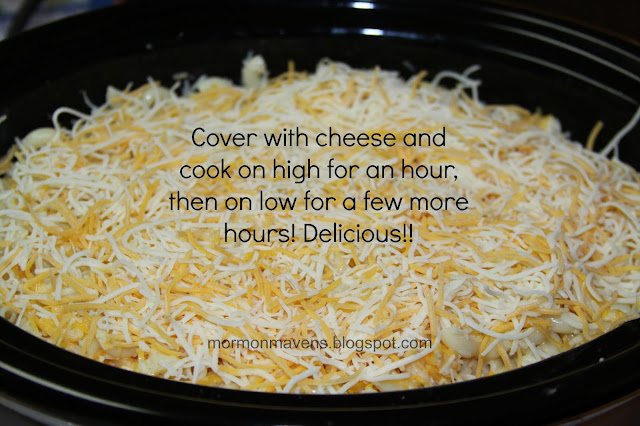
Crockpot Mac & Cheese
AMAZING 100% Whole Wheat Oatmeal Pancakes!
You are going to LOVE these pancakes!!! They are delicious and made with wholesome ingredients. I like to make the batter a little thinner so I can get crunchy edges.
Whole Wheat Oatmeal Pancakes
1. Mix all of the dry ingredients together in a mixing bowl:
2 cups whole wheat flour (I like to use Hard White Wheat and grind it fresh. Hard Red Wheat tastes really good too!)
1 cup oats (you can use instant or old fashioned rolled)
1/4 cup dry milk powder (mix in with flour)*
1/2 tsp salt
3 tsp baking powder
2. Now add the wet ingredients:
1/4 cup of oil (I like canola oil)
2 eggs, beaten
2 1/2 cups water (I use 3 cups to make the batter thinner so it makes those crispy edges! Yum!)
You can add in blueberries, chocolate chips, apple dices and cinnamon, some pumpkin and cinnamon, nuts, or whatever your heart desires!
3. Whisk batter until mixed well. Let sit for a few minutes. Do not stir again. It will flatten the batter.
4. Pour some batter onto a very hot and buttered griddle or frying pan. Let it cook on that side for a minute or so until edges start looking done and bubbles start to pop. Flip pancakes once and let finish cooking.
5. Serve with butter and syrup, fruit, or whatever you like on pancakes. My husband doesn’t like to put sugary syrup on them, so he eats them with homemade applesauce. I’ll stick with maple syrup! : )
These freeze well. Delicious and healthy!
*Notes:
1. If you do not have dry milk powder, you can omit that and use 2 1/2 cups of milk in the place of water. The milk helps them brown nicely, so you at least need some. You could just use 1 cup of milk and 1 1/2 cups of water if you prefer to use less milk.
2. I have a friend with a sweet tooth who said he added a few tablespoons of sugar to the recipe. I think he’s crazy because then he drowns it in syrup, but whatever! Ha ha! If it makes him feel better, he can add sugar with no objection from me!
Source: Me : )
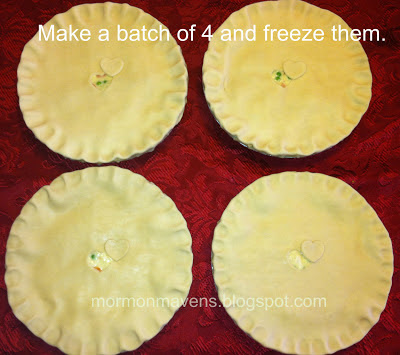
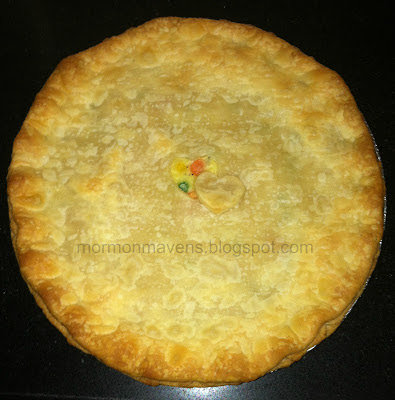
Homemade Chicken Pot Pie
I was thinking of giving you a recipe for a diet soup that I love, but then I thought that everyone should know how to make a delicious homemade pot pie for those days that you need a little comfort food! The diet soup can wait for another day!
I make these in batches of 4 and freeze them, and then I have something quick to pull out of the oven for dinner on a busy day. My kids LOVE these! People ask me how many one will feed, and here is my answer: It will feed me 7-8 servings, but it will feed my son Curtis, who is 16, only 2 servings. It would definitely feed 4 really hungry normal people who are not teenage boys. (smile).
3 Ingredient White Bean Chicken Chili
I love a quick, yummy meal, and this is definitely one of them!
One day I watched my friend dump some things in a pot, stir a bit, and then call her kids down for dinner. I was truly impressed because it took 5 minutes from start to finish, and it looked so delicious and healthy too!
3 Ingredient White Bean Chicken Chili
Ingredients:
A few cans of white beans, drained
1 can of chicken
A cup or two of your favorite salsa
I am not going to give an exact recipe, well, because there isn’t one and I have made it differently every time depending on how many I needed to feed and what I had on hand. But basically you just dump those ingredients into a pot, in whatever quantities you want, add a little water if needed, and maybe some black pepper. If you want to get fancy, you can add a can of corn! Let it simmer for a few minutes. Serve with your favorite shredded cheese, sour cream and tortilla chips!
A delicious and quick meal! I hope you enjoy!
PS – You could also make this in a crock pot.
Source: My amazing friend Kim Jones
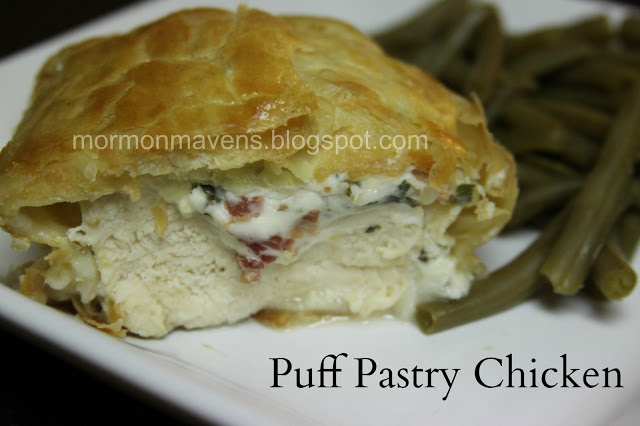
Puff Pastry Chicken
I made this for the first time tonight, and my family LOVED it! It was such an easy recipe too! I will definitely be making this again! YUM!
I’ve never cooked with puff pastry before, and I really liked it! So flaky and delicious!
Puff Pastry Chicken
Ingredients:
4 chicken breasts
frozen puff pastry sheets, thawed (I bought 1 box of Philo dough, and it was enough)
4 oz cream cheese, softened
3-4 slices of bacon, cooked and crumbled
fresh parsley, a few sprigs, chopped
1 green onion, chopped (can use dried onions instead)
1 egg, put in bowl and whisked
salt and pepper to taste
Instructions:
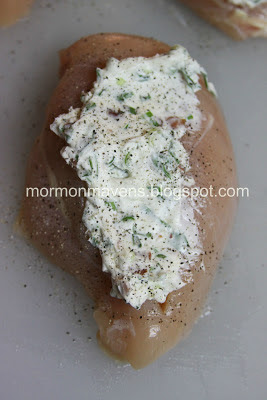
1. Mix together cream cheese, bacon, parsley, and onion. This is your filling.
2. Cut a deep slit into each chicken breast, and add the filling.
*Once I got the chicken breasts slit and stuffed with the filling, I felt they were way too large, and I cut them each in half. Then I wrapped them with the dough. I am so glad I did this! They were the perfect serving size for us. A whole breast would have been way too big!
3. Generously salt and pepper the chicken.
4. If you get two large sheets of puff pastry like I did, you will need to cut them into pieces the right size to wrap around each piece of chicken. This is slightly tricky, but I made it work.
5. Place the chicken onto the dough, filling side down. Brush some egg around the edge of the dough – this is used to help seal the dough together. Fold the dough around the chicken and place on greased baking sheet, with the ends of the dough down.
6. Brush top with egg.
7. Bake at 400 degrees for 30-35 minutes, or until the chicken is done.
These were truly delicious! I hope you enjoy them like we did!
Source: adapted from kayotickitchen
30 Minute Rolls!
I think this is my favorite recipe of all time!
I use it to make dinner rolls, cinnamon rolls, hamburger and hot dog buns, crescent rolls, bread bowls for soup, etc. I think they should be called “45 Minute Rolls”, because I’ve never made them in 30 minutes. I like to let them rise a little longer and bake a little slower than the original recipe calls for. Here’s how I make the AMAZING dinner rolls you see in the picture.
(PS – this recipe makes 48 rolls, so you might want to half the recipe. I do the whole recipe and usually make a pan of 24 dinner rolls, and a pan of 24 cinnamon rolls!)
30 MINUTE ROLLS
3 1/2 cups of warm water (as warm as a nice bath…not scalding)
1 cup oil (I use canola)
1/2 cup honey (or 3/4 cup sugar)
6 TBSP yeast
1 TBSP salt
3 eggs
10 1/2 cups flour (approximately) This recipe is FABULOUS for whole wheat rolls too!
1. I put the water, oil, honey and yeast in my Bosch and turn it on for just a second to mix it up a little. (You can do the same with a mixing bowl and wooden spoon.) Then I let it sit until the yeast rises up and is frothy looking. This might take 10-20 minutes, depending on how warm your mixture is and how fast the yeast grows.
2. Then I add the salt, eggs and half of the flour. The secret to good bread is not adding too much flour. Start off by adding half the flour and turn on the mixer. Then keep adding in a cup or less at a time until the dough forms a ball and is no longer sticking to the side of the bowl. The second it stops sticking to the bowl, do not add any more flour. Keep mixing for a few more minutes. Then turn it off and let the dough rise for about 10 minutes. I put a cloth over it to help it not dry out.
If you are using a bowl and spoon, follow the same directions. Just add half the flour at first and give it a good mixing. Then start adding in more flour until it gets difficult to stir. Then you can turn it out onto a floured counter and keep kneading in a little flour at a time until the dough stops being so sticky. It takes a little practice to know when you have the right amount of flour. But a little less flour is better than a little too much! Too much gives you a hard, dry bread.
3. Form into rolls. I divide the dough in half and work with one half at a time. I just gently press it out with my hands until it is about 1 inch thick. Then I take a cup and cut out rolls and place them onto my large baking sheet (half sheet pan). I can put 24 rolls on that pan, and they are placed touching each other.
4. Let the rolls rise for about 10 minutes or more until you think they look perfect, and put into the oven. Bake at 375 degrees for 15-20 minutes or so, or until they are lightly browned and are done in the center. You can brush them with butter when they come out of the oven. Get your honey butter and homemade jam ready, and ENJOY! (The original recipe says to bake at 425 degrees for 10-12 minutes. I like to cook them slower and not have them get so dark brown on the top.)
I HAVE LOTS OF NOTES:
1. I use the Saf Instant yeast. It’s a lot of yeast, but that’s how it rises so fast! If you are not in a hurry, use less yeast. You can use 2-3 TBSP and still have fabulous rolls, but it will take longer to rise!
2. How to make cinnamon rolls: Take half the dough and roll it out into a rectangle about 1/4 inch thick. Pour on enough melted butter to coat the whole surface. Mix brown sugar and cinnamon together and spread on. I’ve never measured how much…maybe 2-3 cups brown sugar and 2 TBSP cinnamon. Be generous with the cinnamon….that’s what makes them taste so amazing. Roll up the dough from one of the long sides, forming a long roll of dough. Cut into 1 inch slices and place onto the pan to rise. Follow the rest of the directions above for the rolls. I make a cream cheese frosting for mine. Of course, I never measure, so here’s approximately what I do: Soften about 2 oz of cream cheese and 1 tablespoon of butter in a large plastic bowl. Add 3-4 cups powdered sugar, a dash of salt, 1 teaspoon of vanilla extract, and a few (maybe 4??) tablespoons of milk. Mix with hand mixer. You may need to add more milk or powdered sugar to get the right consistency you like. I like it kinda medium like a cake batter, not thick like cake icing.
3. I have learned that making bread is really easy but can be tricky to give an exact recipe. It depends on what kind of flour you use, how warm the water is that you use, how your oven cooks, and a dozen other variants. When I use freshly ground whole wheat flour, I use a different amount than when using white flour. Just remember the rule about the dough forming a ball and pulling away from the bowl and not sticking to the bowl anymore. That’s the precise moment when your dough has the perfect amount of flour. Also, I use a convection oven at 350 degrees (instead of a regular oven at 375 degrees) and cook two pans of rolls at once. In my mom’s oven, I can only cook one pan at a time, and it cooks hot and uneven, so I lower the temp just a bit and rotate the pan halfway through the cooking process. With a little practice you can perfect the art of bread making!
Source: My mother in law, Glenna Coombs, first shared this recipe with me. She’s a wonderful bread maker!
My Favorite Carrot Cake!
2 tsp vanilla


